
Emails sent to admin
Set up the Mail notifications email that tells you when a customer has submitted a quote request.
This is the alert that tells you a quote has come in. Getting it right matters — a quote you do not notice is a sale you do not make.
The setting is called Mail notifications, and the app describes it as: “Automatically send an email notification to the store owner when a quote is submitted.”
Set it up
Section titled “Set it up”-
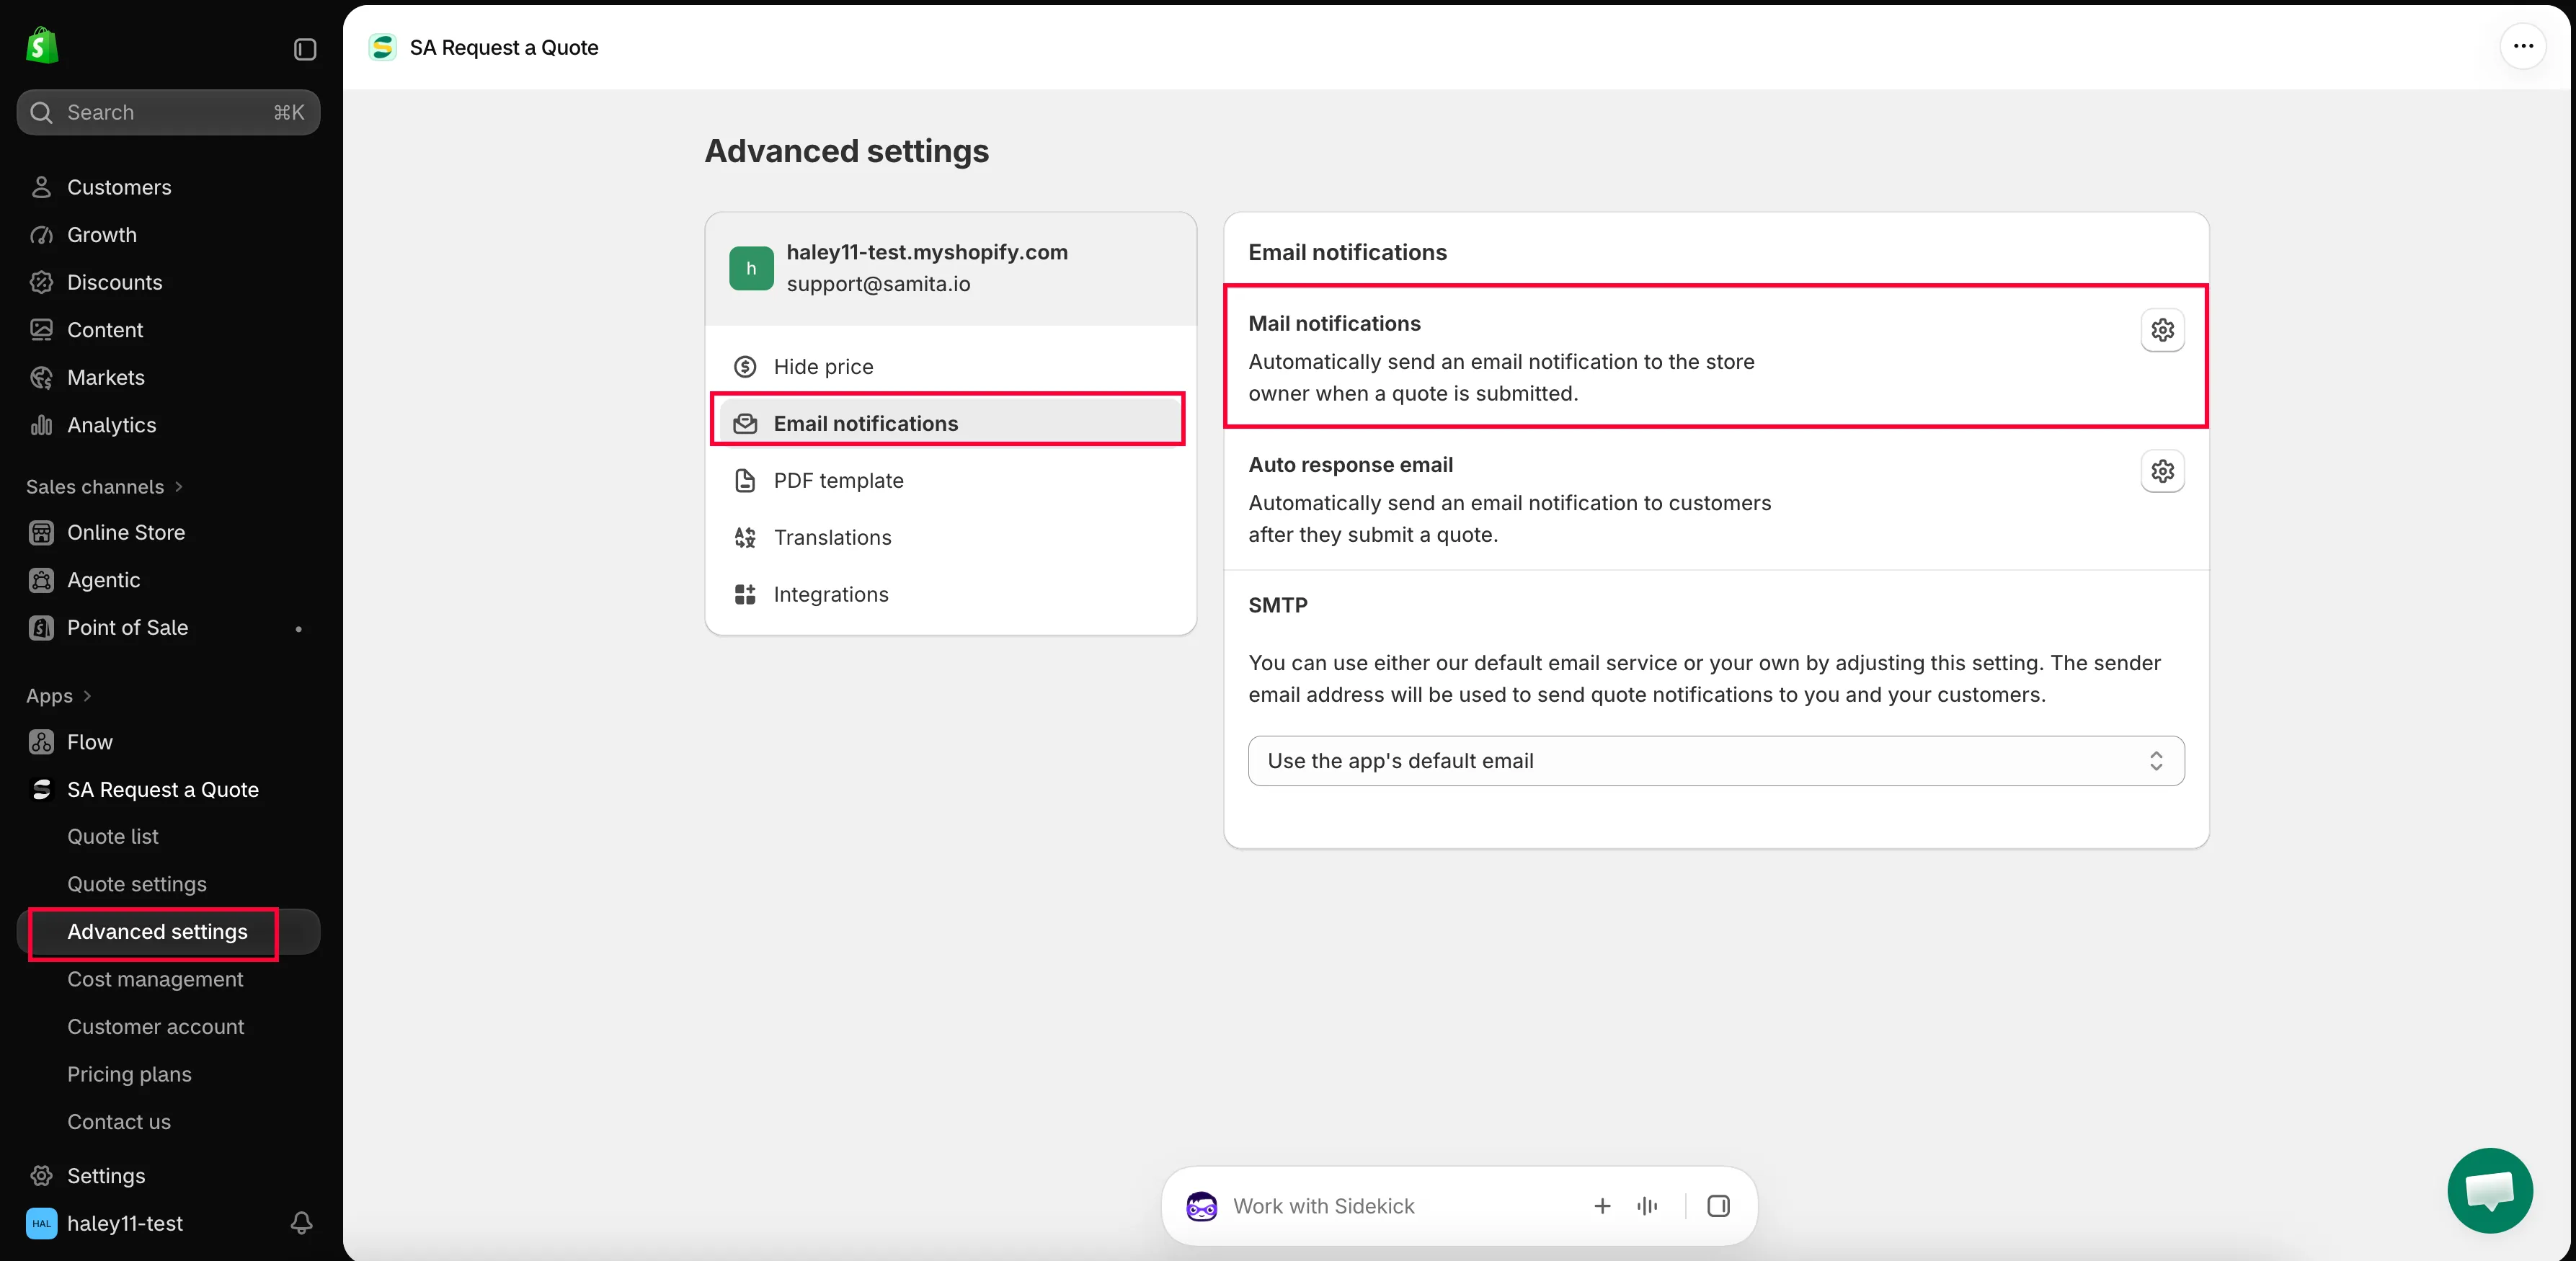
Open Advanced settings
Section titled “Open Advanced settings”In the app sidebar, click Advanced settings.
From the dashboard you can also use the Setup guide step Set up email notifications and its Open notifications button.
-
Go to the Email notifications tab
Section titled “Go to the Email notifications tab”Choose Email notifications from the list of tabs.
-
Open the Mail notifications editor
Section titled “Open the Mail notifications editor”Click the icon button at the end of the Mail notifications row. The email opens in its own editor, with template tabs Basic and Advanced.
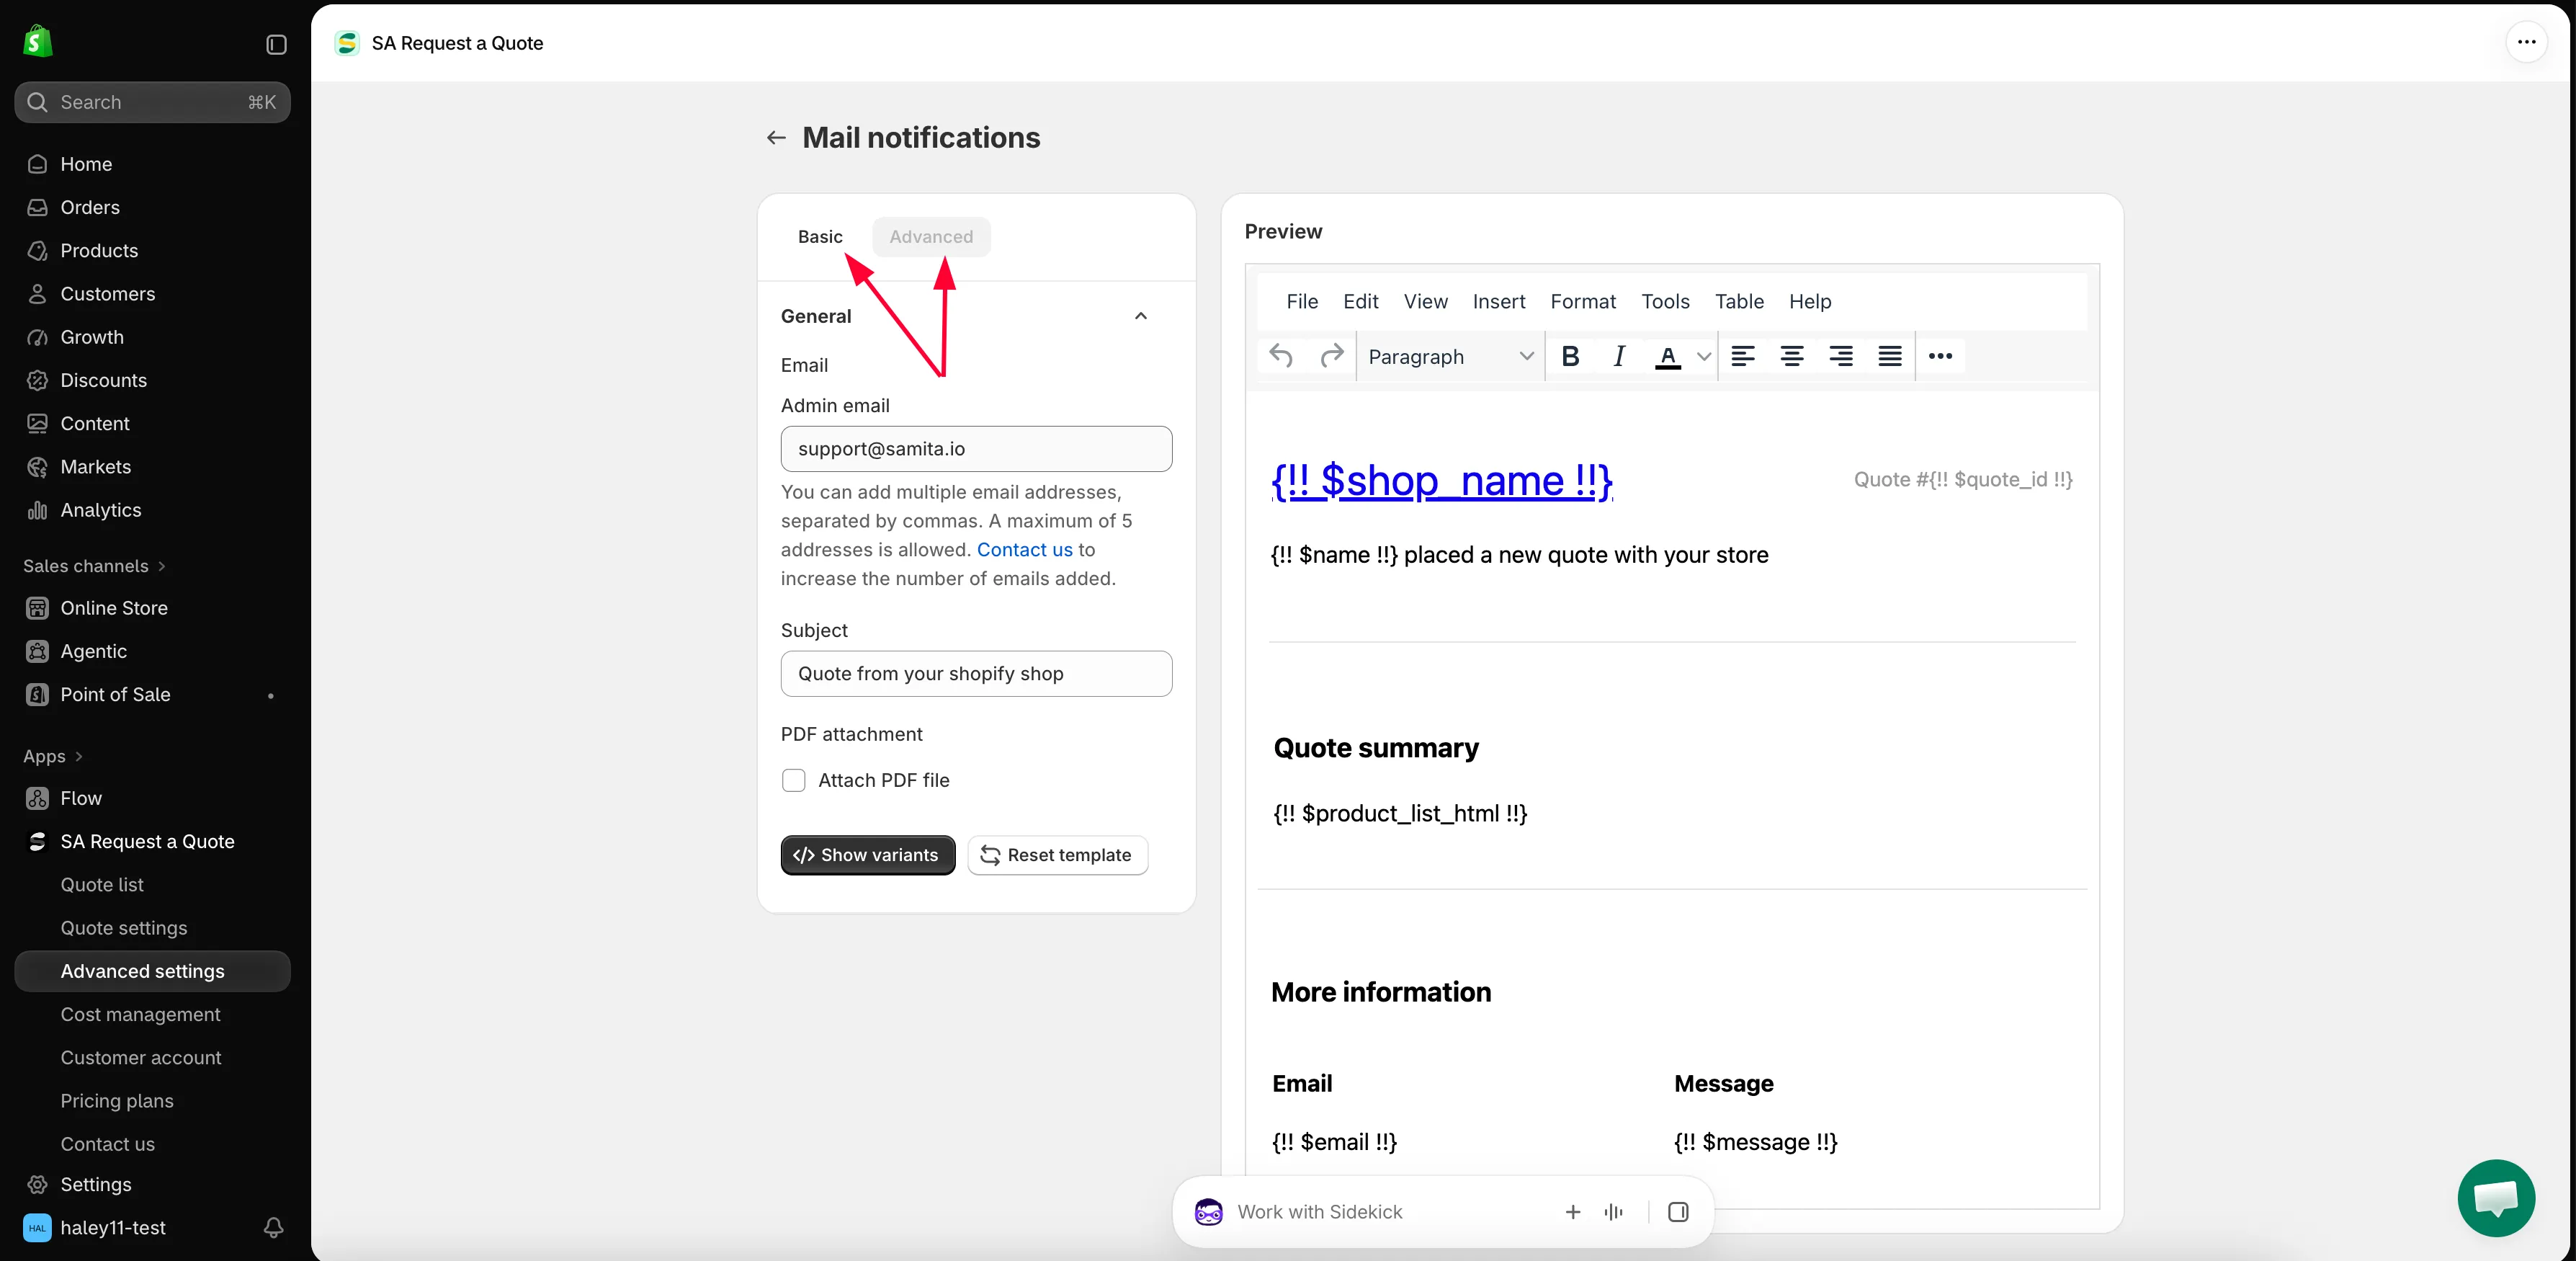
The Mail notifications editor. Settings on the left, Preview on the right.
-
Choose a template tab
Section titled “Choose a template tab”There are two email templates, and you pick one of them:
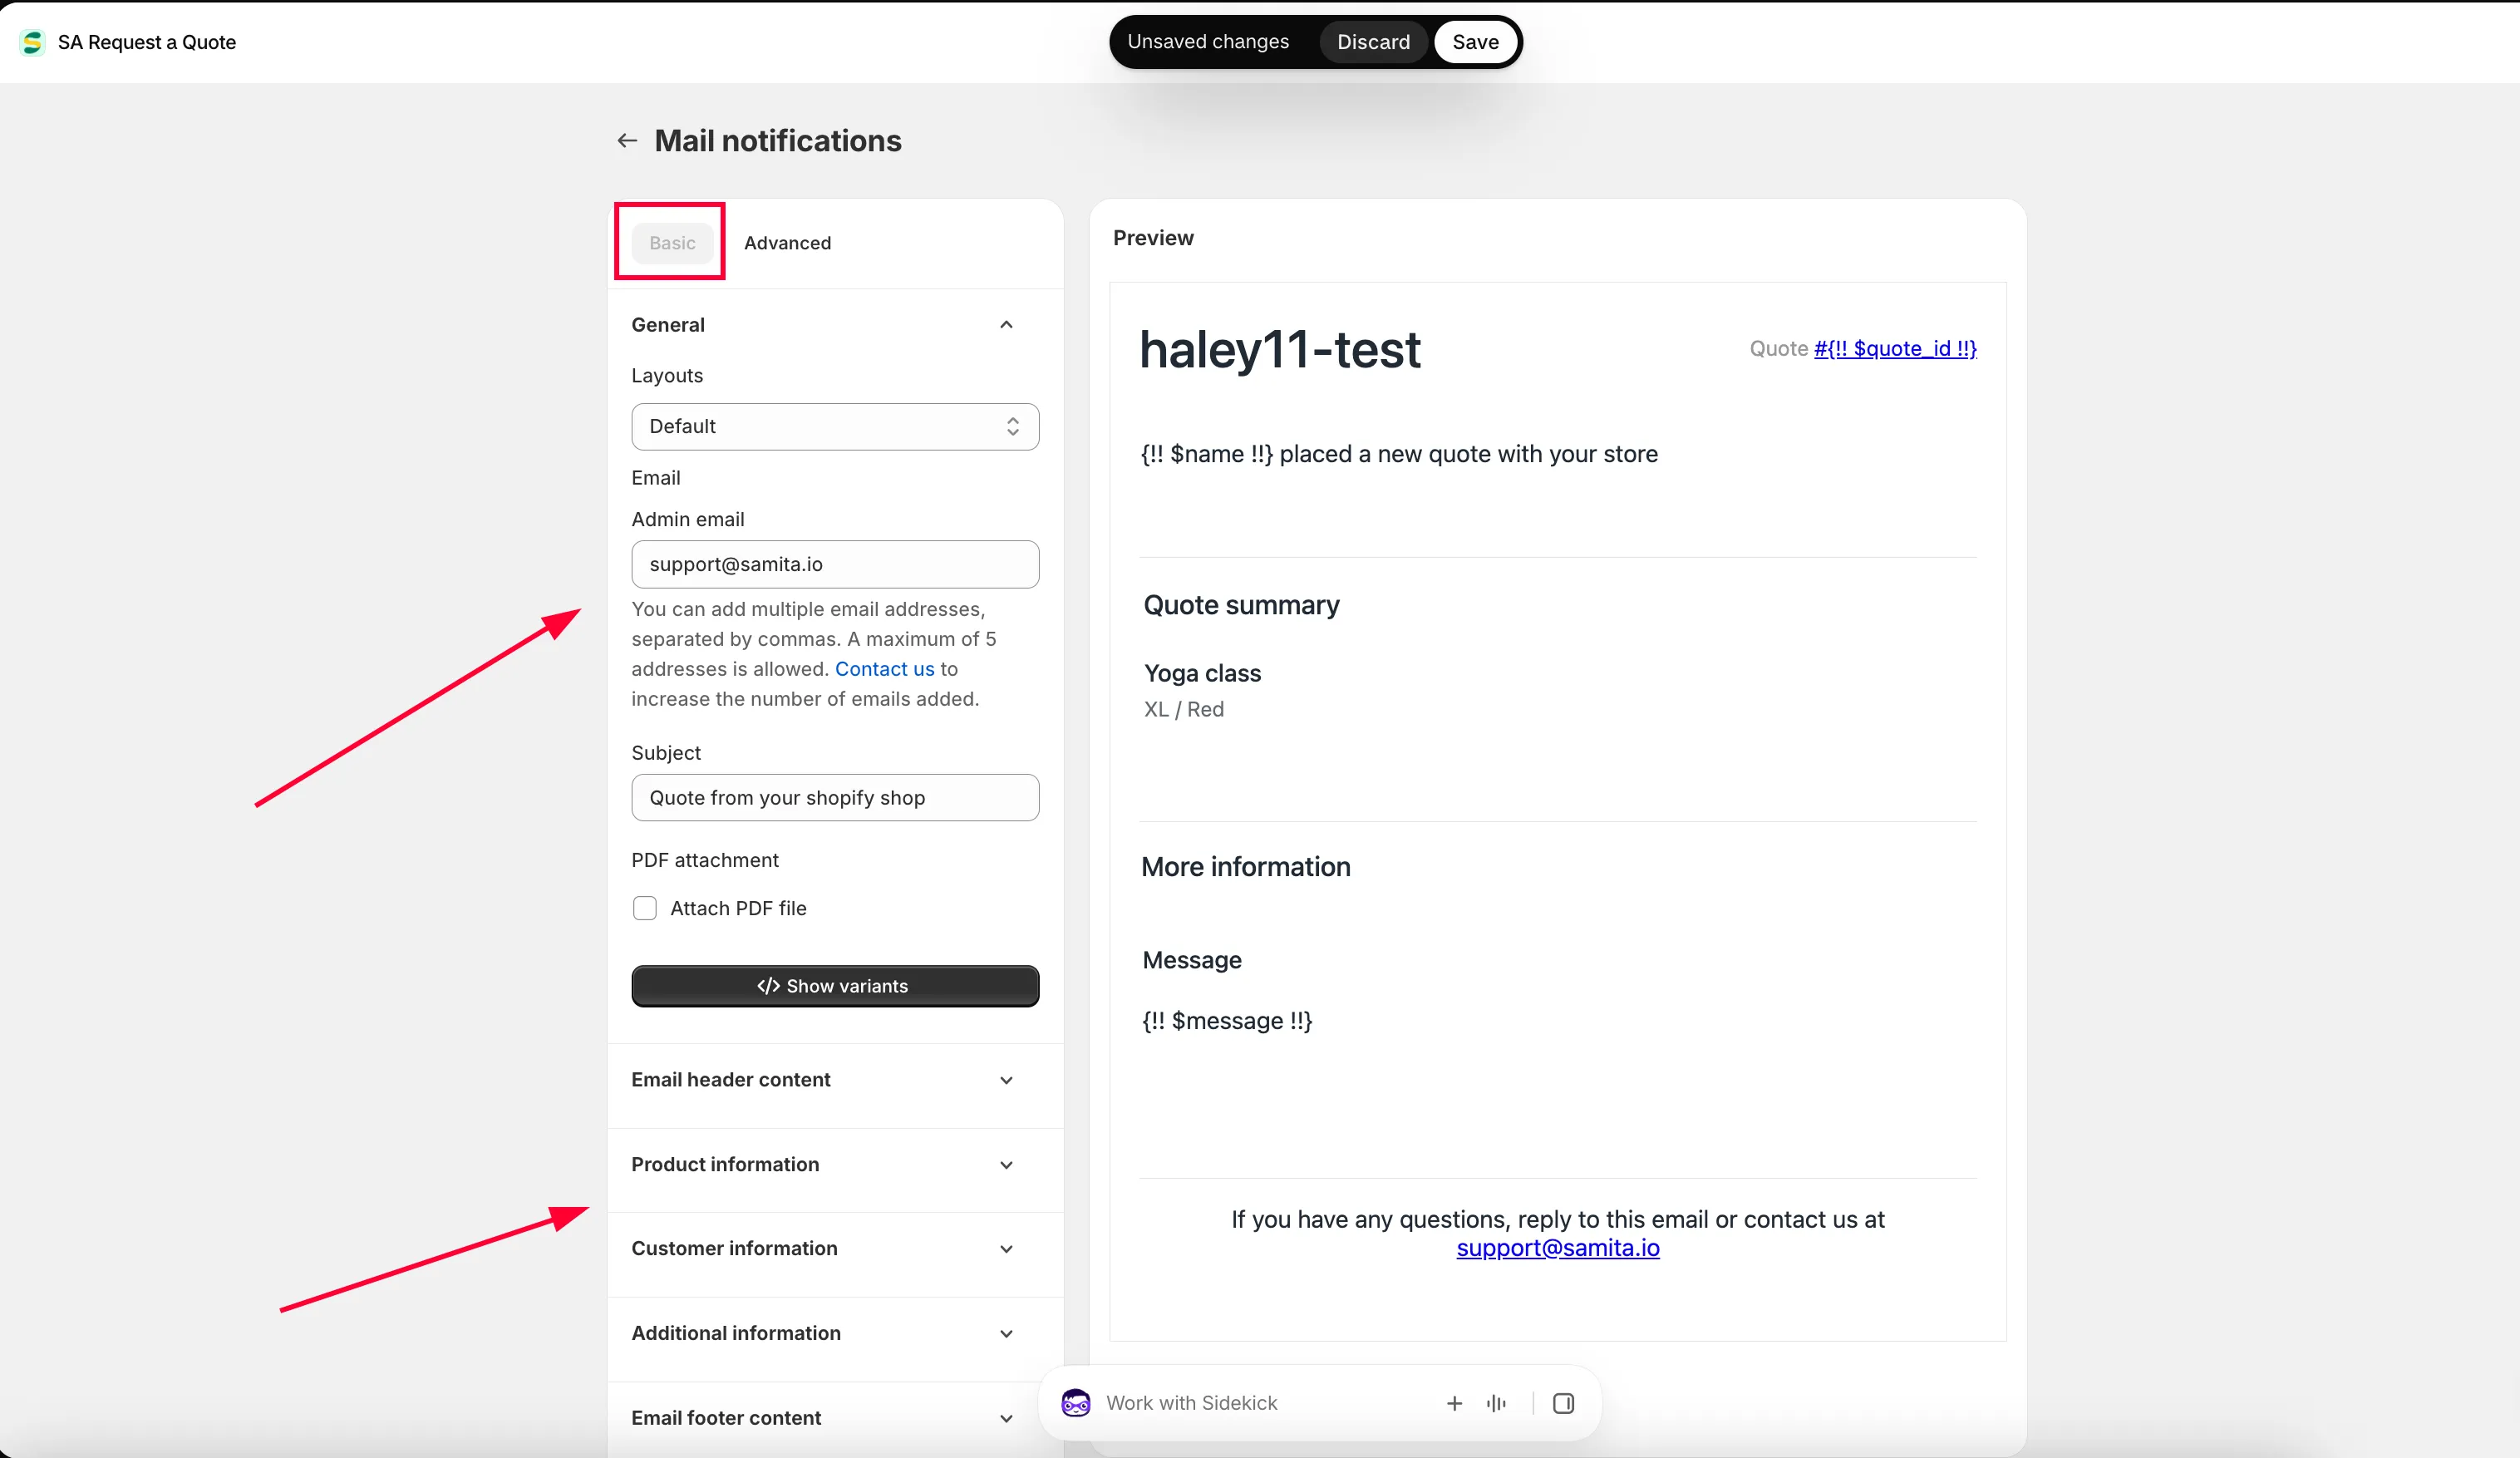
- Basic — configure the email template with the available options. The email is built from sections you open and fill in, listed down the right of the page.
- Advanced — manually edit the email content yourself.
Choosing a template is itself a saved action: if you select the basic template and click Save, the basic template is applied to the emails.
Everything in the steps below is on Basic.
-
Set who receives the alert
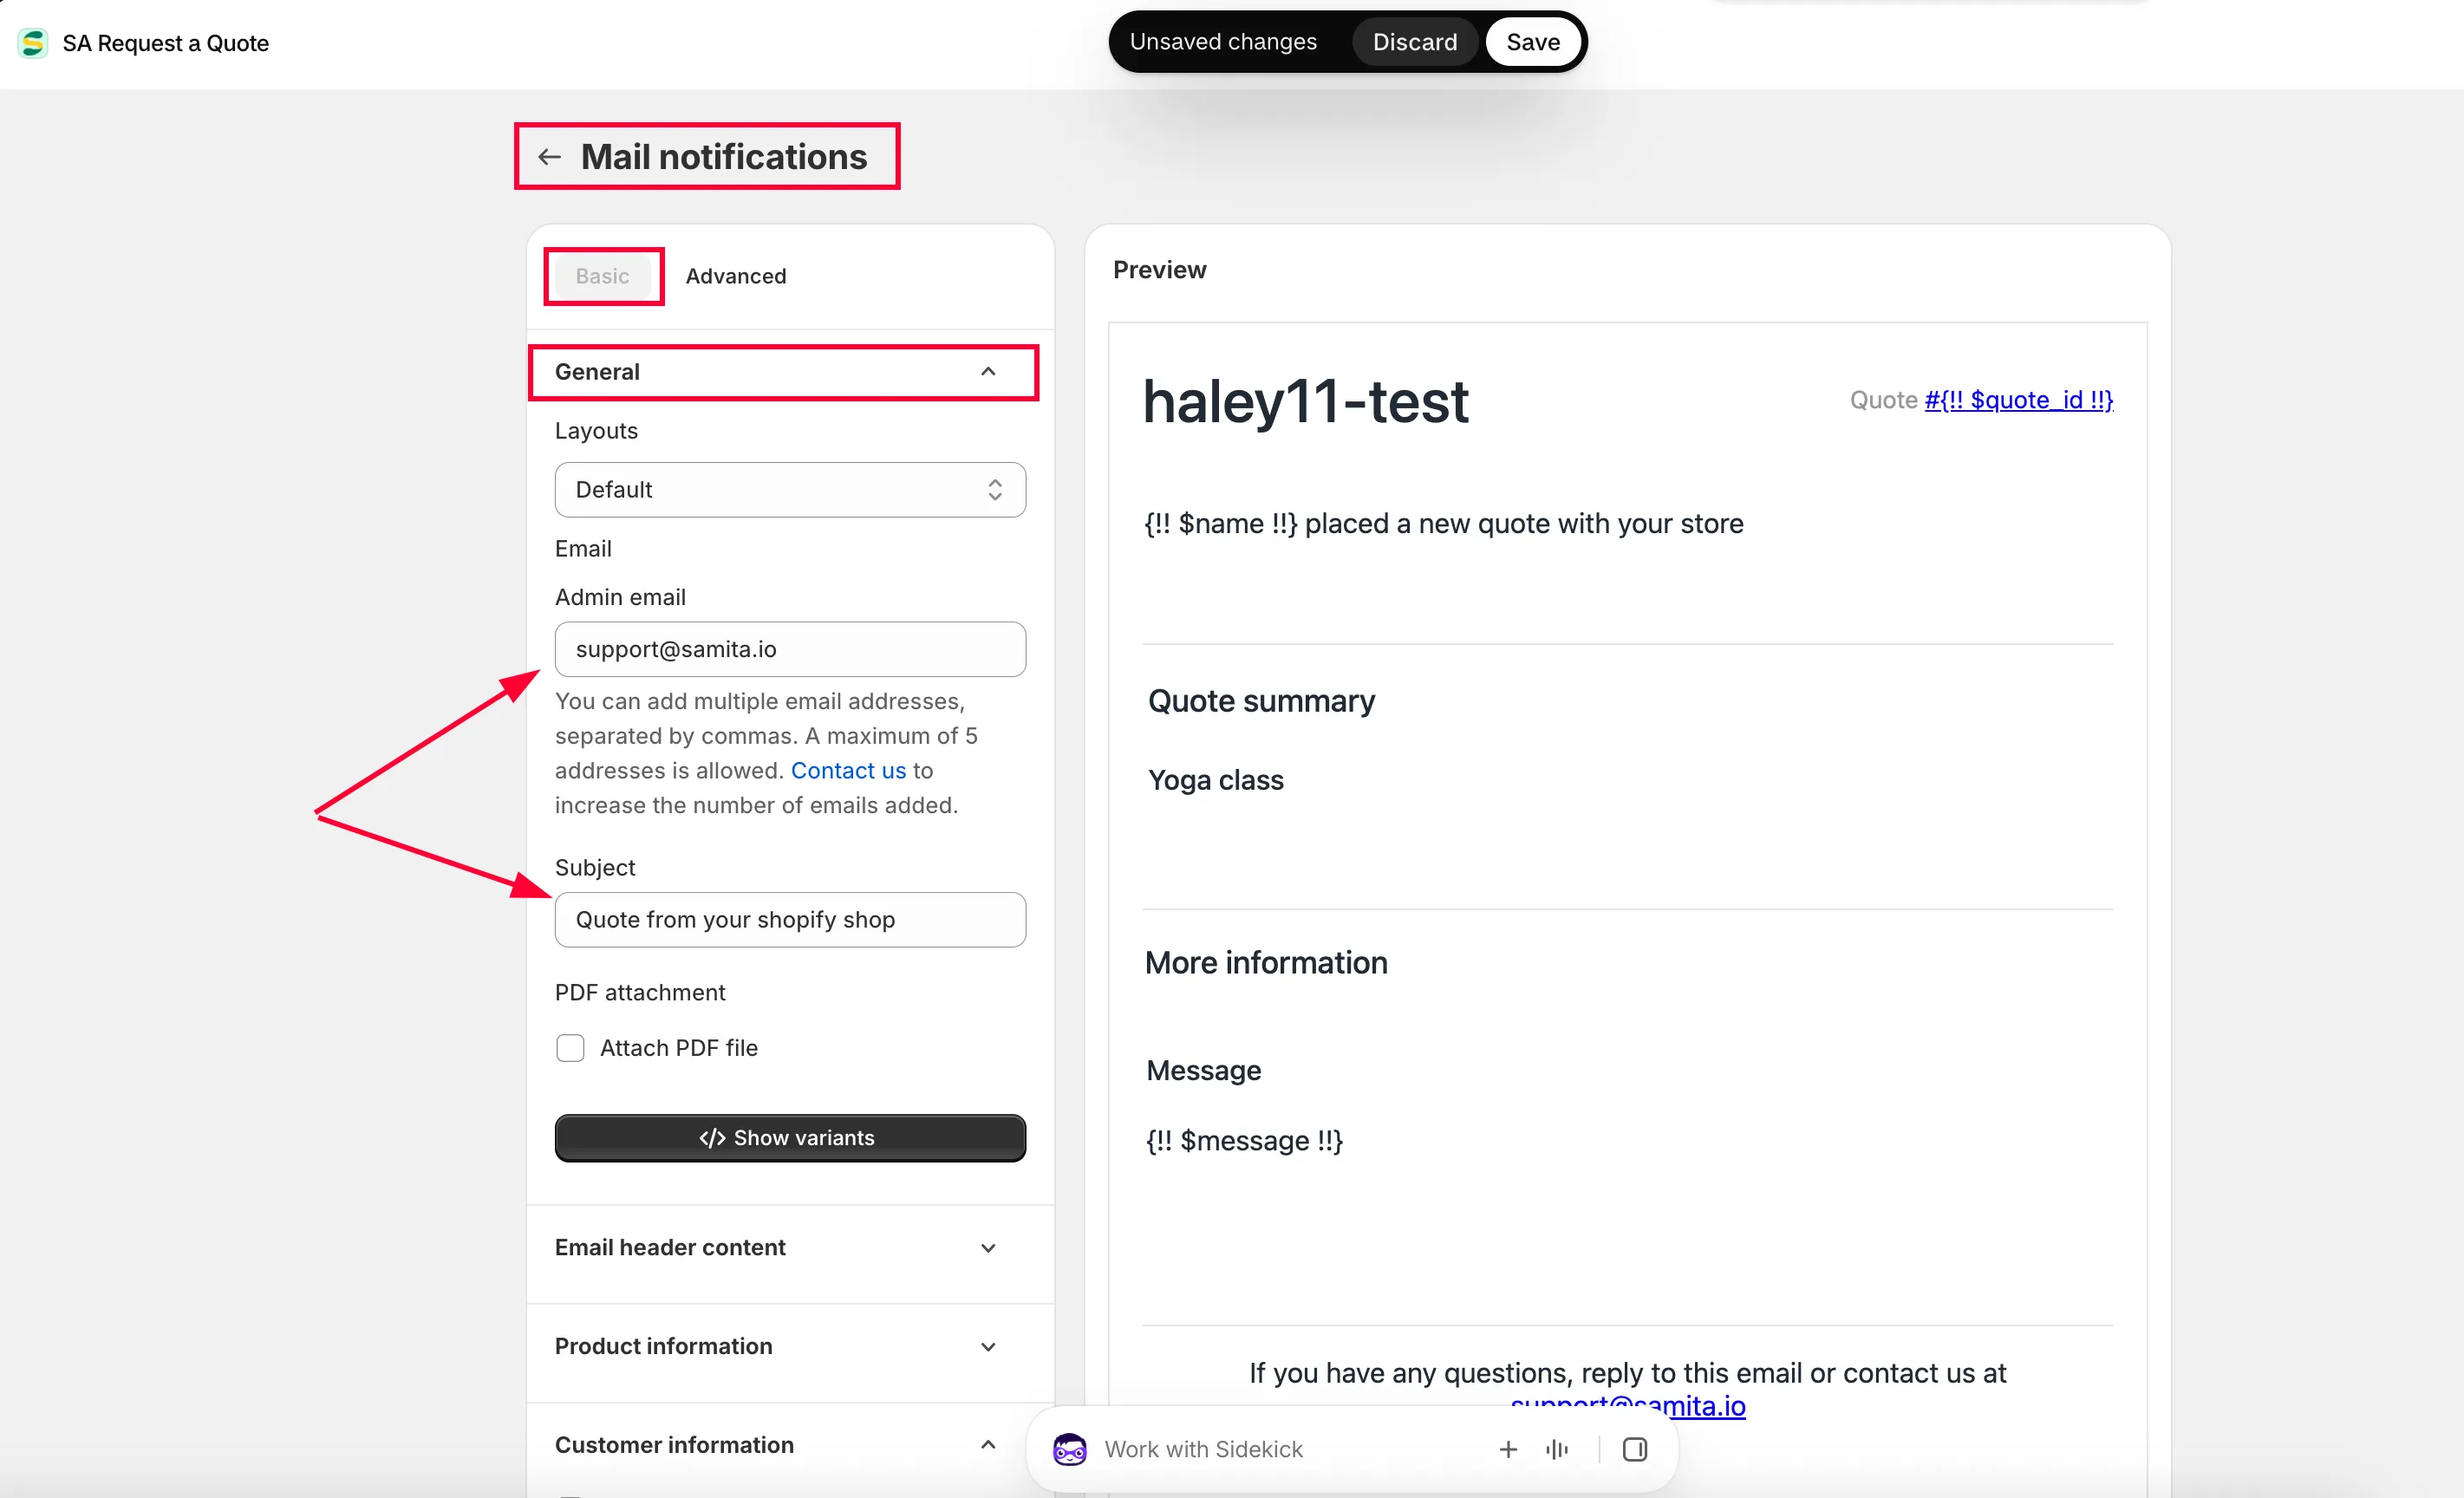
Section titled “Set who receives the alert”The General section holds Email, and inside it the Admin email field. Put the address that should be notified here.
You can list more than one. The field’s own help text says: “You can add multiple email addresses, separated by commas. A maximum of 5 addresses is allowed. Contact us to increase the number of emails added.”
Choosing those addresses well is worth a moment — see Change notification recipients.
-
Write the Subject
Section titled “Write the Subject”Subject is the line the alert arrives with. Put something identifying in it so quote emails stand out in a busy inbox.
-
Write the message
Section titled “Write the message”The editor gives you a rich-text editor with File, Edit, View, Insert, Format, Tools, Table and Help menus, so the wording can be changed without writing code.
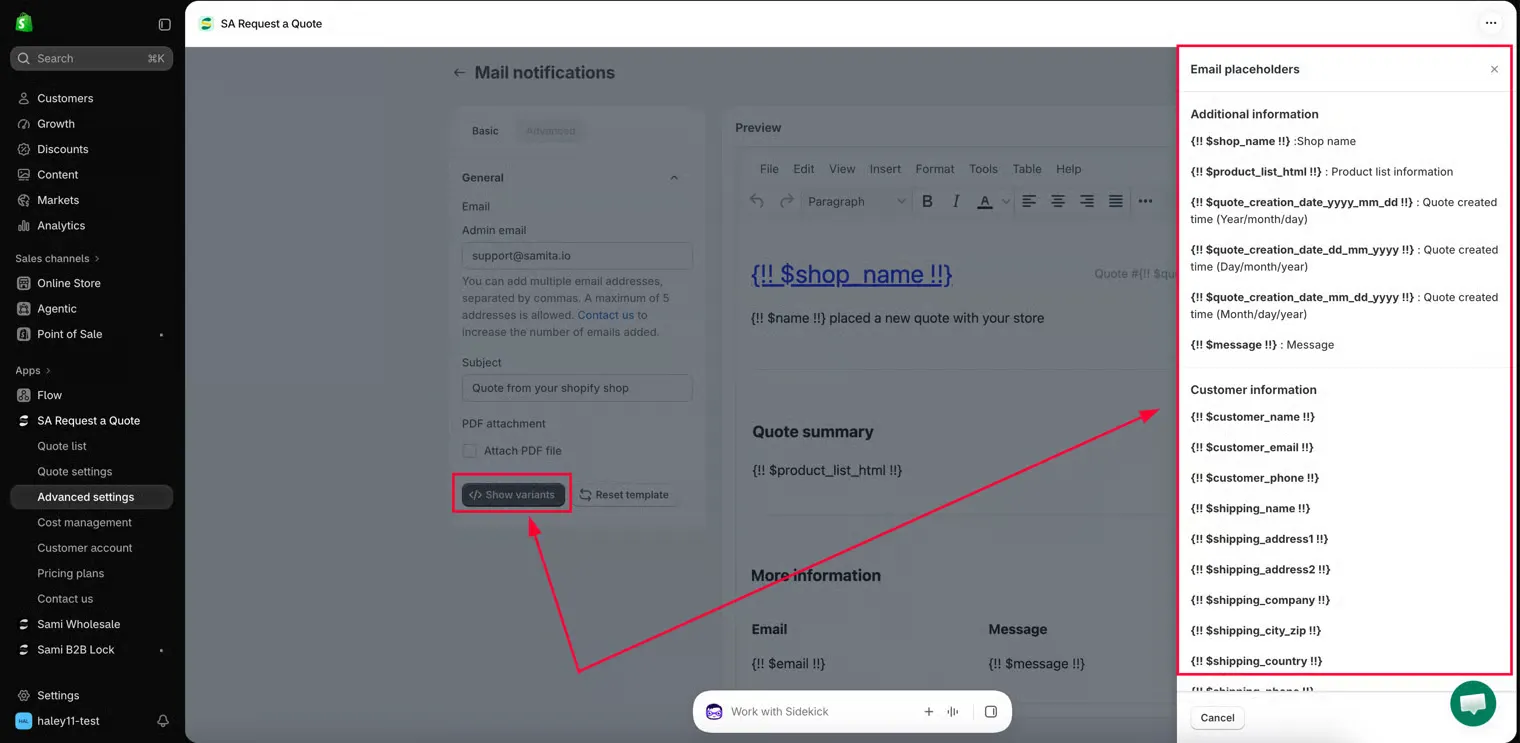
Show variants lists the variables you can drop into the template, such as the name of the customer who submitted the quote. Copy one from the list and paste it where you want it — The Advanced template below shows the syntax and a worked example.
If you want to use some app variables, click on Show variant.
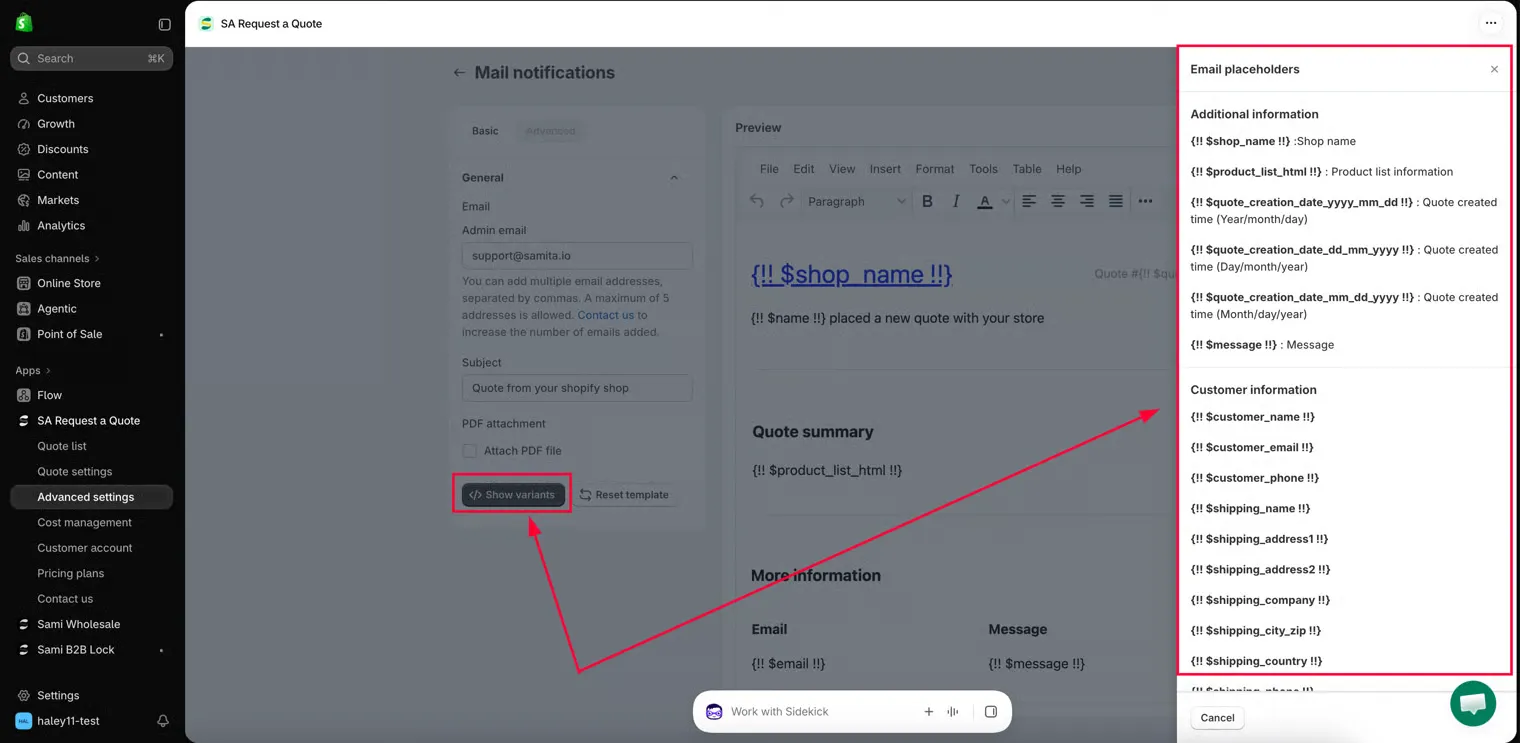
Write the message, then drop variables in where the details belong.
-
Decide whether to attach the quote
Section titled “Decide whether to attach the quote”The PDF attachment section holds Attach PDF file. Tick it if you would rather read the quote as a document than as an email. The document is built from your Quote PDF template — set that up first, as Attach a PDF to quote emails explains.
-
Read it back in Preview
Section titled “Read it back in Preview”Preview shows the email as it will arrive. Read it there before you save.
If an edit has gone wrong and you would rather start over, Reset template puts the email back to the template you began with.
-
Save, then send yourself a test
Section titled “Save, then send yourself a test”Click Save to save the template. Then submit a quote request from your own storefront and check the email arrives.
The Basic template, section by section
Section titled “The Basic template, section by section”On the Basic template there are sections down the right of the page that build the email. Click each one to set it up.
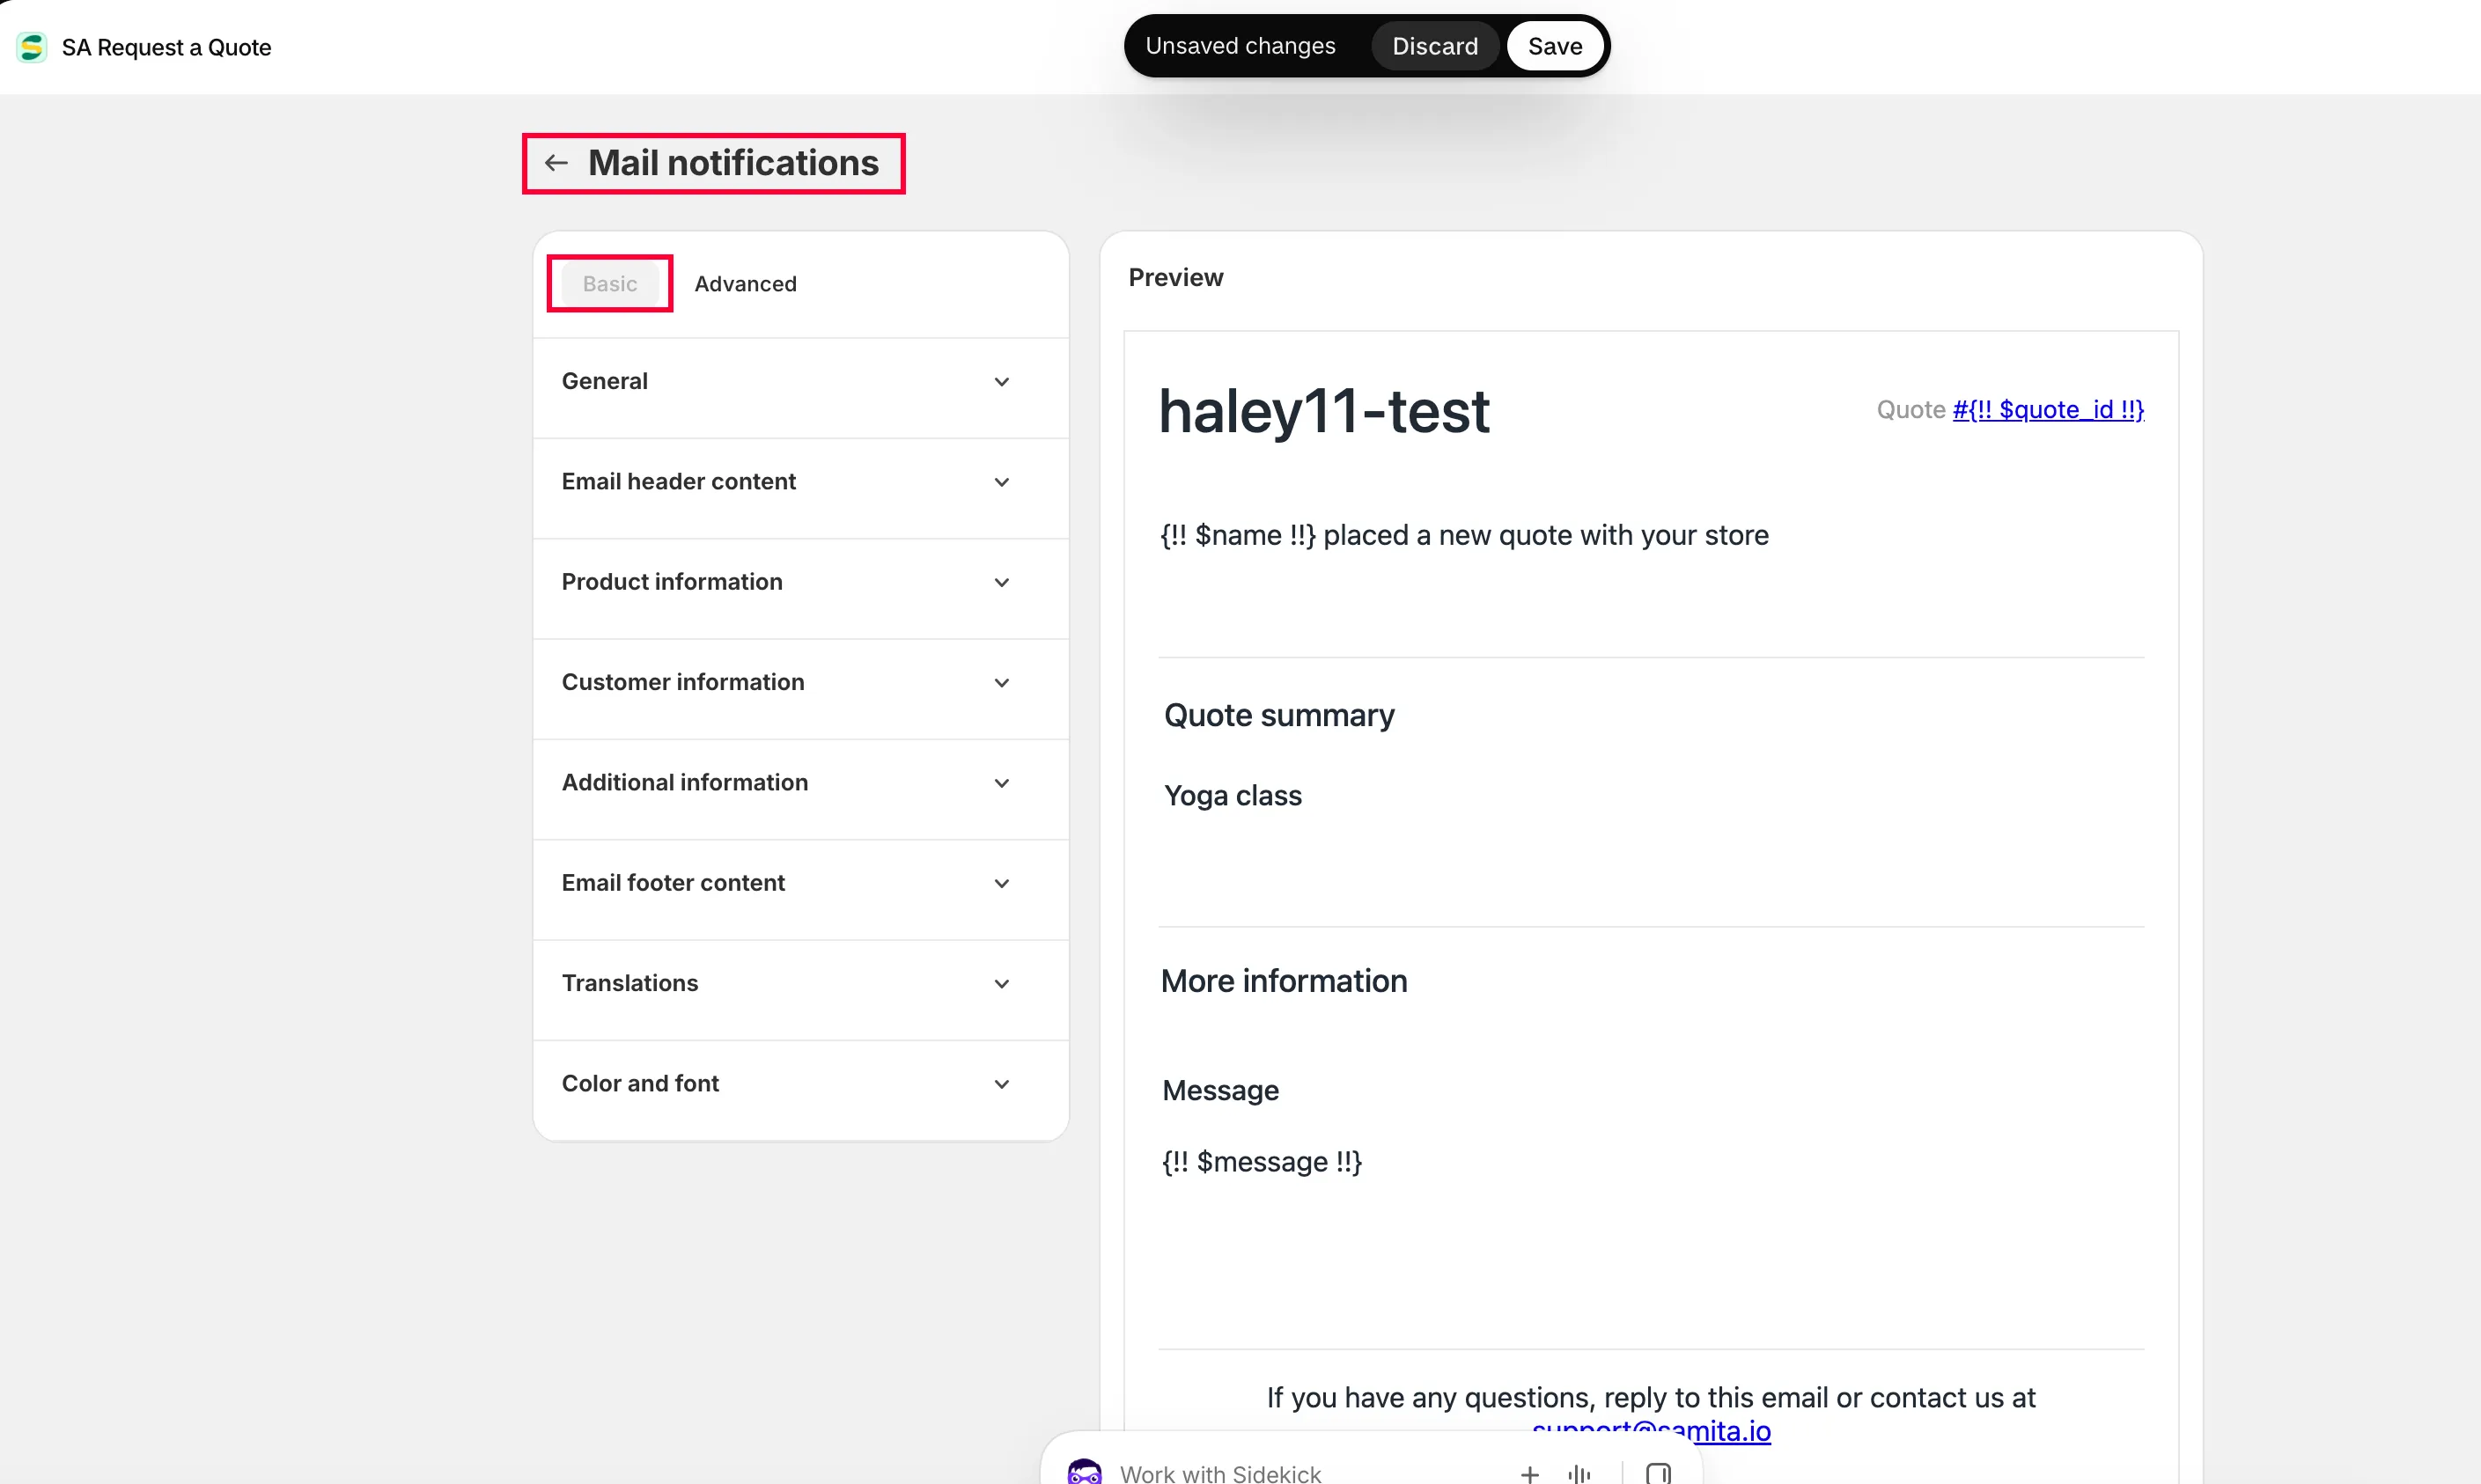
1. General
Section titled “1. General”- Admin Email — add or change the email addresses that receive quote notifications. Set in the steps above, where the five-address limit is quoted.
- Subject — the subject of this notification email.
- Attach PDF file — tick this checkbox if you want to attach the quote as a PDF file to the email.
Emails are sent by the app’s email server by default. If you want your own email address to be the sender instead, set up SMTP — see Send from your own address (SMTP).
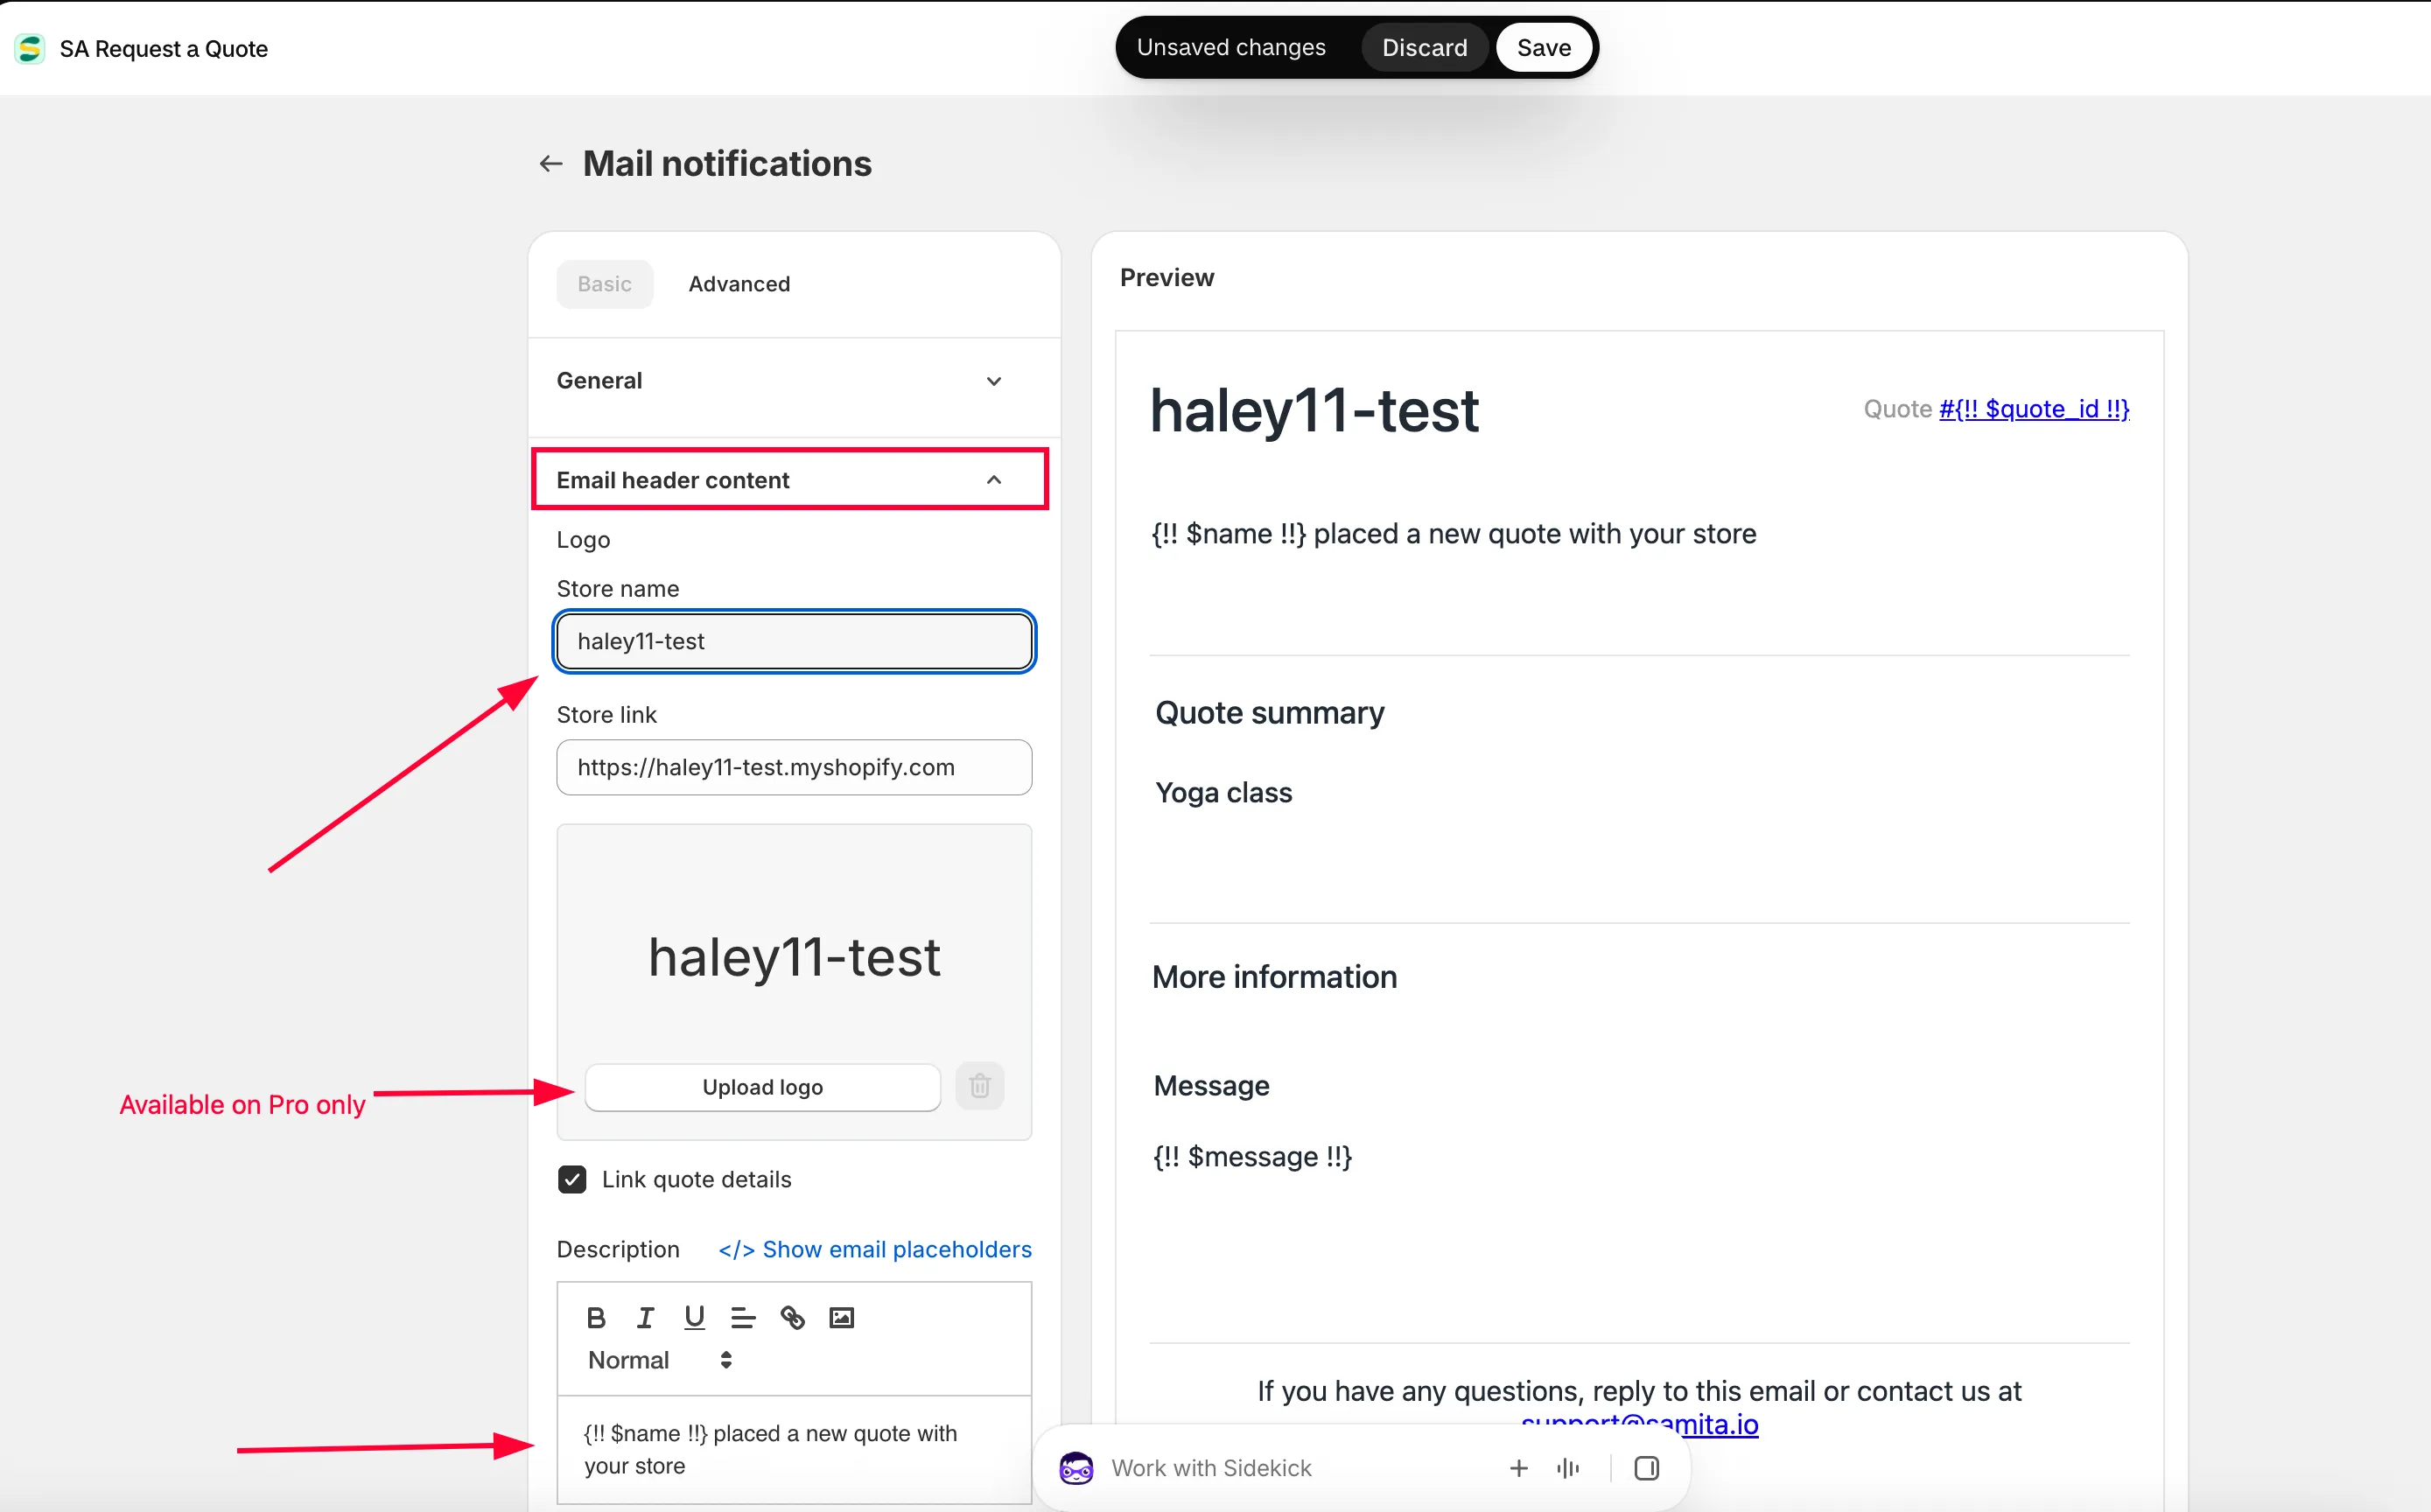
2. Header email content
Section titled “2. Header email content”- Enter the Store name and Store link fields.
- Click Upload photo to add the logo of the store.
- Edit the Description part. You can use the available email placeholders here.
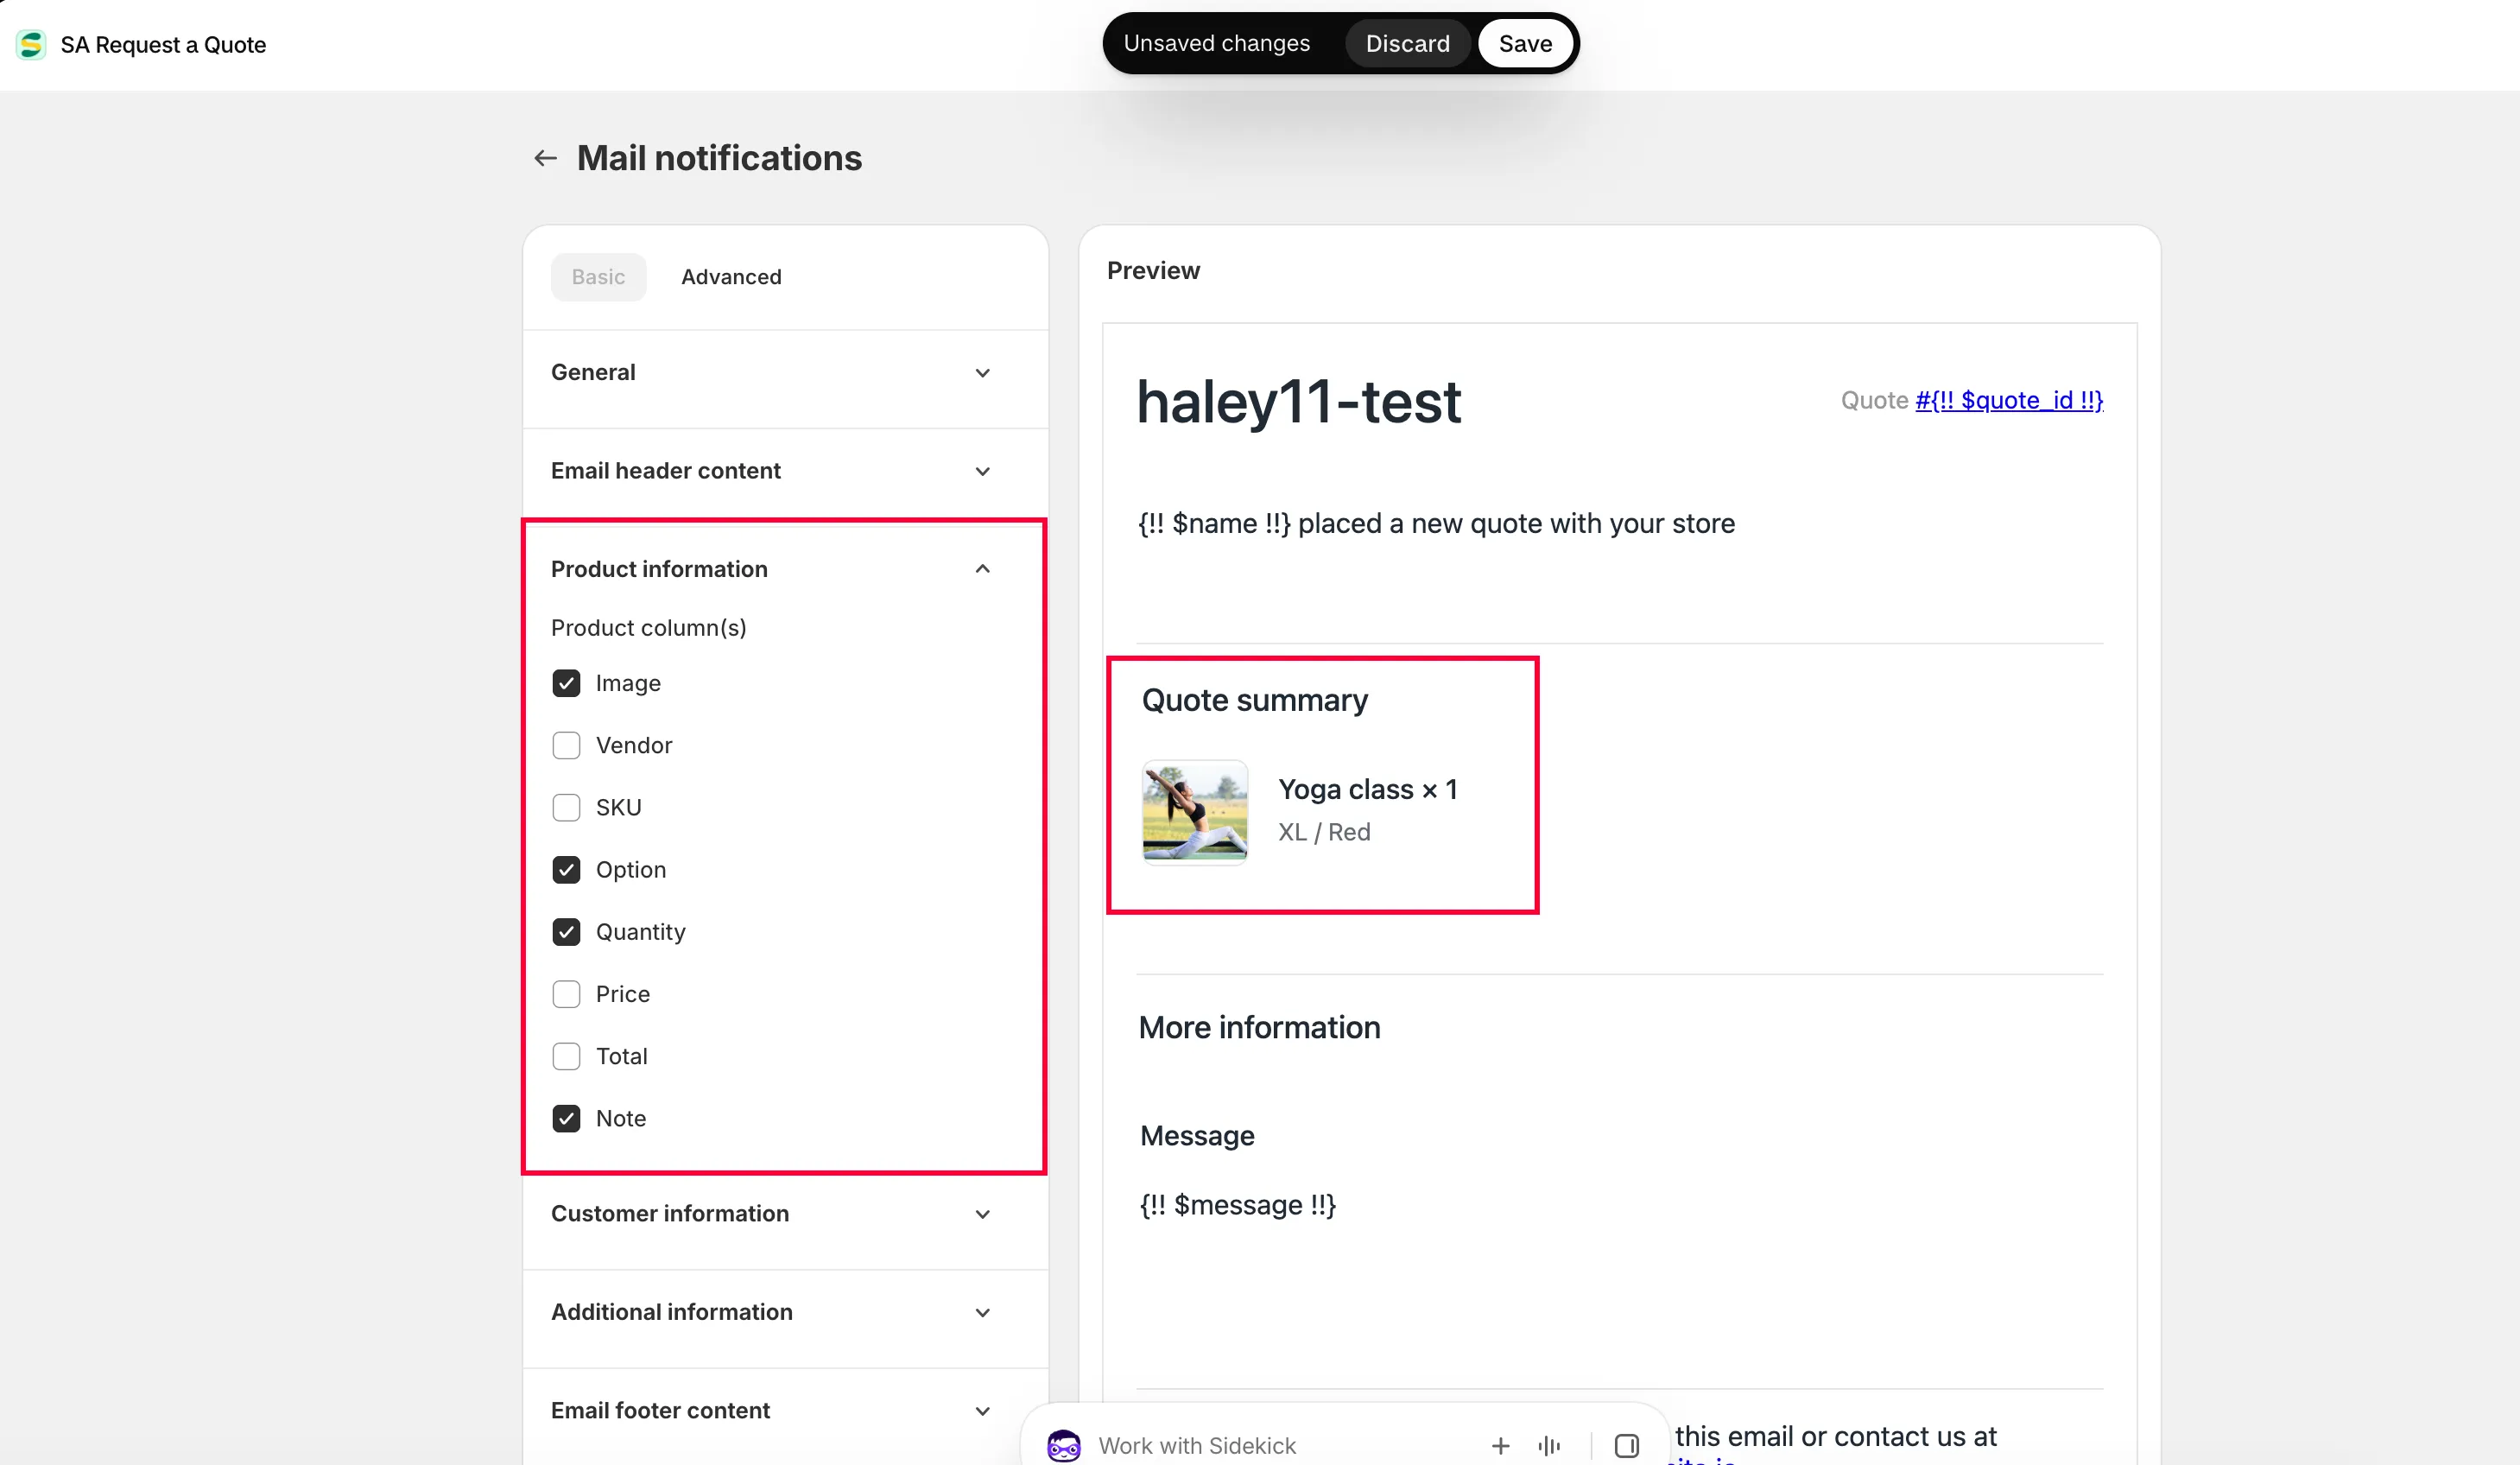
3. Product information
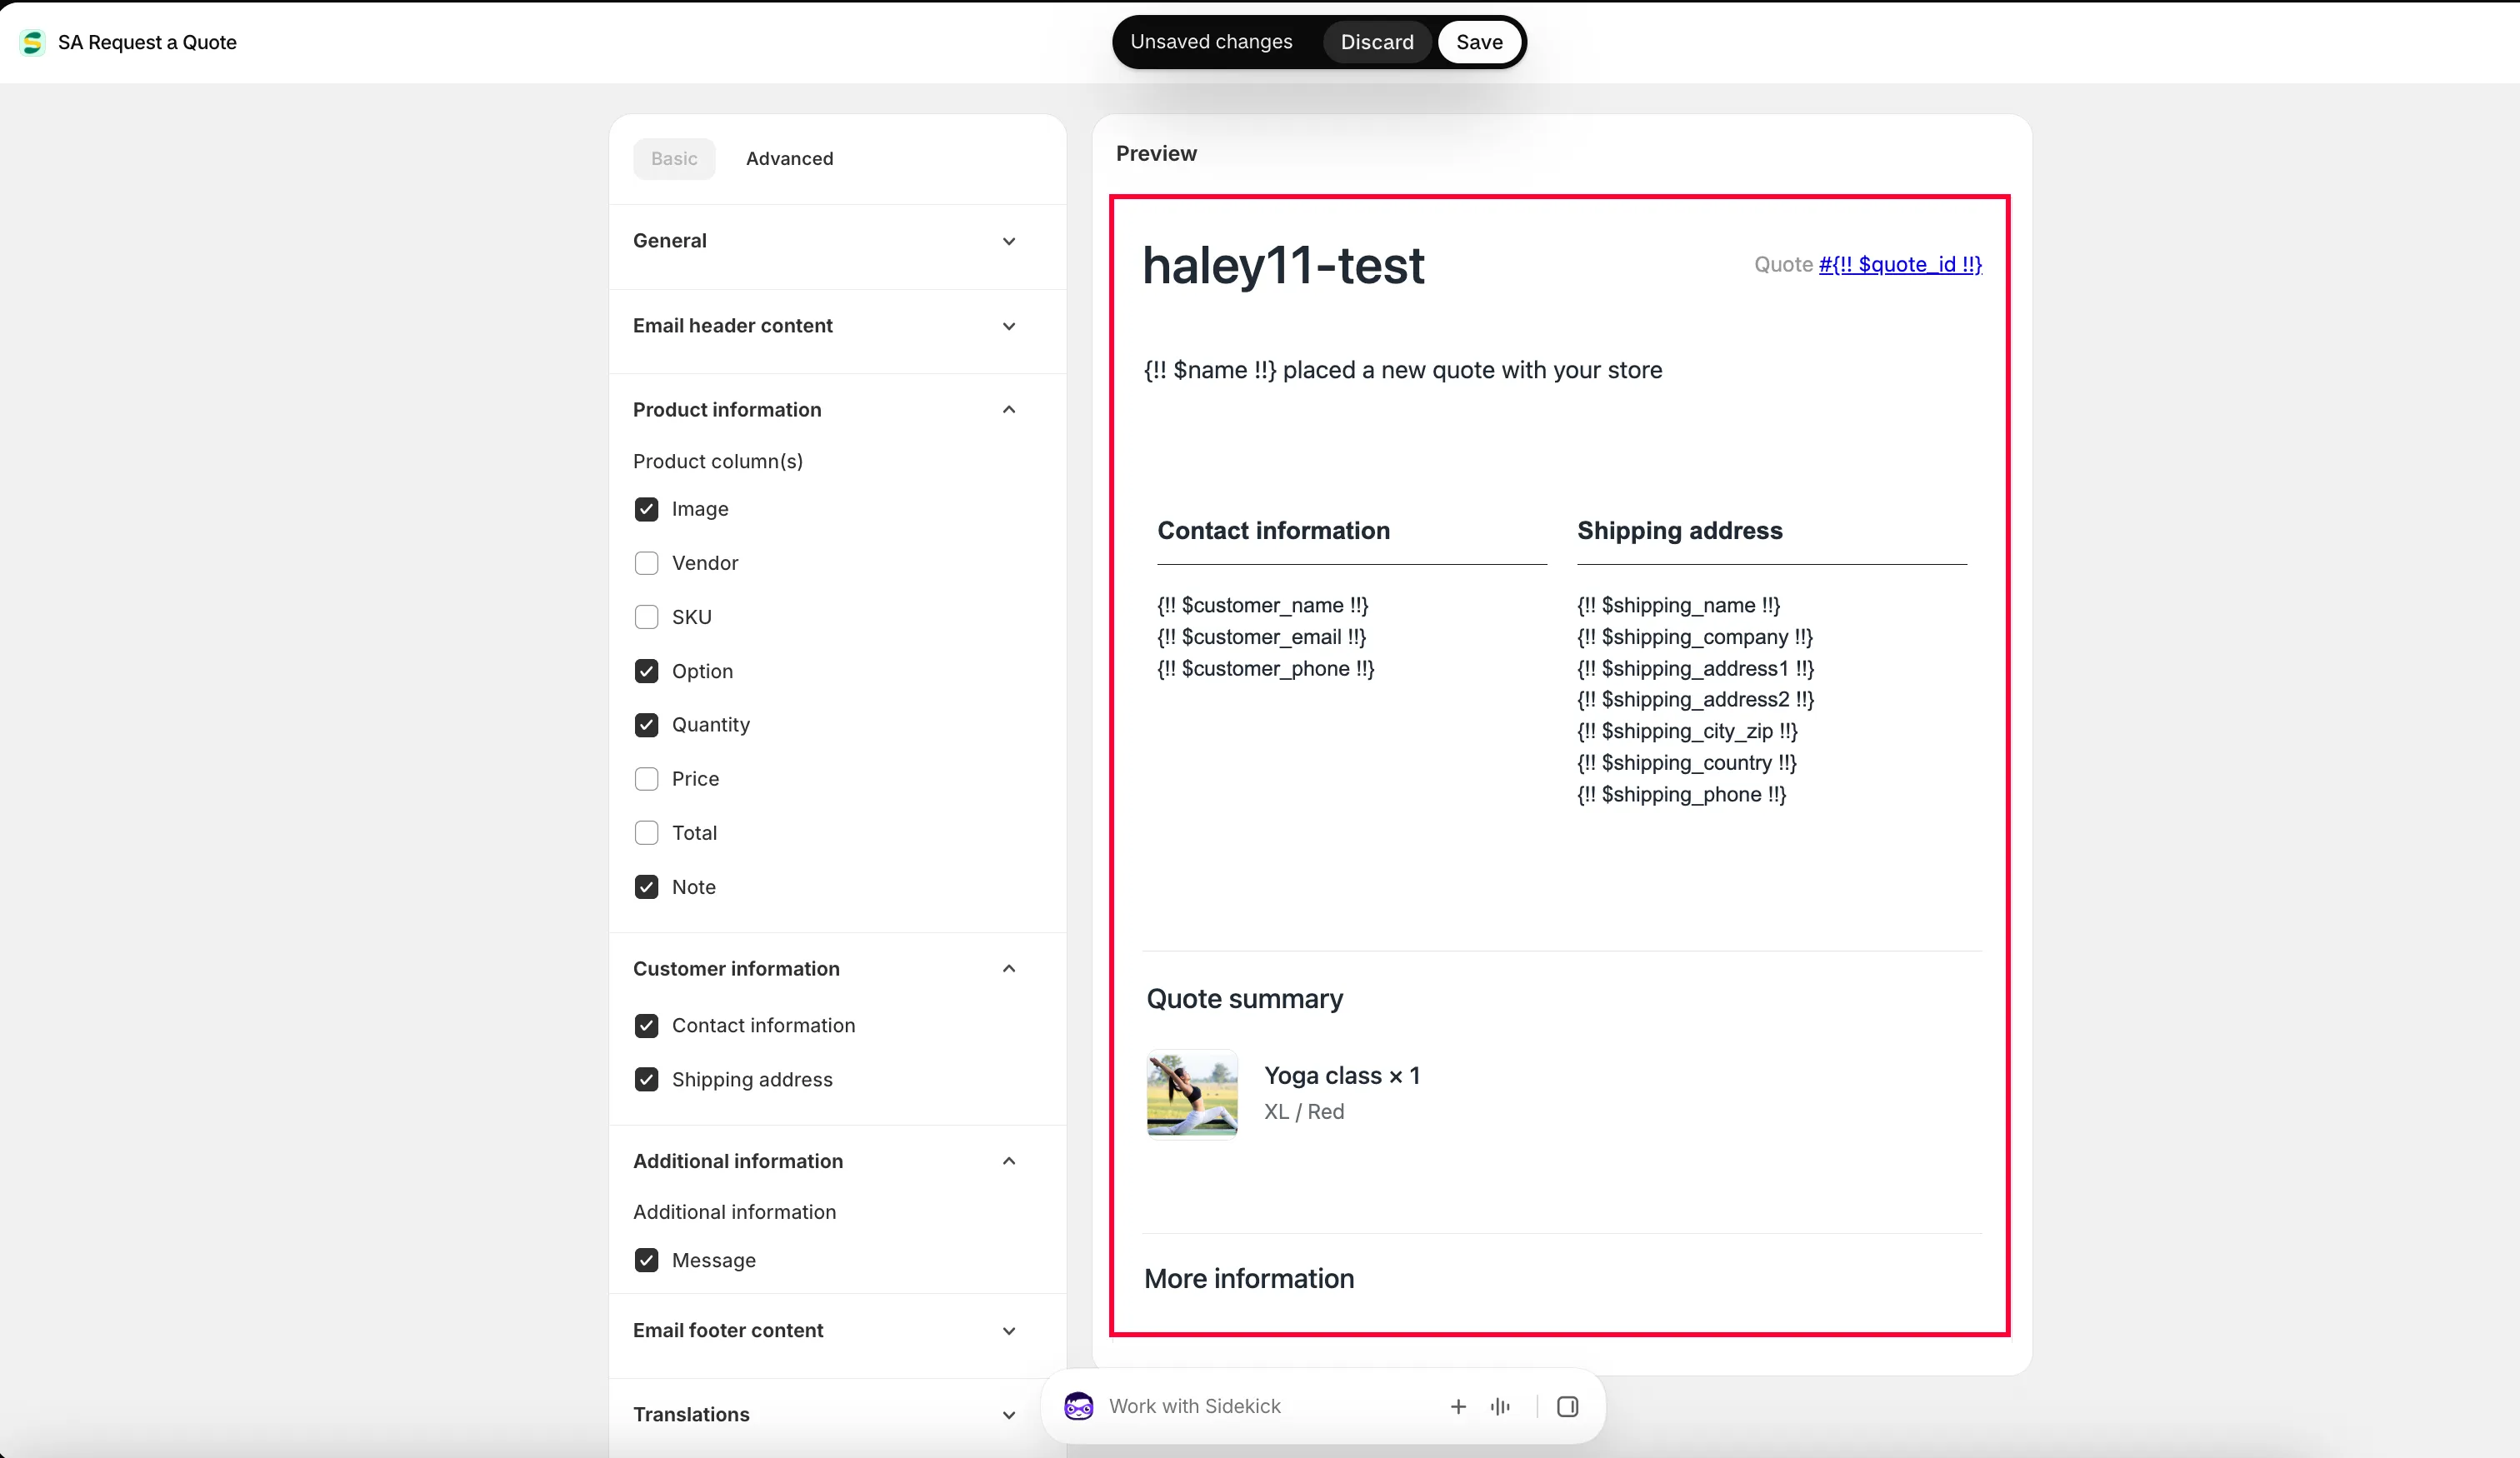
Section titled “3. Product information”Tick the checkbox of each piece of information you want shown in your email. This is the section that decides whether your alert is readable at a glance or whether you have to open the quote to learn anything:
| Checkbox | Shows in the email |
|---|---|
| Product Image | The product photo. |
| Product Vendor | The vendor recorded on the product. |
| Product SKU | The SKU — the fastest way to identify what was asked for. |
| Product Option | The variant the customer chose, such as size or finish. |
| Product Quantity | How many they asked for, so you can judge the job before opening it. |
| Product Price | The unit price. |
| Product Total price | The line total. |
4. Additional information
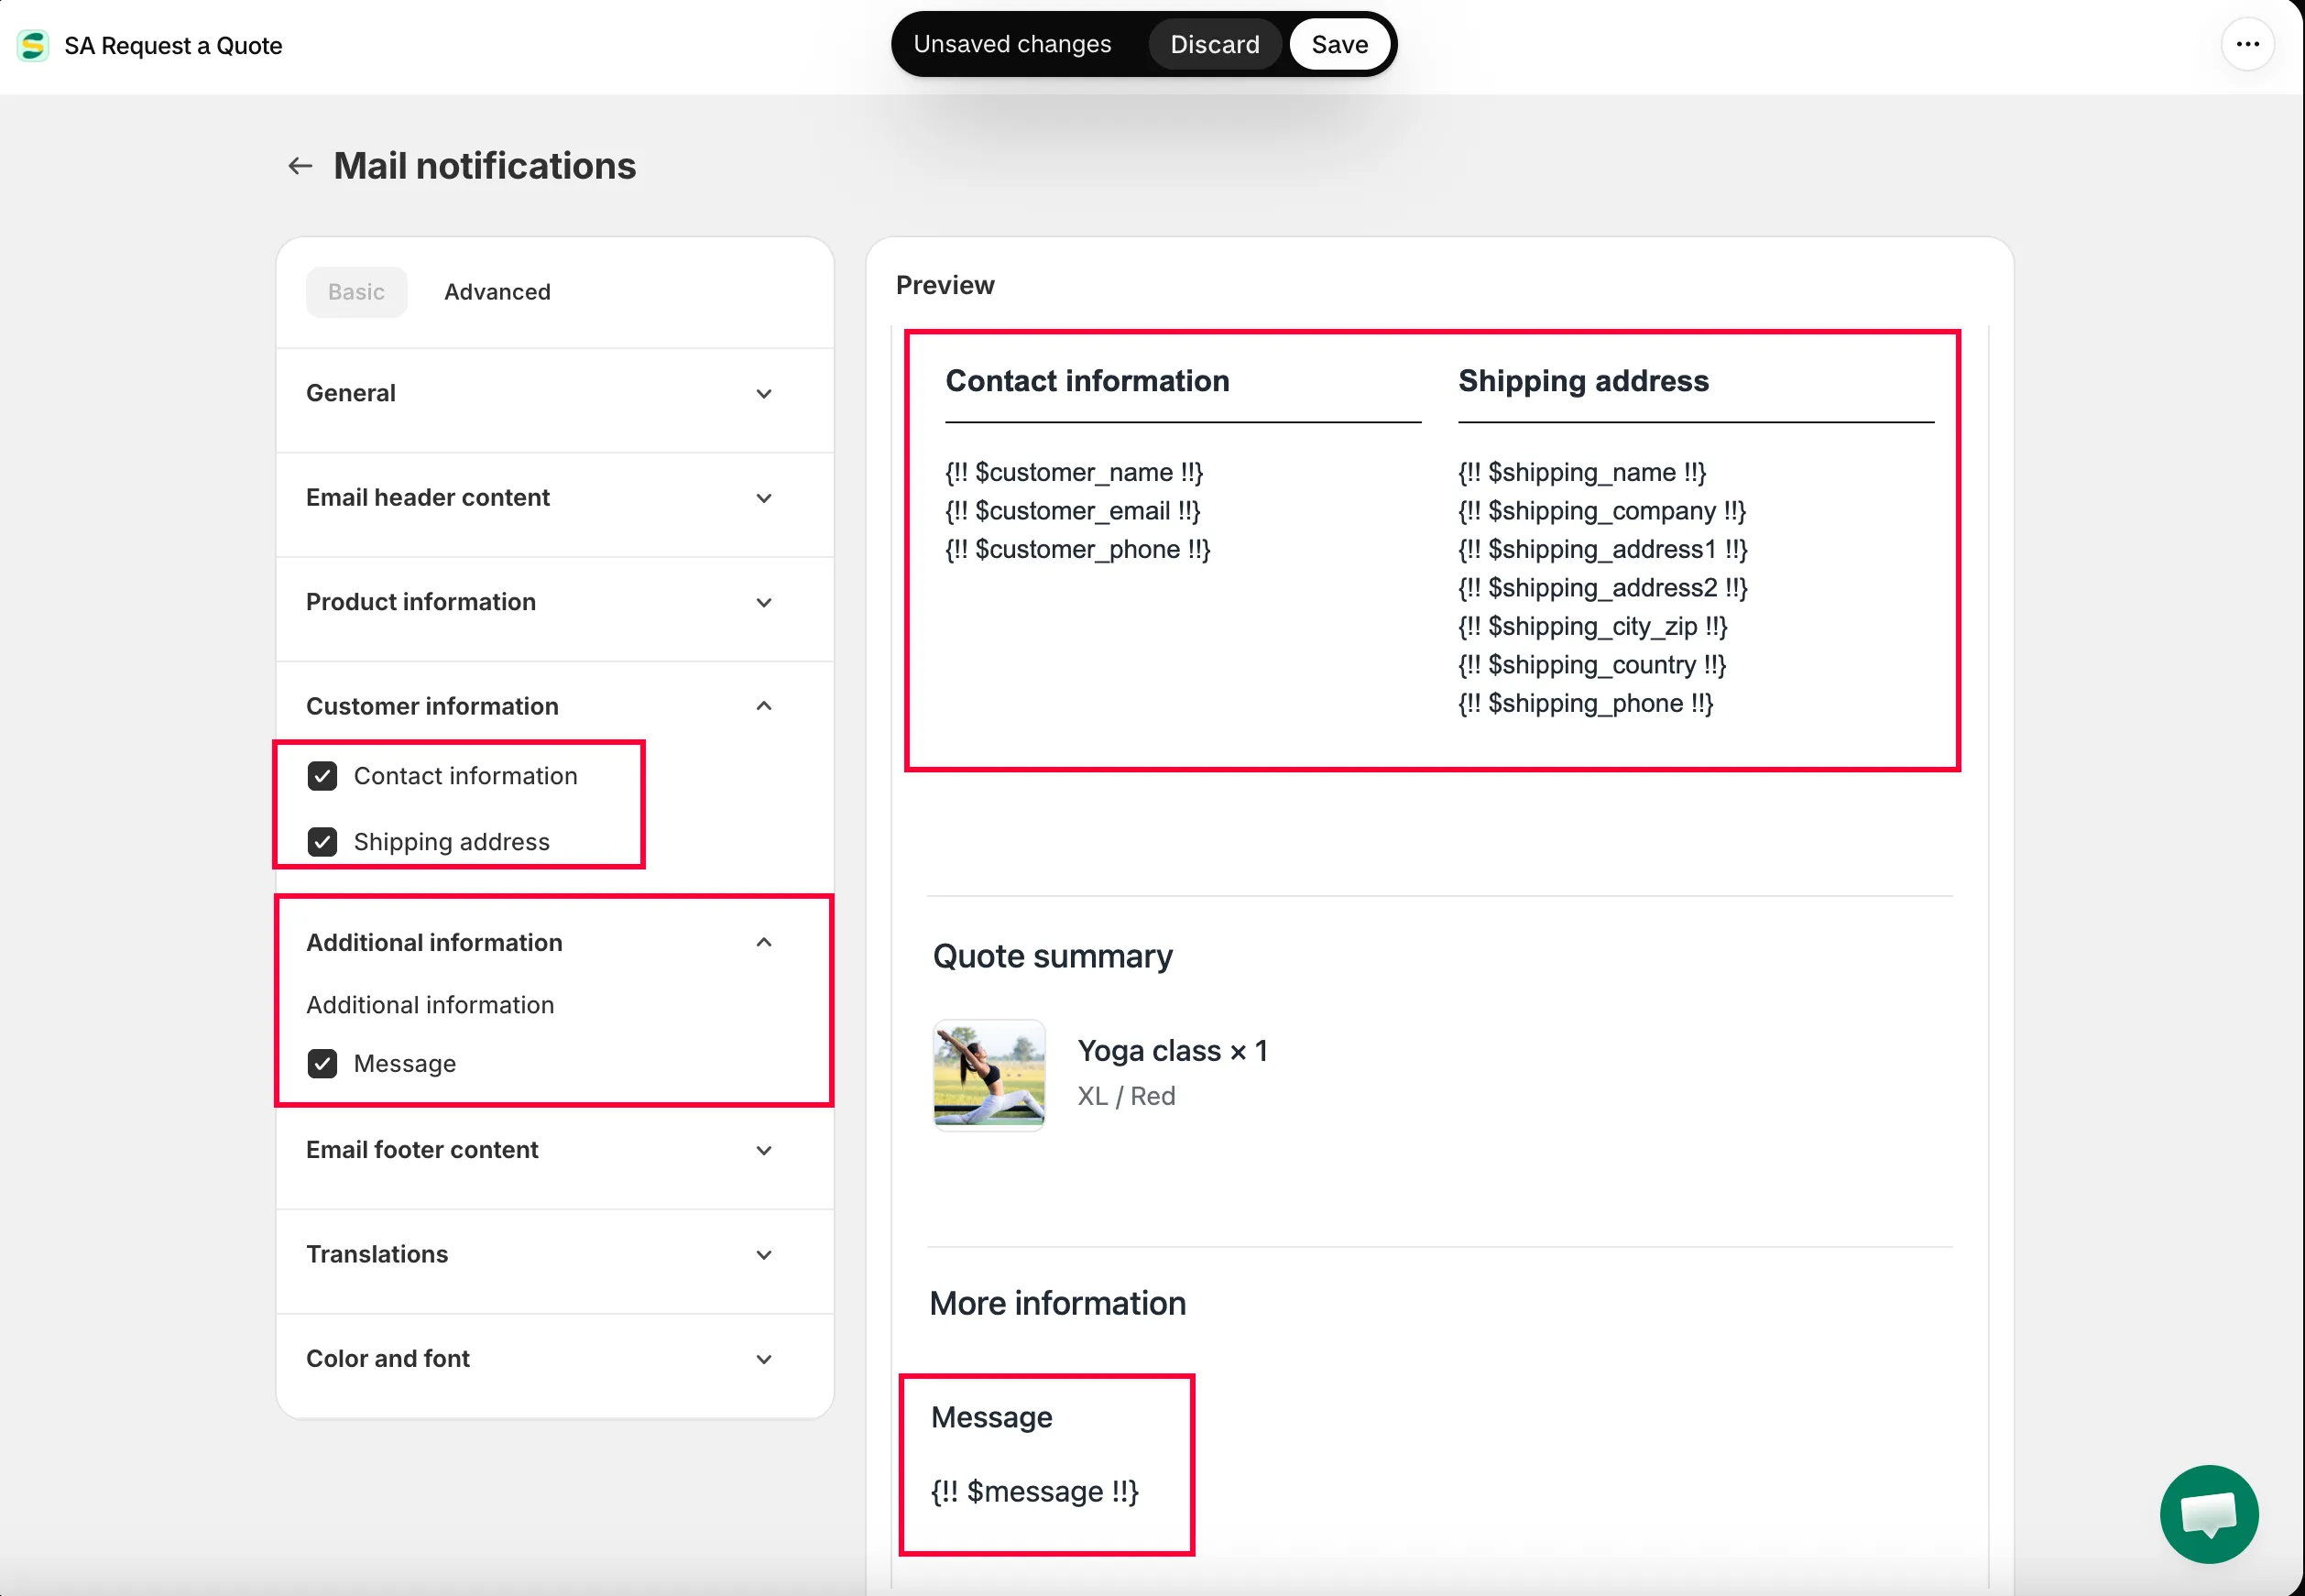
Section titled “4. Additional information”Tick a checkbox to select the form builder fields you want shown in your email.
If a field you added to the quote form is missing from the alert, this is why: form builder fields are opt-in here, and an unticked box simply does not appear.
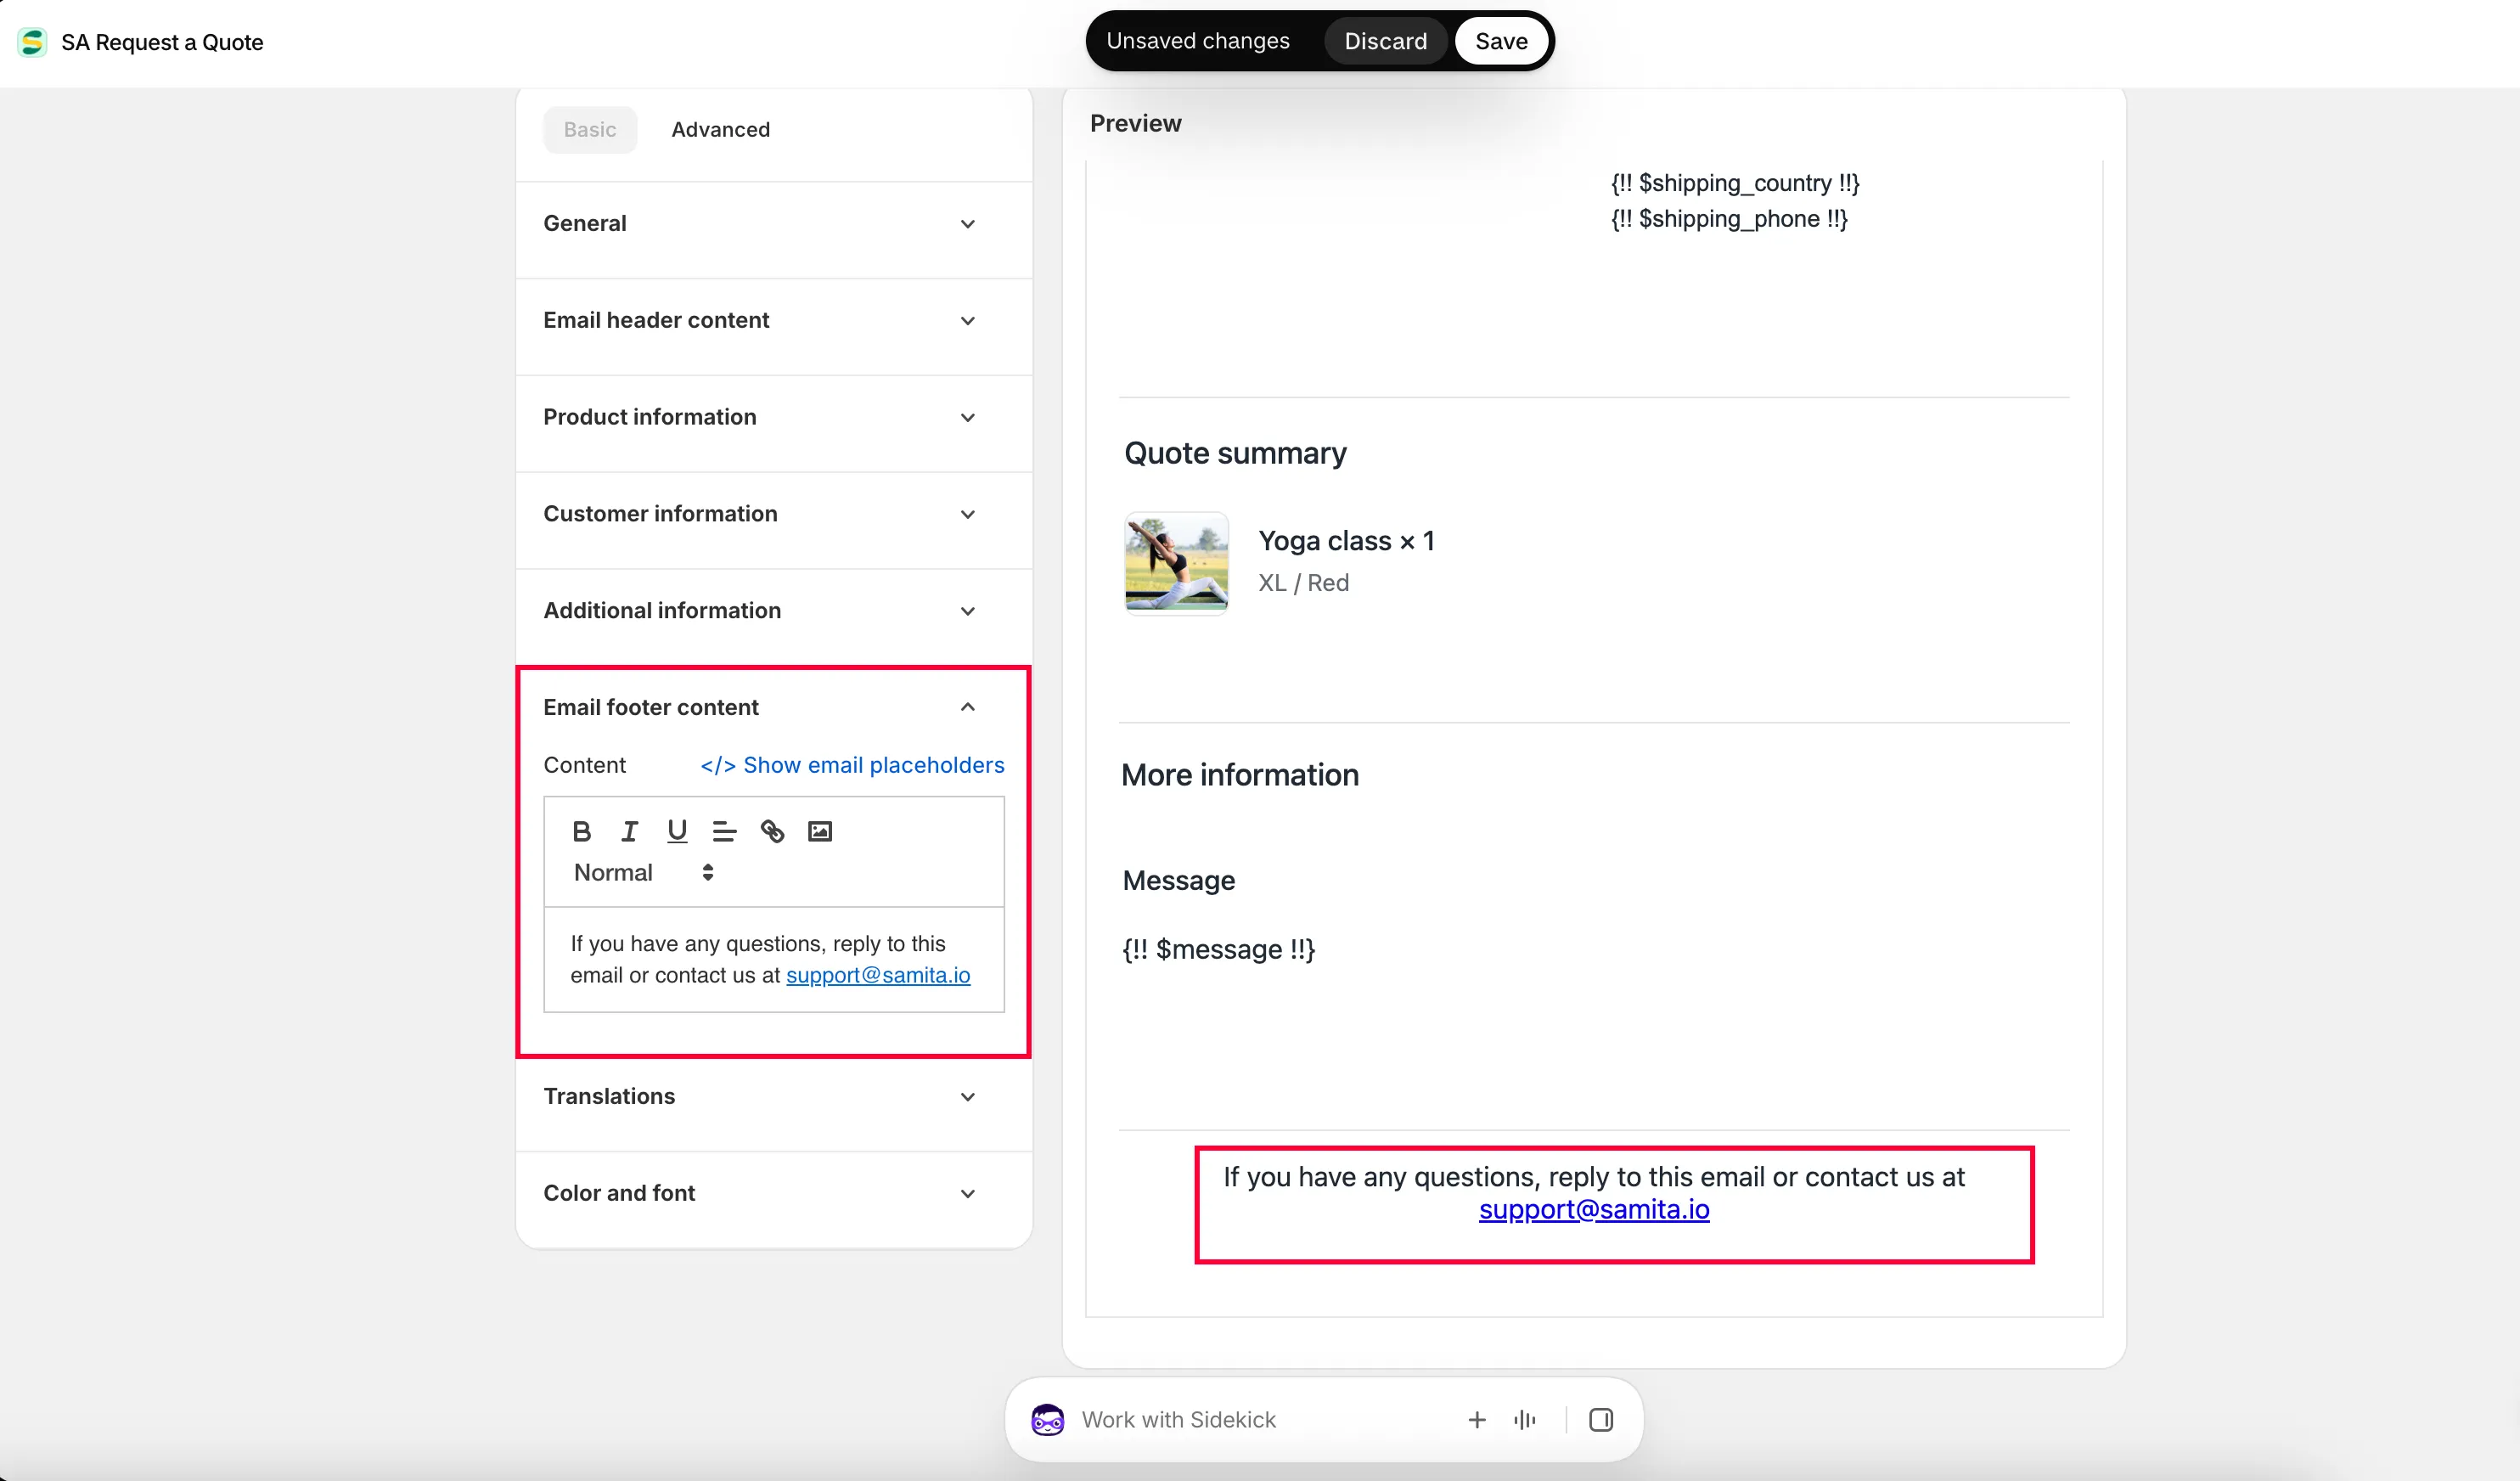
5. Footer email content
Section titled “5. Footer email content”Edit the footer content as you want, using the available email placeholders.
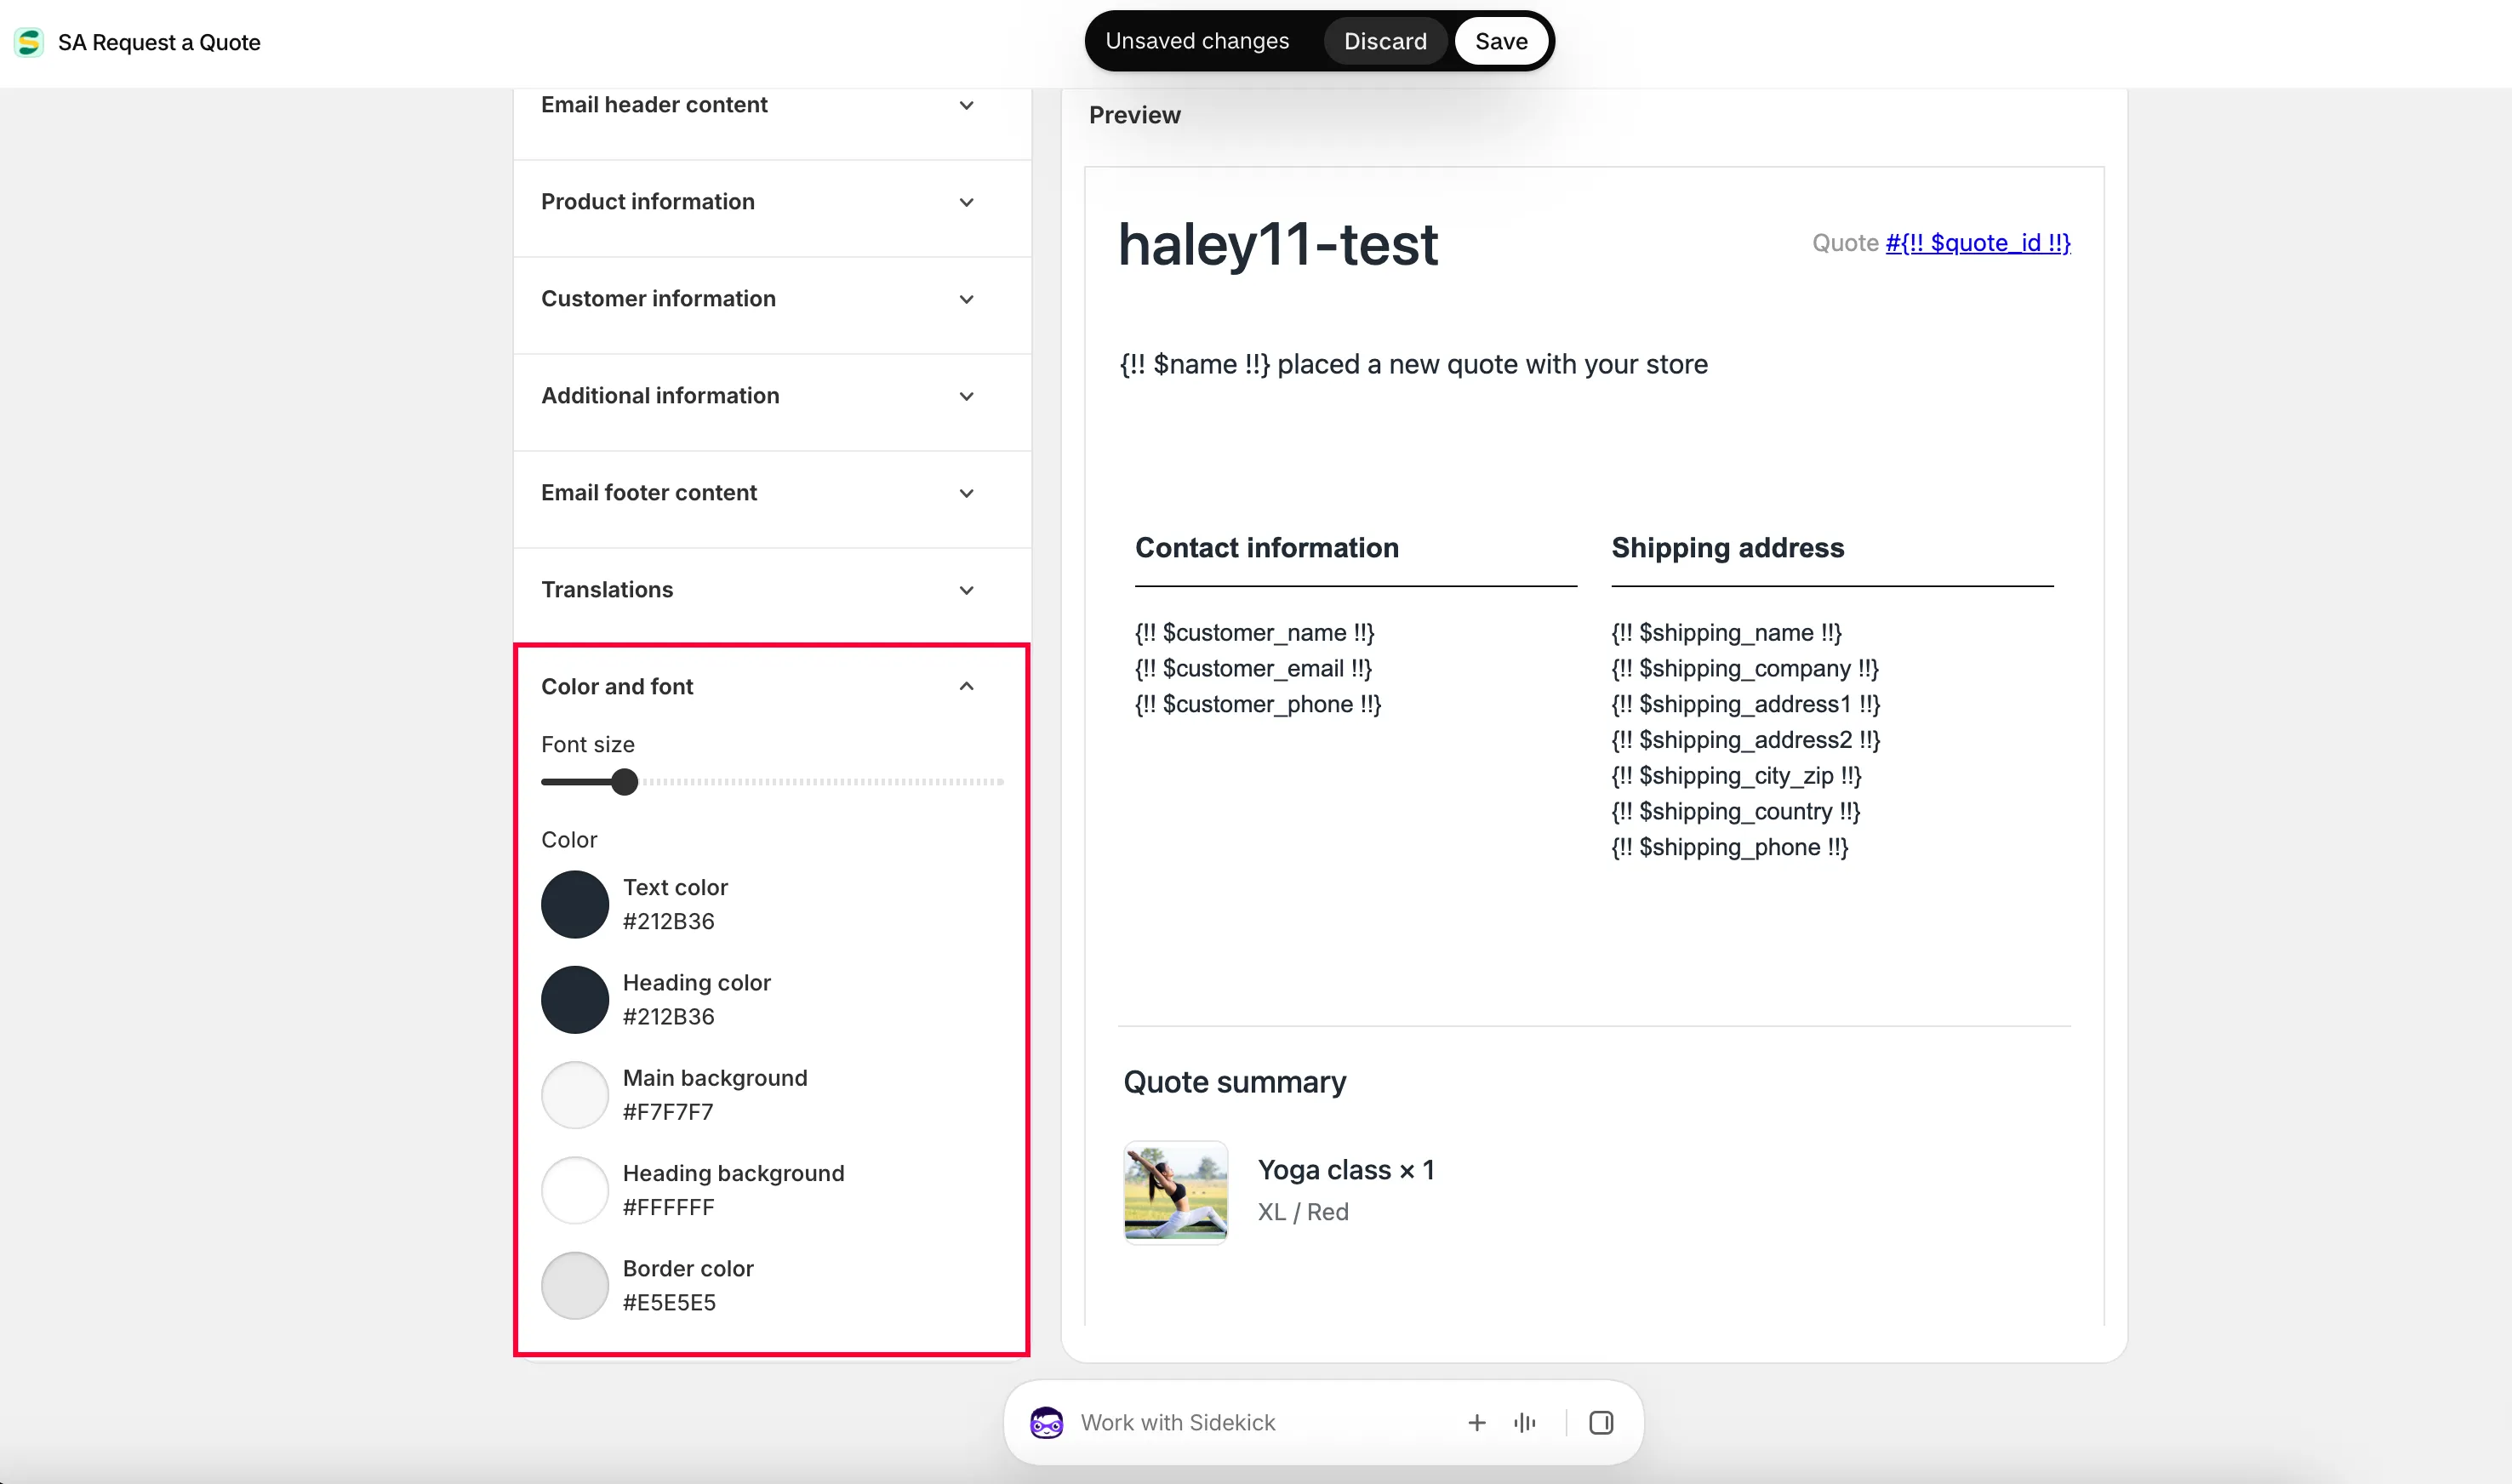
6. Color and font
Section titled “6. Color and font”- Drag and drop to adjust the Font size.
- Click to choose the Text color and the Heading color you want.
The Advanced template
Section titled “The Advanced template”Choose Advanced when you would rather write the alert yourself than assemble it from the Basic sections.
-
Choose the Advanced template
Section titled “Choose the Advanced template”From the same email setting page, choose the Advanced template.
-
Edit the content
Section titled “Edit the content”Manually edit the email template content on the right of the page — Admin email, Subject, attach PDF file and the rest.
-
Add variables
Section titled “Add variables”Click Show variants, copy a variable from the list and add it to the email template.
For example, to show the name of the customer who submitted the quote: the Email placeholders list shows
{!! $name !!}against First name. Put{!! $name !!}in the Subject field and in the body, and it is replaced with the name of the customer who submitted your quote.Because variables work in Subject as well as the body, the alert can name the customer in your inbox list — which is exactly what makes a notification readable without opening it.
-
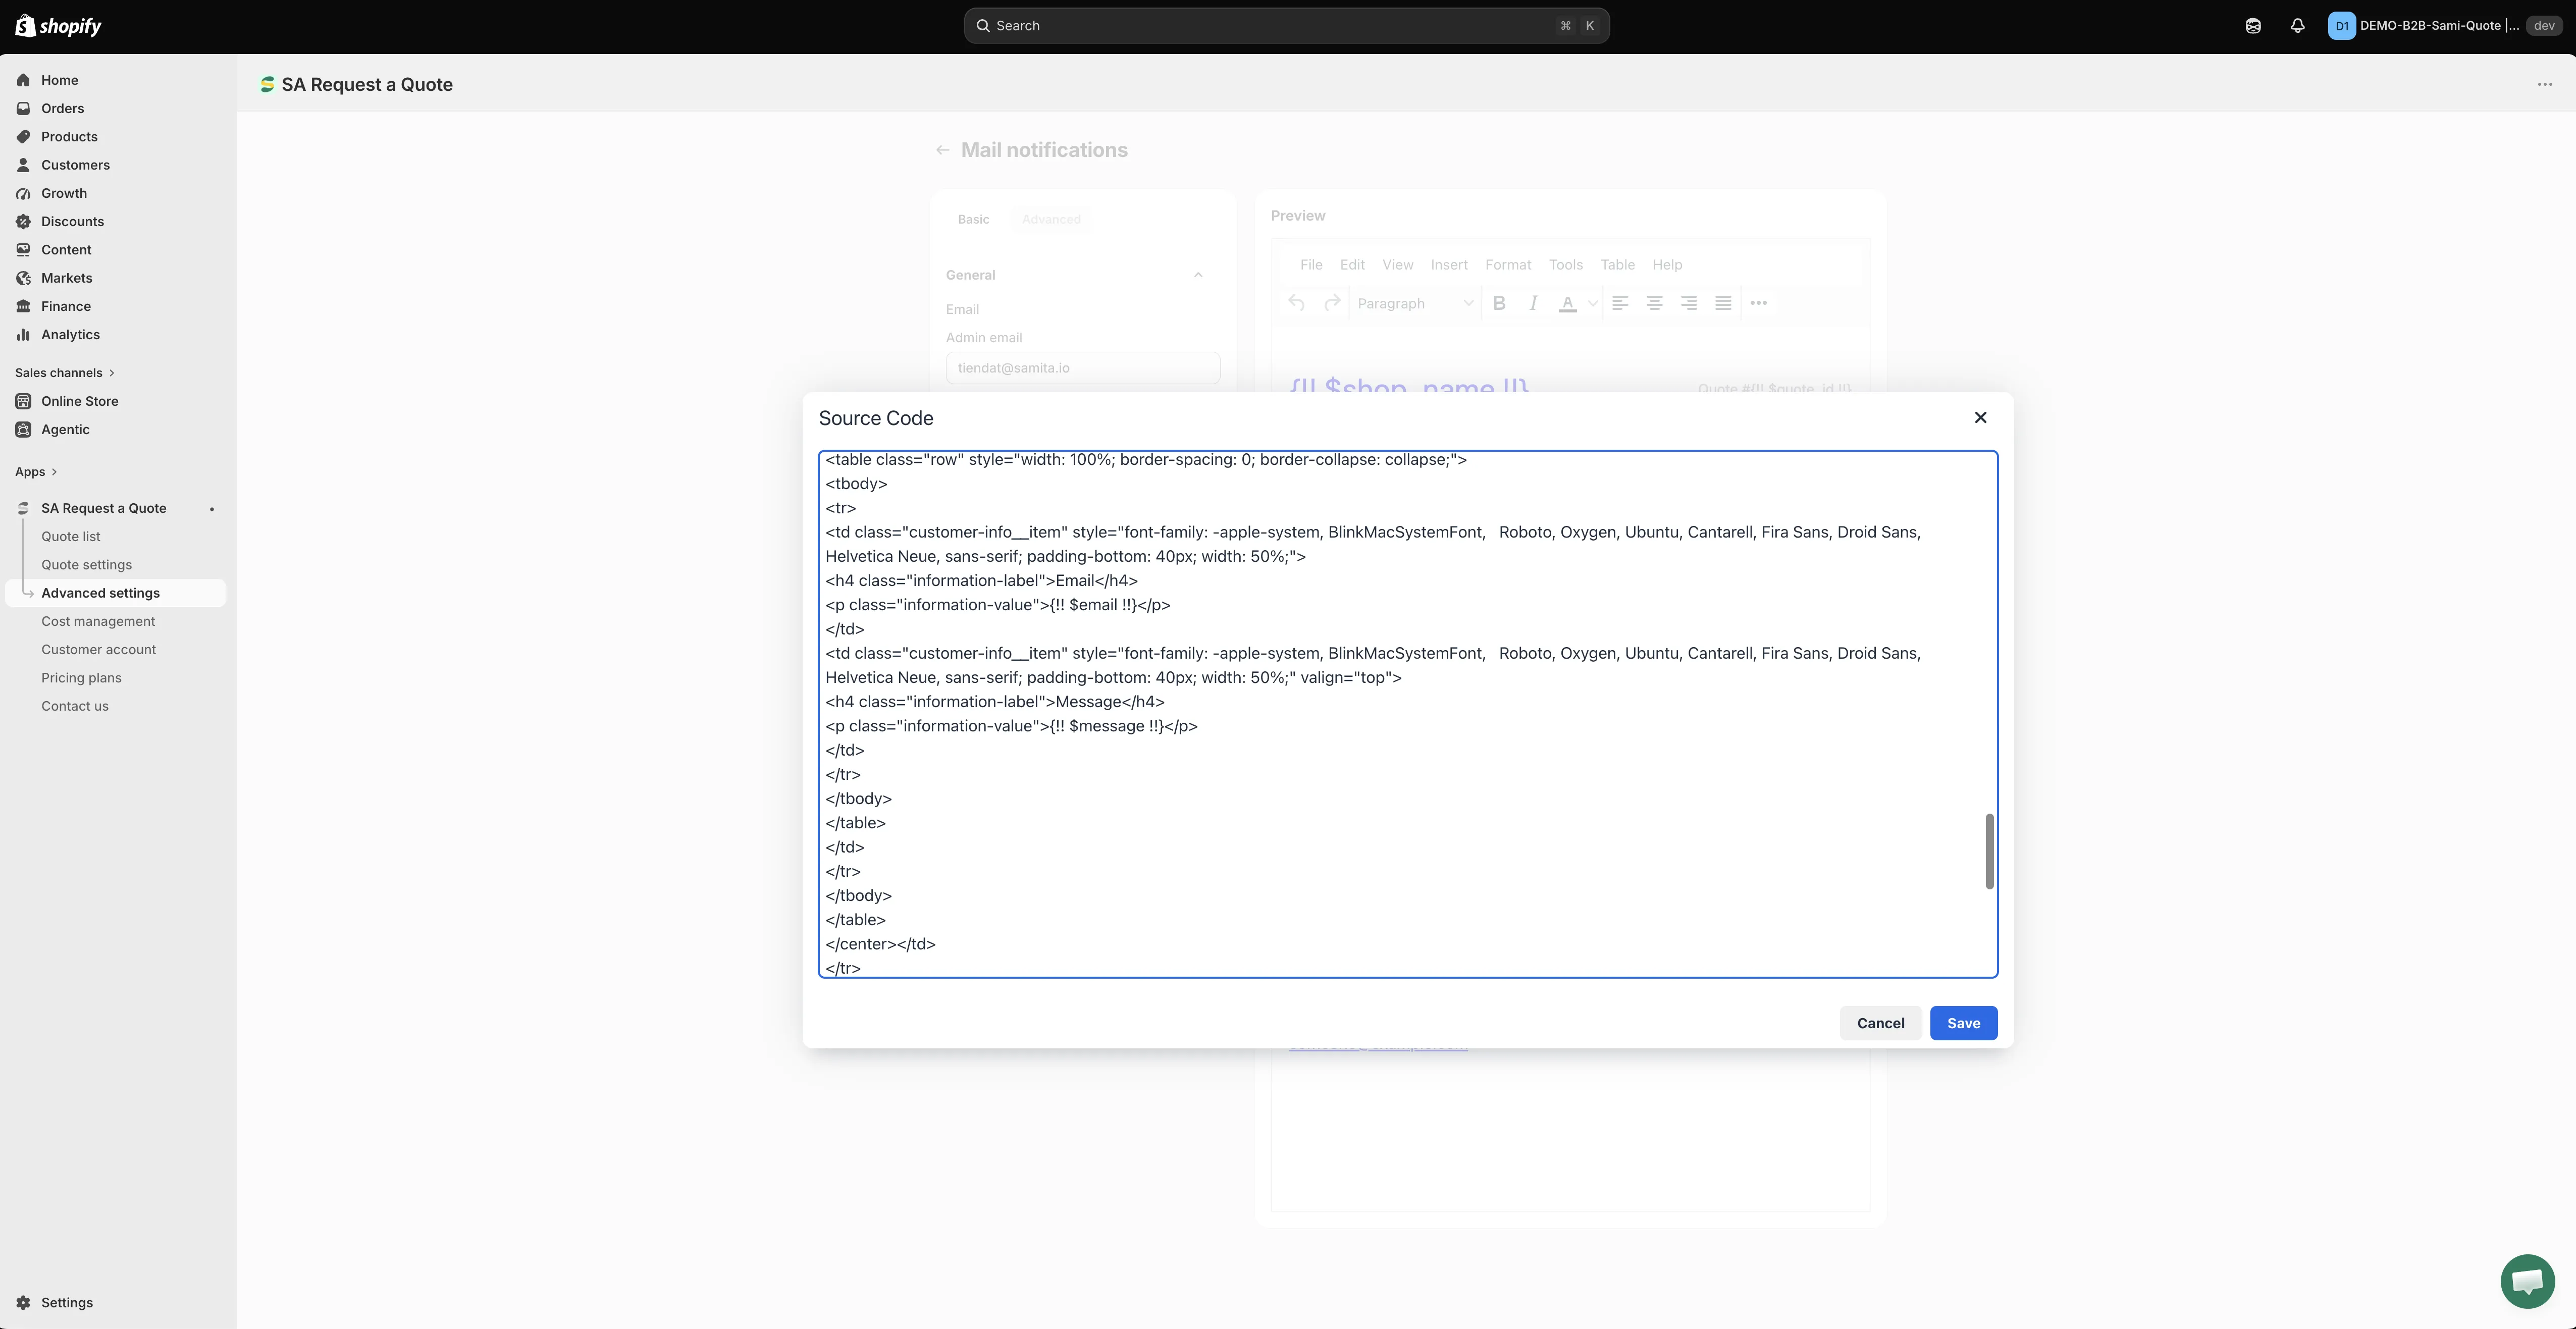
Custom CSS codes
Section titled “Custom CSS codes”Put custom CSS codes for the email content in the Custom CSS codes field. This is optional.
-
Click Save to save the template.
Make it useful at a glance
Section titled “Make it useful at a glance”A notification you have to open to understand slows you down. Worth doing:
- Put something identifying in Subject so you can spot quote emails in a busy inbox. On the Advanced template, a variable such as
{!! $name !!}puts the customer’s name there too. - Tick the Product information boxes that matter to you — Product SKU, Product Option and Product Quantity are usually enough to price a job from the alert alone.
- Tick the Additional information fields you rely on, or the answers your form collects will not travel with the alert.
- Notify a shared inbox rather than one person, so quotes do not stall when someone is away — see Change notification recipients.
- Tick Attach PDF file if you would rather read the quote as a document — see Attach a PDF to quote emails.
The email is not the only record
Section titled “The email is not the only record”Every request is also saved in the app. Open Quote list in the sidebar — the page is headed Quotes — and use the status tabs All, Read, Unread, Order created and Purchased to see what still needs attention. If an email goes astray, nothing is lost.
If you are not receiving them
Section titled “If you are not receiving them”Notifications come from no-reply@samita.io unless you set up your own mail server. If nothing arrives, check your spam folder and allow that sender — full steps in Troubleshooting.
Next steps
Section titled “Next steps”- Change notification recipients — add colleagues to the notifications
- Emails sent to customers — what the customer receives
- Send from your own address (SMTP) — send from your own address instead