
Settings
Translate storefront text
Use Translations AI in Advanced settings to translate everything your customers see, in the languages you publish in Shopify.
If you sell in more than one language, the quote experience should follow. You don’t translate it piece by piece — Translations AI covers the whole of it at once.
The setting is on the Translations tab of Advanced settings. The app describes it as: “Translate everything your customers see — quote form, storefront text and both quote emails. Languages come from Settings → Languages.”
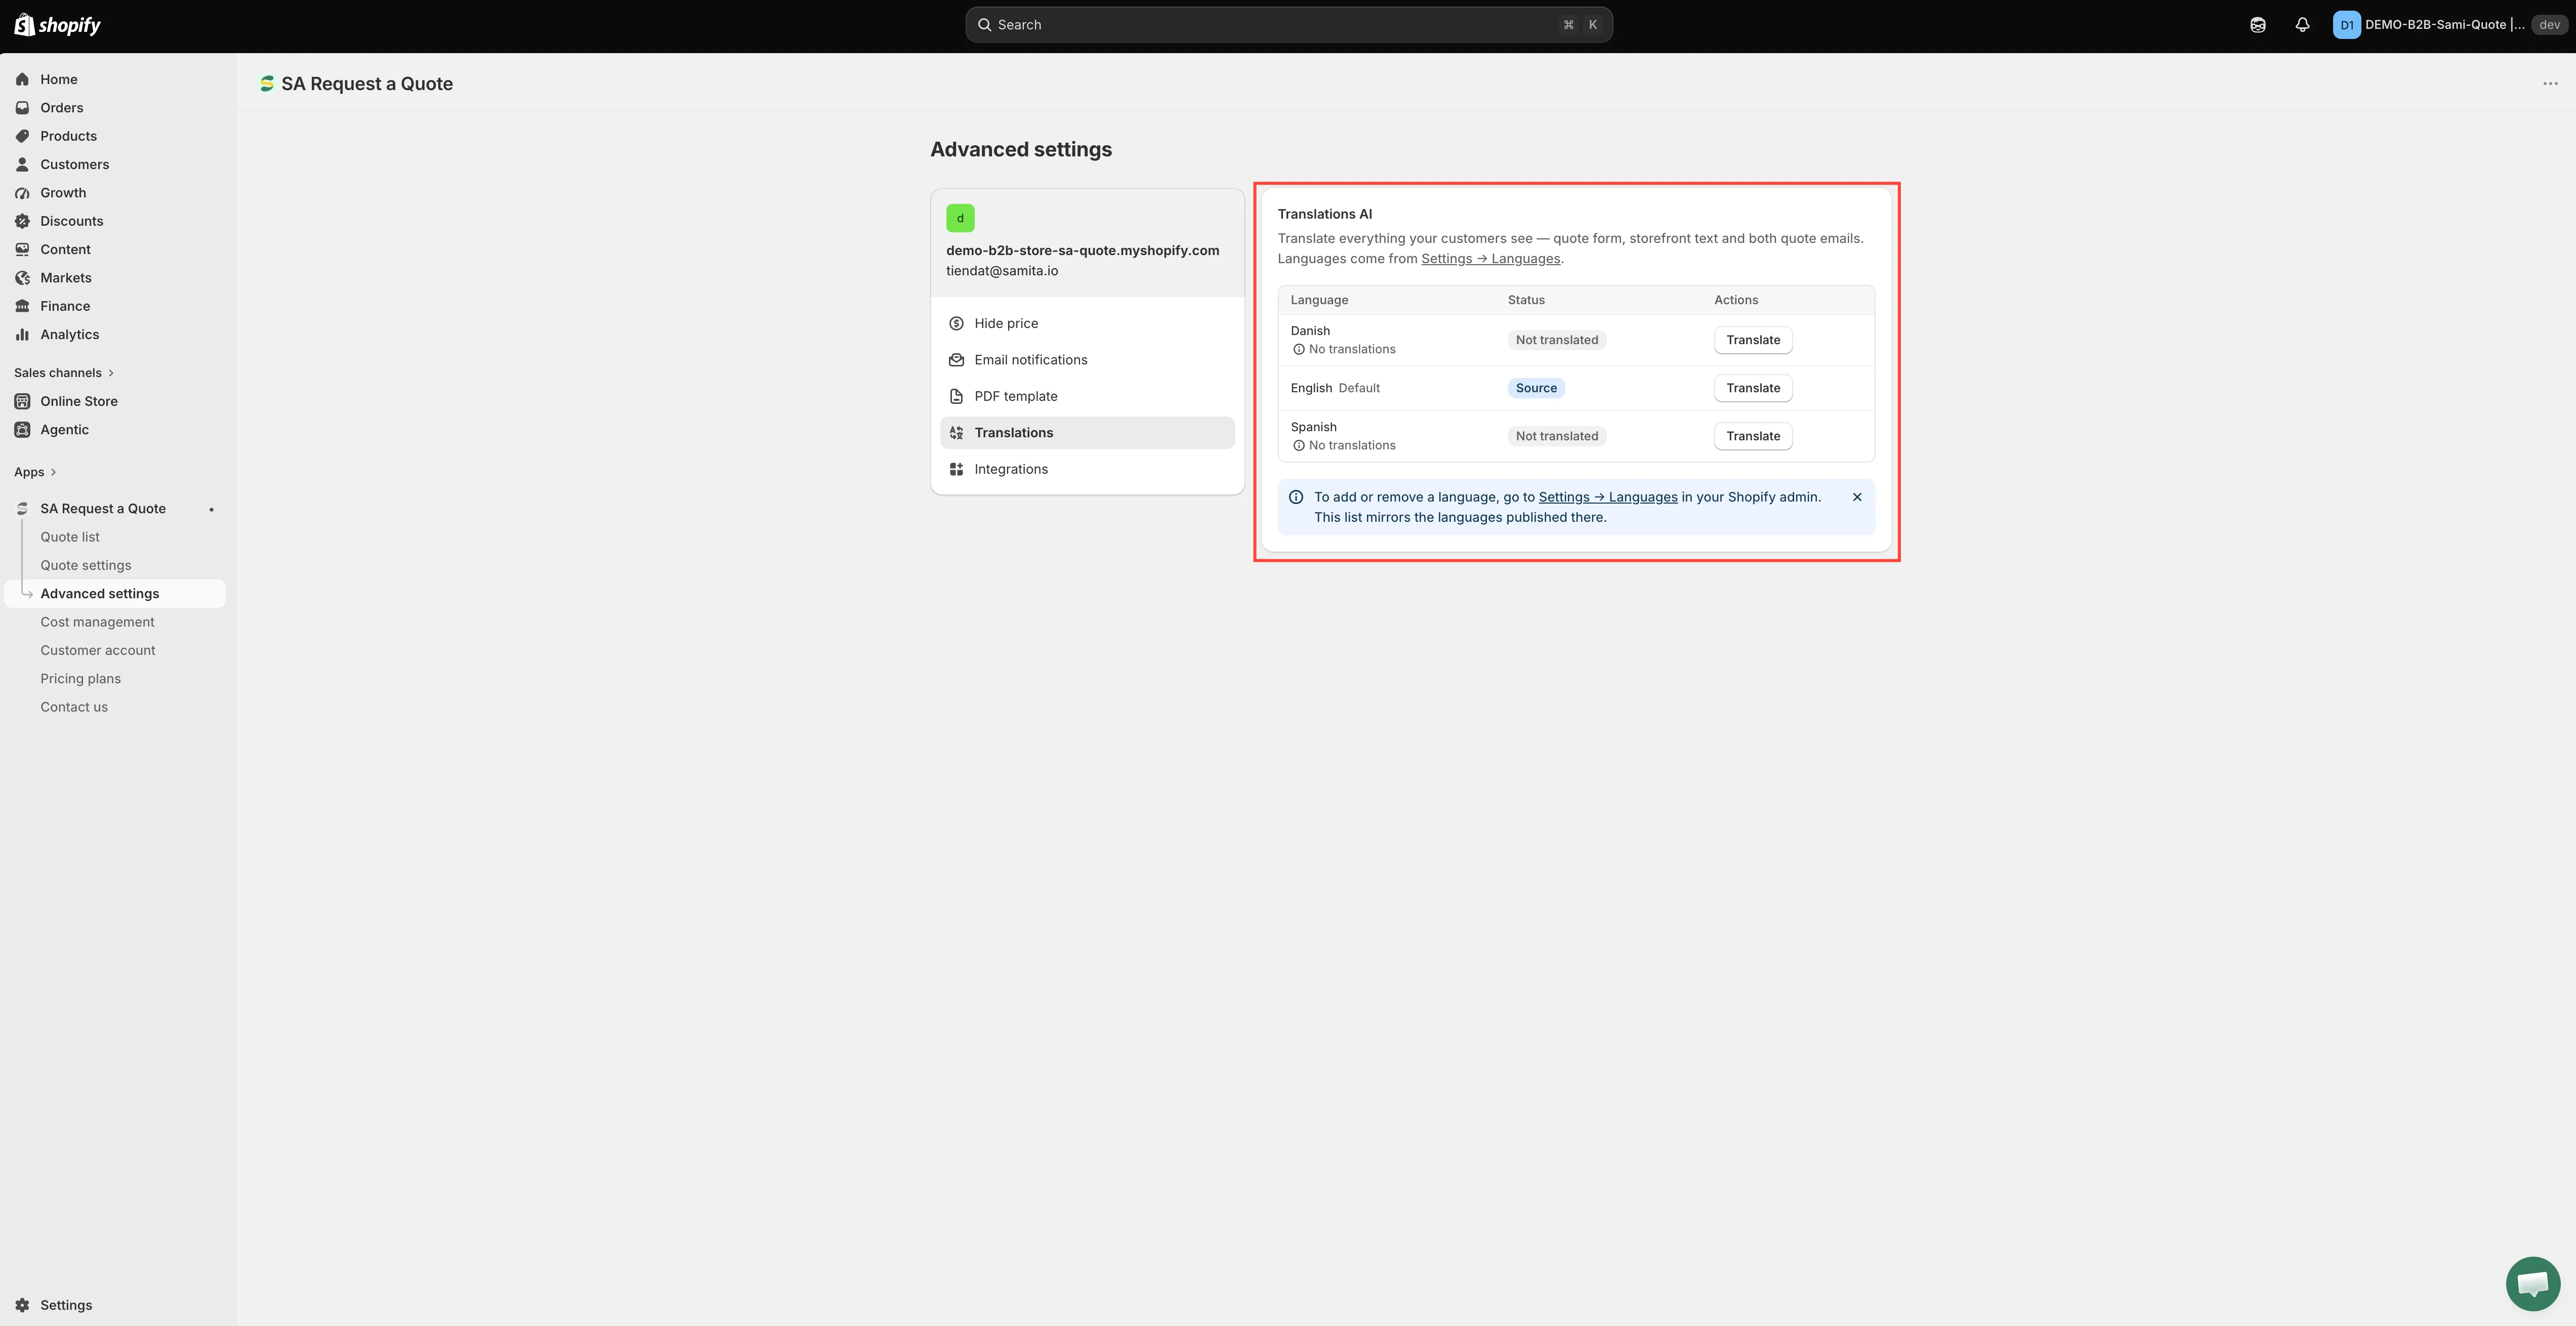
Languages come from Shopify; this table is where you translate them.
Languages come from Shopify
Section titled “Languages come from Shopify”The app keeps no language list of its own. It mirrors the languages your store publishes, so there is nothing to add here.
That means the order of work runs one way: publish the language in Shopify first, then translate it in the app. A language you haven’t published won’t appear in the table.
Get your source text right first
Section titled “Get your source text right first”The table has three columns — Language, Status and Actions. The row marked Default carries the status Source: that is the text every other language is translated from. On a store whose default language is English, that row reads English — Default — Source.
Because everything is made from the source, wording you fix afterwards has to be translated again. Settle your default-language text before you translate anything:
| Source text | Where you write it |
|---|---|
| Button text, and the Message shown after a product is added | Quote settings > Customize > Button & widget |
| The quote form's fields and sections | Quote settings > Customize > Quote form |
| The two quote emails | Advanced settings > Email notifications |
Translate a language
Section titled “Translate a language”-
Publish the language in Shopify
In your Shopify admin, go to Settings > Languages and publish the language you sell in.
-
Open the Translations tab
In the app, go to Advanced settings and open the Translations tab.
-
Find the language in the table
Look for it in the Language column. Your store’s default language sits there too, marked Default with the status Source, so get that wording right before you translate.
-
Use Translate on that row
Click Translate in the Actions column. One click covers the quote form, your storefront text and both quote emails together — there is no separate entry point for the emails or for individual sections on this tab, so one pass does the lot.
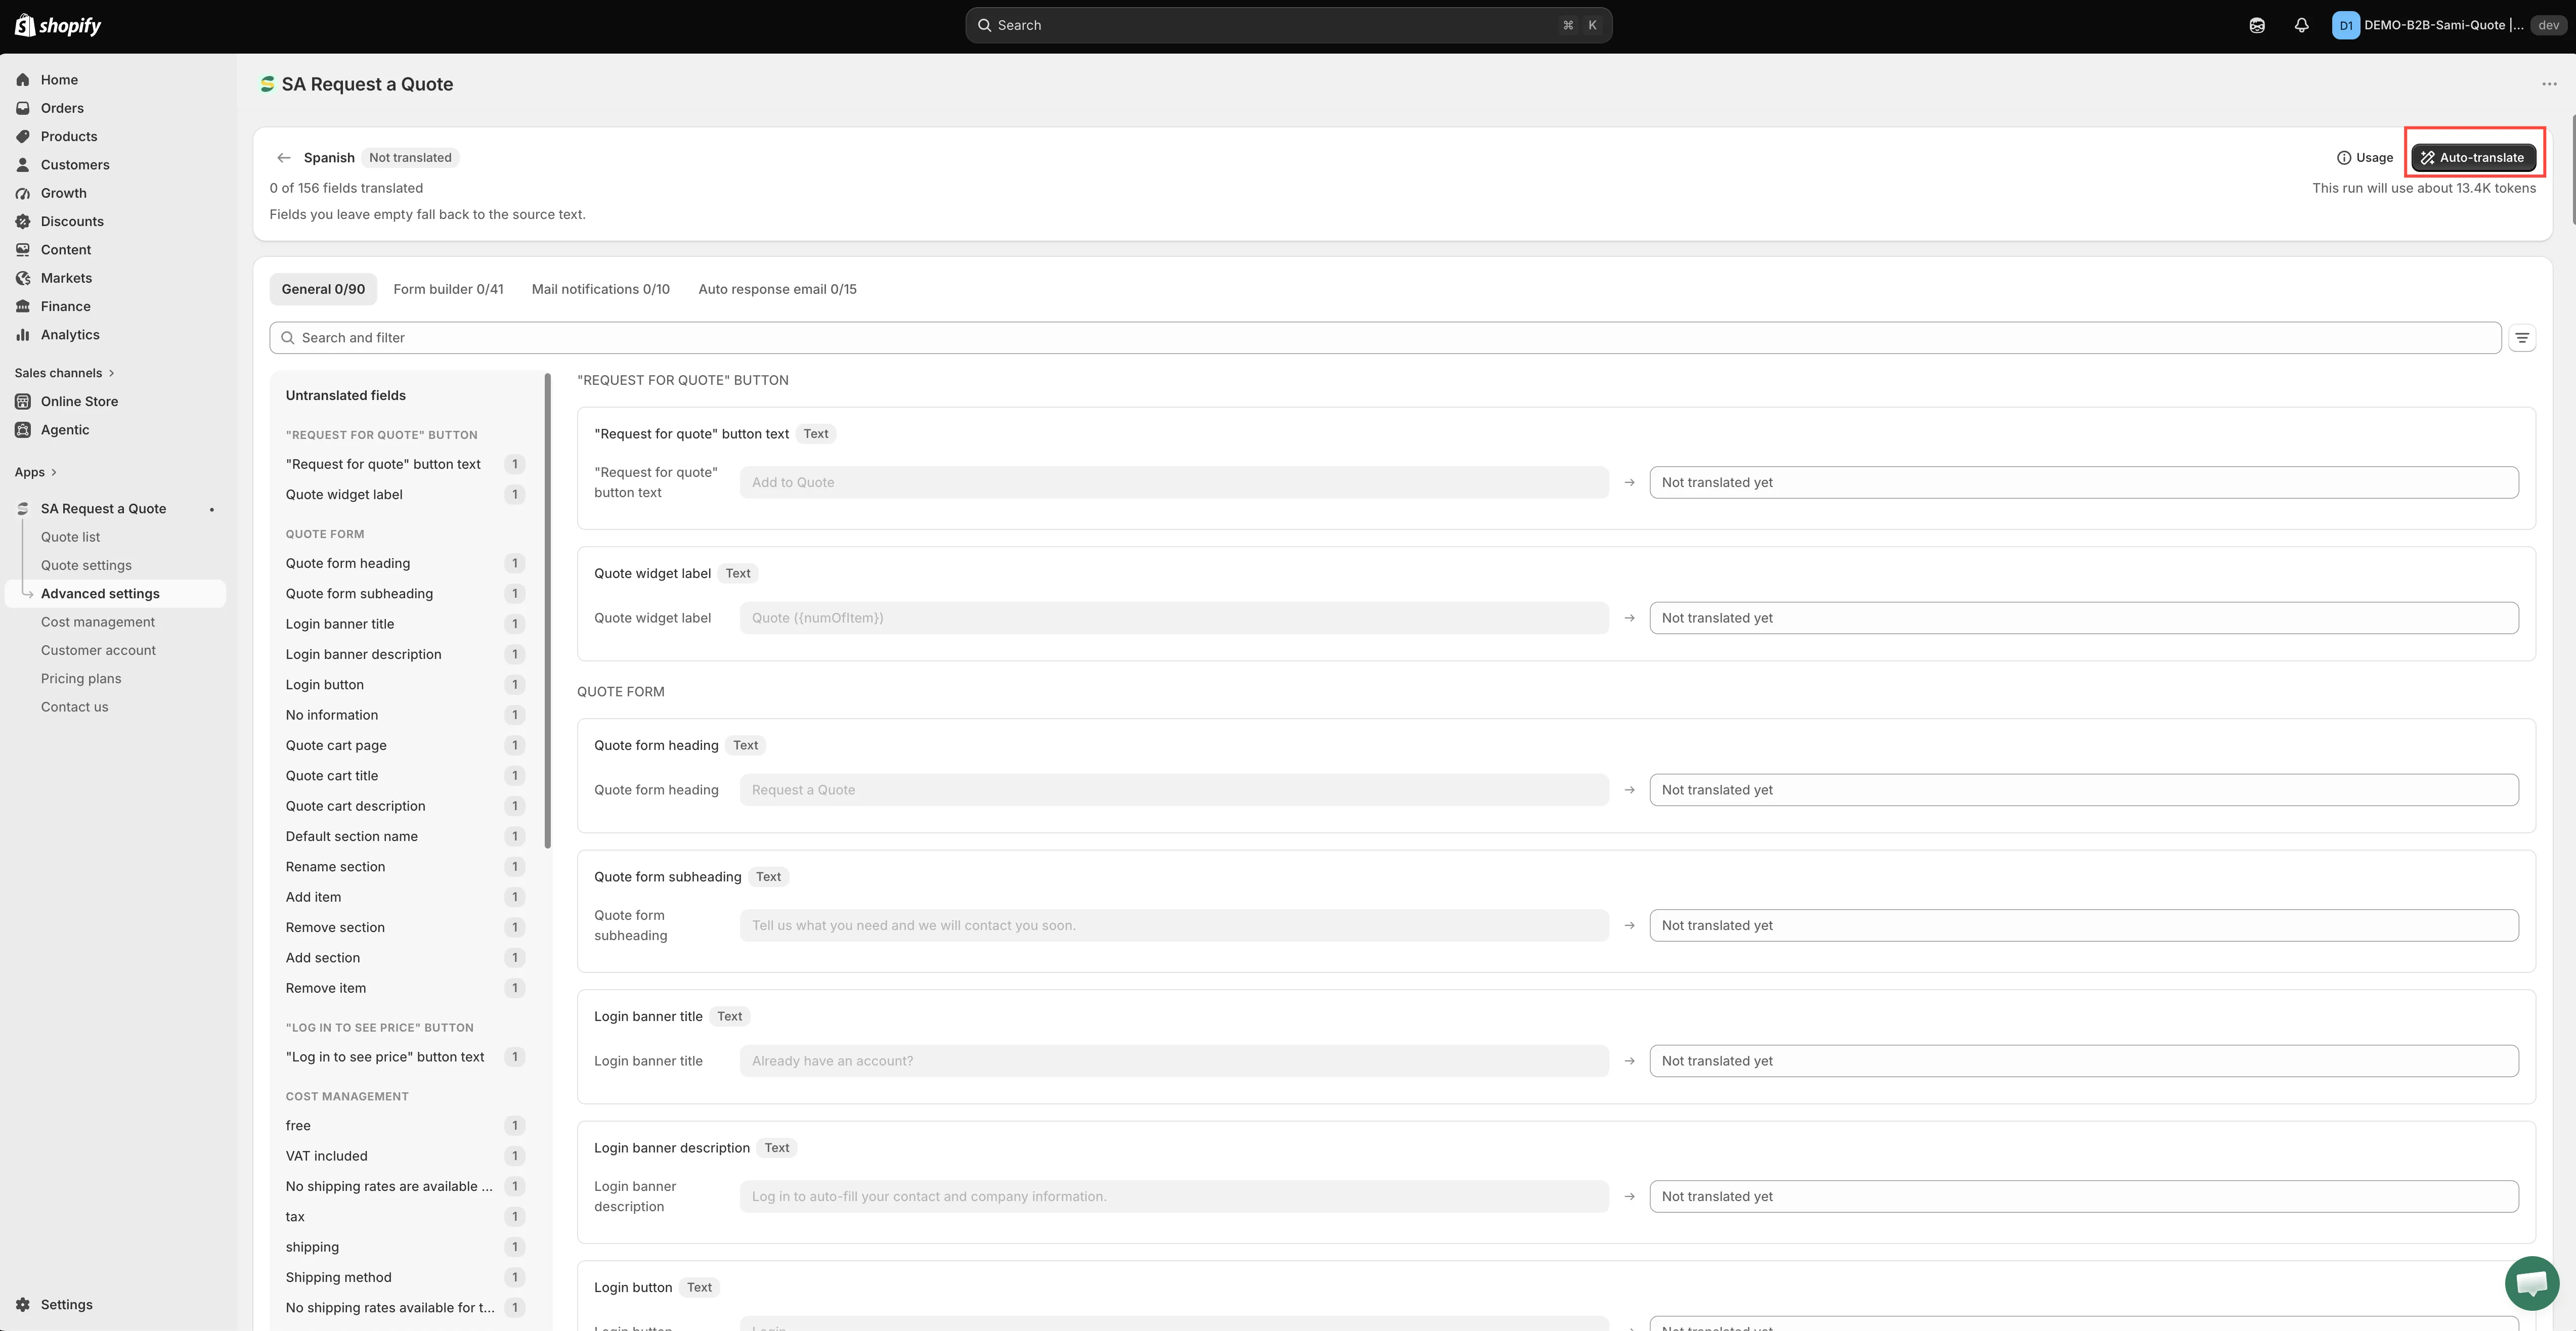
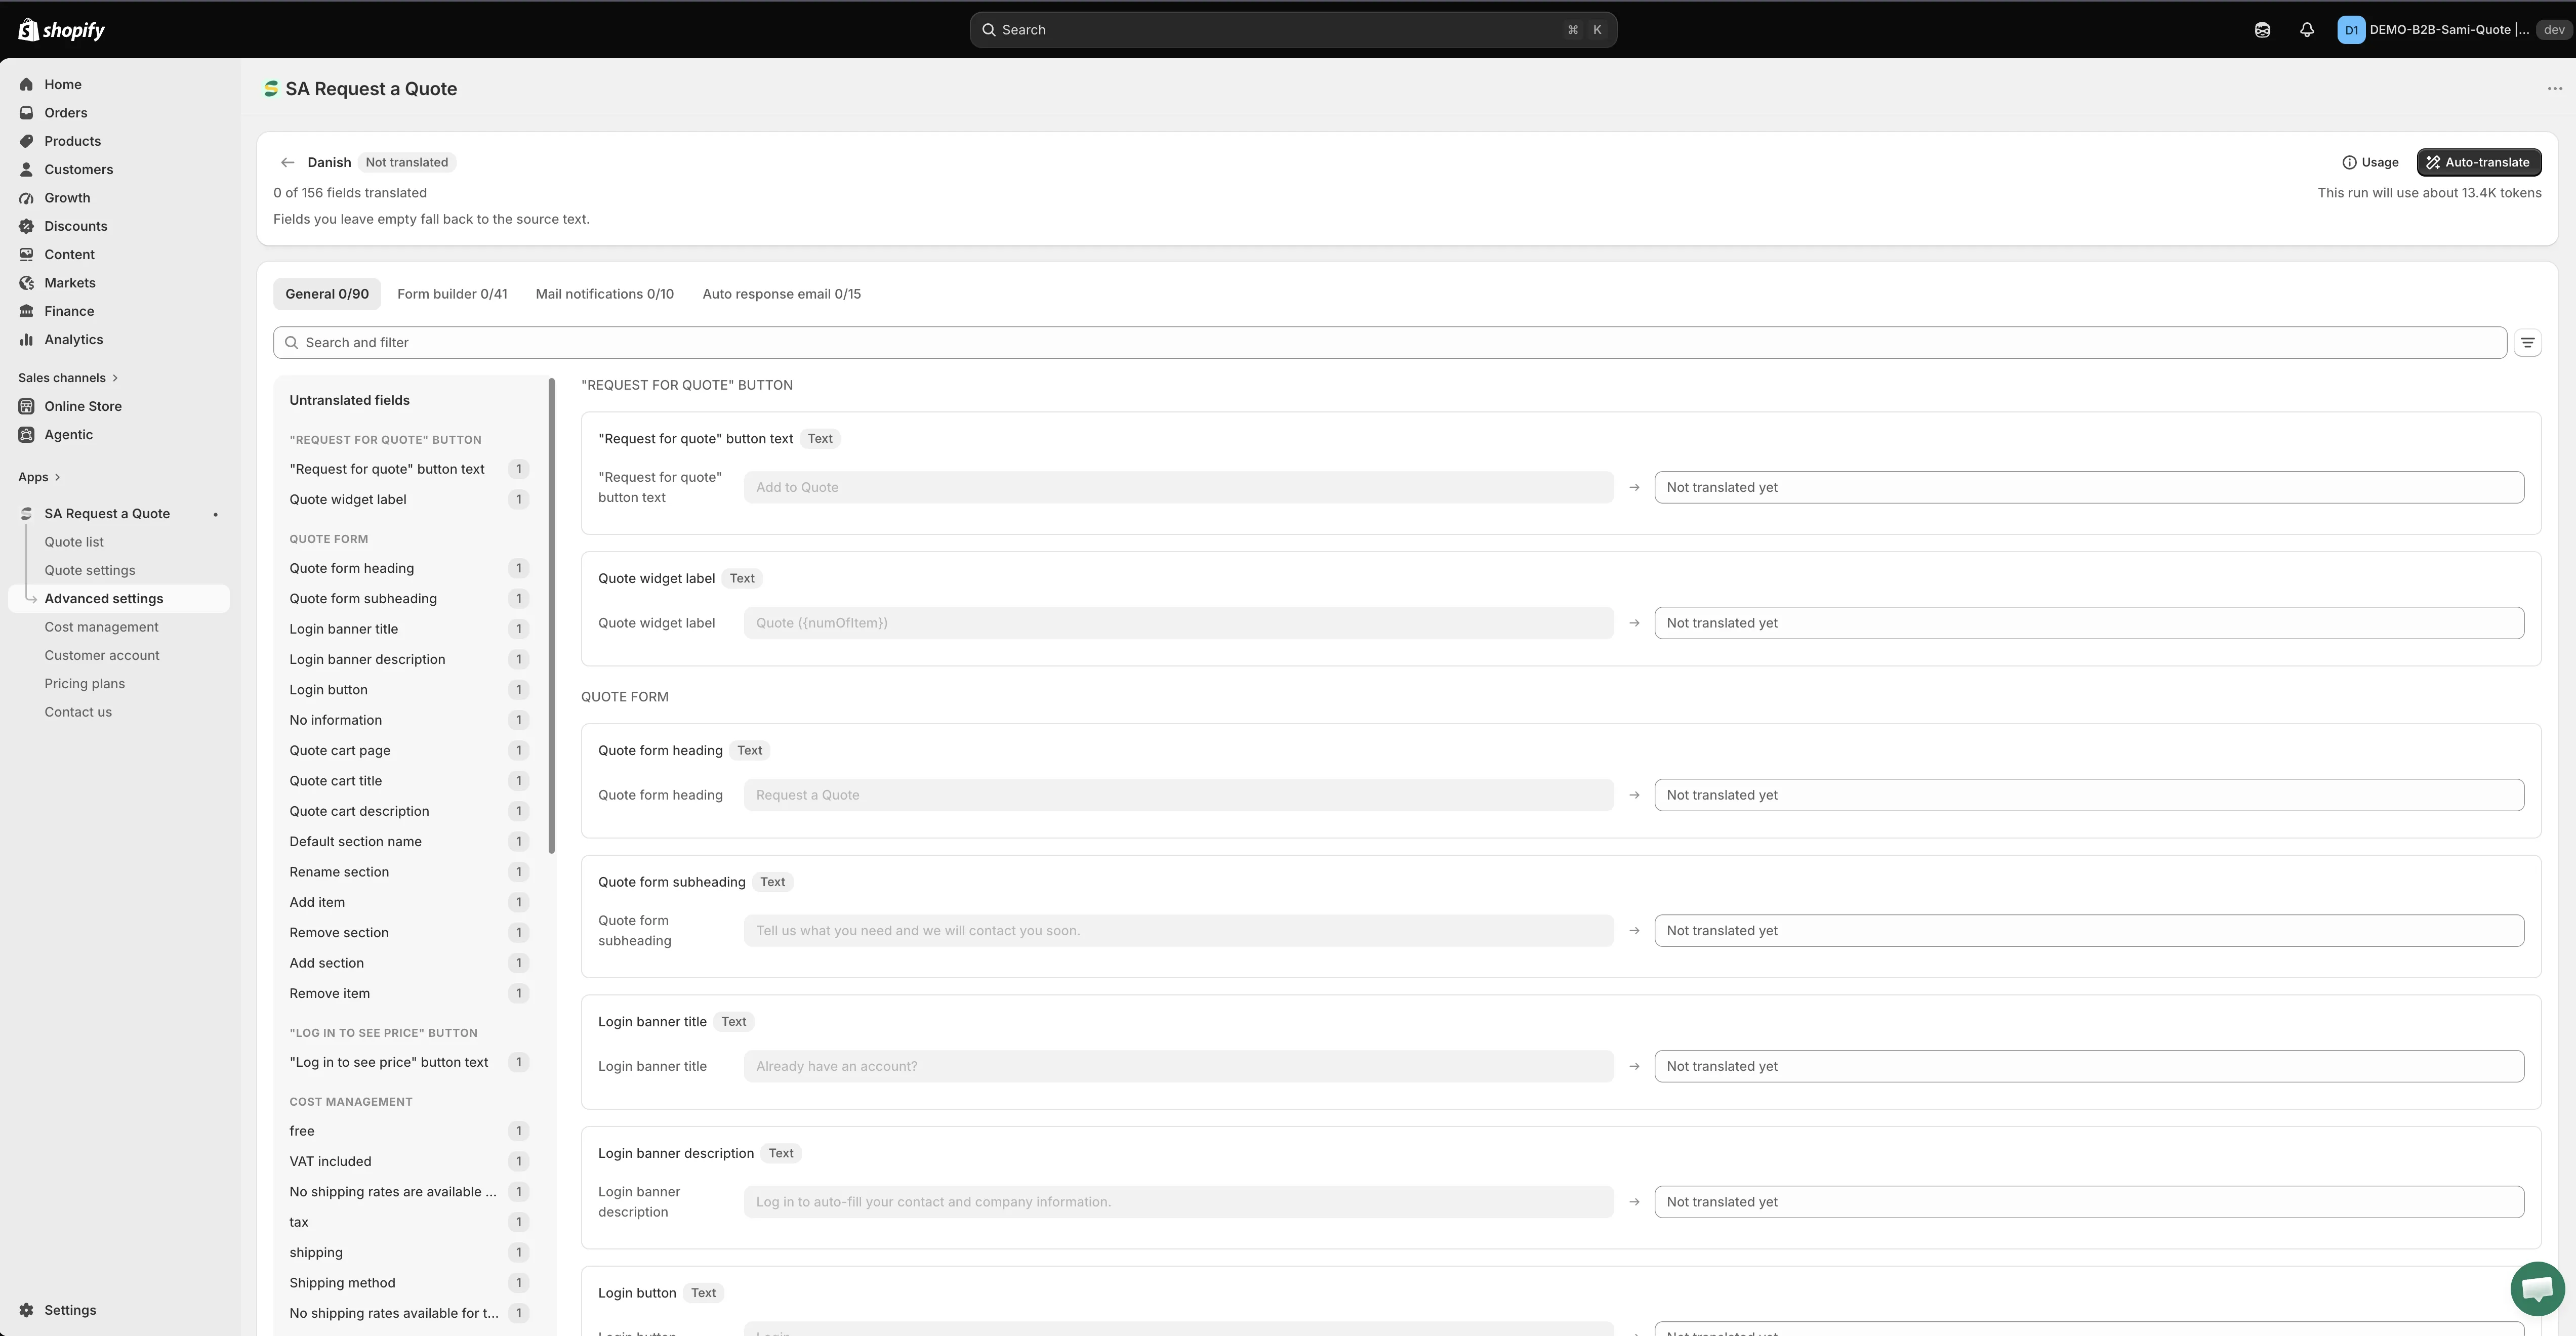
Translate opens a field for every string customers read.
-
Read the result before you save it
Machine translation is a first draft, not a finished one. Read what came back with the same eye you would give your own English wording — the button text and the email subject line especially, because those are the two strings a customer meets first.
Then save your work before you leave the screen. An unsaved translation looks exactly like a translation that didn’t work, and you will go hunting for a bug that isn’t there.
-
Read it back on your storefront
Switch your storefront to that language and walk through a quote request as a customer would, from the button to the confirmation email. Send yourself one real test request — the emails are part of what you just translated, and they are the part you cannot see from the admin.
A worked example: an English store adding Danish
Section titled “A worked example: an English store adding Danish”Say your quote button currently reads Request a Quote and you have just started selling into Denmark. In order:
- Fix the English first. Quote settings > Customize > Button & widget > Button text. Whatever this says is what Danish gets made from, so settle it now — change it later and the Danish has to be redone.
- Publish Danish in Shopify. Settings > Languages in your Shopify admin. Until you do, Danish will not be in the app’s table at all.
- Translate the Danish row. Advanced settings > Translations > Translate on the Danish row. Read it back, correct anything that reads oddly, save.
- Compare the two storefronts. Open a product page on the English storefront and the same page on the Danish one. The button should read Request a Quote on one and its Danish equivalent on the other, in the same place, at the same size.
- Send a test request from the Danish storefront. The confirmation email that arrives should be Danish too — that is how you know the email half of the translation landed.
What it covers
Section titled “What it covers”| What customers see | Covered by |
|---|---|
| The quote form | Translations AI, on this tab |
| Storefront text, including your quote button wording | Translations AI, on this tab |
| Both quote emails — Mail notifications and Auto response email | Translations AI, on this tab |
| The Quote List section in new customer accounts | Translation, on the Customer account page |
| The quote PDF | The Translations tab inside the Quote PDF template editor |
Your quote emails are translated here too
Section titled “Your quote emails are translated here too”Both quote emails are covered by the same Translate action on the language row — you don’t translate them separately:
- Mail notifications — “Automatically send an email notification to the store owner when a quote is submitted.” The alert you receive. See Emails sent to admin.
- Auto response email — “Automatically send an email notification to customers after they submit a quote.” The confirmation your customer receives. See Emails sent to customers.
The quote list in customer accounts
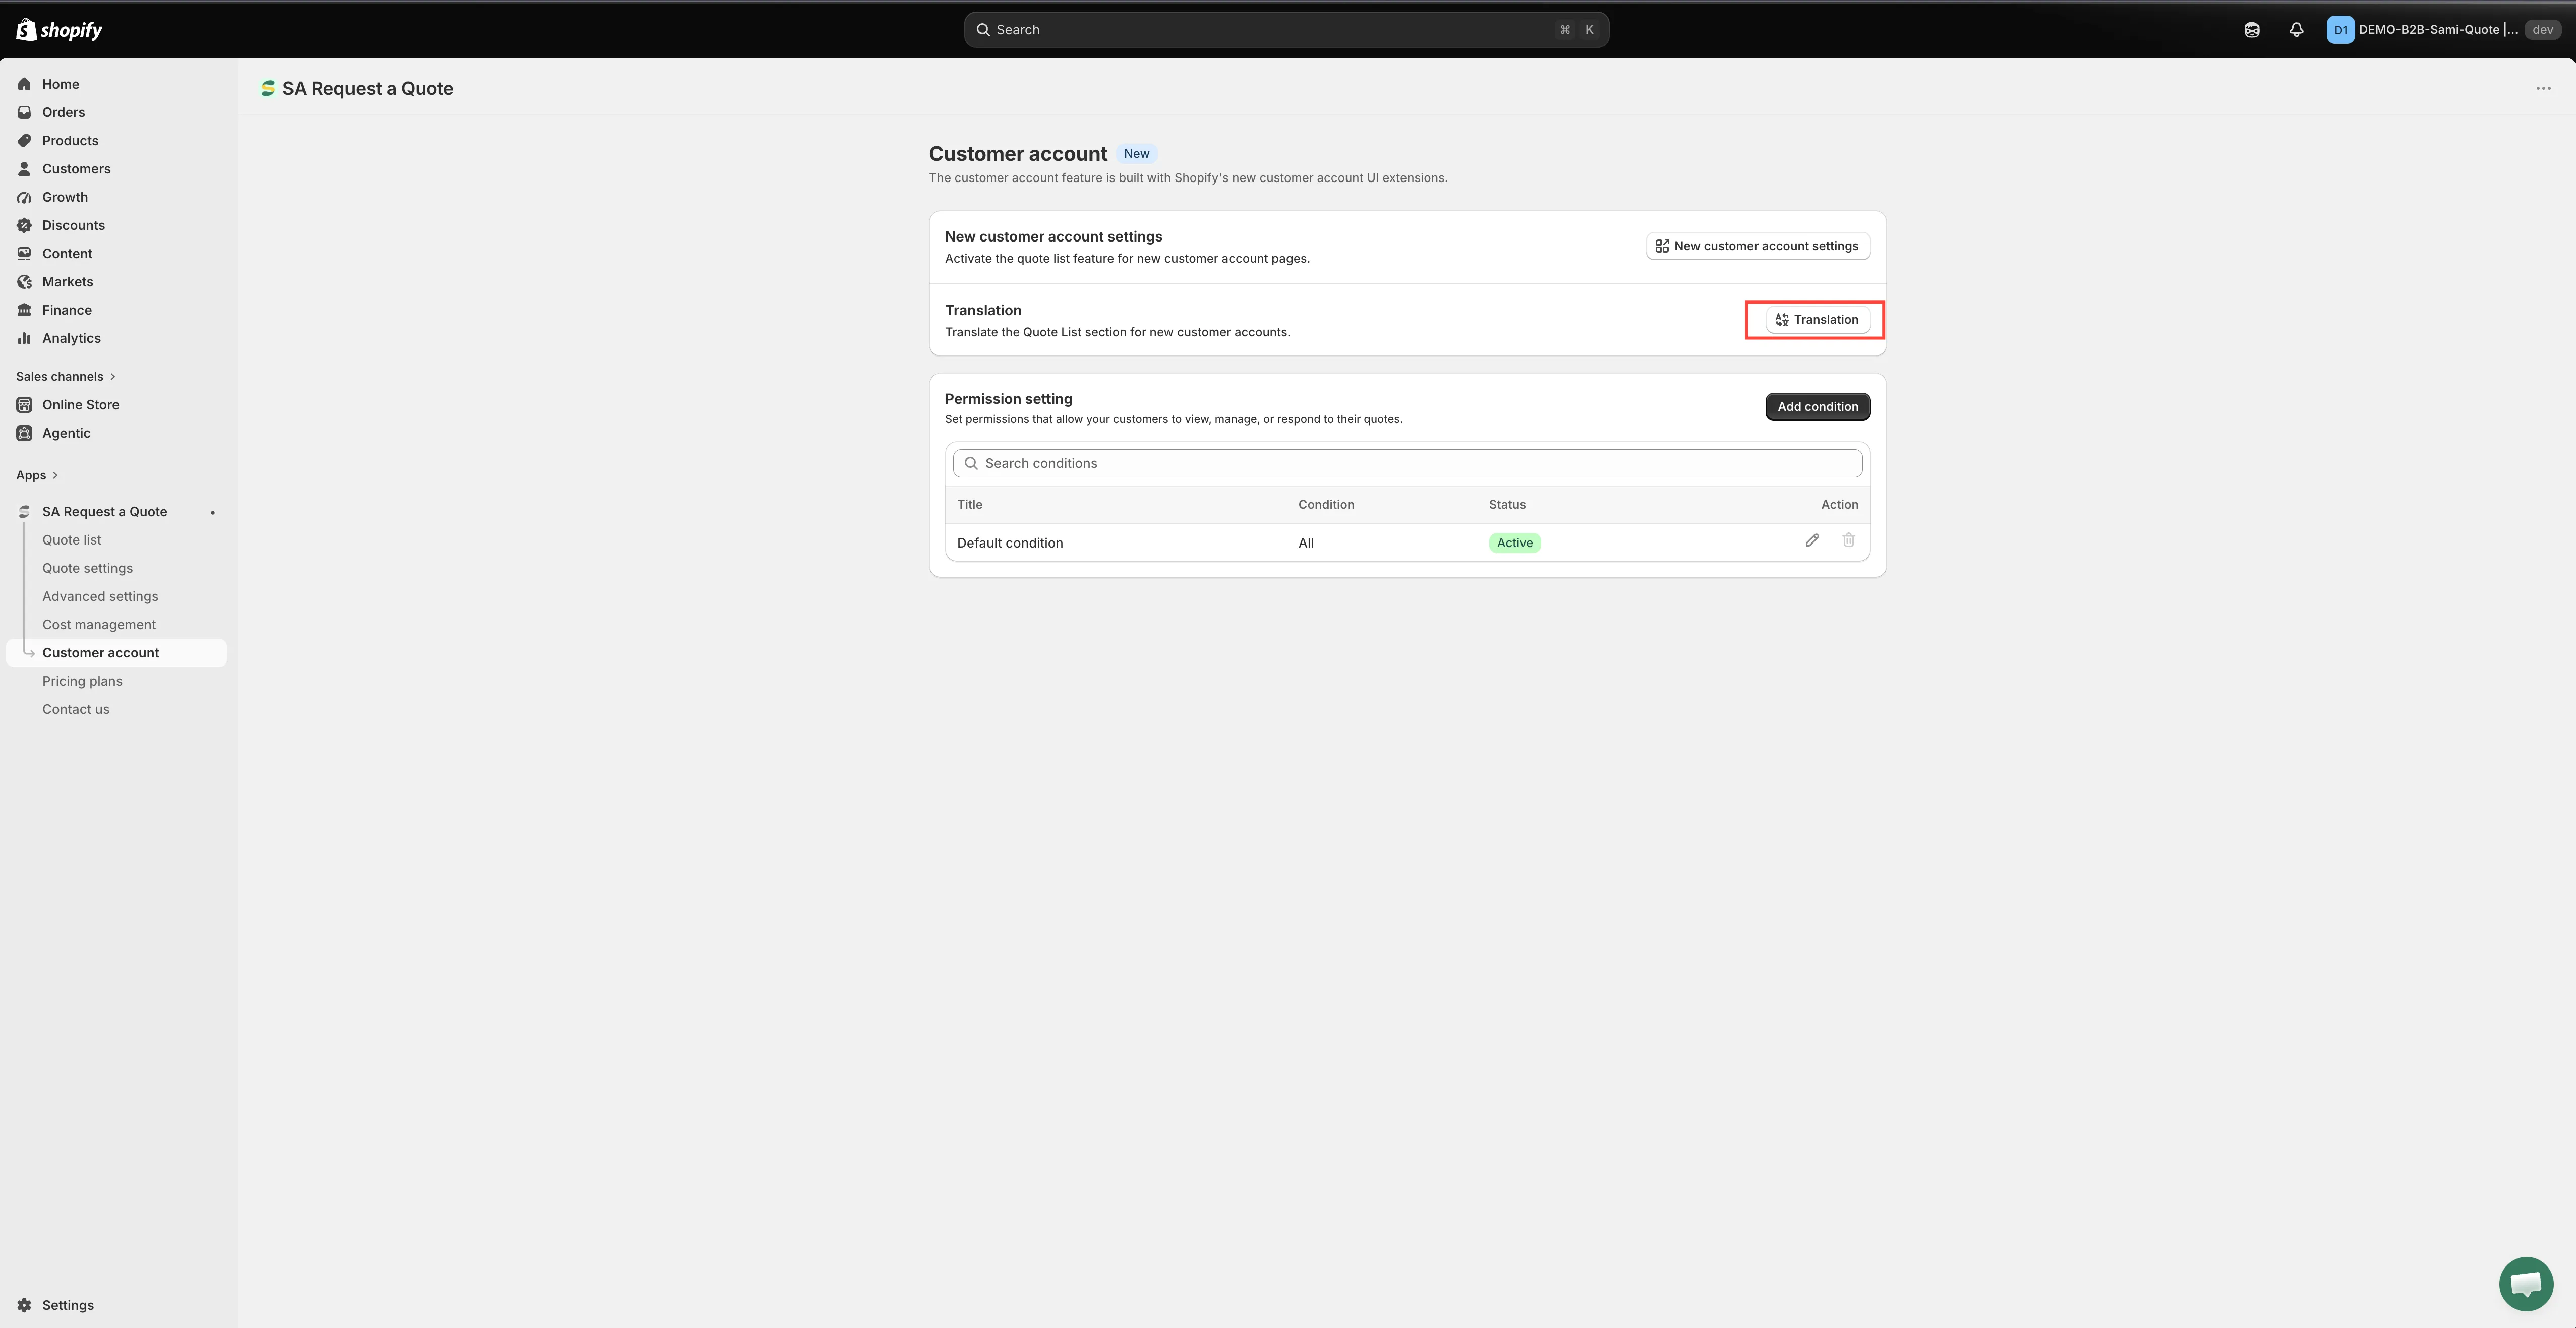
Section titled “The quote list in customer accounts”One piece sits outside Translations AI. If you show quotes inside Shopify’s new customer accounts, the app has a separate Translation setting for it, described as: “Translate the Quote List section for new customer accounts.”
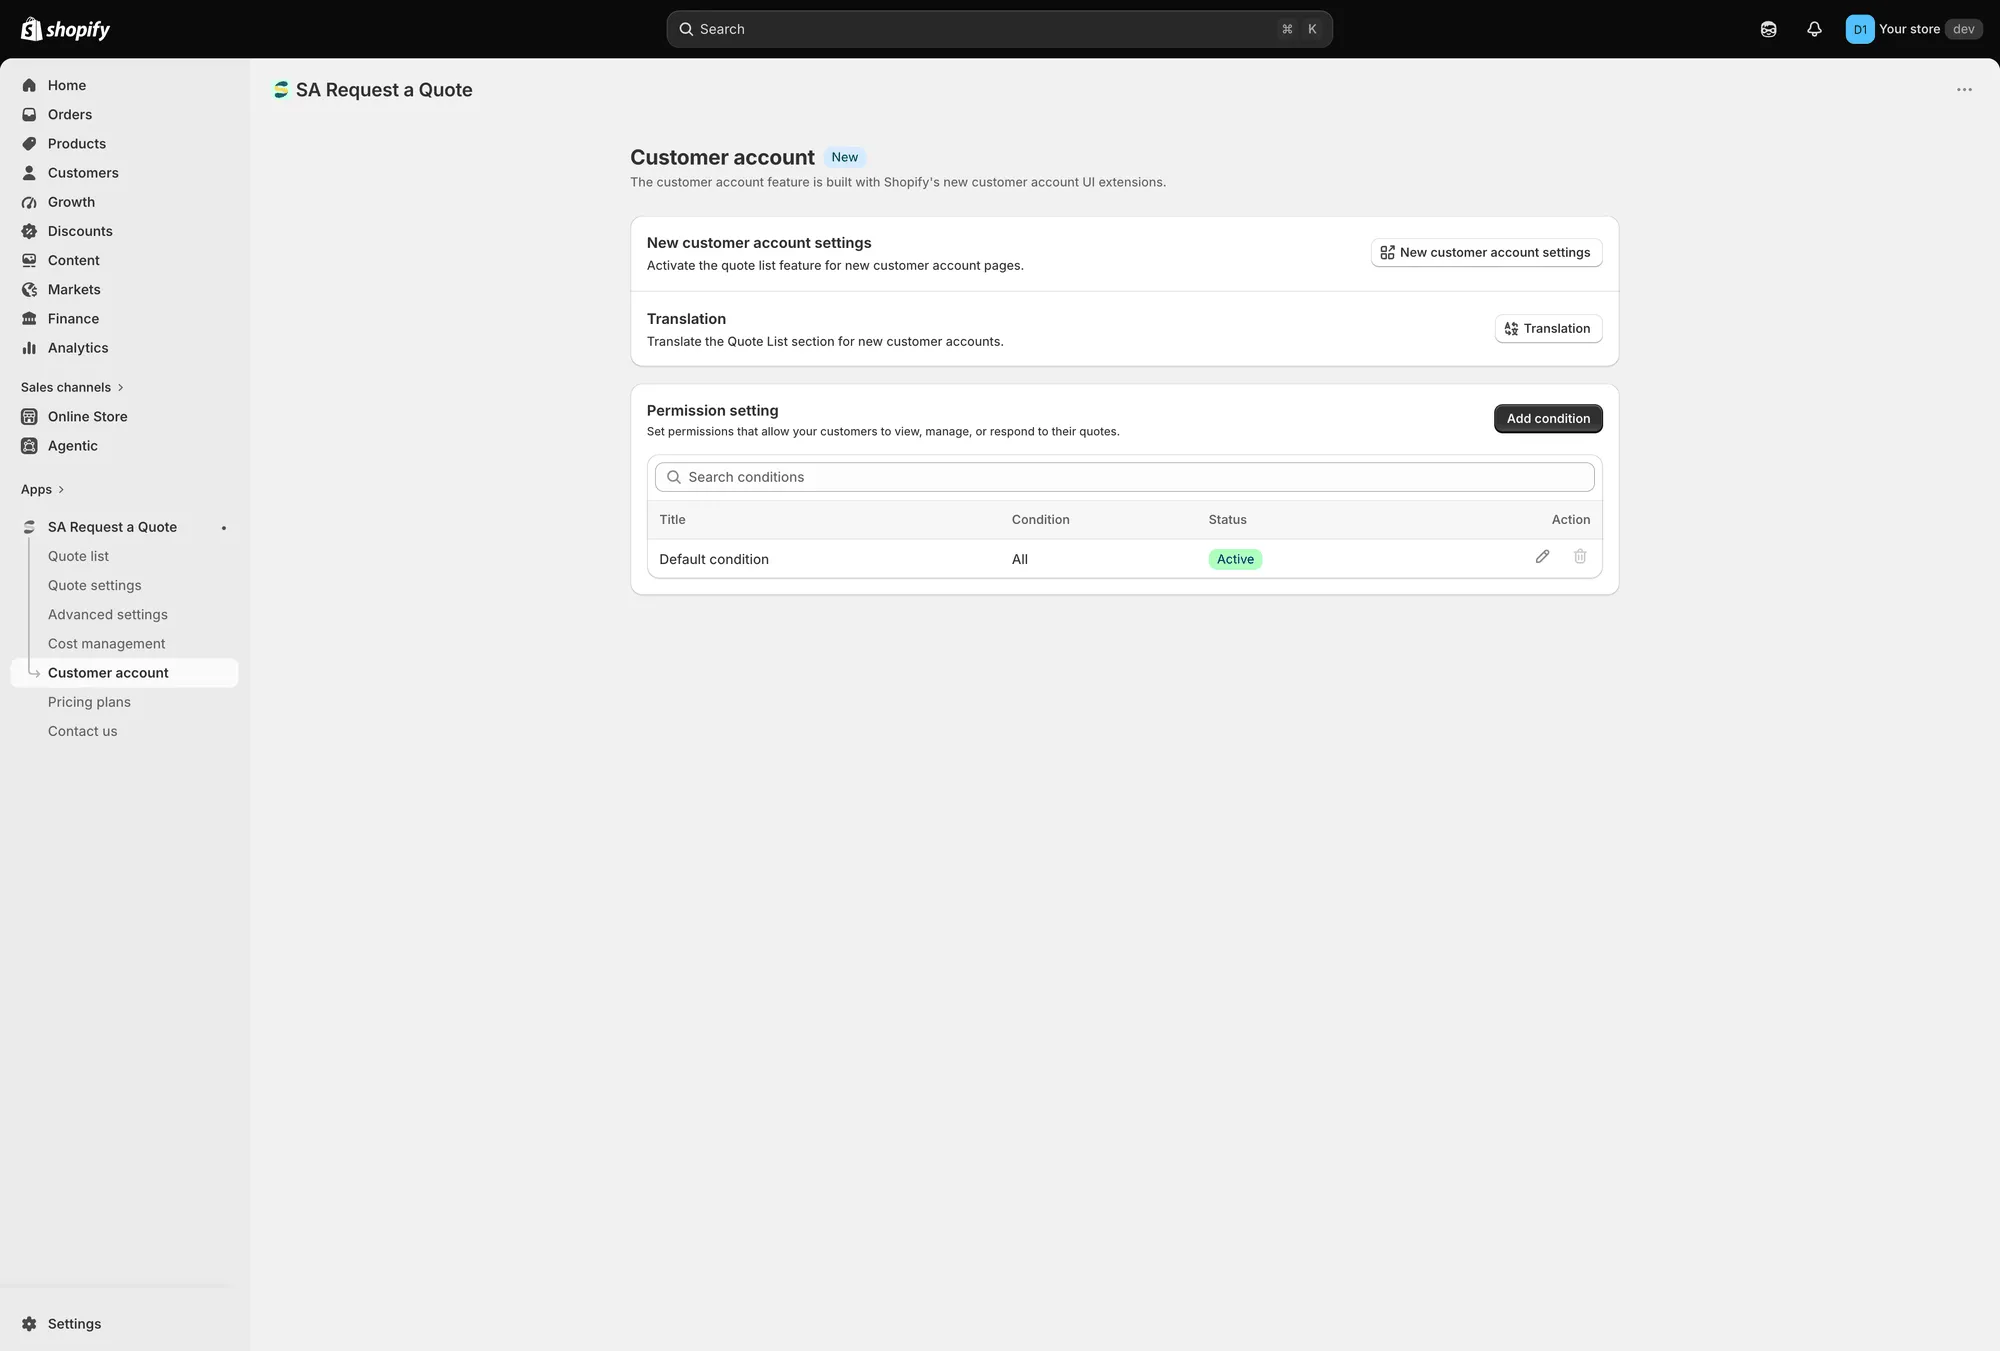
Translation sits on the Customer account page, below New customer account settings.
You’ll find it in the app under Customer account, between New customer account settings and Permission setting.
-
Open the Translation section
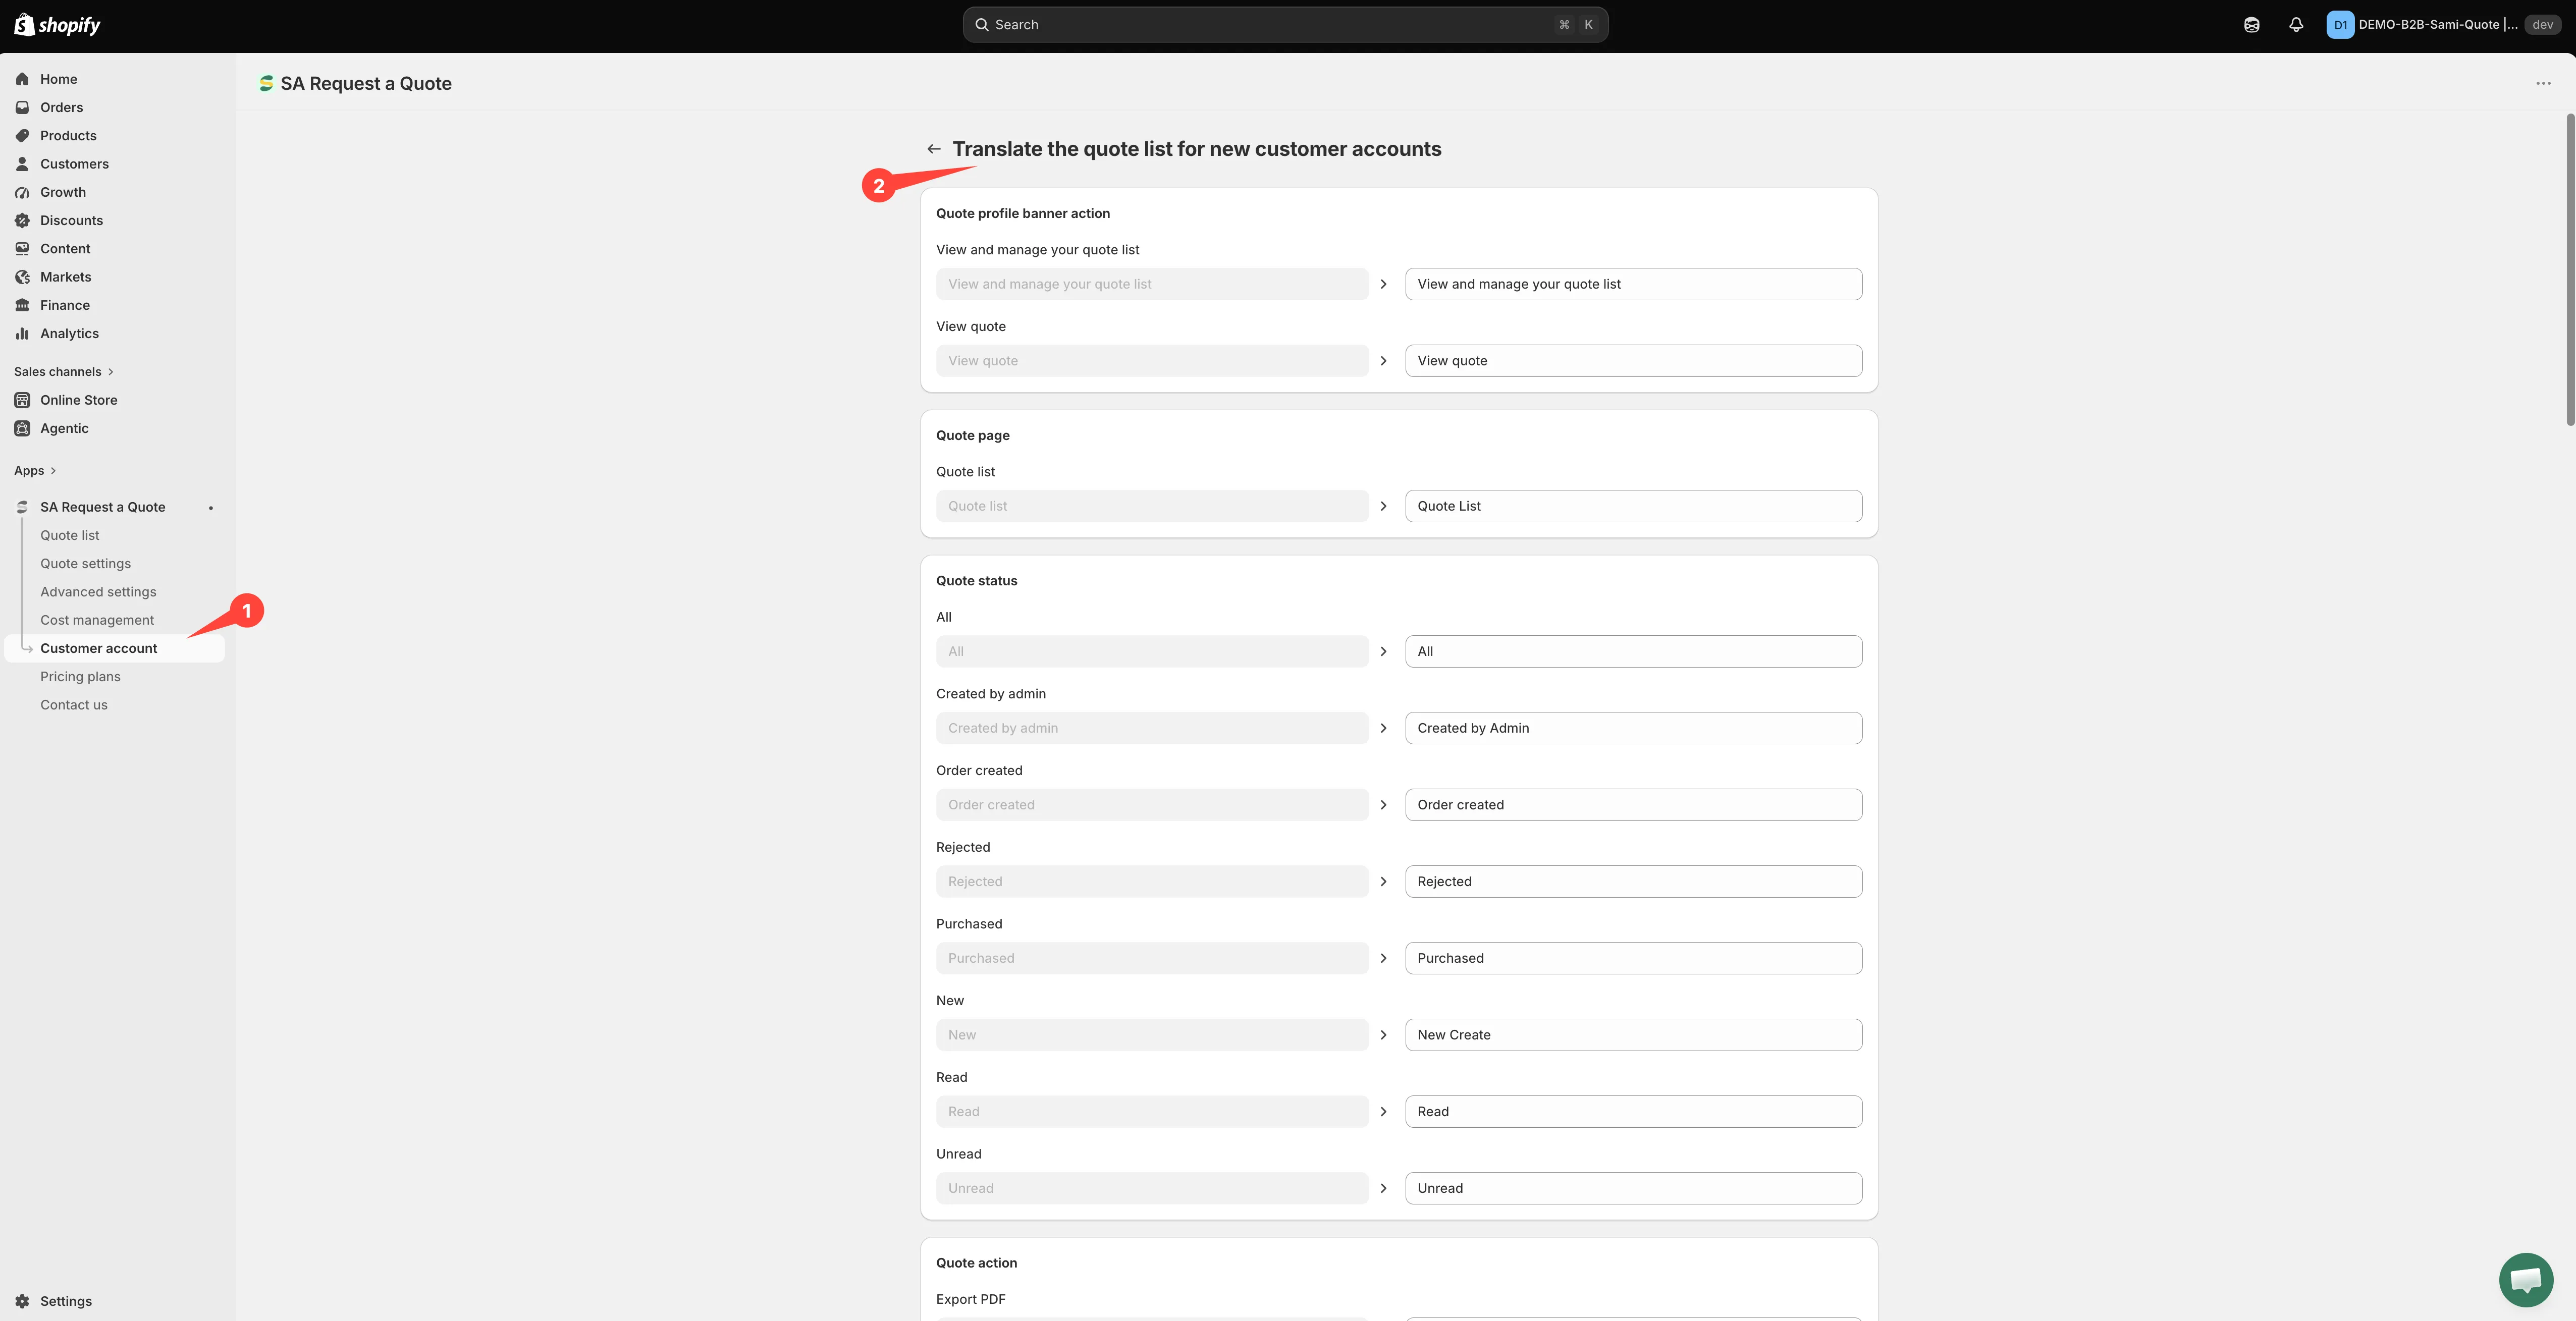
In the app, go to Customer account and find the Translation section. Click its Translation button.
-
Fill in the text fields
The Translate quote list new customer accounts page opens. It is a set of text input fields, one per label — click into each one and type the wording you want customers to see.
This section sits outside Translations AI, so translating a language on the Translations tab does not fill these in for you. Whatever you type here is what customers read.
-
Save, then check it from a customer account
Save your changes, then open the quote list in customer accounts on your storefront and read it back.
More on that area: Quotes in customer accounts.
The quote PDF
Section titled “The quote PDF”The PDF has its own wording too. The Quote PDF template editor, under Advanced settings > PDF template > Quote PDF, has three tabs — Design, Content and Translations — and it is that Translations tab, not this one, that covers the document. See Customize the quote PDF.
Cover the whole journey
Section titled “Cover the whole journey”Translating the button but not the form leaves customers switching languages mid-task. Because Translations AI handles the quote form, storefront text and both emails together, doing a language once keeps those consistent — the two pieces to remember separately are the customer account section and the quote PDF above.
Next steps
Section titled “Next steps”- Translate quote emails — the same setting, seen from your quote emails
- Customize the quote PDF — the PDF’s own Translations tab
- Change button text and colors — where your quote button wording is set
- General settings — where each setting lives in the app