
Integrations
Create a Shopify customer after submit
Turn on the Shopify integration so quote requests automatically create customers in your own store.
This turns quote requests into customer records in your own Shopify store — no third-party tool involved. In the app it is simply called Shopify, described as “Automatically create customers in Shopify”.
Once it is on, submitting a quote creates the person automatically under Customers in your Shopify admin.
It is the integration most stores should turn on first: the data stays in Shopify, it is listed under the FREE plan, and there is no API key to fetch and no list to create.
Turn it on
Section titled “Turn it on”-
Open the Integrations tab
In your Shopify admin, open SA Request a Quote, select Advanced settings, then open the Integrations tab.
-
Select Shopify
Under Third-party integration, select Shopify. It opens on its own page, with a Third-party breadcrumb to take you back to the list.
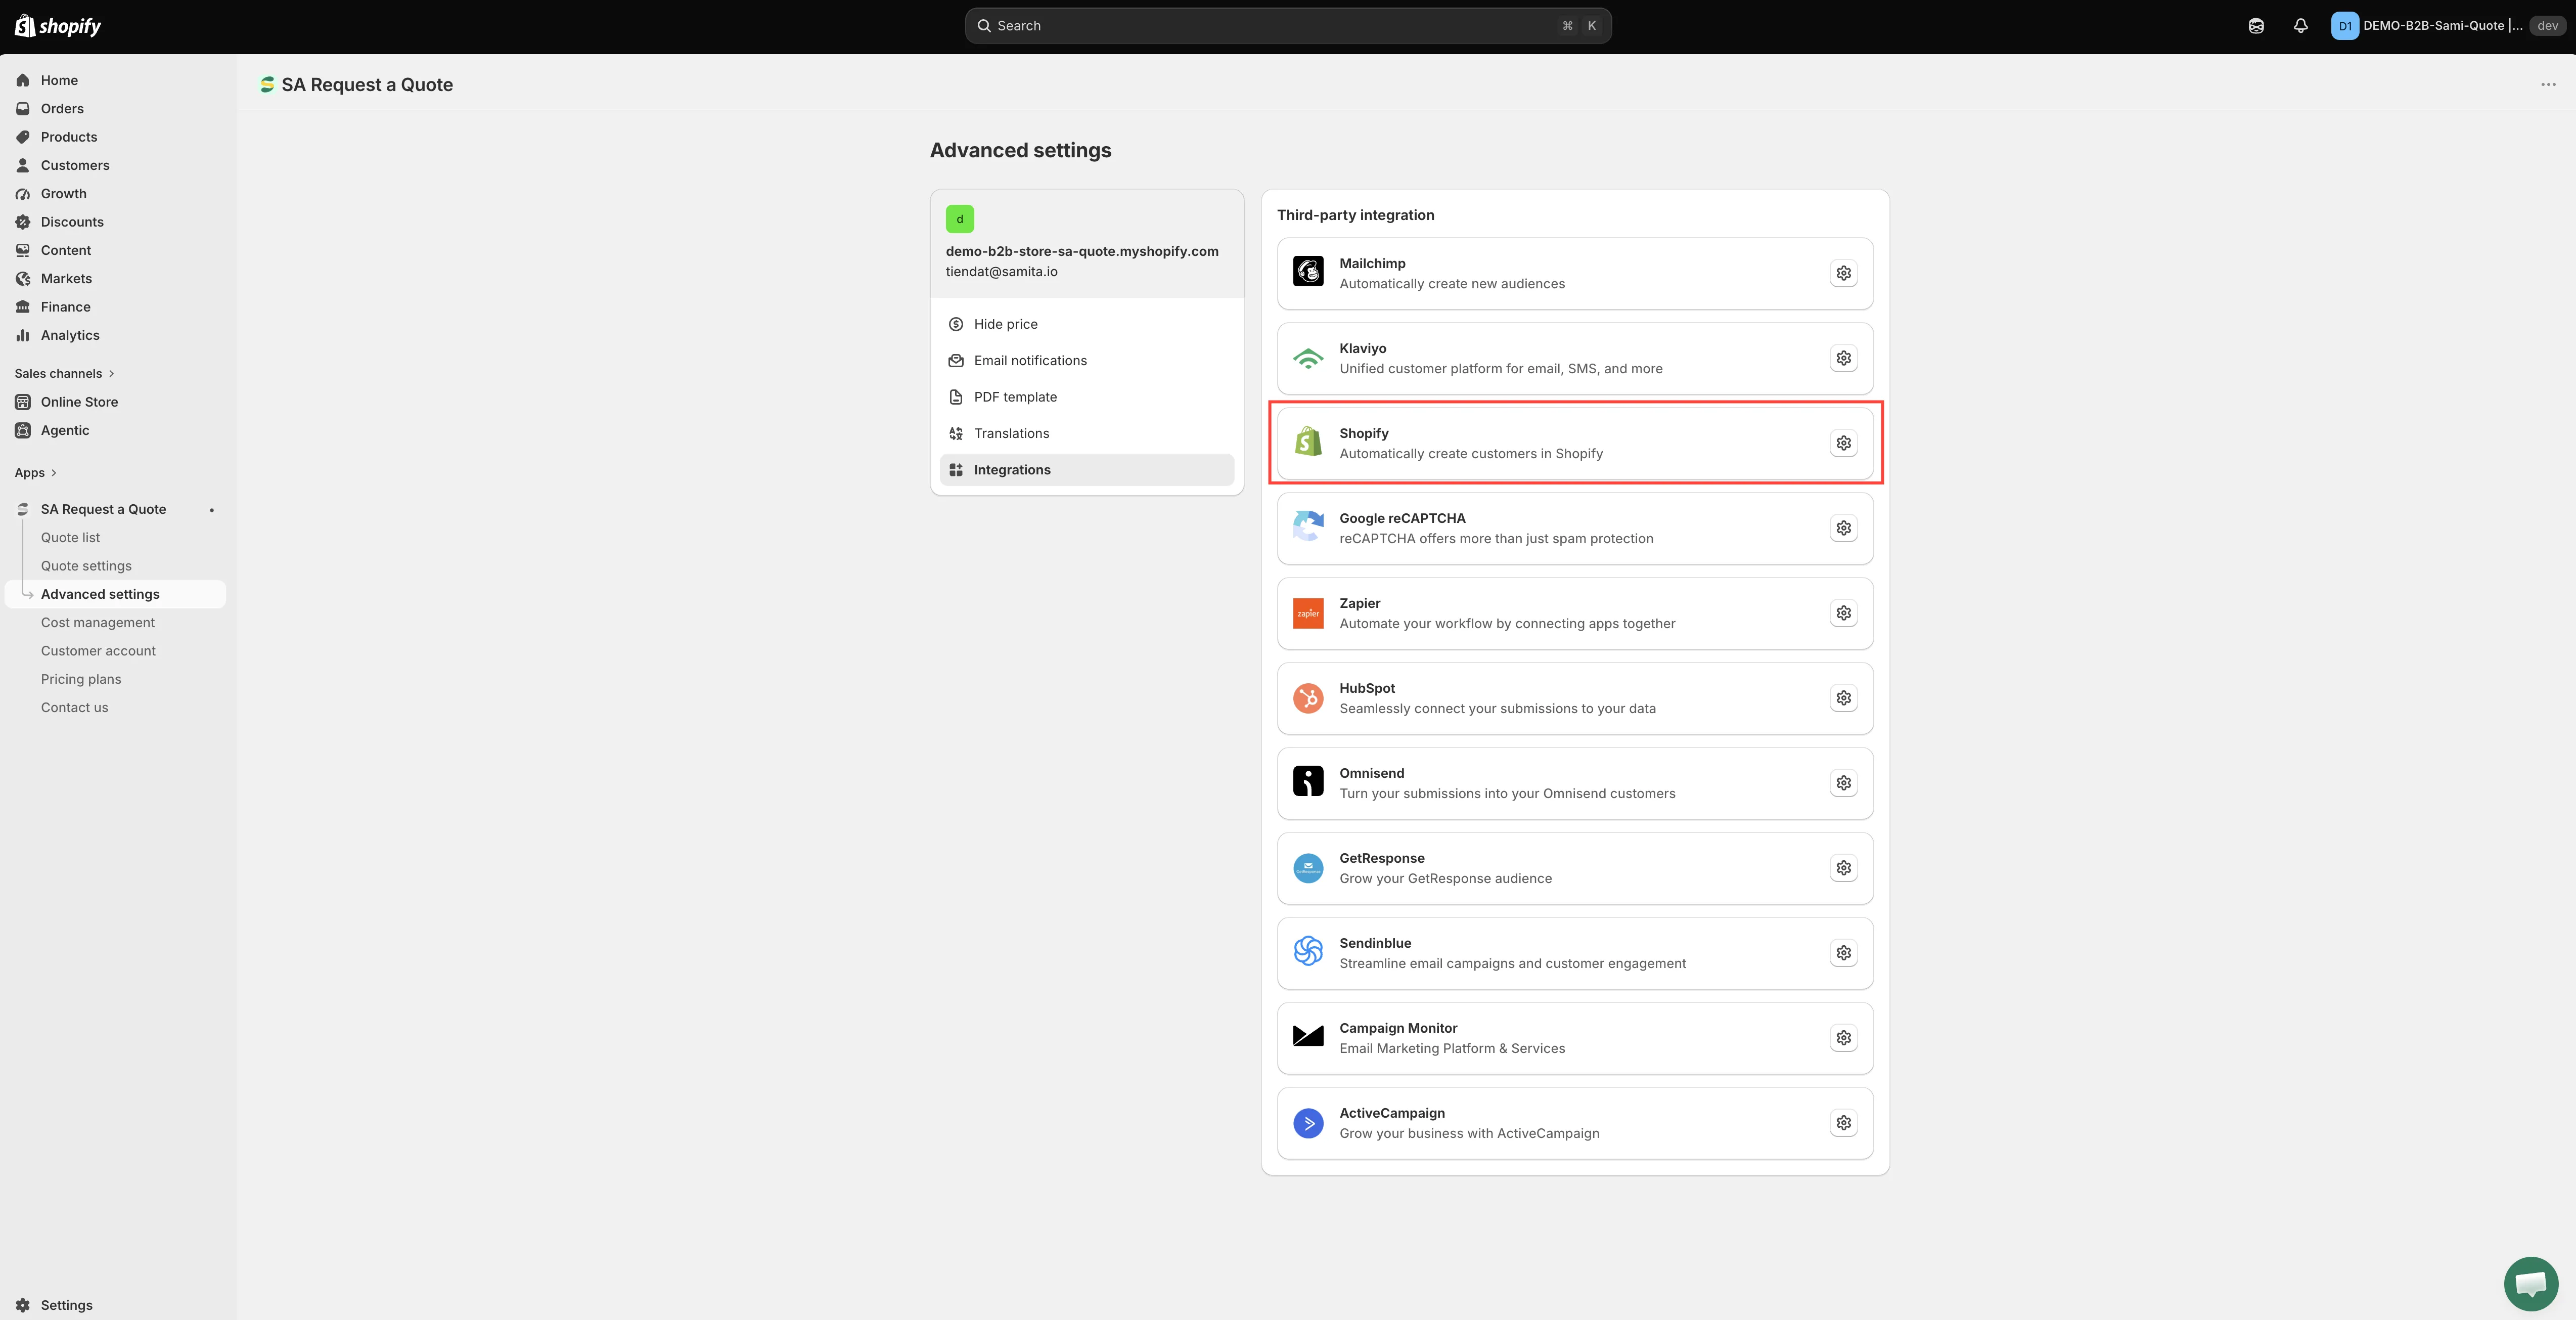
This integration creates a Shopify customer from a quote request.
-
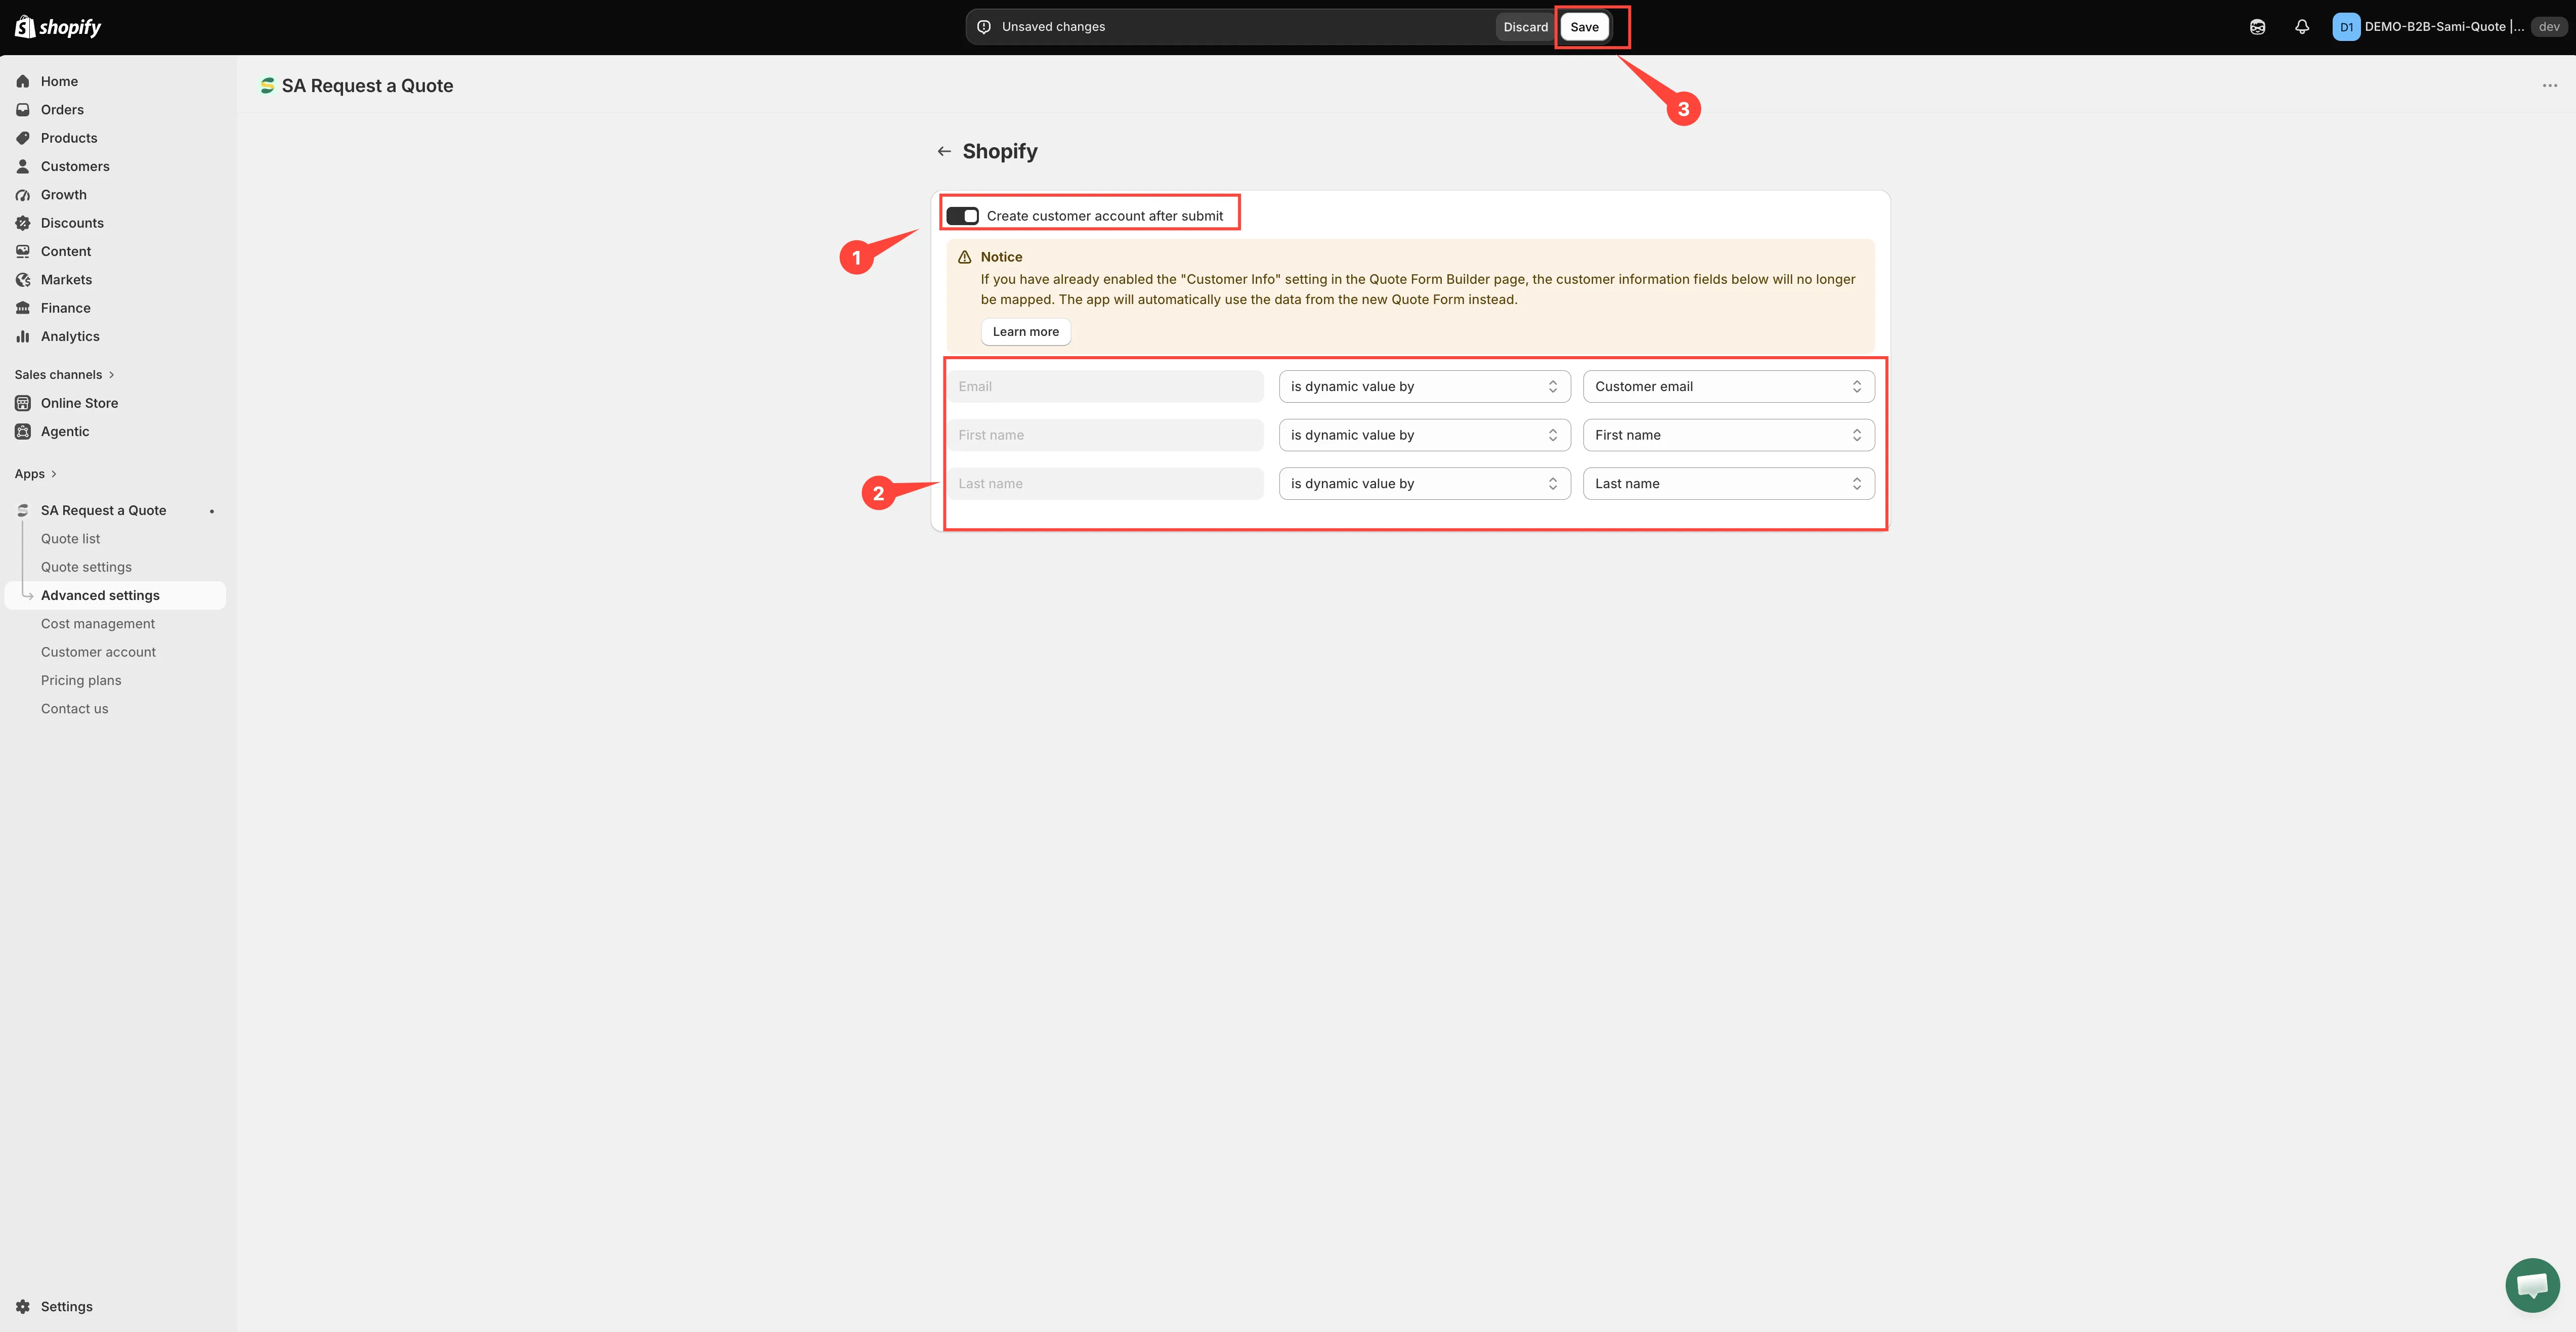
Switch on Create customer account after submit
Create customer account after submit is the switch at the top of the page. Switch it on.
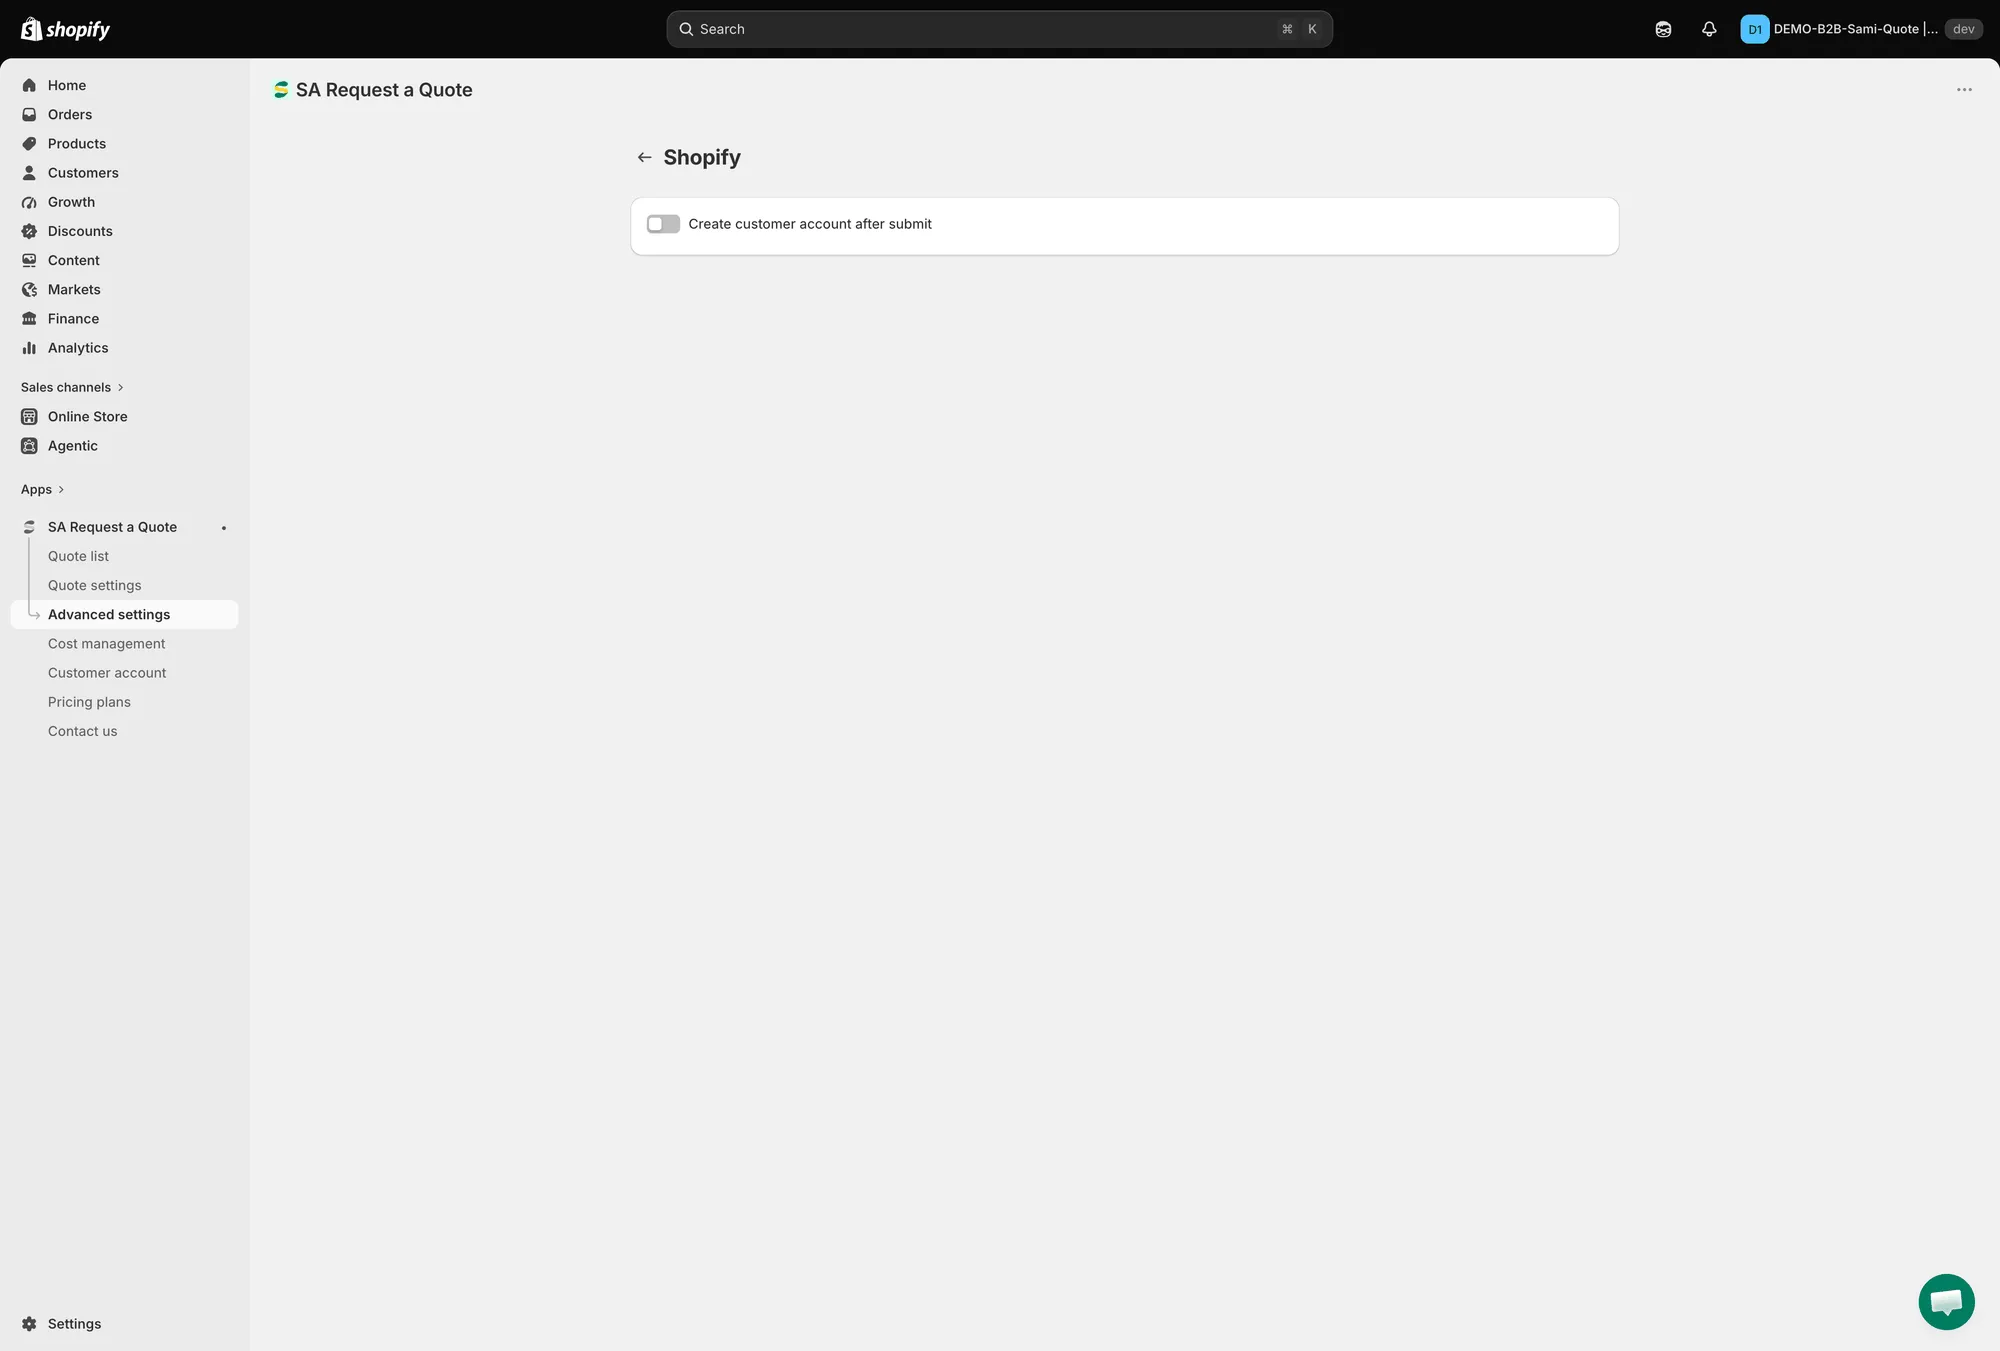
One switch: Create customer account after submit.
-
Match the customer fields
Switching it on reveals a Notice banner and three mapping rows. Read each row left to right:
- On the left — the Shopify customer field, greyed out because you cannot rename it: Email, First name and Last name.
- In the middle — how the value is supplied: has no value, is dynamic value by (take it from the quote form) or is fixed value by (write the same text on every customer).
- On the right — the quote form field you are sending, or the fixed text you typed.
So you pick the quote form value on the right to fill the Shopify field named on the left, never the other way round.
What to set:
- Email is already set, and is dynamic value by is the only option its dropdown offers — a customer record cannot be created without an email address. Its value list only offers email fields from your form, so change it only if the form has more than one.
- First name and Last name arrive on has no value. Switch each to is dynamic value by and choose the matching field from your quote form — otherwise the customer record is created with no name on it.
-
Save
Select Save. The switch and the mapping are not stored until you do.
While you have unsaved changes the app shows a save bar with Save and Discard changes — Discard changes throws away everything you have just set. A Changes saved message confirms the save.
-
Test it
Submit a test quote from your storefront, then open Customers in your Shopify admin and look for the new record. Check it has a name on it, not just an email address.
Why this is worth doing
Section titled “Why this is worth doing”| Benefit | What it means |
|---|---|
| Faster repeat quotes | Returning customers who log in get their contact and company information filled in for them — the quote form offers "Already have an account? Log in to auto-fill your contact and company information." |
| Converting is cleaner | When you use Convert to Order on a quote, the customer already exists in your store. |
| Everything in one place | Quote requesters sit alongside buyers in your Shopify customer list, rather than only inside the app. |
Things to be aware of
Section titled “Things to be aware of”Also worth knowing:
- Requiring an account is separate. This setting creates a record after someone submits. If you would rather people signed in before quoting at all, that is the Require login before adding to quote checkbox under Add to quote — see Require login to quote.
- Check what arrives. Your customer record is built from what the form collected, so make sure the form asks for it — see Customer information fields. A field the form never collects cannot be mapped in Step 4.
Next steps
Section titled “Next steps”- Integrations overview — the other tools you can connect
- Require login to quote — require an account before quoting
- Quotes in customer accounts — show quotes in customer accounts