
AI Features
Generate an AI image
Generate a custom badge image from a short description or your own prompt, using the AI Image Generator.
The AI Image Generator creates a badge image from a description — no design skills needed. Fill in five short guided fields, or switch to a single free-form prompt.
-
Open an image badge
In Sami Product Labels, go to Badges & Labels and open a badge that uses an image, or click Create badge to start a new one. The editor opens on the Design tab.
-
Click Create AI image
In the Content panel, find the AI Badge Generator box directly beside the badge image. It shows your remaining credits and two links: Create AI image and View AI images.
Click Create AI image to open the AI Image Generator dialog.
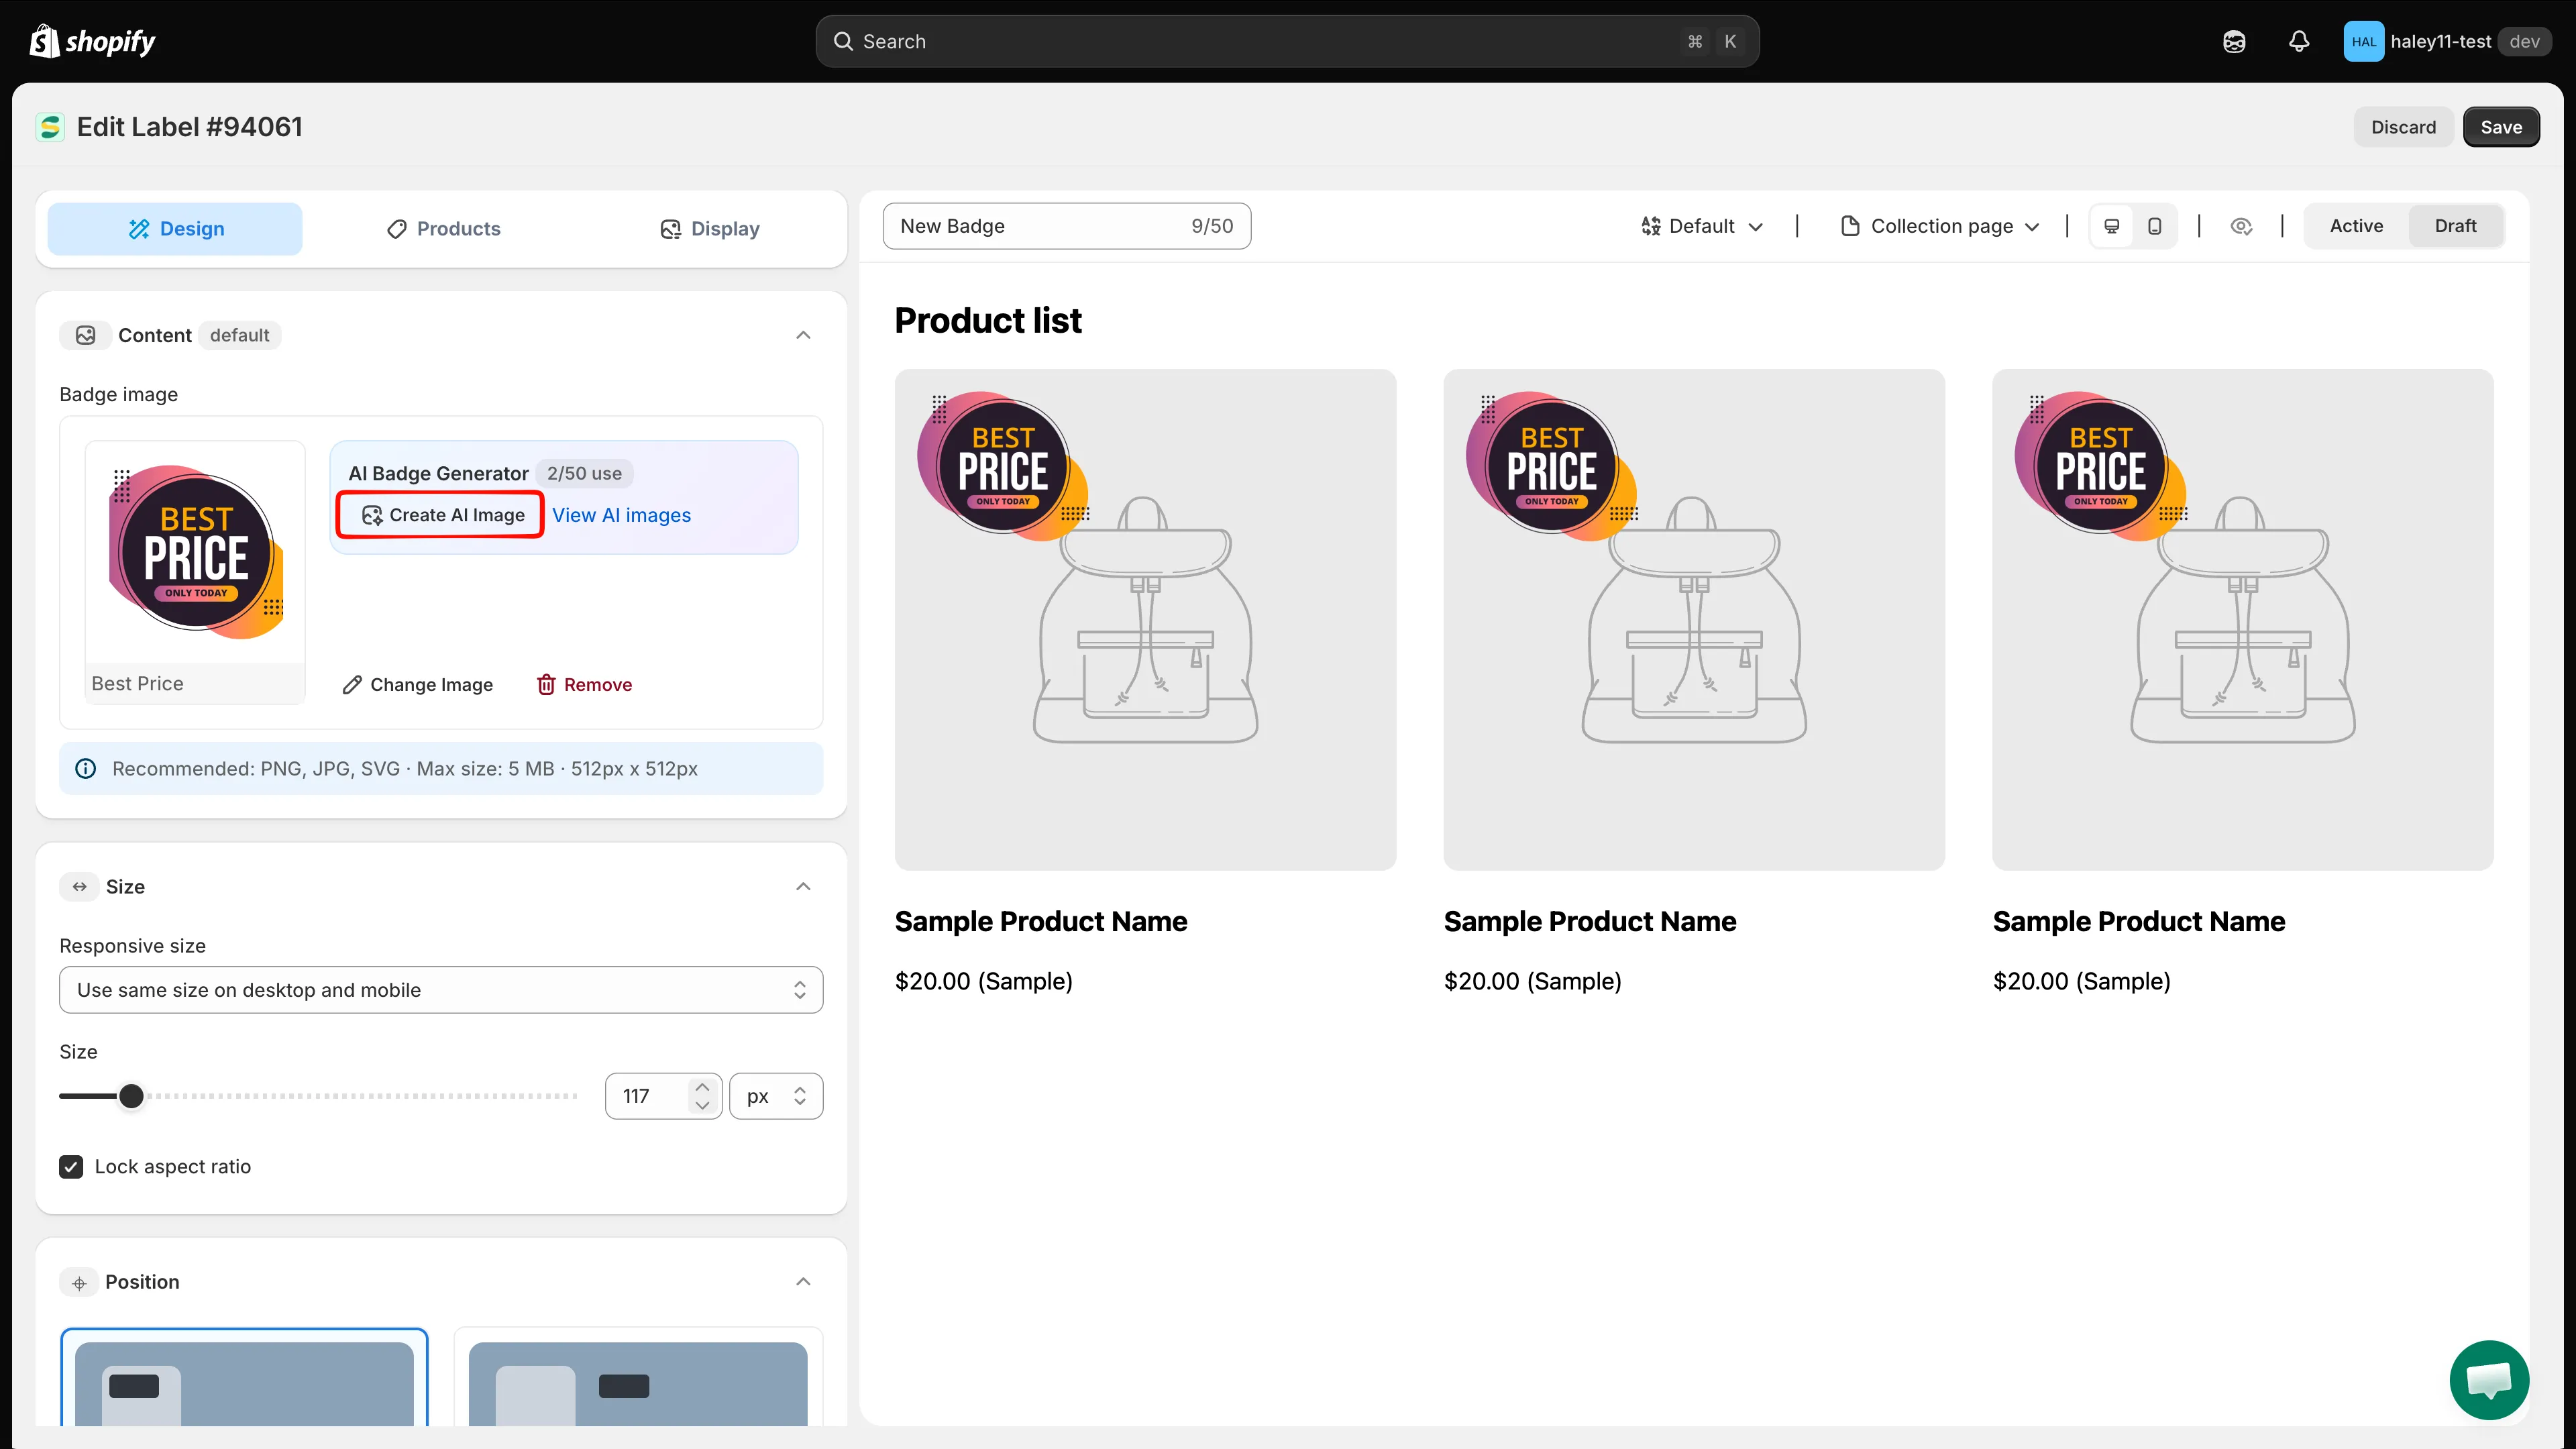
The AI Badge Generator box sits next to the badge image in the Content panel.
-
Describe the badge with the guided fields
Fill in as many of the five fields as apply. Each one takes a short free-text description — there is no fixed list to pick from.
Field Example Background color Red, green, blue, etc. Shape Circle, round corners, etc. Text Save 36% Text color White, black, etc. Illustration Related to Black Friday 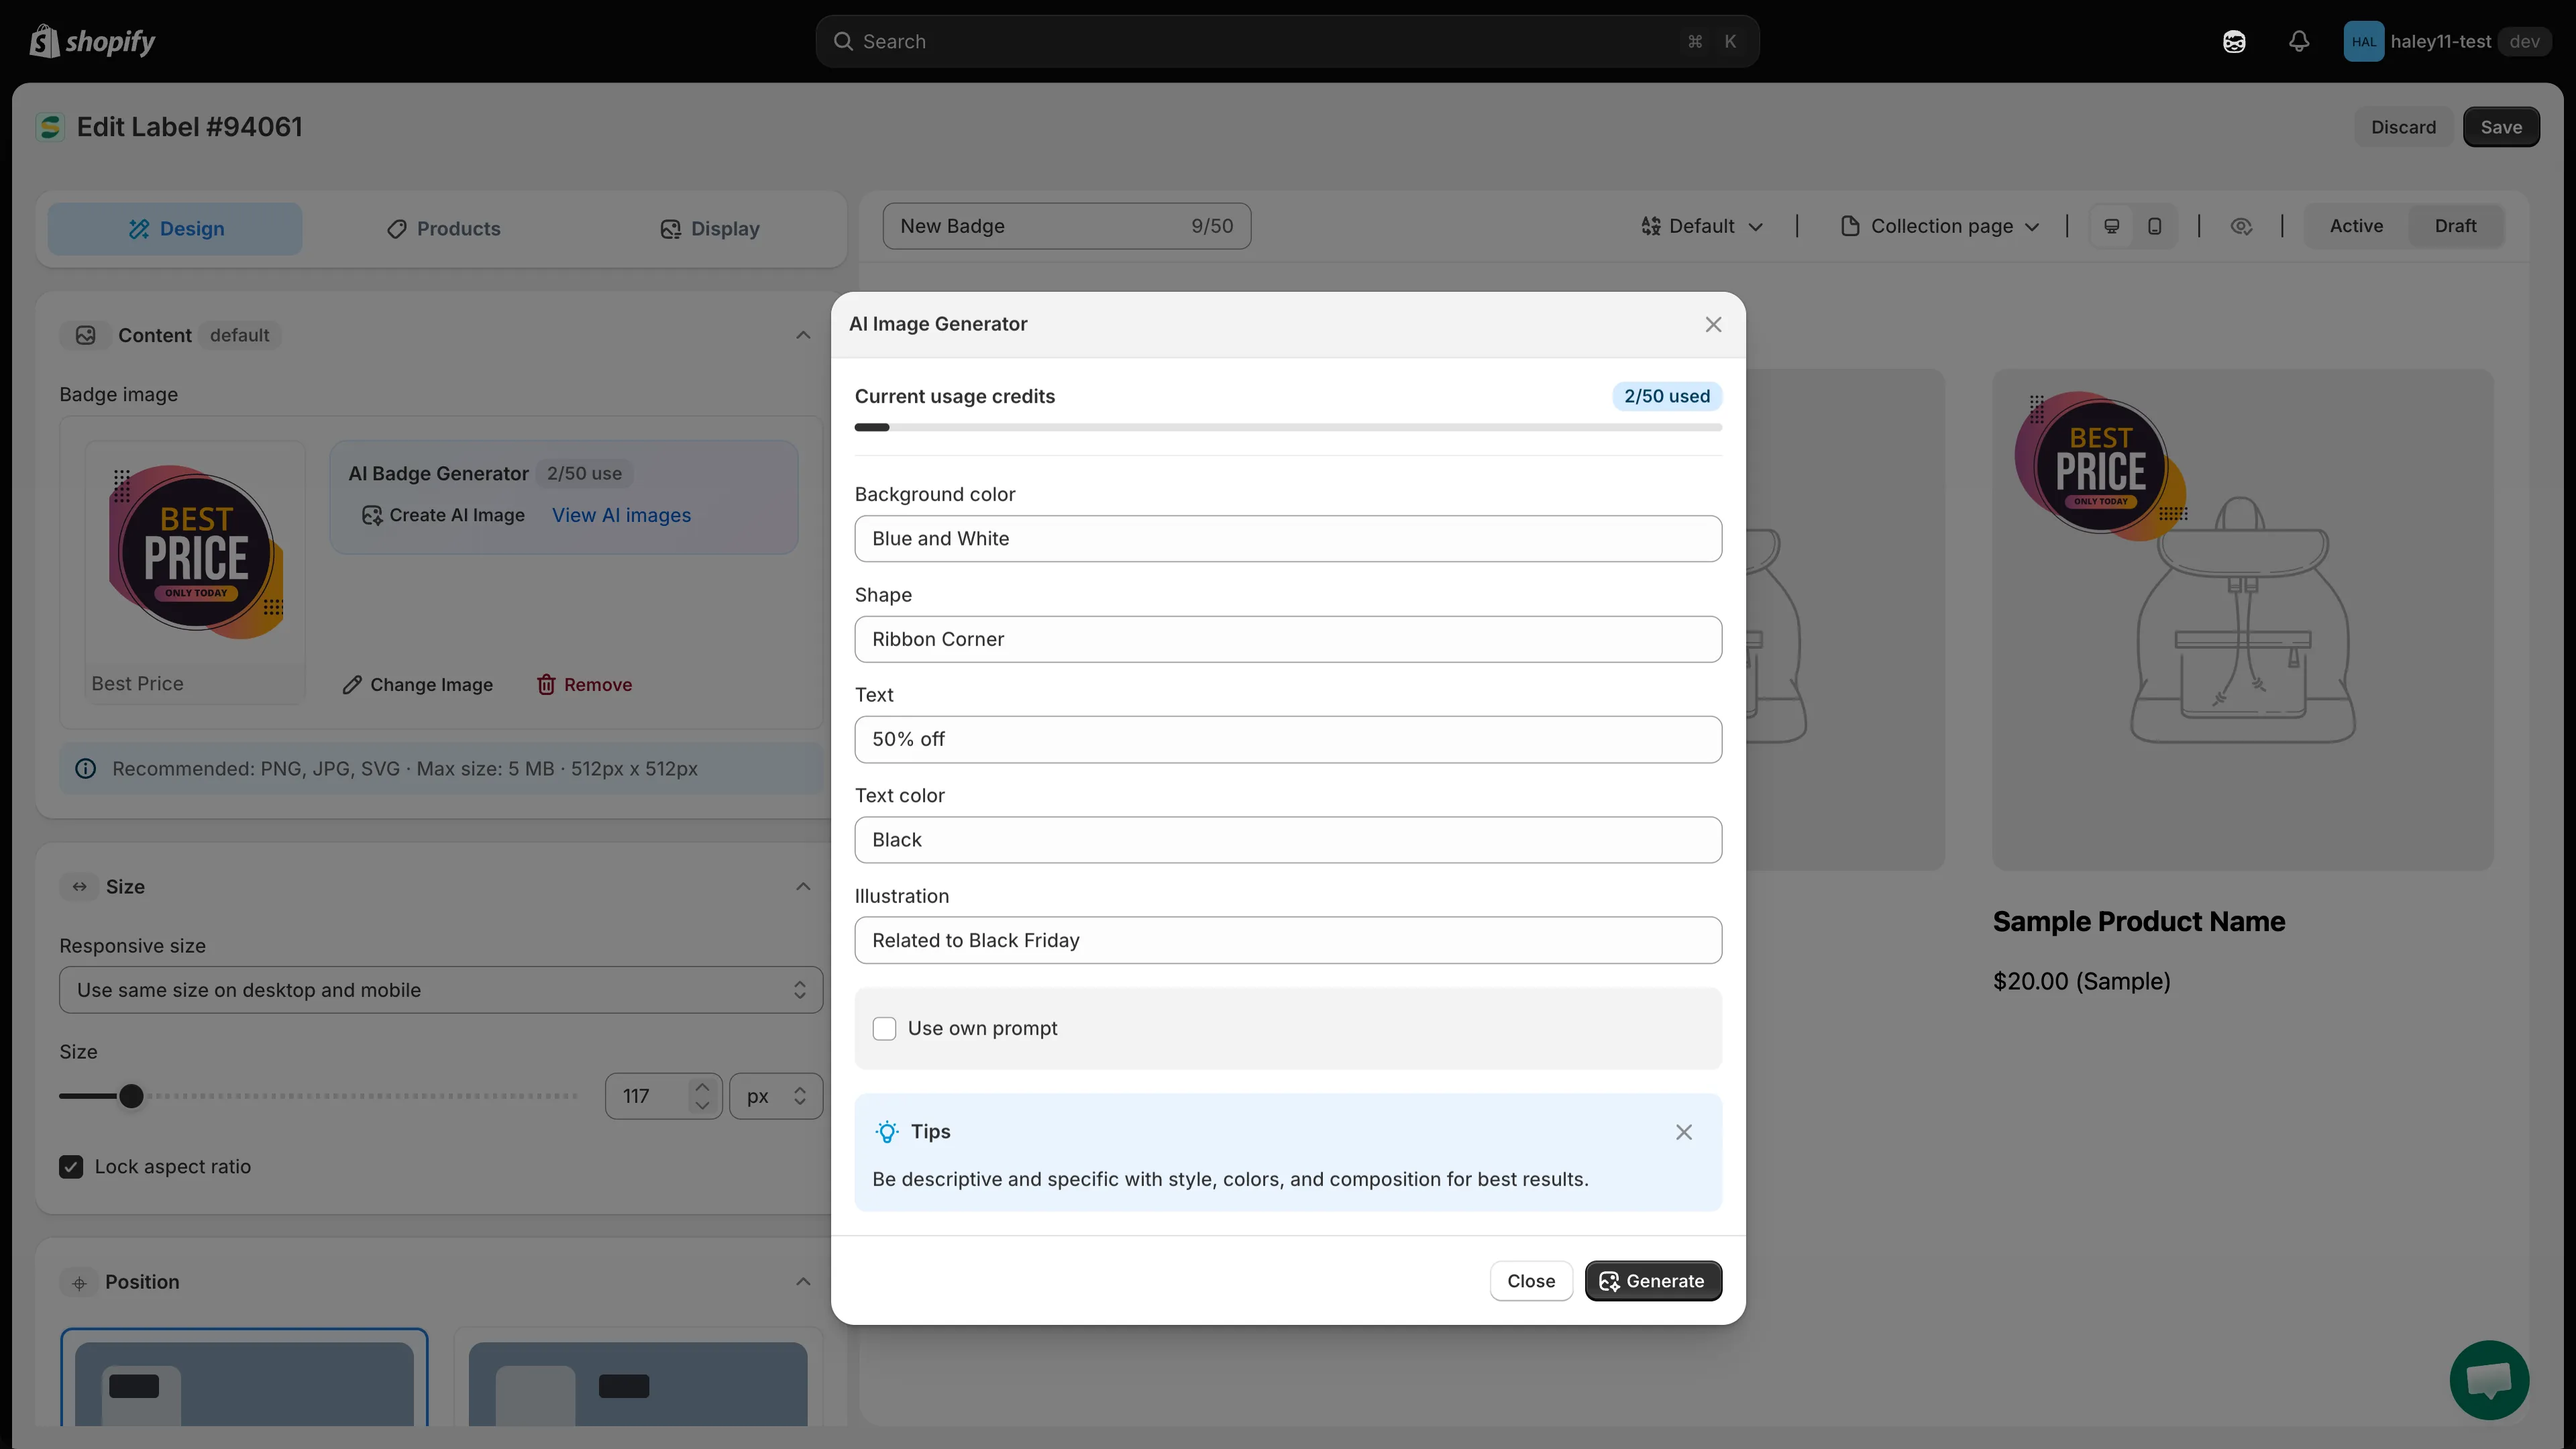
Describe the badge you want, then click Generate.
-
(Optional) Write your own prompt instead
Tick Use own prompt. The five guided fields grey out and a single Type your prompt here… text area takes their place, giving you full control over the description sent to the AI.
-
Click Generate
Click Generate at the bottom of the dialog. Close discards the dialog without generating.
-
Apply the result
When the image is ready, use the preview panel to finish:
Action Result Apply Uses the image on your badge and closes the dialog. Remove background Strips the background from the generated image first. View all Opens your full All AI images gallery. 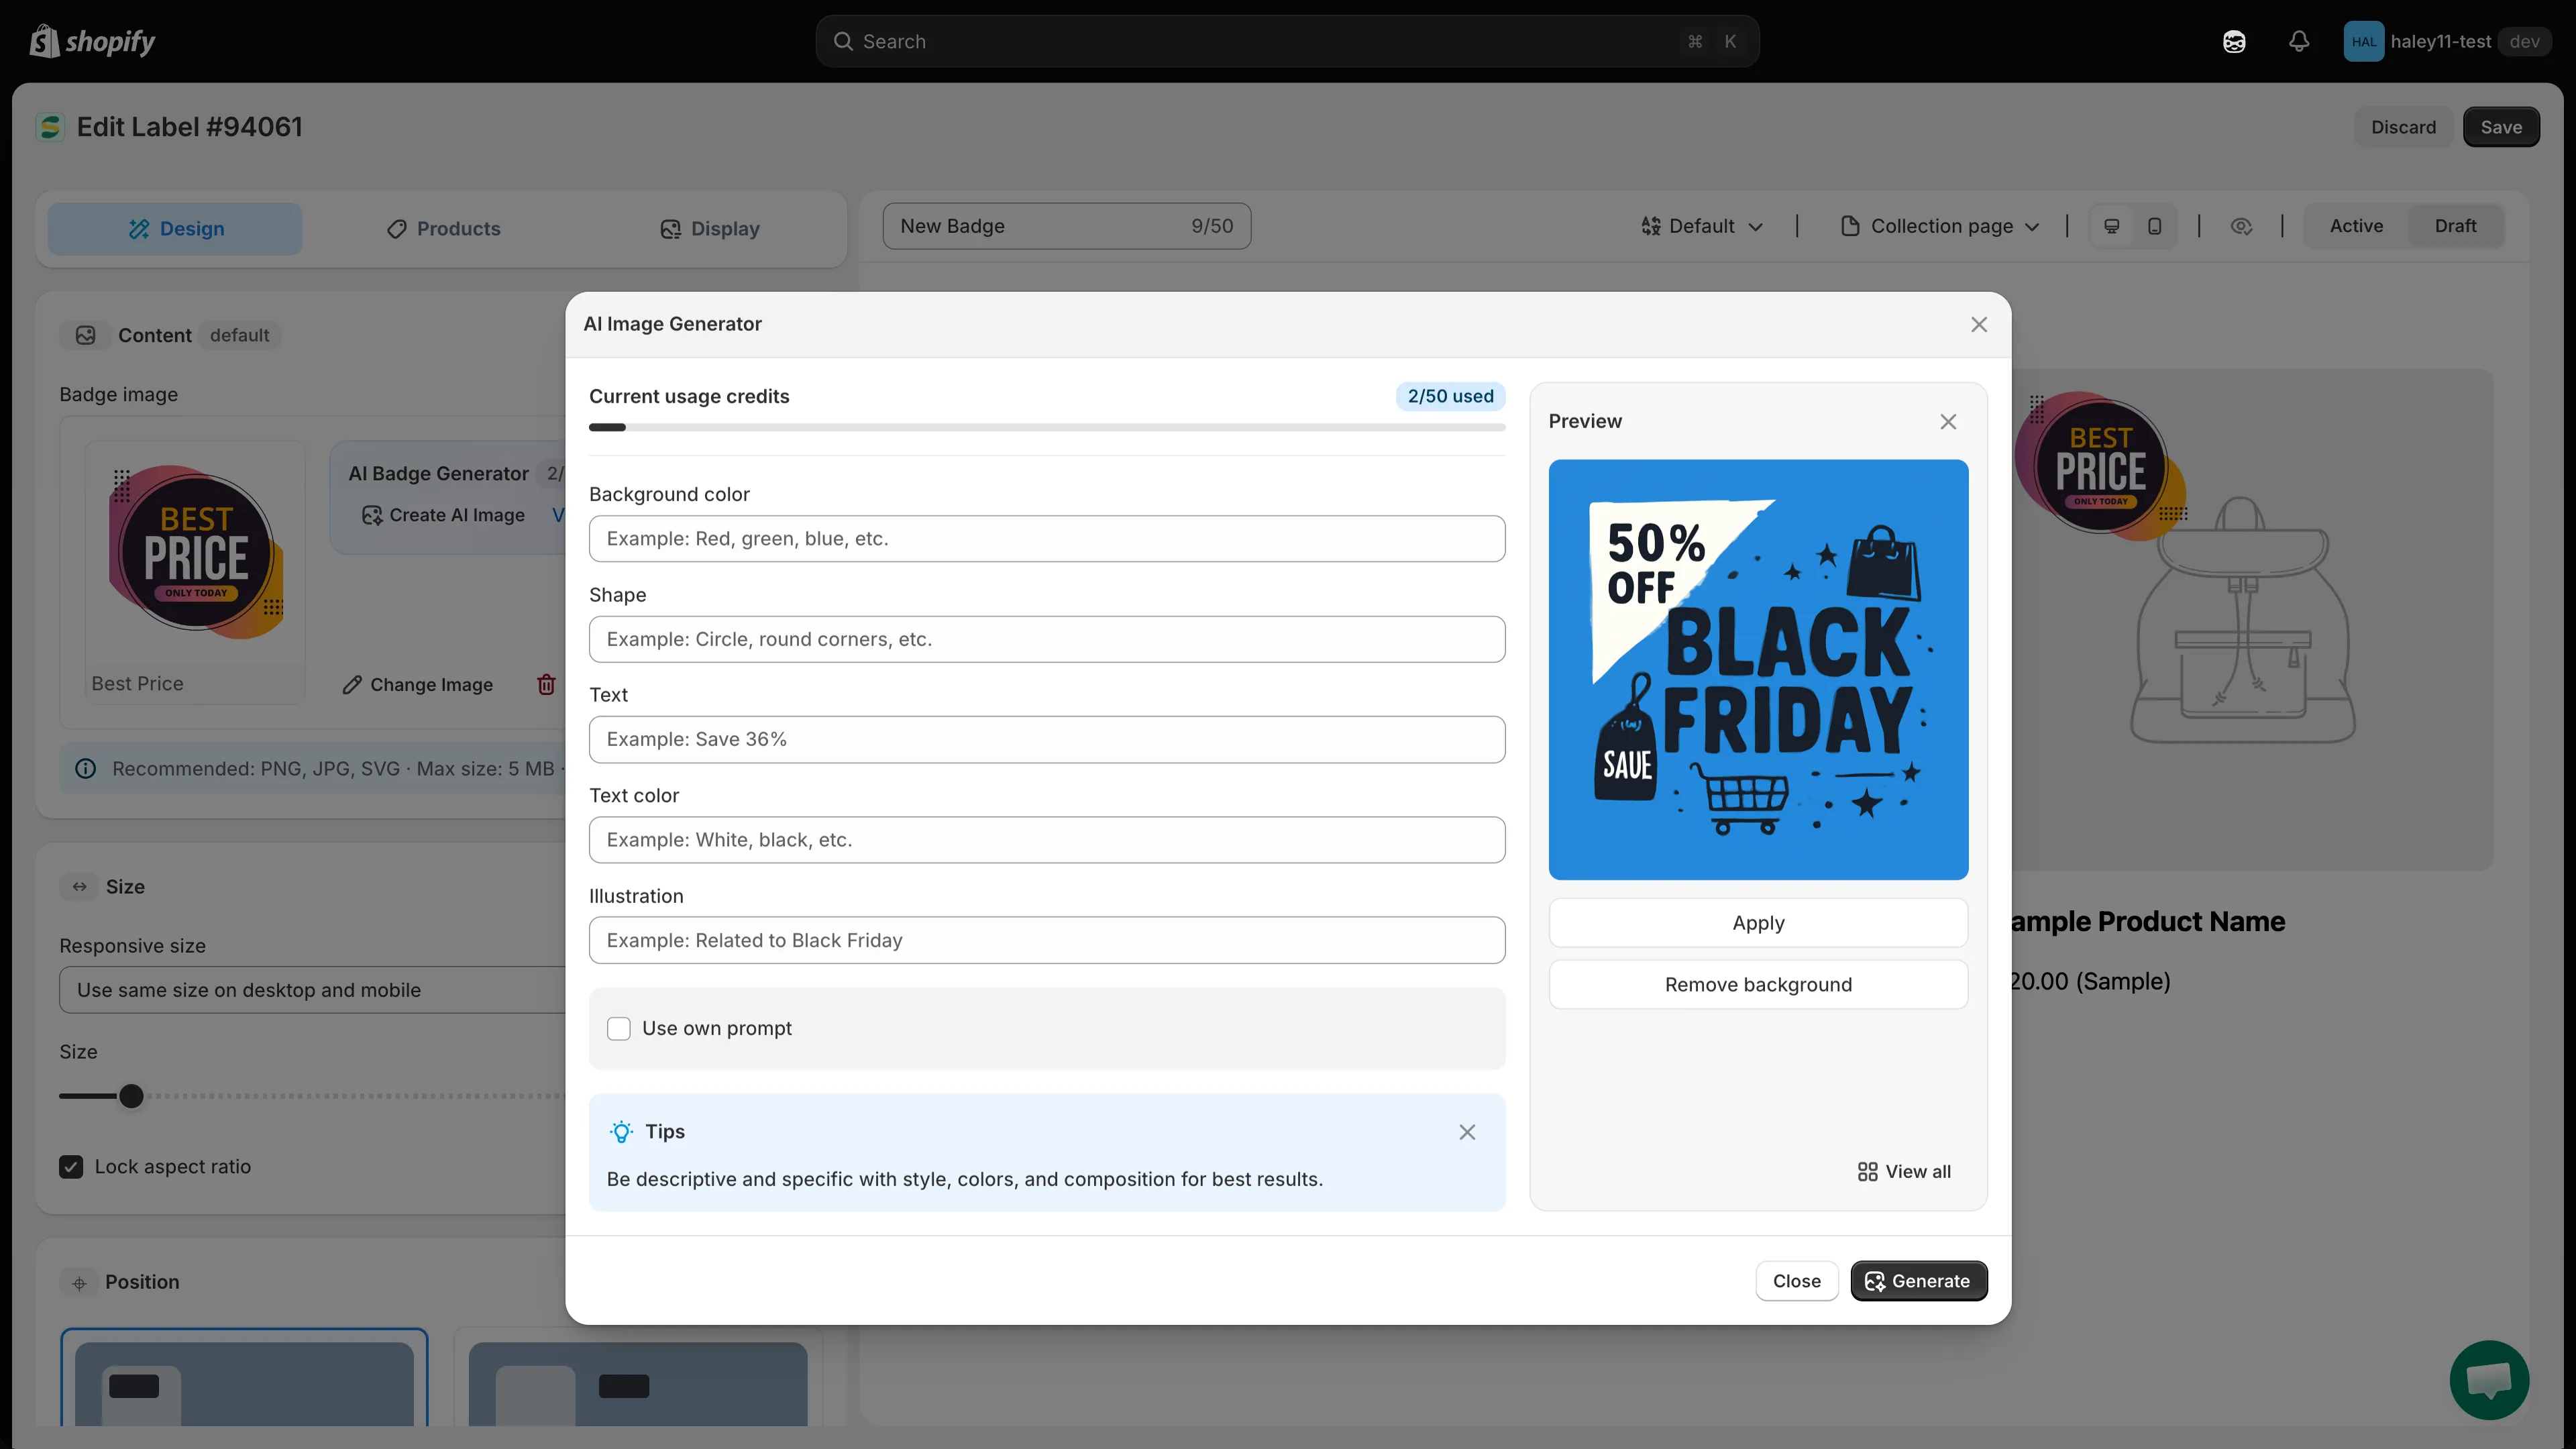
Review the generated image, then apply it to the badge.
-
Reuse images from All AI images
Every image you generate is saved. Click View AI images in the AI Badge Generator box to open the All AI images gallery, pick any previous image, and click Apply — from any badge, at any time, without spending another credit.
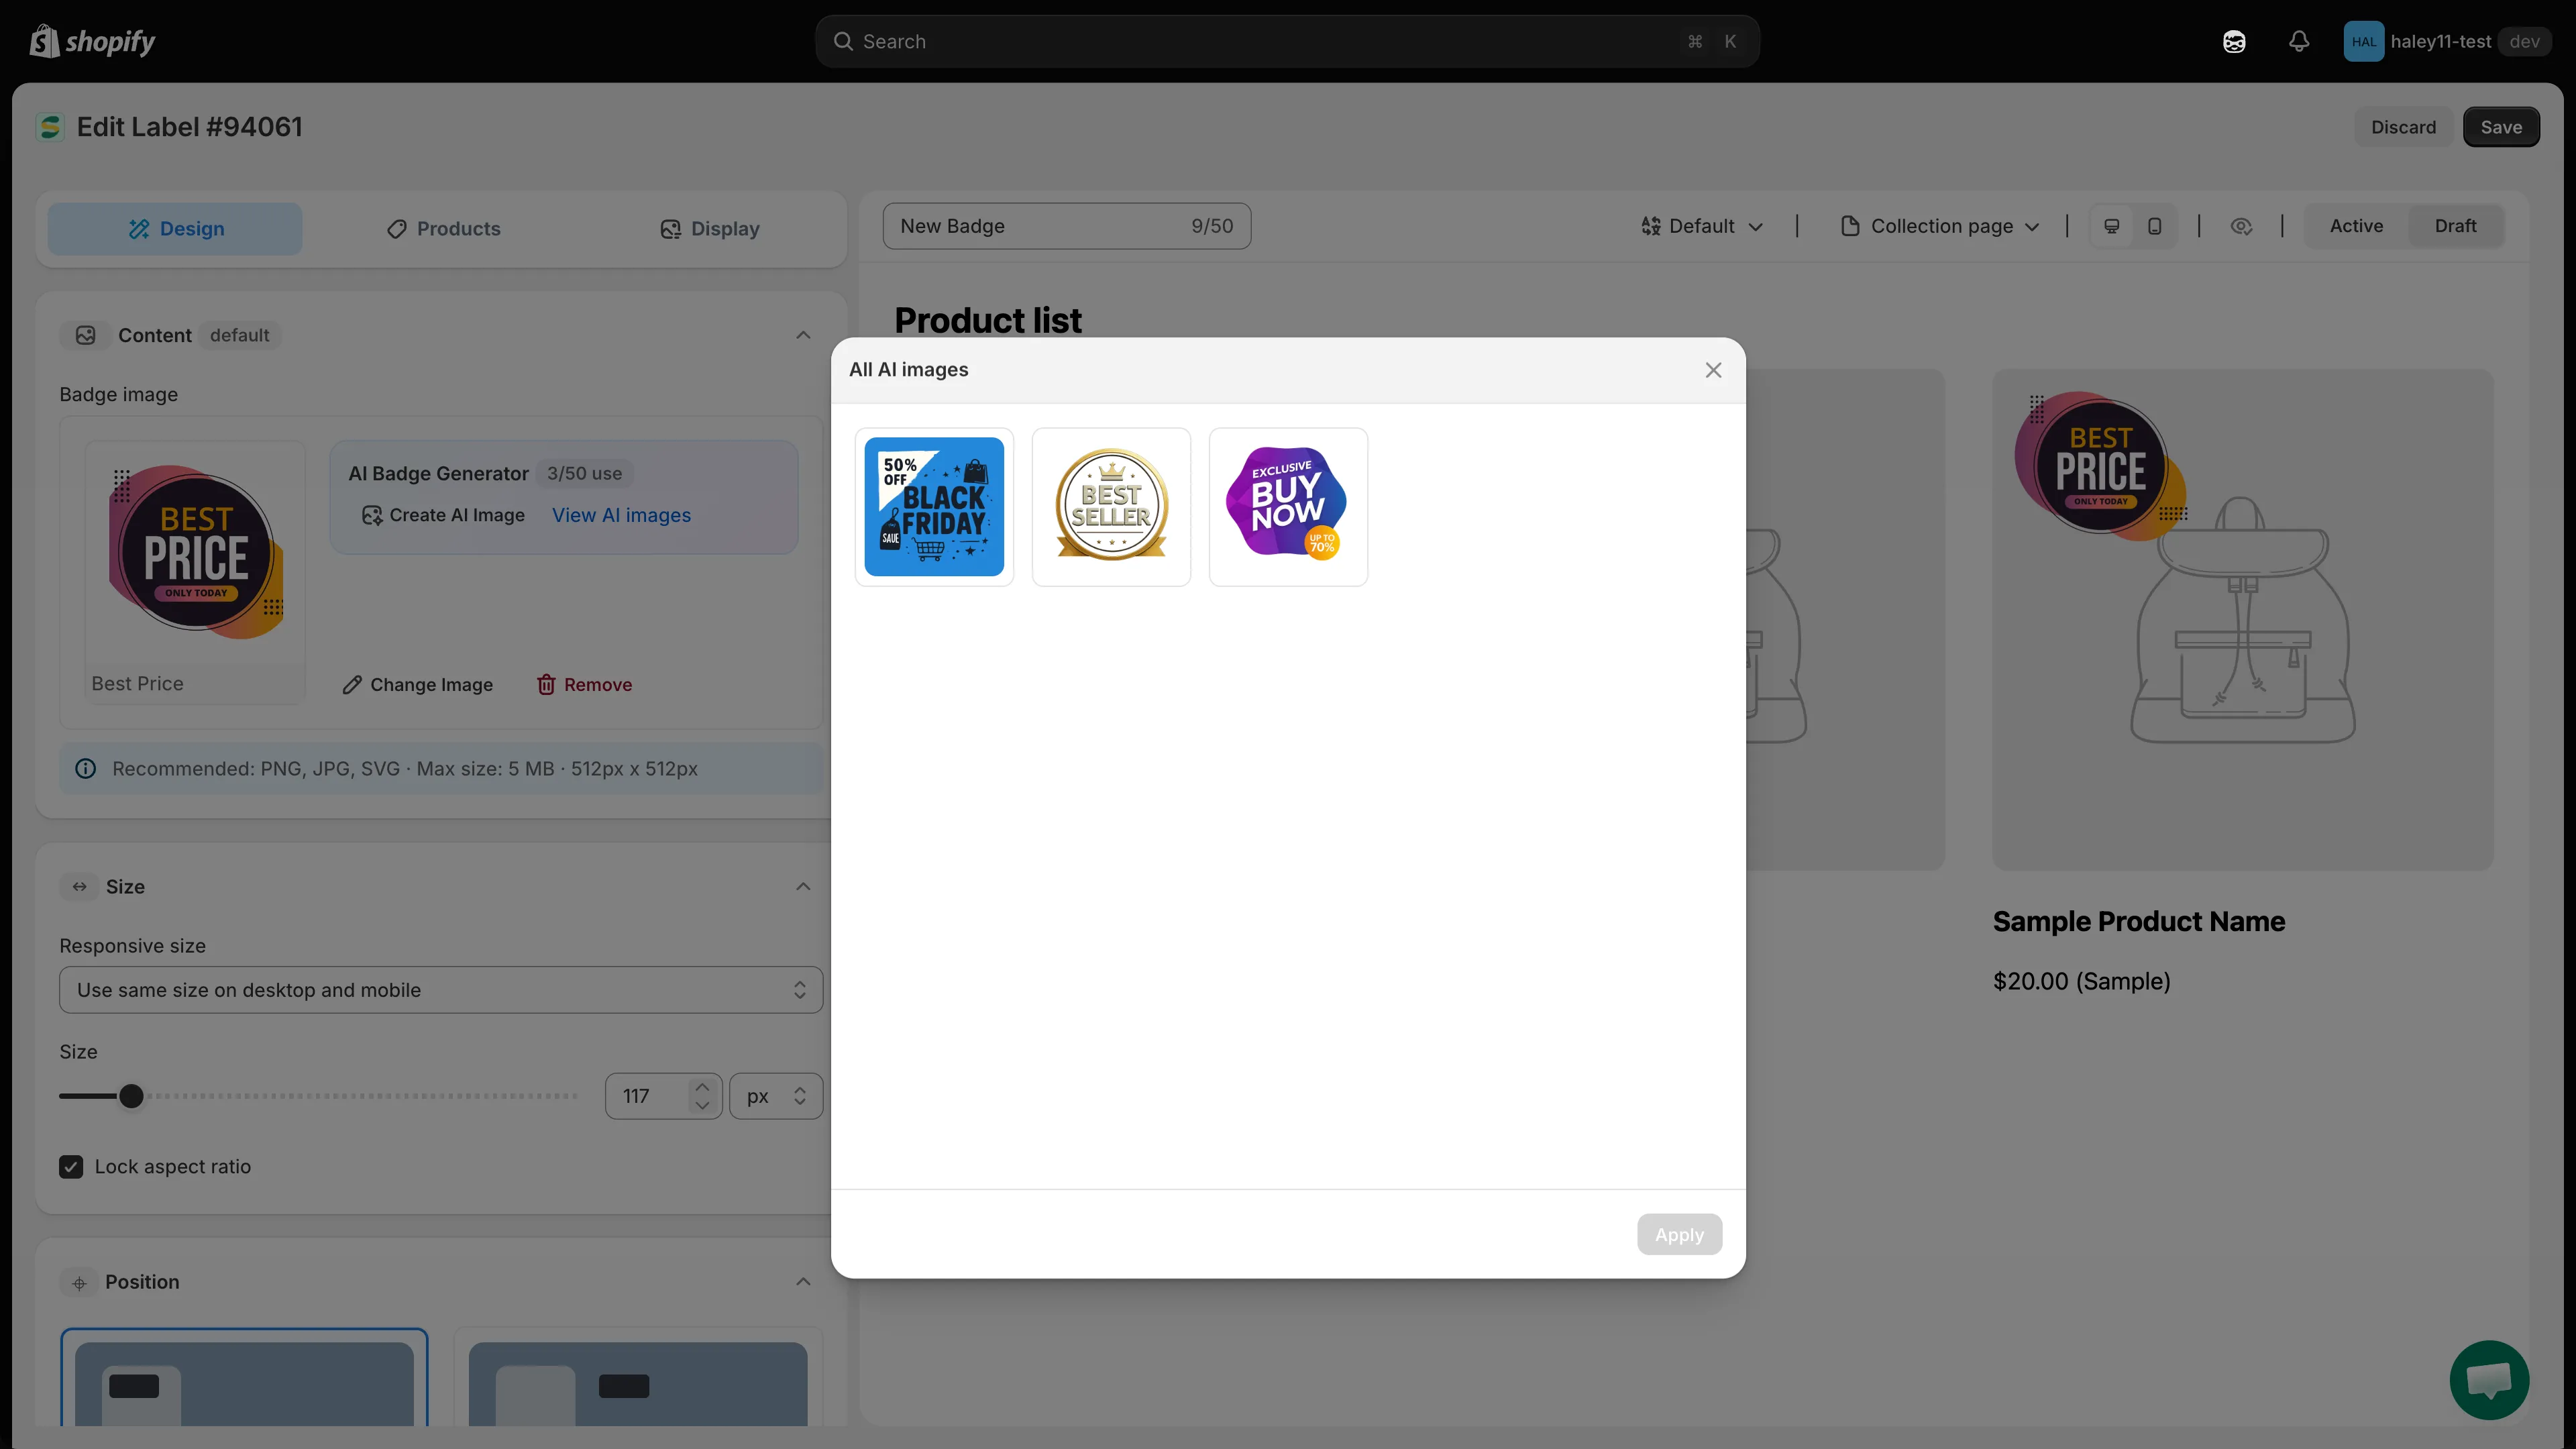
Reuse a previously generated image instead of spending a new credit.
Tips for better results
Section titled “Tips for better results”- Be specific. Fill in as many guided fields as you can, or name colors, shapes, text, and style in your own prompt.
- Ask for a transparent background. Badges blend into your theme better without a solid backdrop — or use Remove background afterwards.
- Iterate. If the first result misses, adjust the description and generate again.
- Check the gallery first. Reusing an image from All AI images costs no credit.
Next steps
Section titled “Next steps”- Edit an image with AI — refine a generated image or change an existing one.
- Create an image badge — set up an image-based badge.