
Schedule badge visibility
Schedule when a badge appears and disappears, restrict it to recurring weekday time windows, and add a countdown to the end time.
Use Visibility Date & Countdown to control the overall period when a badge can appear. For recurring campaigns, you can also limit the badge to selected weekdays and a specific time window on those days.
Schedule a badge
Section titled “Schedule a badge”-
Open the badge editor
Section titled “Open the badge editor”In Sami Product Labels, open Badges & Labels, then create a badge or click Edit badge/label for an existing one.
-
Open Visibility Date & Countdown
Section titled “Open Visibility Date & Countdown”Select the Display tab, then expand Visibility Date & Countdown.
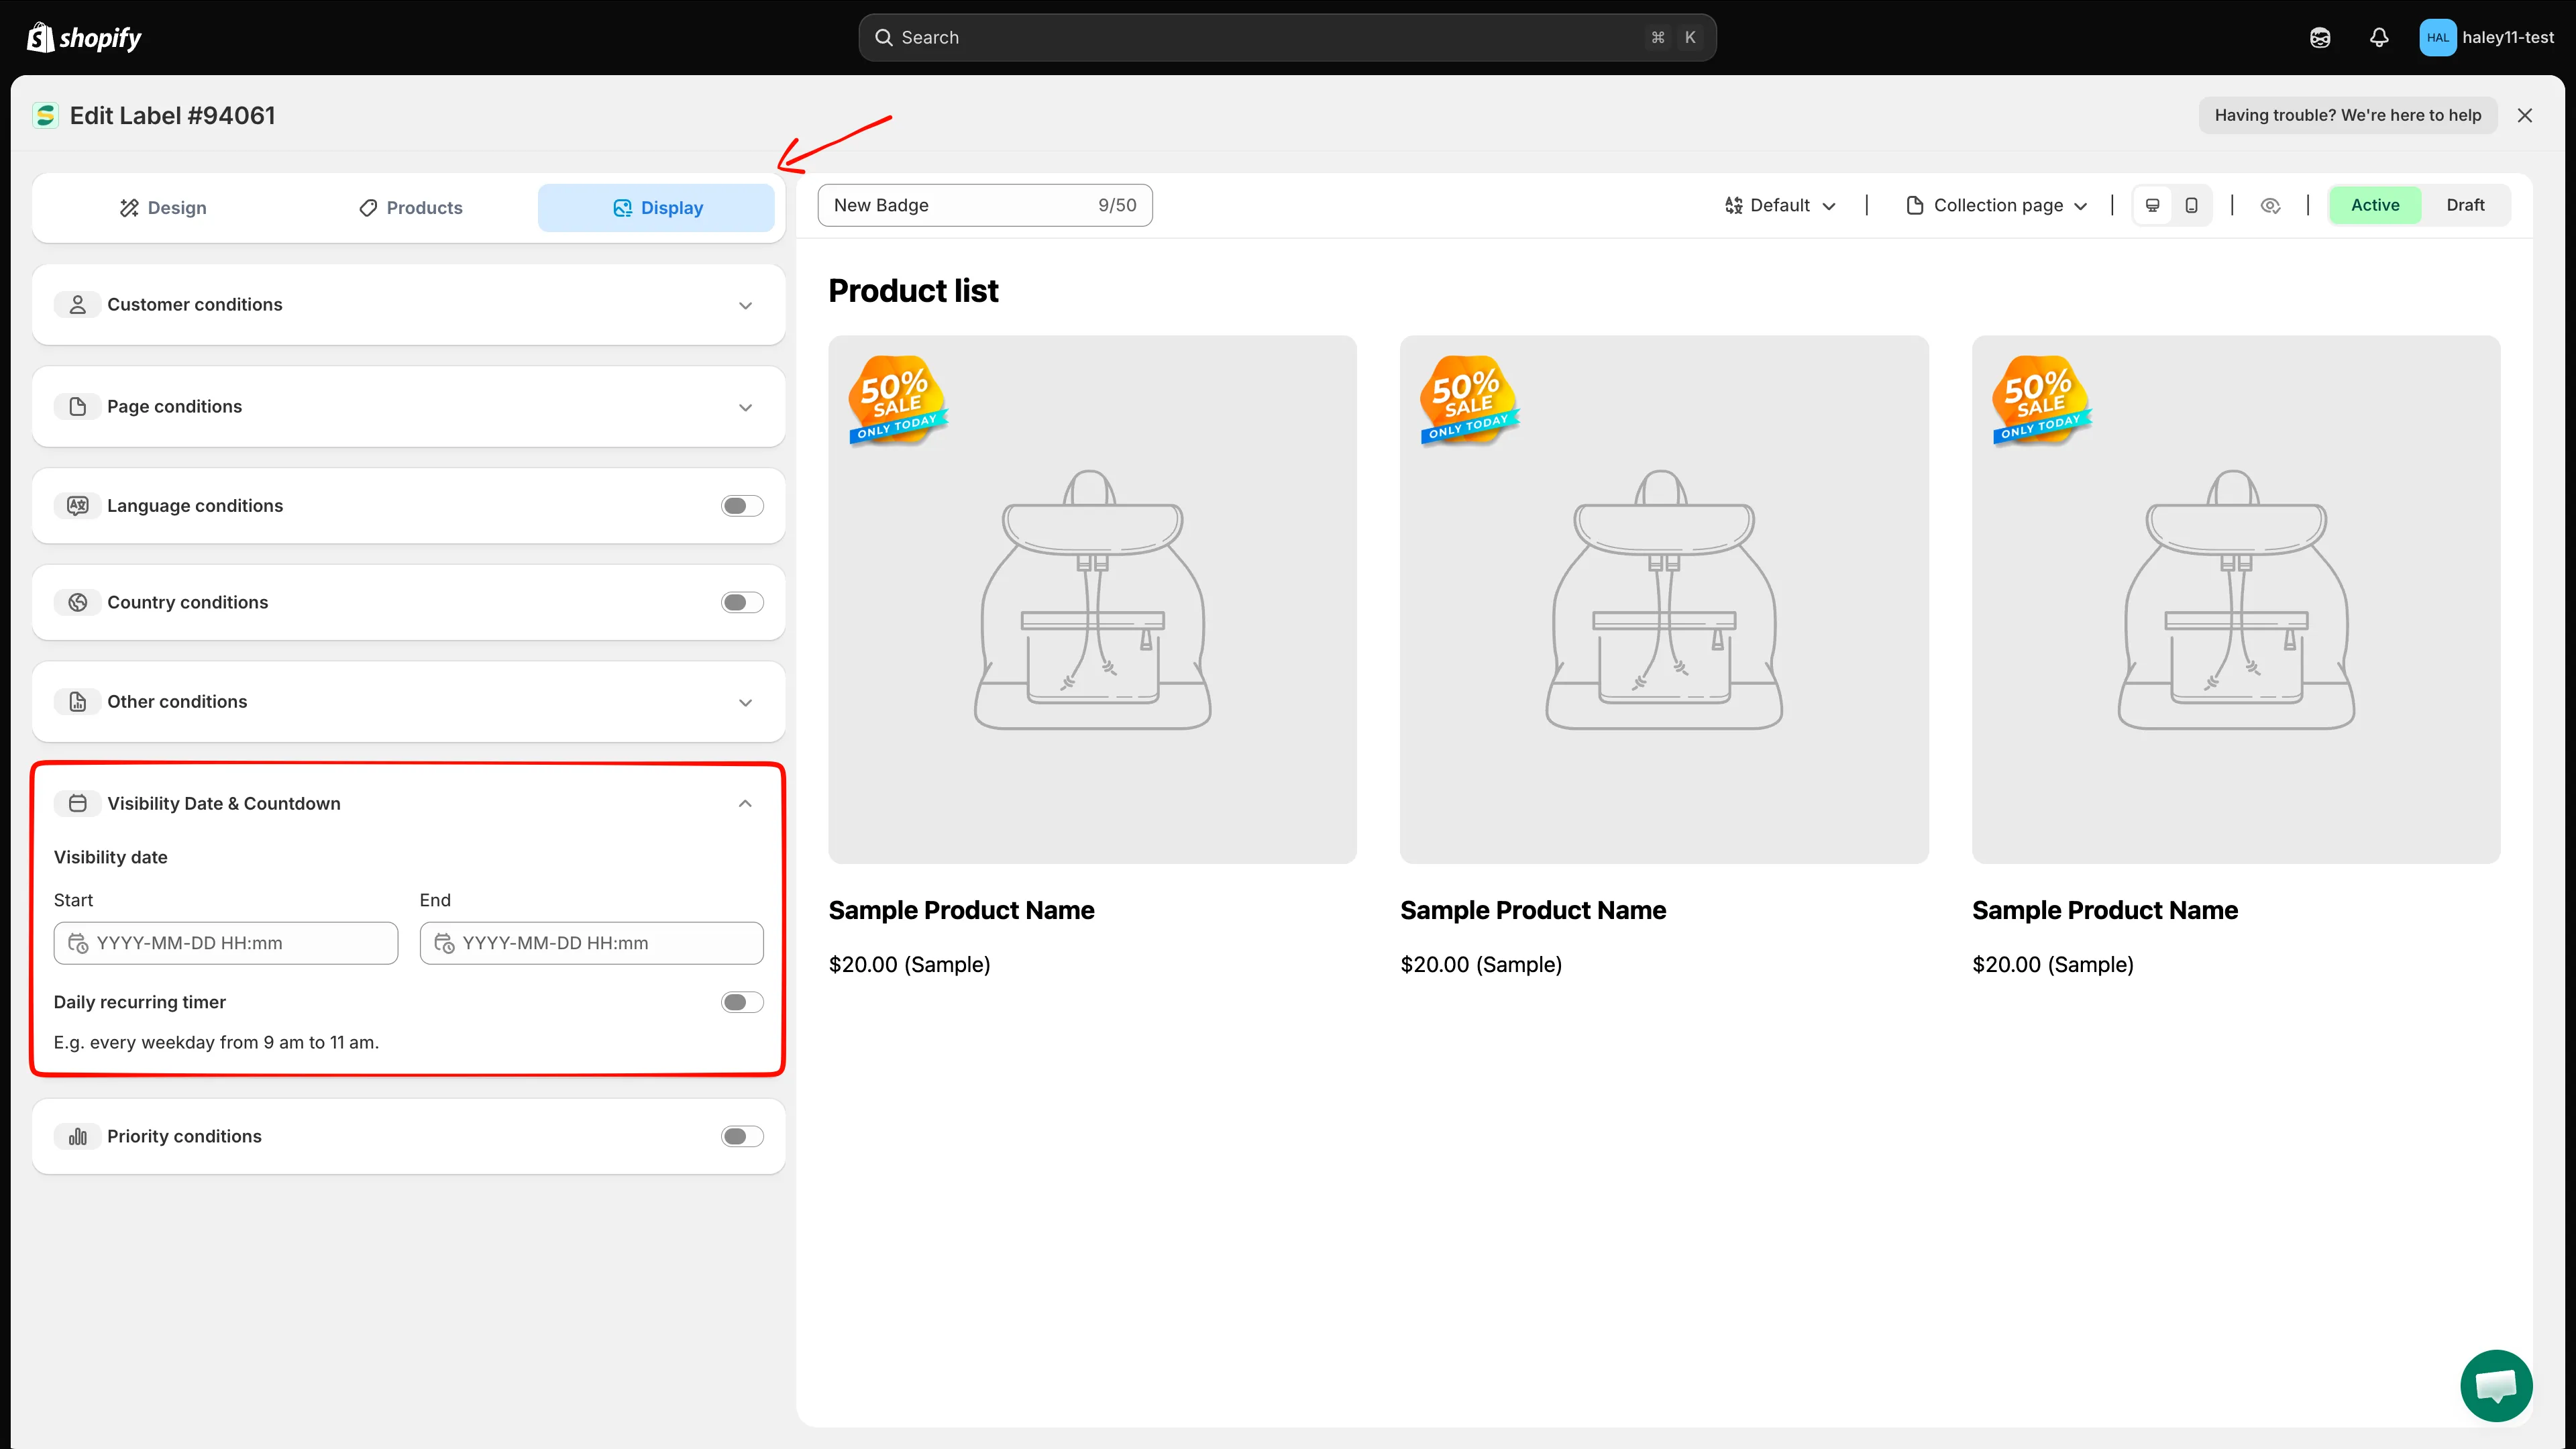
Open Display > Visibility Date & Countdown to configure the overall visibility period.
-
Set the start date and time
Section titled “Set the start date and time”Click Start, select a date in the calendar, then choose the Hours and Minutes. The badge remains hidden until this time.
The field uses the format
YYYY-MM-DD HH:mm.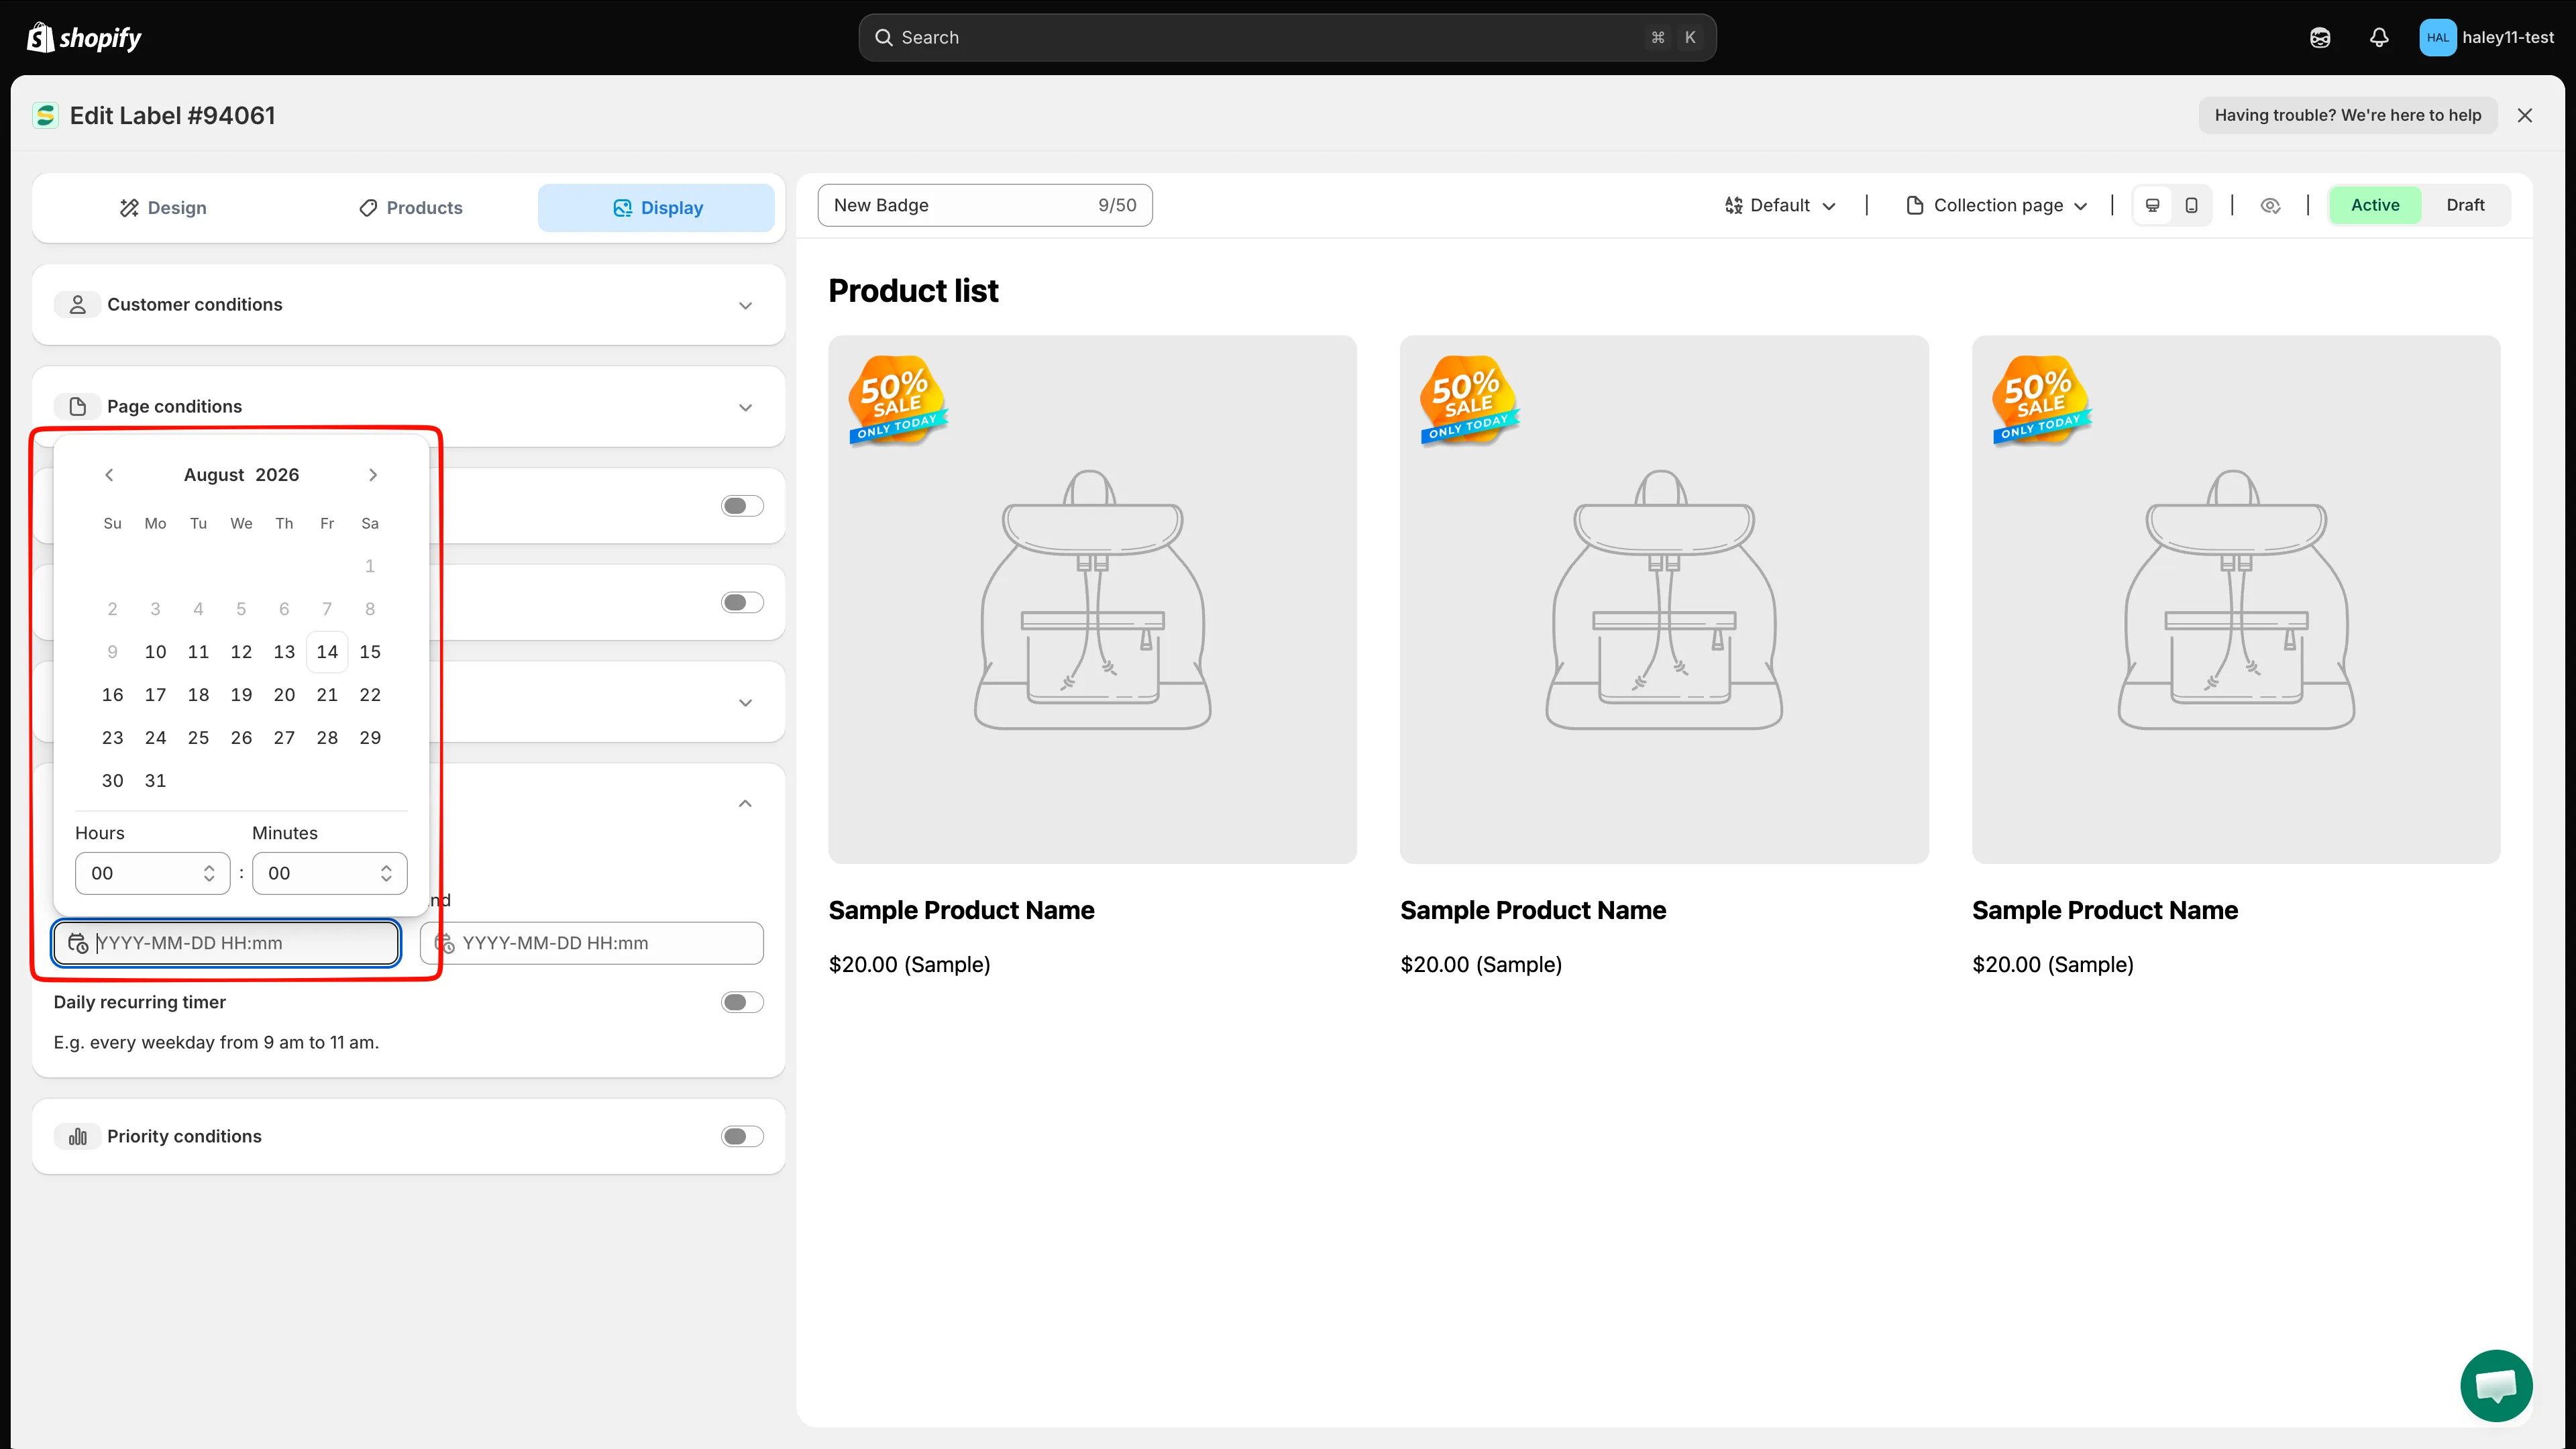
Select the date, hour, and minute when the badge should start appearing.
-
Set the end date and time
Section titled “Set the end date and time”Click End and select the date, Hours, and Minutes when the badge should stop appearing. The End time must be later than the Start time.
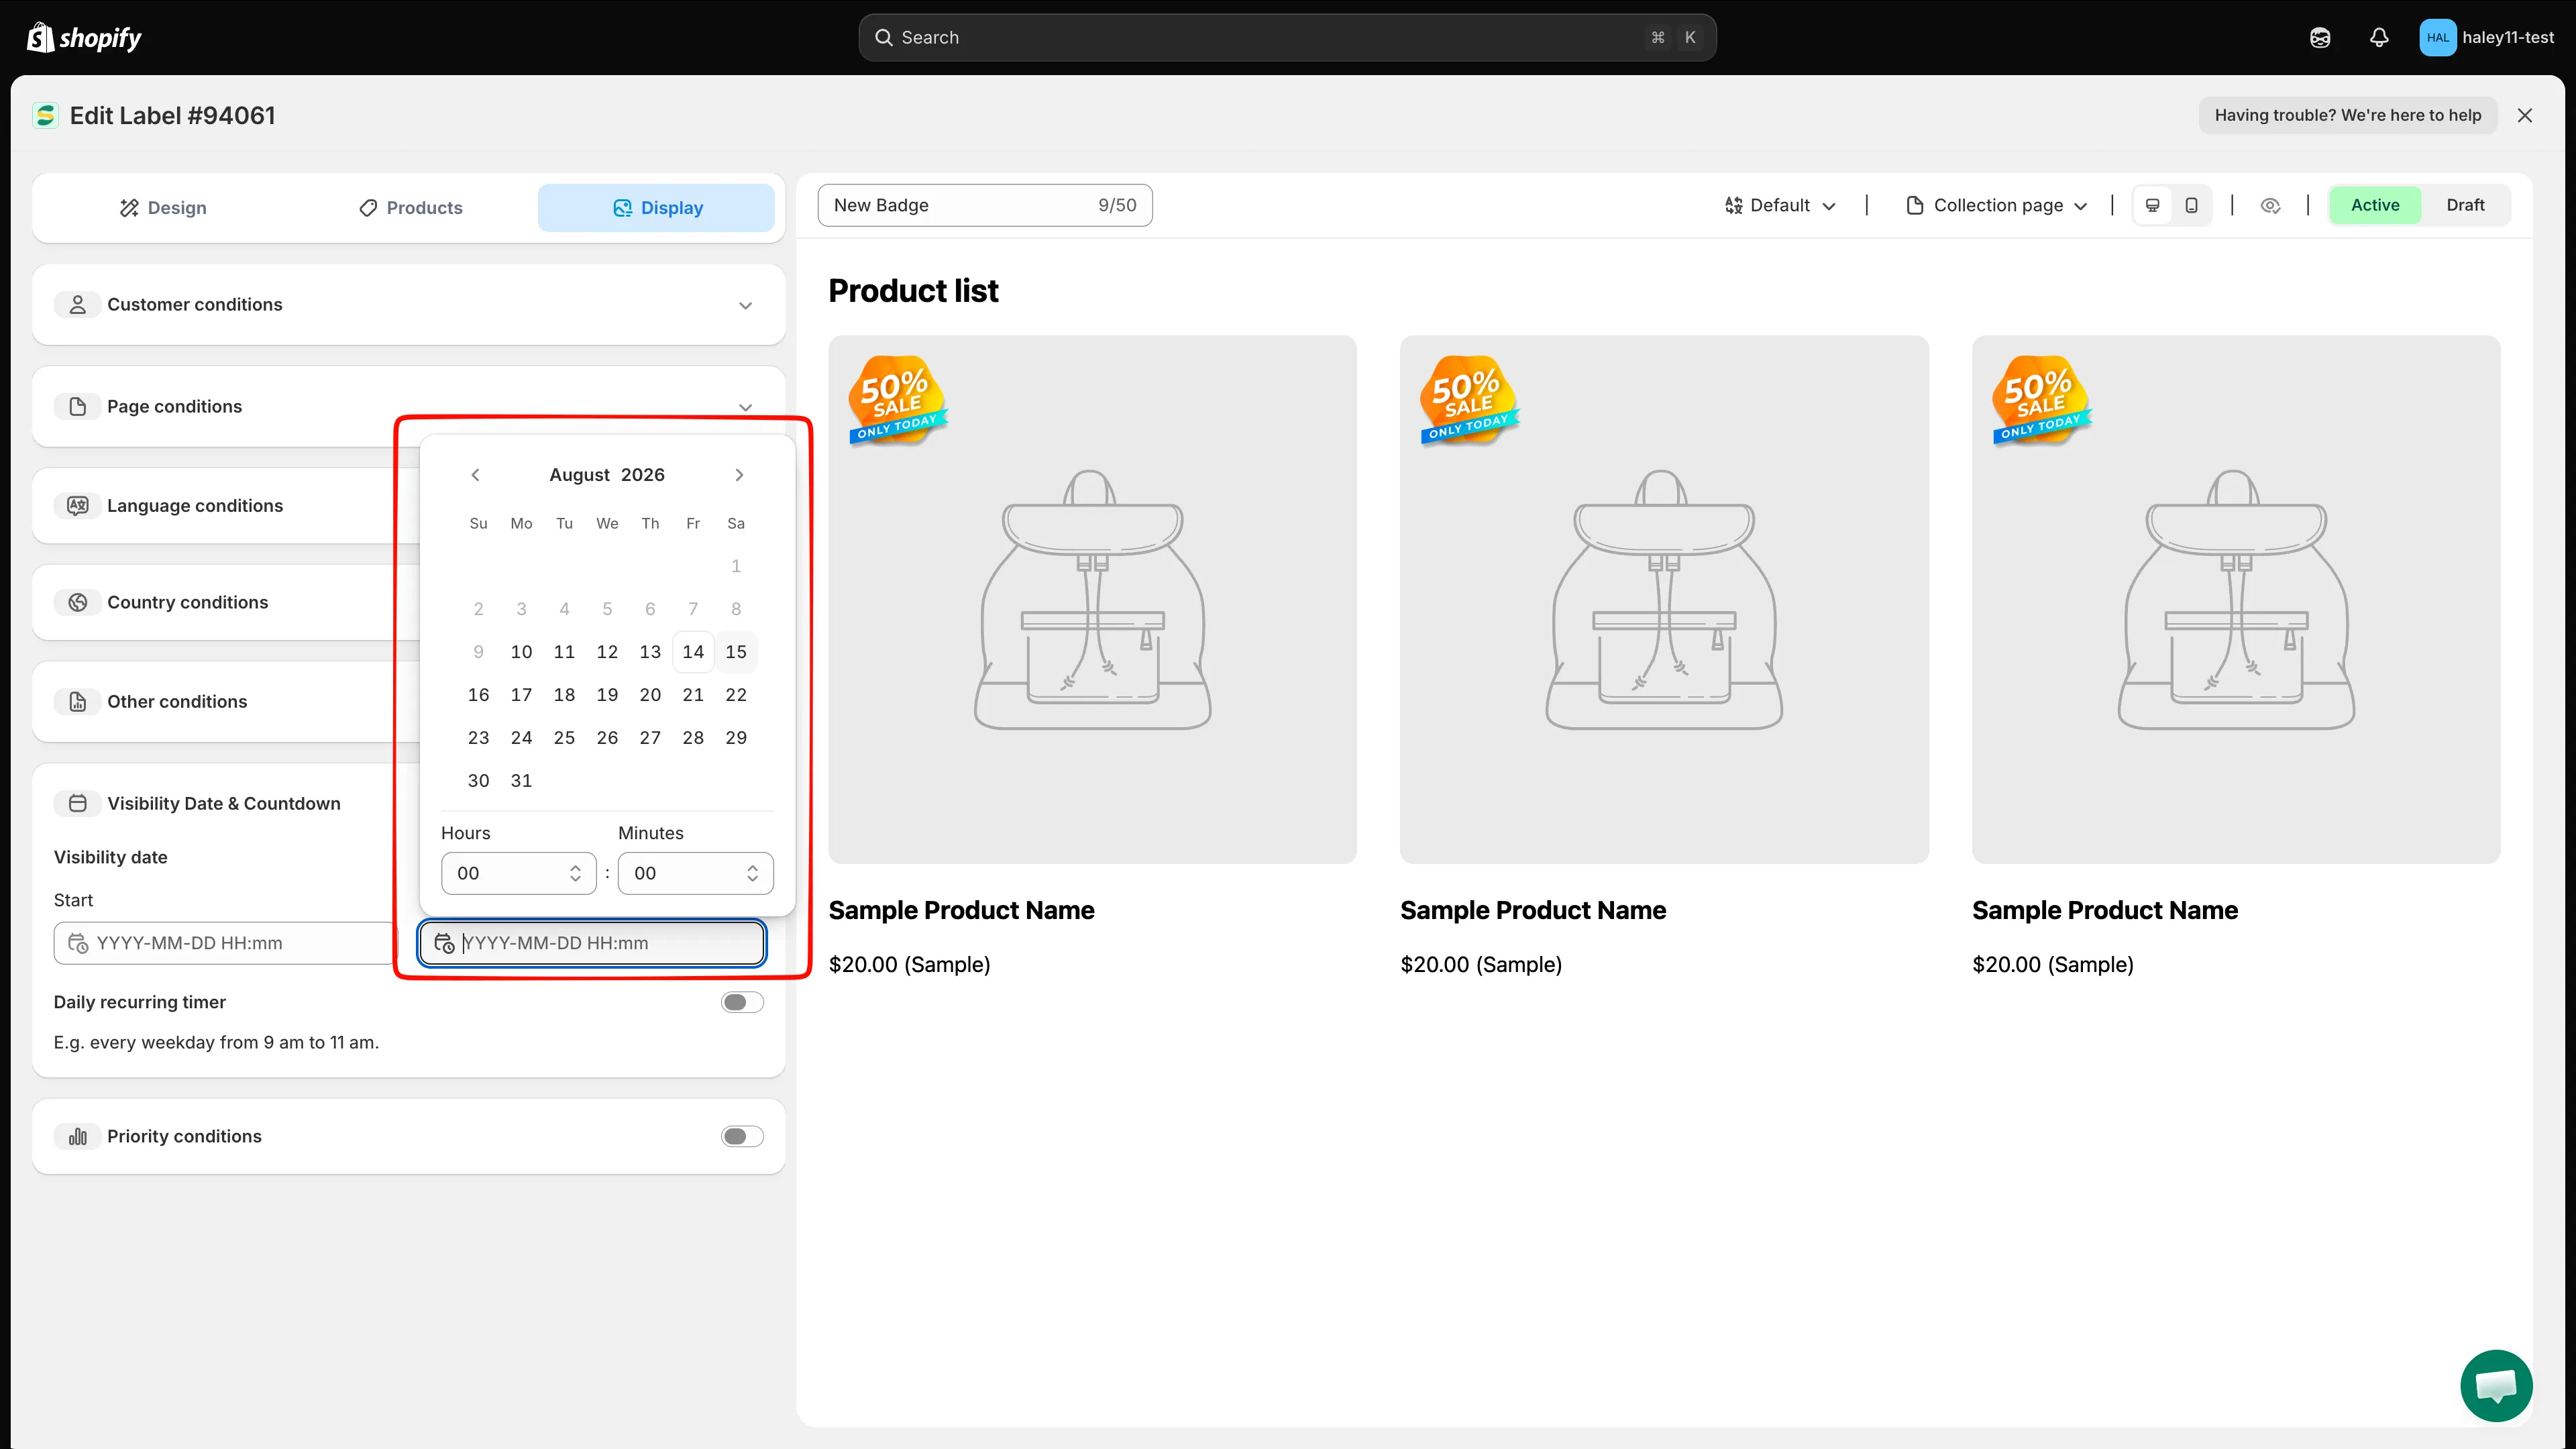
Select when the badge should stop appearing on the storefront.
-
Optional: add a recurring weekday schedule
Section titled “Optional: add a recurring weekday schedule”Enable Daily recurring timer when the badge should appear only on certain days and during the same time window on each selected day.
- Under Weekday, keep the days when the badge should appear and clear the other days. All seven days are selected by default.
- Under Start time, enter the Hours, Minutes, and Seconds when the daily window begins.
- Under End time, enter the Hours, Minutes, and Seconds when the daily window ends.
The recurring weekday and time rules apply inside the overall Start and End visibility period. For example, a Monday-to-Friday window from 09:00:00 to 11:00:00 displays the badge only during those hours on those weekdays, and only while the overall date range is active.
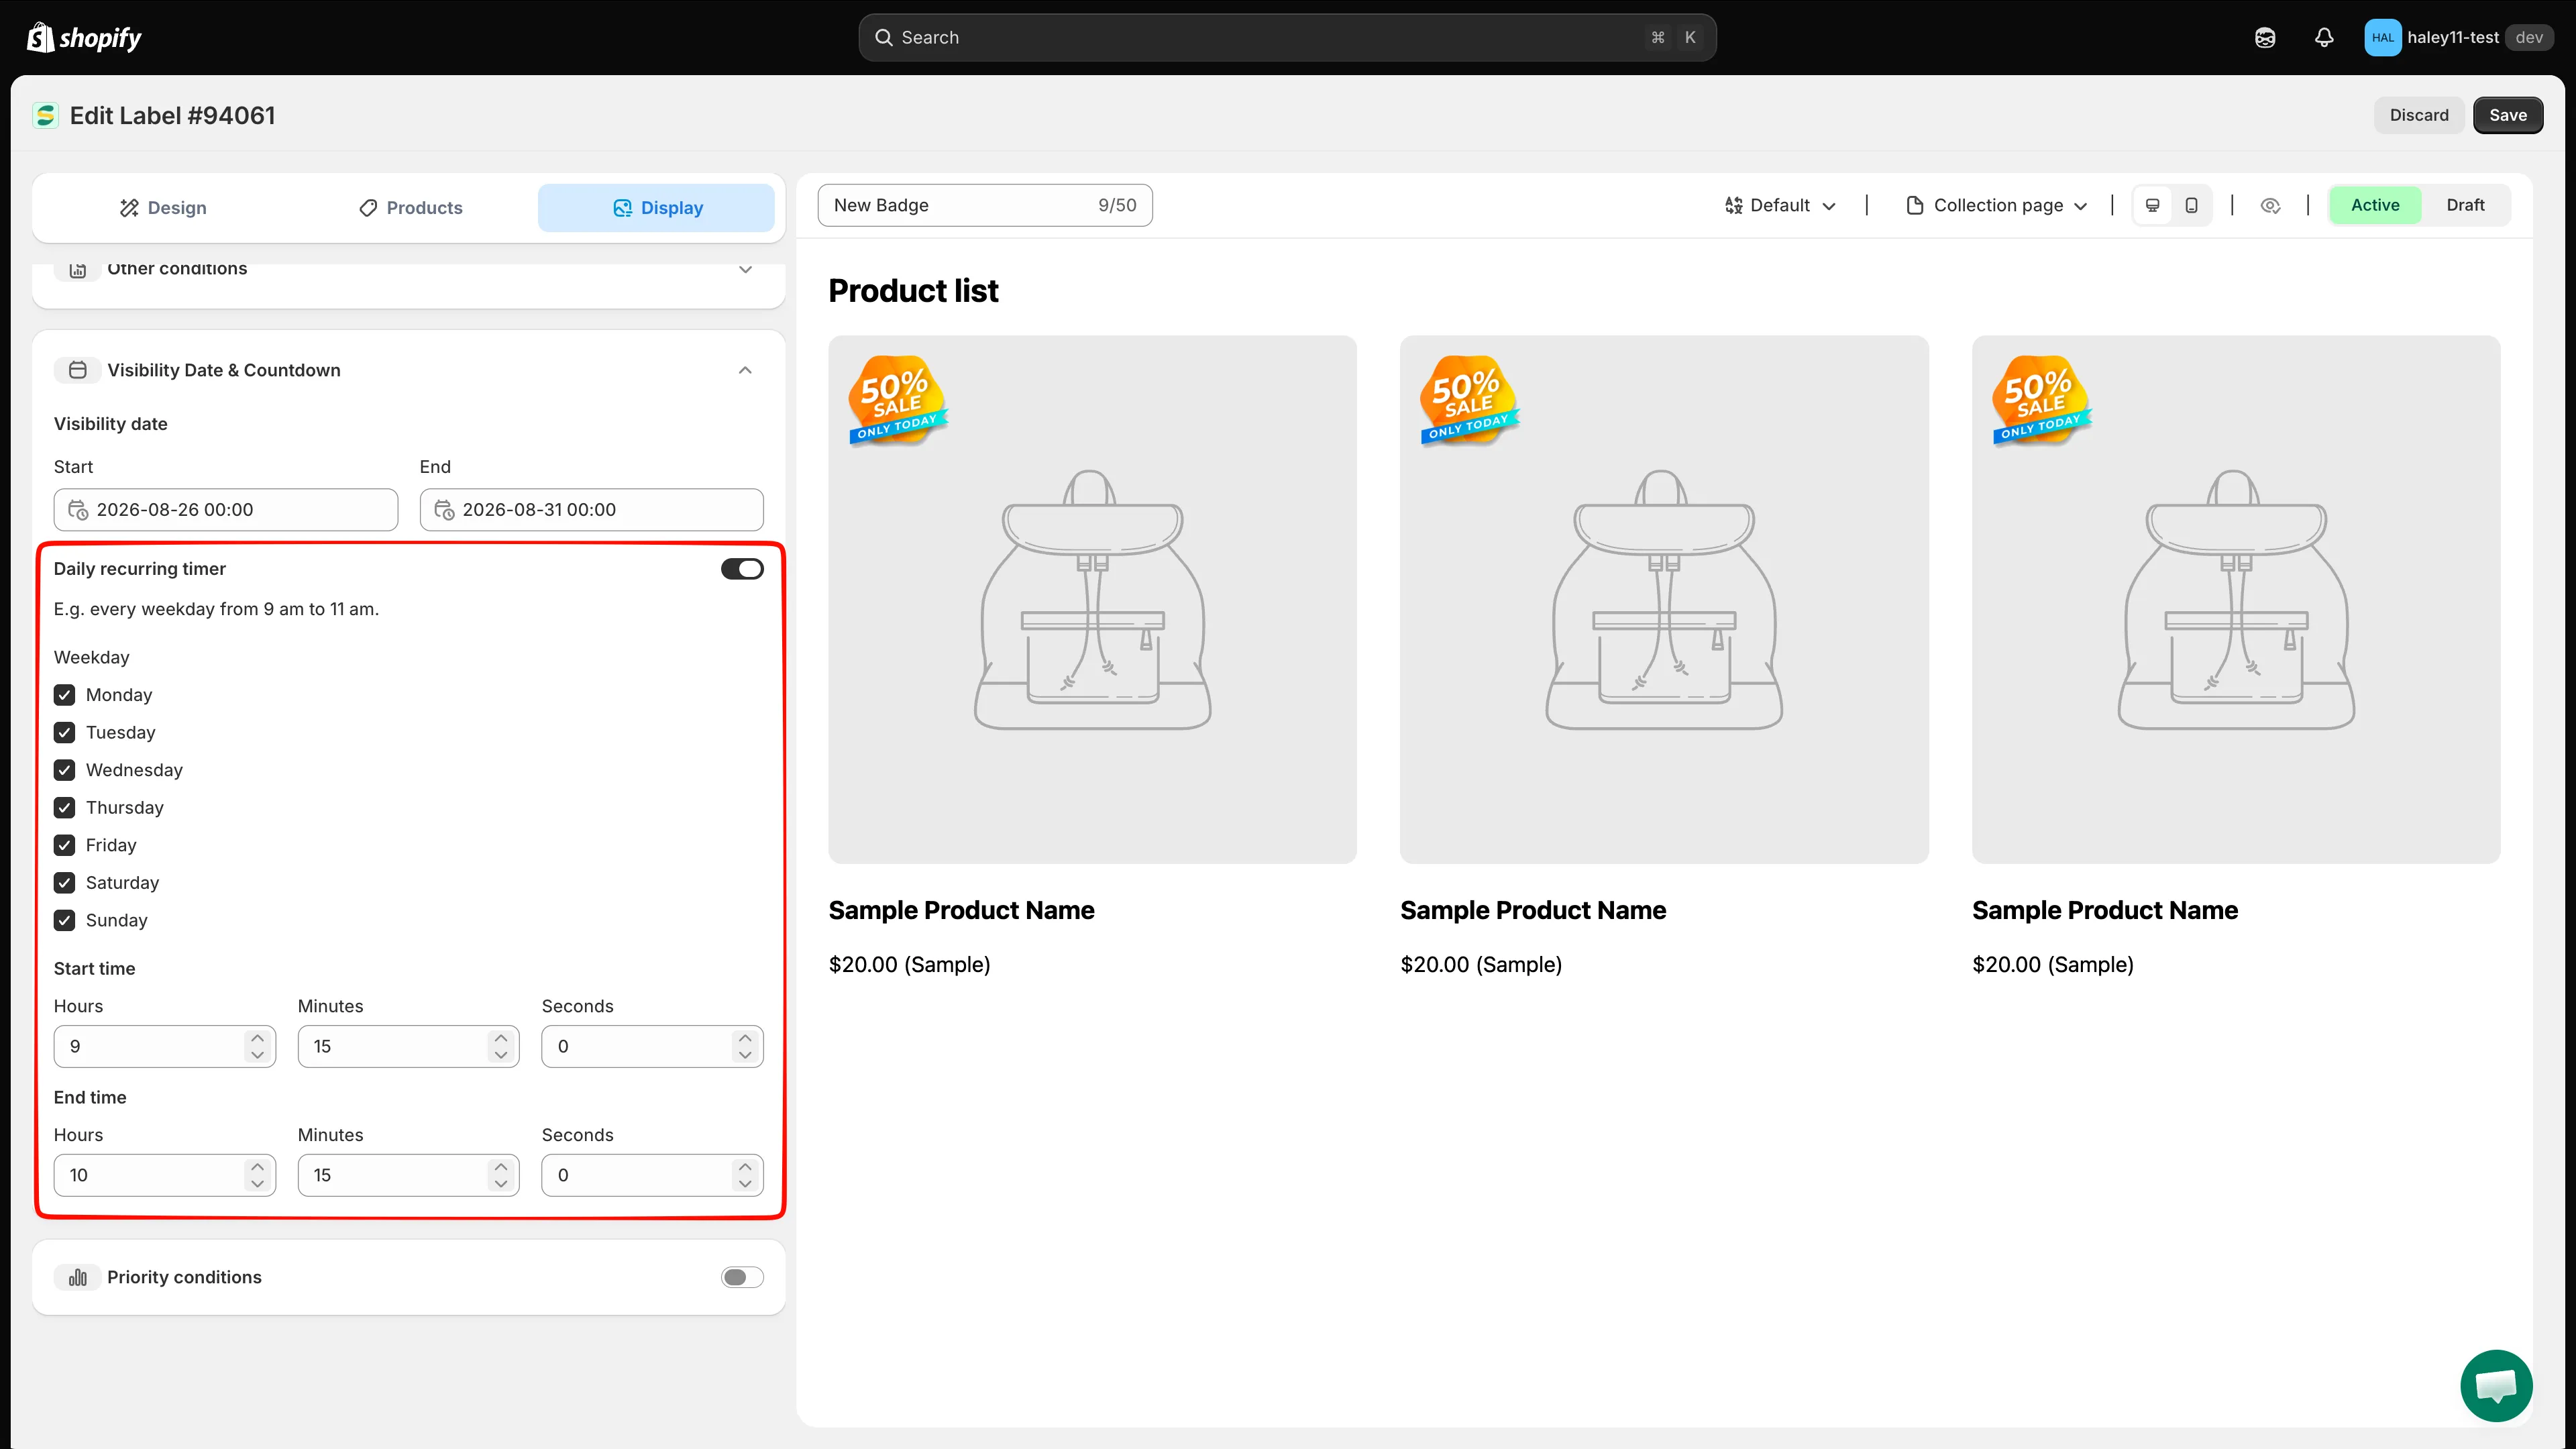
Select the active weekdays and set one recurring time window shared by those days.
-
Choose a status and save
Section titled “Choose a status and save”Choose Active to make the badge eligible to appear according to the schedule, or Draft to keep it hidden. Click Save to apply the configuration.
Add a countdown to a text badge
Section titled “Add a countdown to a text badge”The countdown is separate from the visibility controls. Visibility Date & Countdown defines the schedule, while the {countdown} variable renders the remaining time inside a text badge.
- Make sure the badge has a valid End date and time. The countdown counts down to this value.
- Return to Design, expand Content, and click Insert Dynamic Text in the Badge text toolbar.
- Find
{countdown}, choose Style 1 or Style 2, then click Copy. - Paste the copied token into the Badge text editor, preview the result, and save the badge.
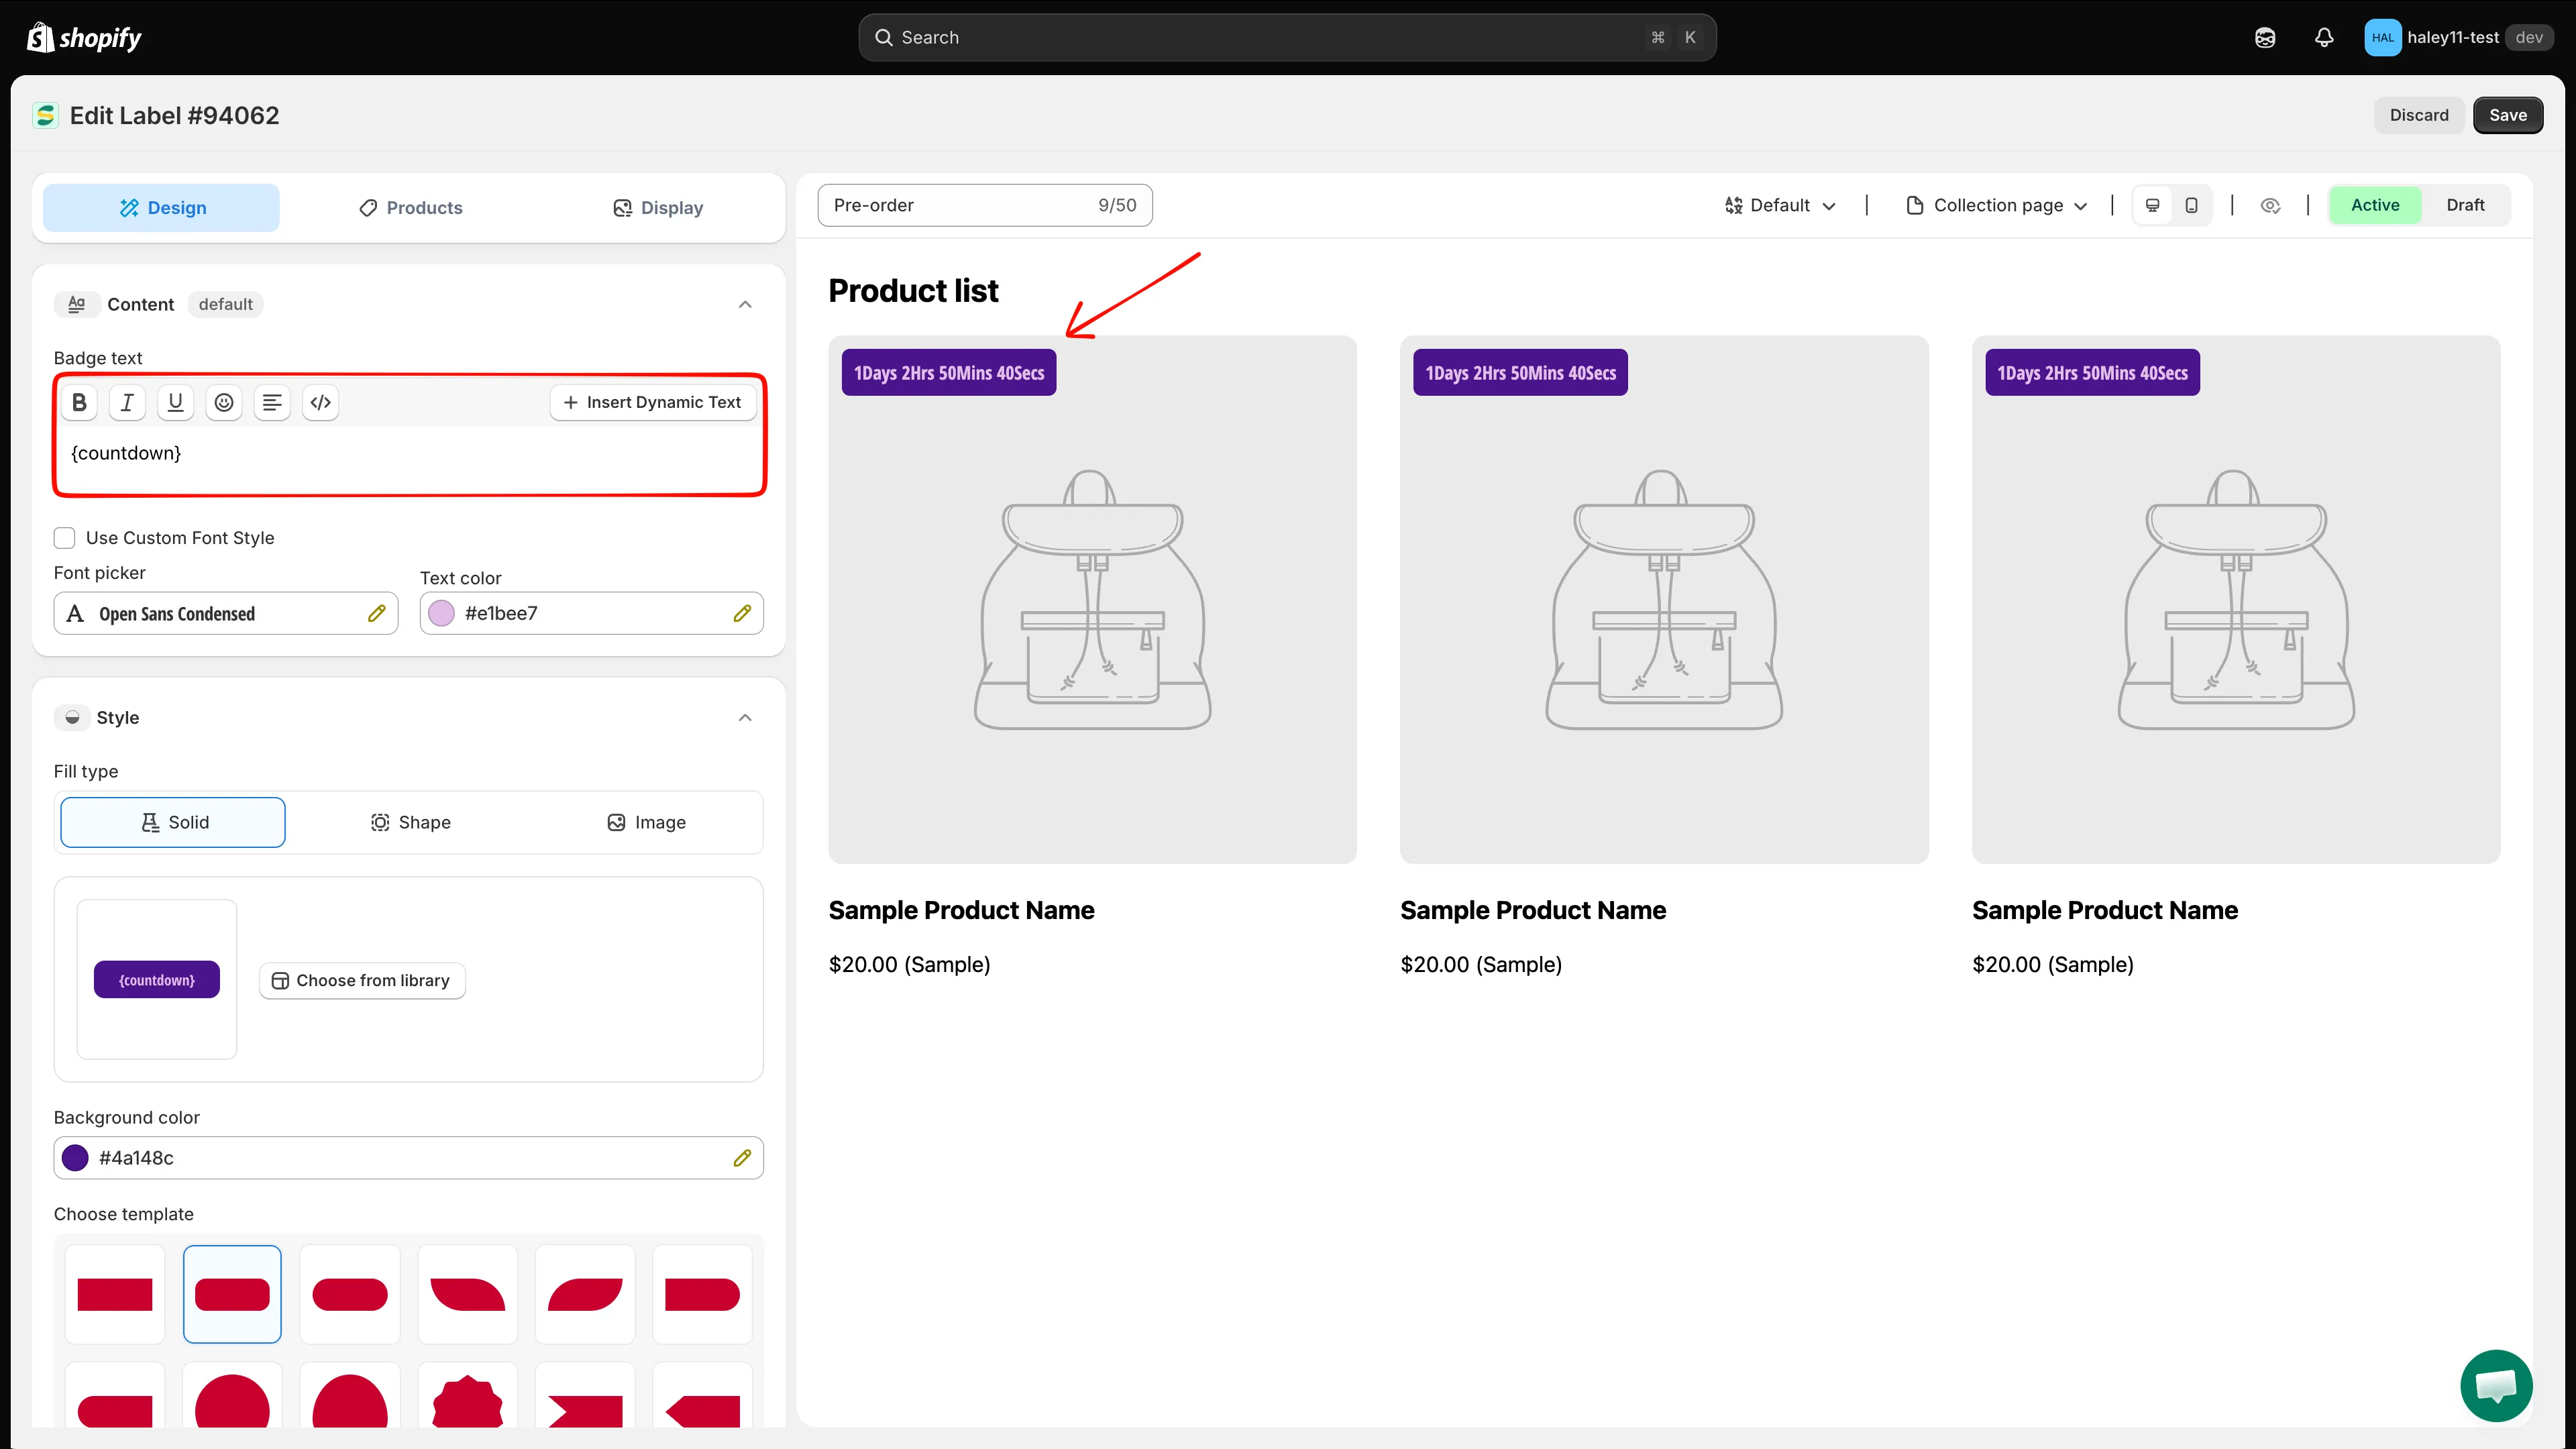
Choose a countdown style, copy the generated token, and paste it into the badge text.
For the complete variable workflow, see Dynamic Variables.
How the visibility rules work together
Section titled “How the visibility rules work together”| Configuration | When the badge can appear |
|---|---|
| Start and End only | At any time inside the overall date and time range |
| Start, End, and Daily recurring timer | Inside the overall range, on a selected weekday, and inside the recurring daily time window |
| Draft status | Never, even when the schedule matches |
| Active status | When the schedule and all other product and display conditions match |
Next steps
Section titled “Next steps”- Dynamic Variables — Insert
{countdown}and other live values into a text badge. - Target Products — Choose which products are eligible to display the scheduled badge.