
Integrations
Zapier
Send quote form data to thousands of other apps through Zapier, without writing any code.
Zapier connects apps that do not otherwise talk to each other. If the tool you want is not on the Third-party integration list, Zapier is almost certainly the answer — a spreadsheet, a Slack channel, your CRM, an accounting system.
Zapier is the simplest page in the app. There is one field — Zapier Webhook URL — and a Save button. No API key, no list to pick, no field mapping. All the real work happens on the Zapier side.
Step 1 — Build the trigger in Zapier
Section titled “Step 1 — Build the trigger in Zapier”Everything in this step happens in your Zapier account. You are building the half of the Zap that listens, so that it has an address the app can send to.
-
Create a new Zap
In Zapier, select Create, then New Zap.
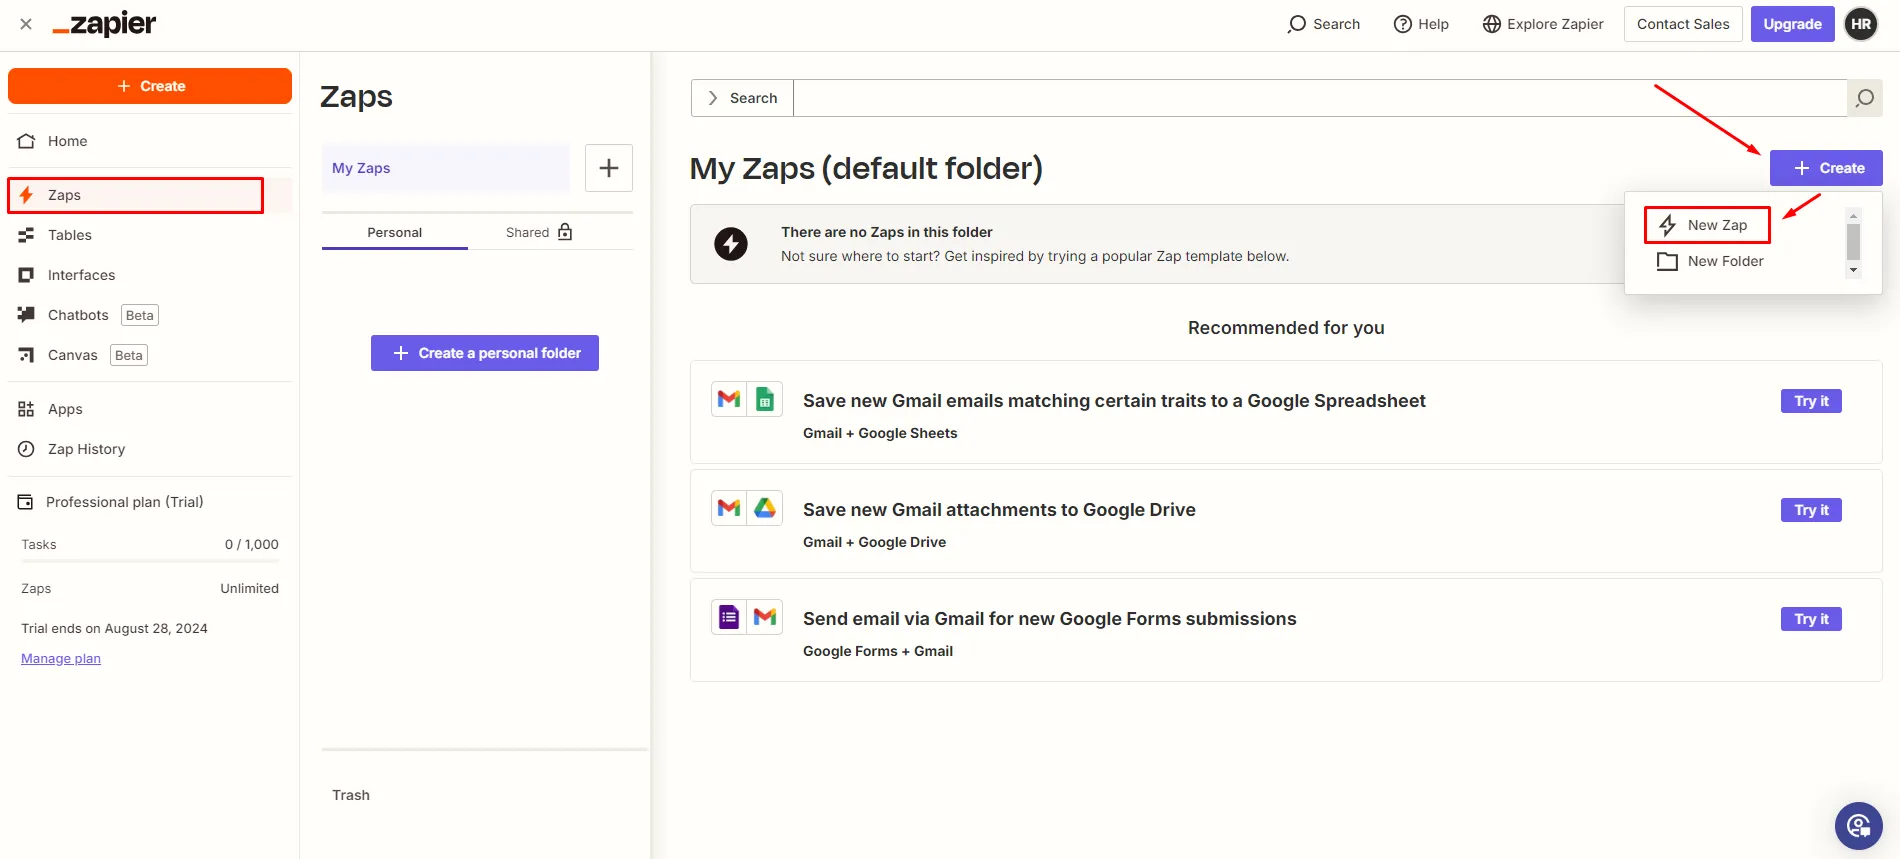
In Zapier, open Create and choose New Zap.
-
Choose Webhooks by Zapier as the trigger
Open the trigger and choose Webhooks by Zapier. This is the app that gives you an address to send to.
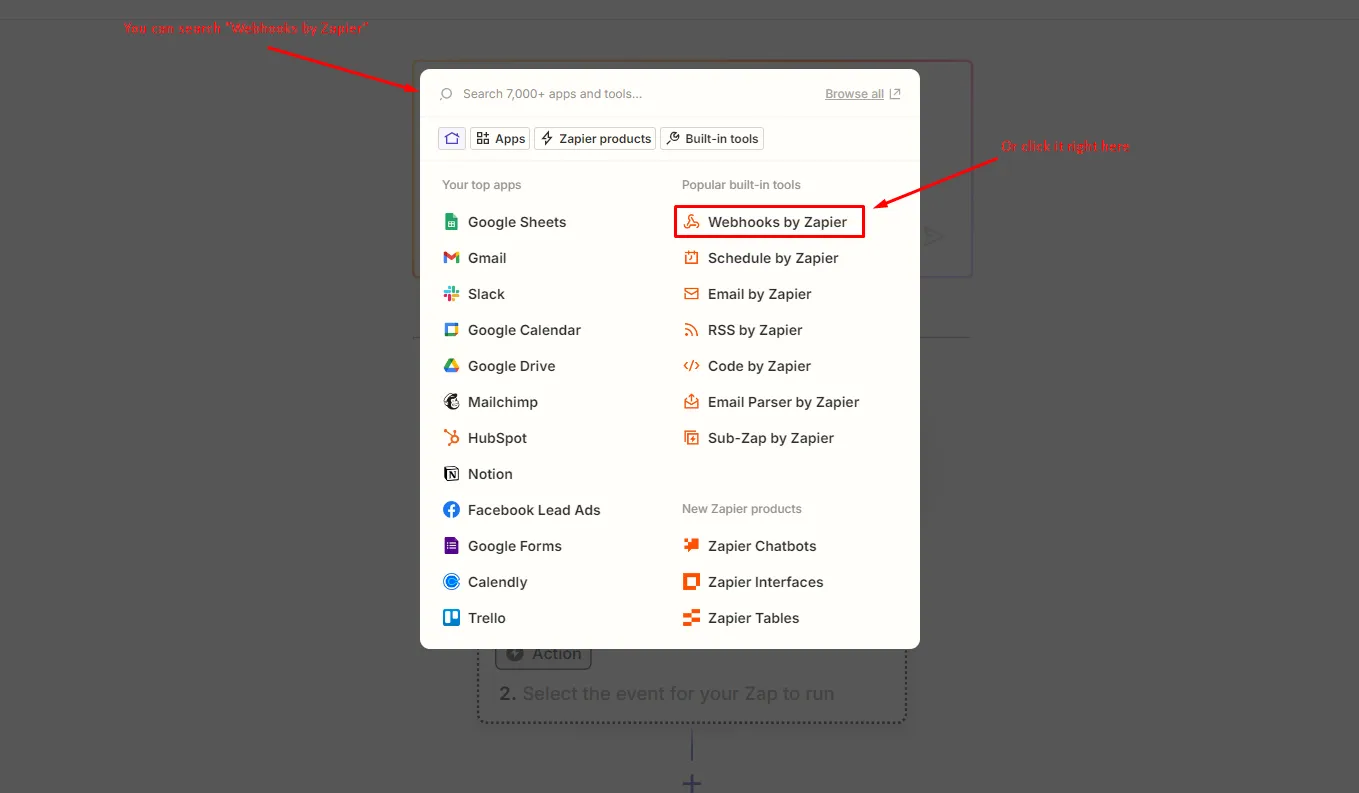
Pick Webhooks by Zapier as the trigger app.
-
Choose the Catch Hook event
Under App and Event, choose the event Catch Hook, then select Continue. Catch Hook simply receives whatever is sent to it.
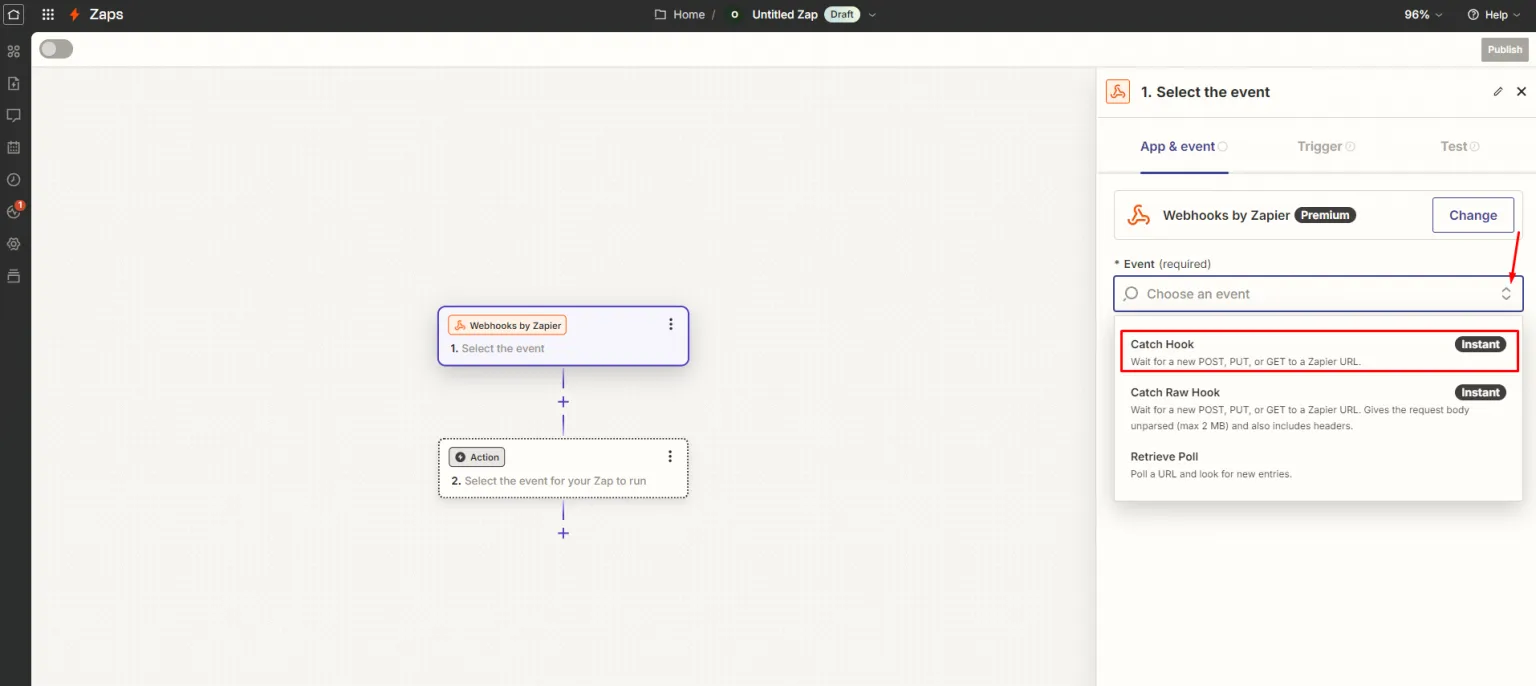
Choose the Catch Hook event.
-
Enter a Child key
Zapier then asks for a Child key. Any word will do — it does not have to match anything in the app. Type one and select Continue.
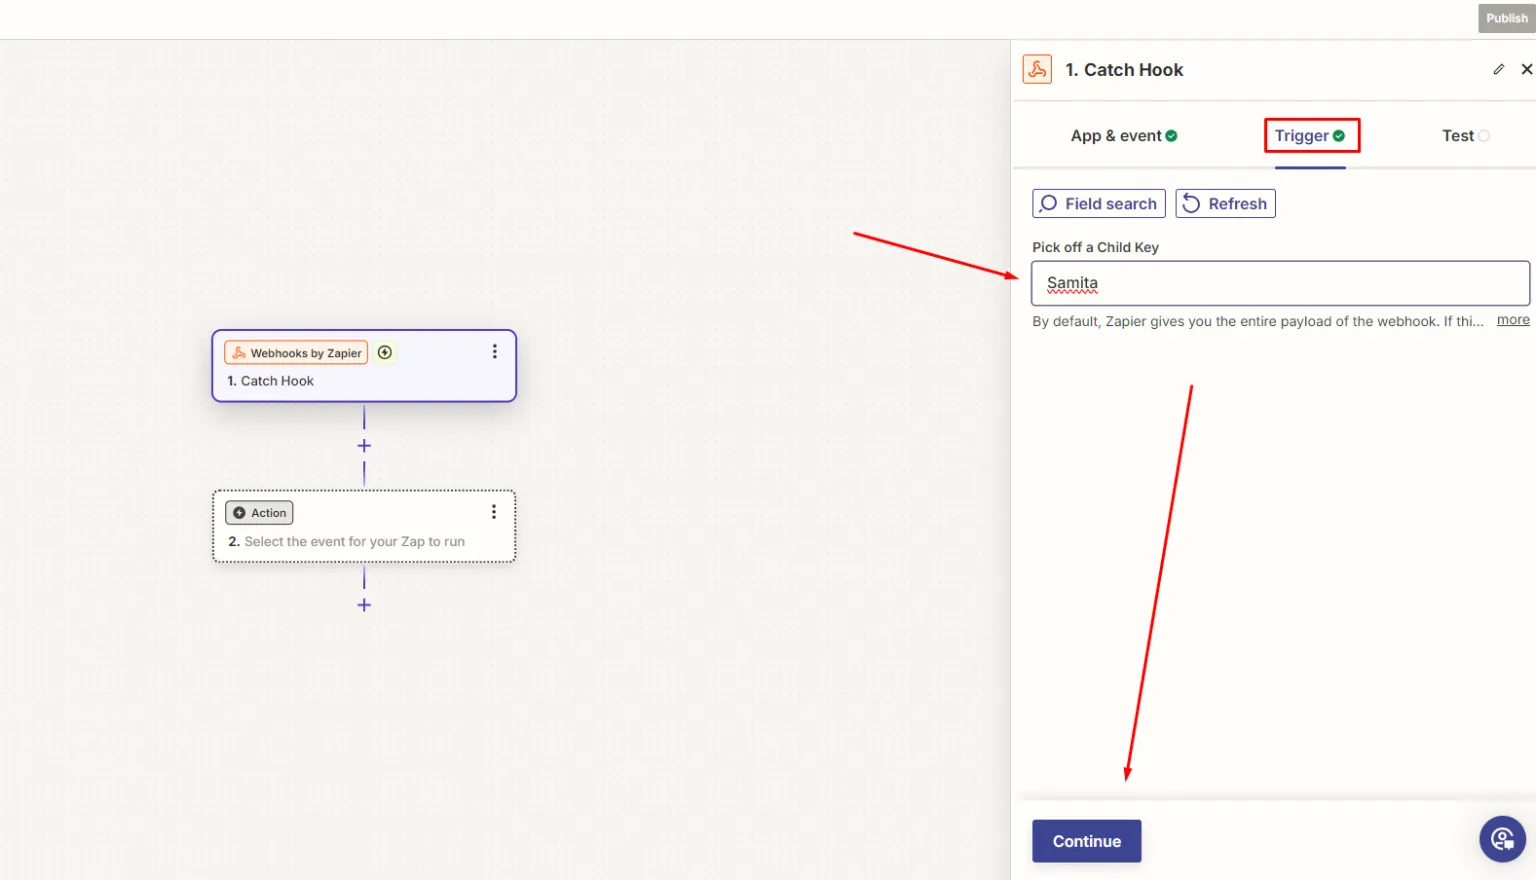
Any word works as the Child key.
-
Copy the webhook address
On the test screen Zapier shows a webhook address. Copy it — you paste it into the app next.
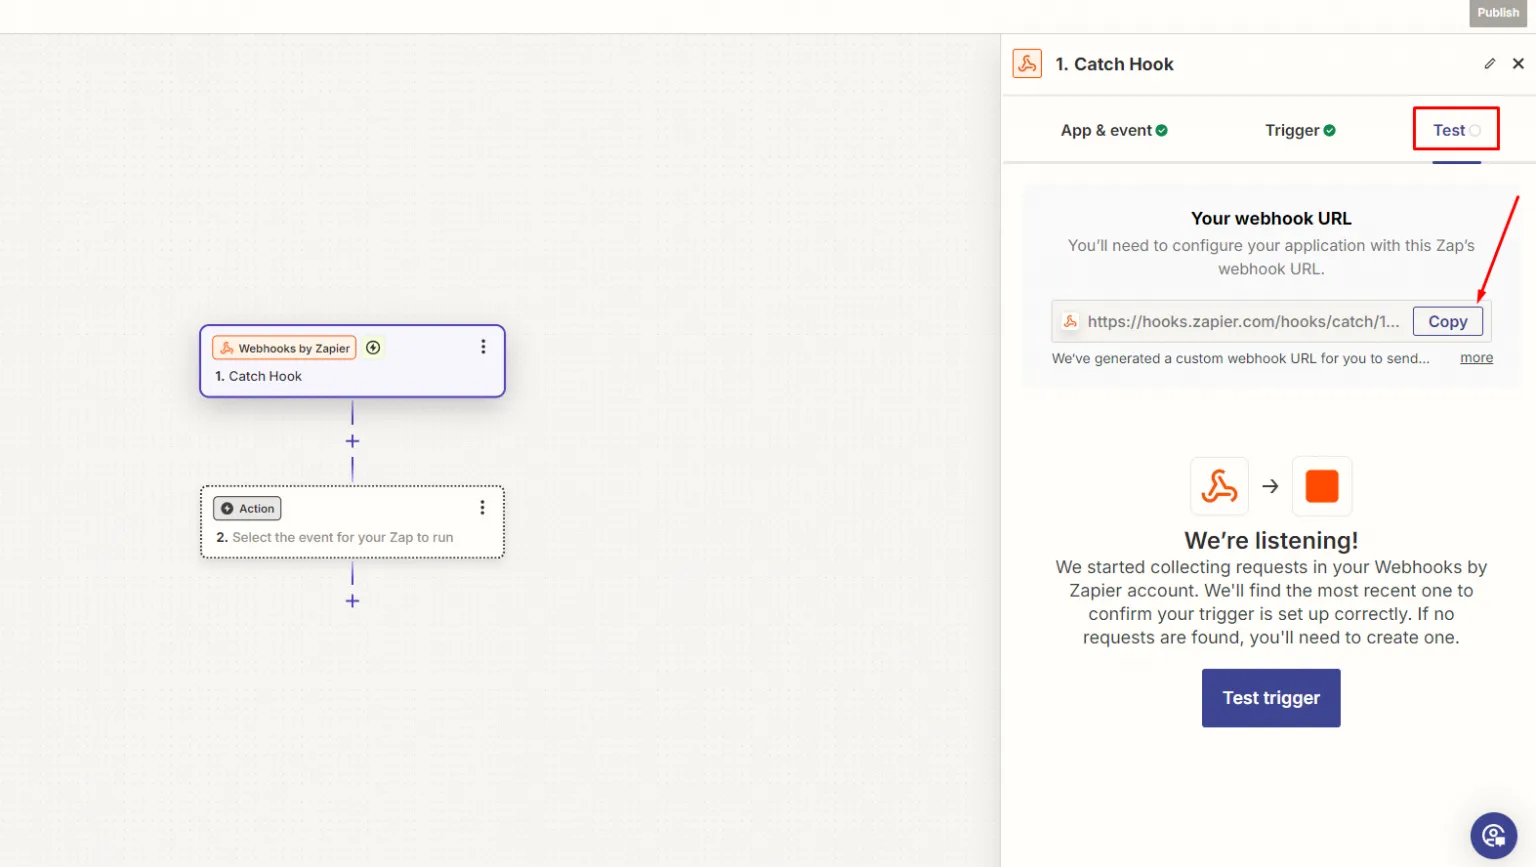
Copy the address under Your webhook URL — the app needs it next.
Step 2 — Paste the address into the app
Section titled “Step 2 — Paste the address into the app”-
Open the Integrations tab
In your Shopify admin, open SA Request a Quote, select Advanced settings, then open the Integrations tab.
-
Select Zapier
Under Third-party integration, select Zapier — described in the app as “Automate your workflow by connecting apps together”.
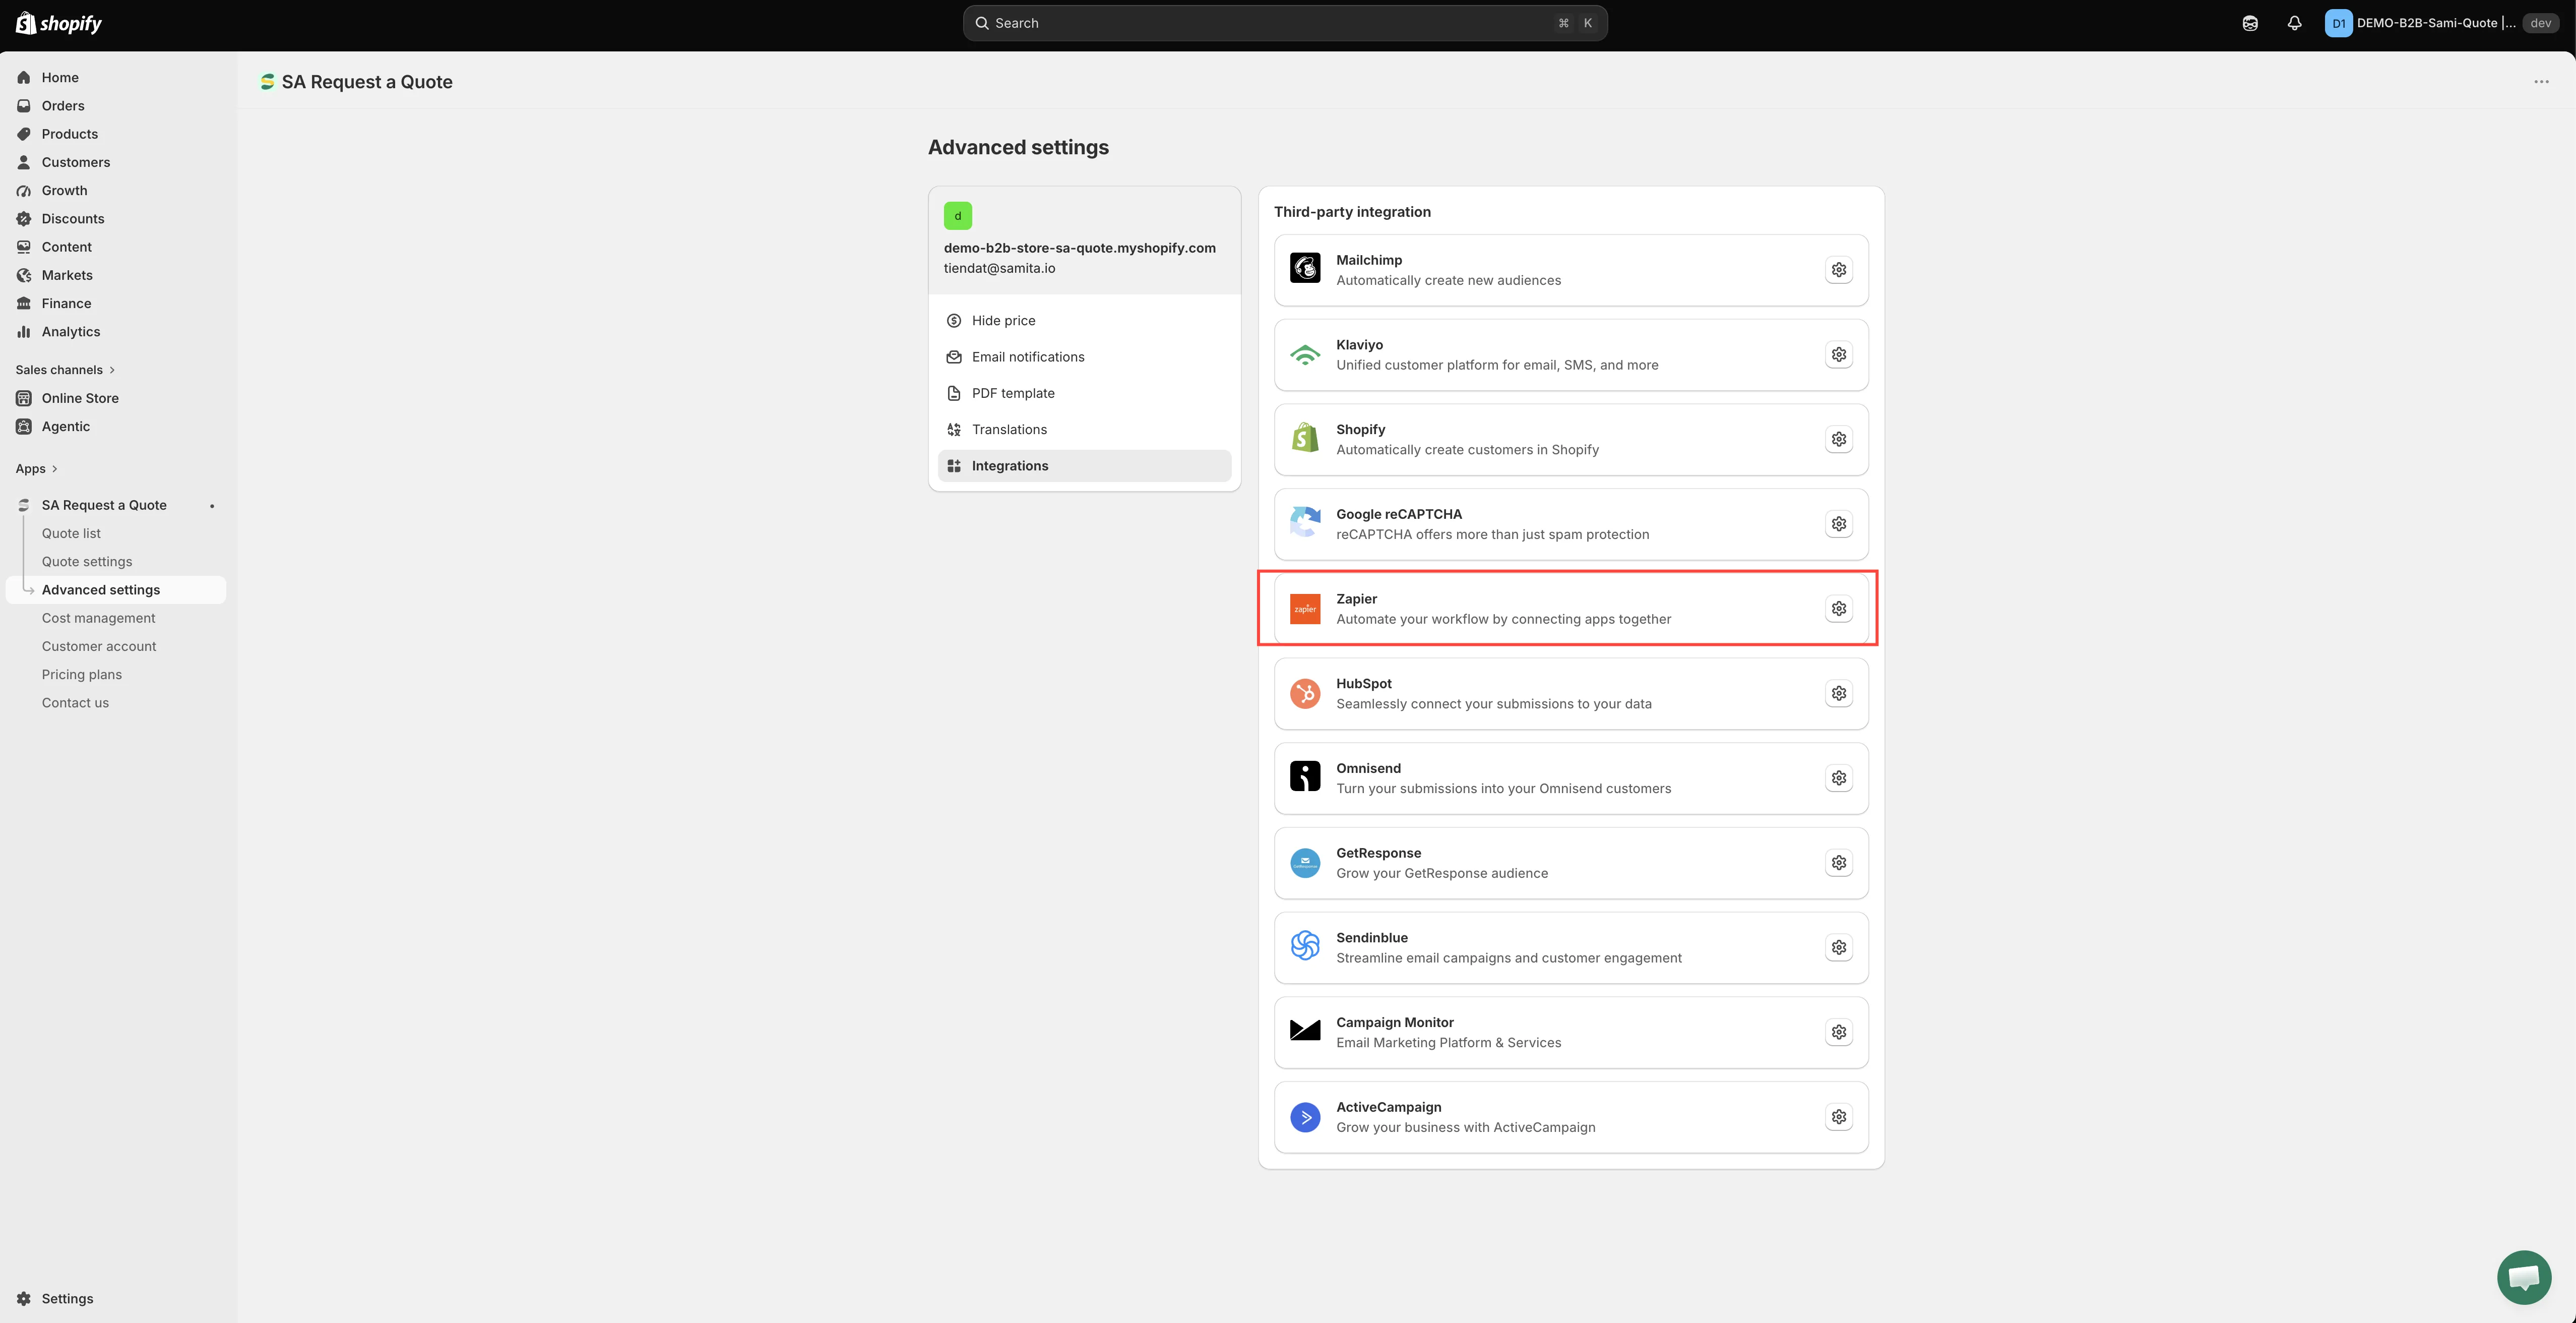
Zapier is how you reach a service the app does not list.
-
Paste it into Zapier Webhook URL
Paste the address you copied into the Zapier Webhook URL field. It is the only field on the page.
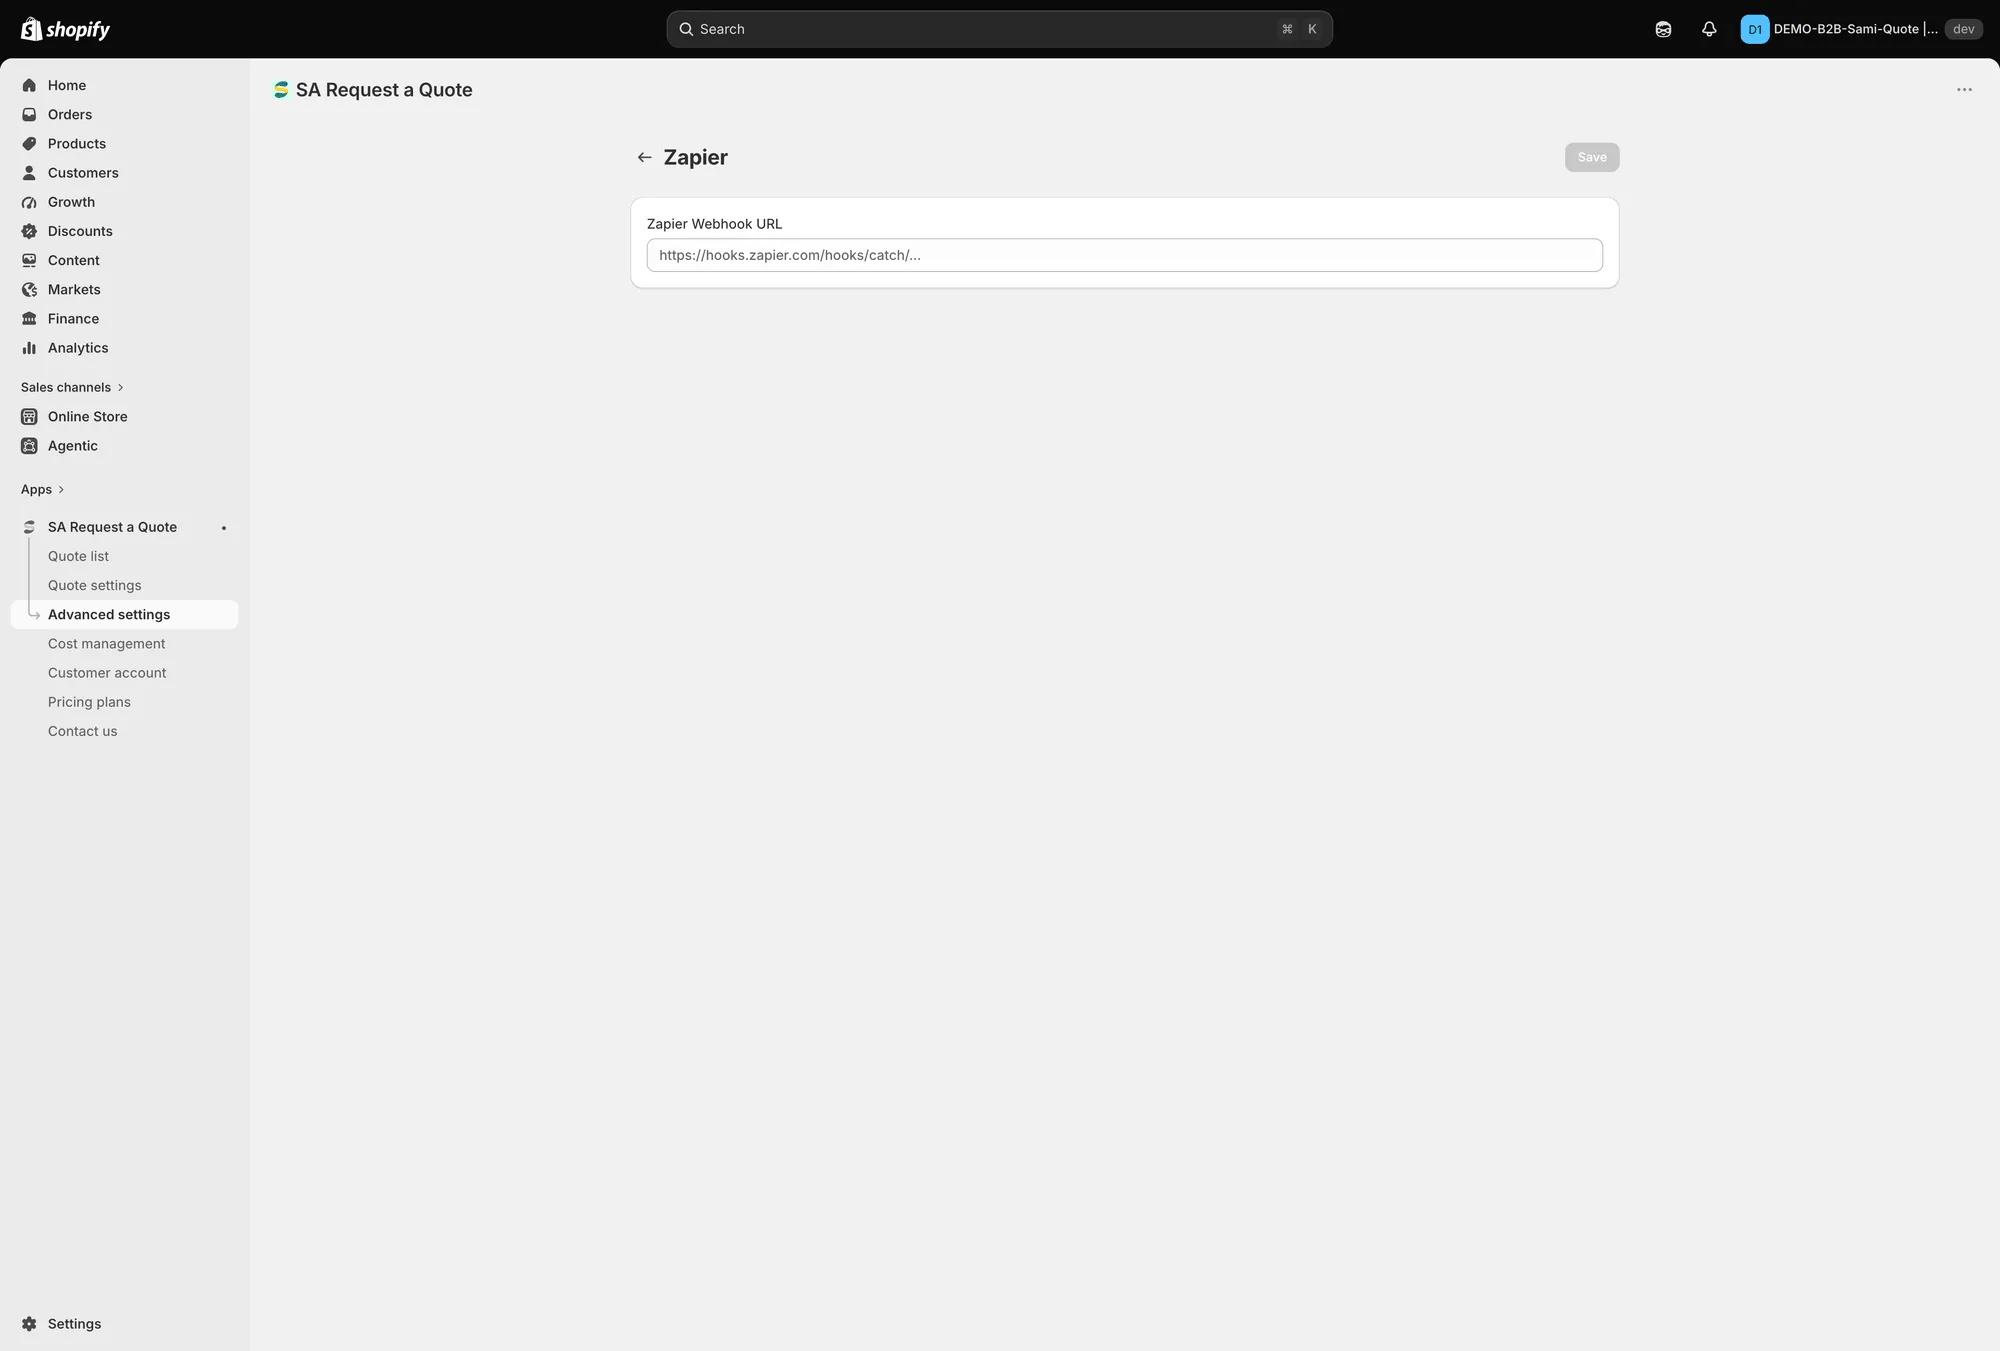
One field, one button: paste the address and select Save.
-
Save
Select Save. Quote submissions now go to that address.
Step 3 — Send Zapier some test data
Section titled “Step 3 — Send Zapier some test data”-
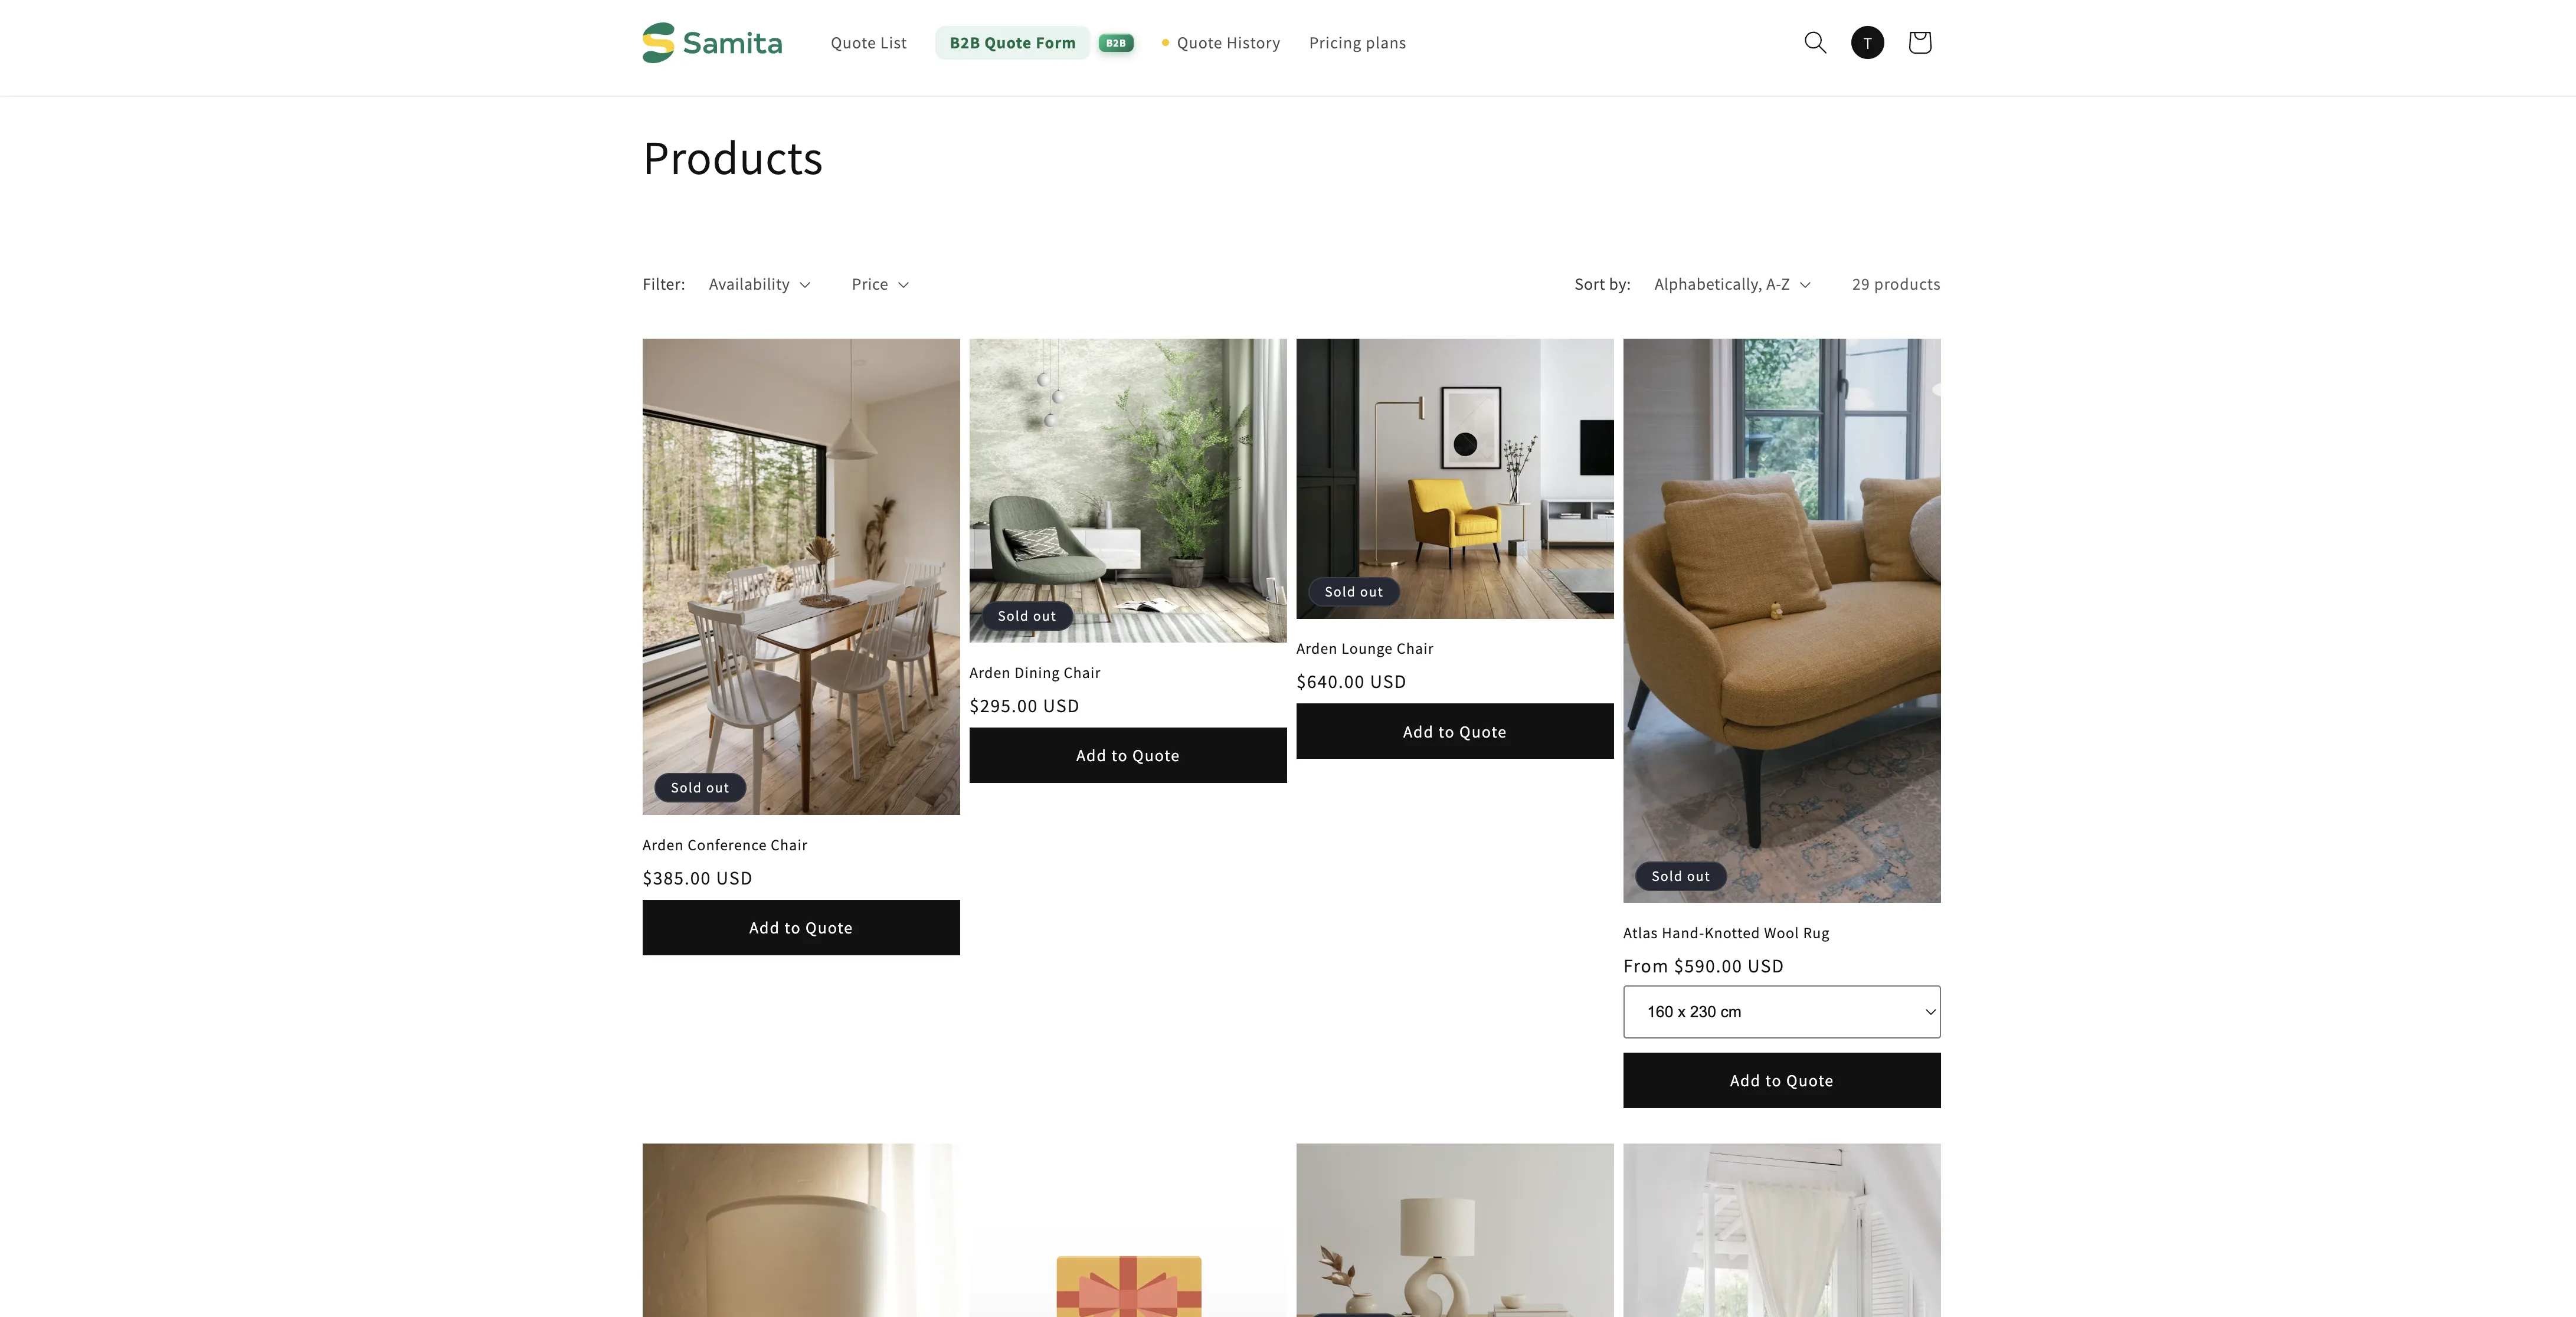
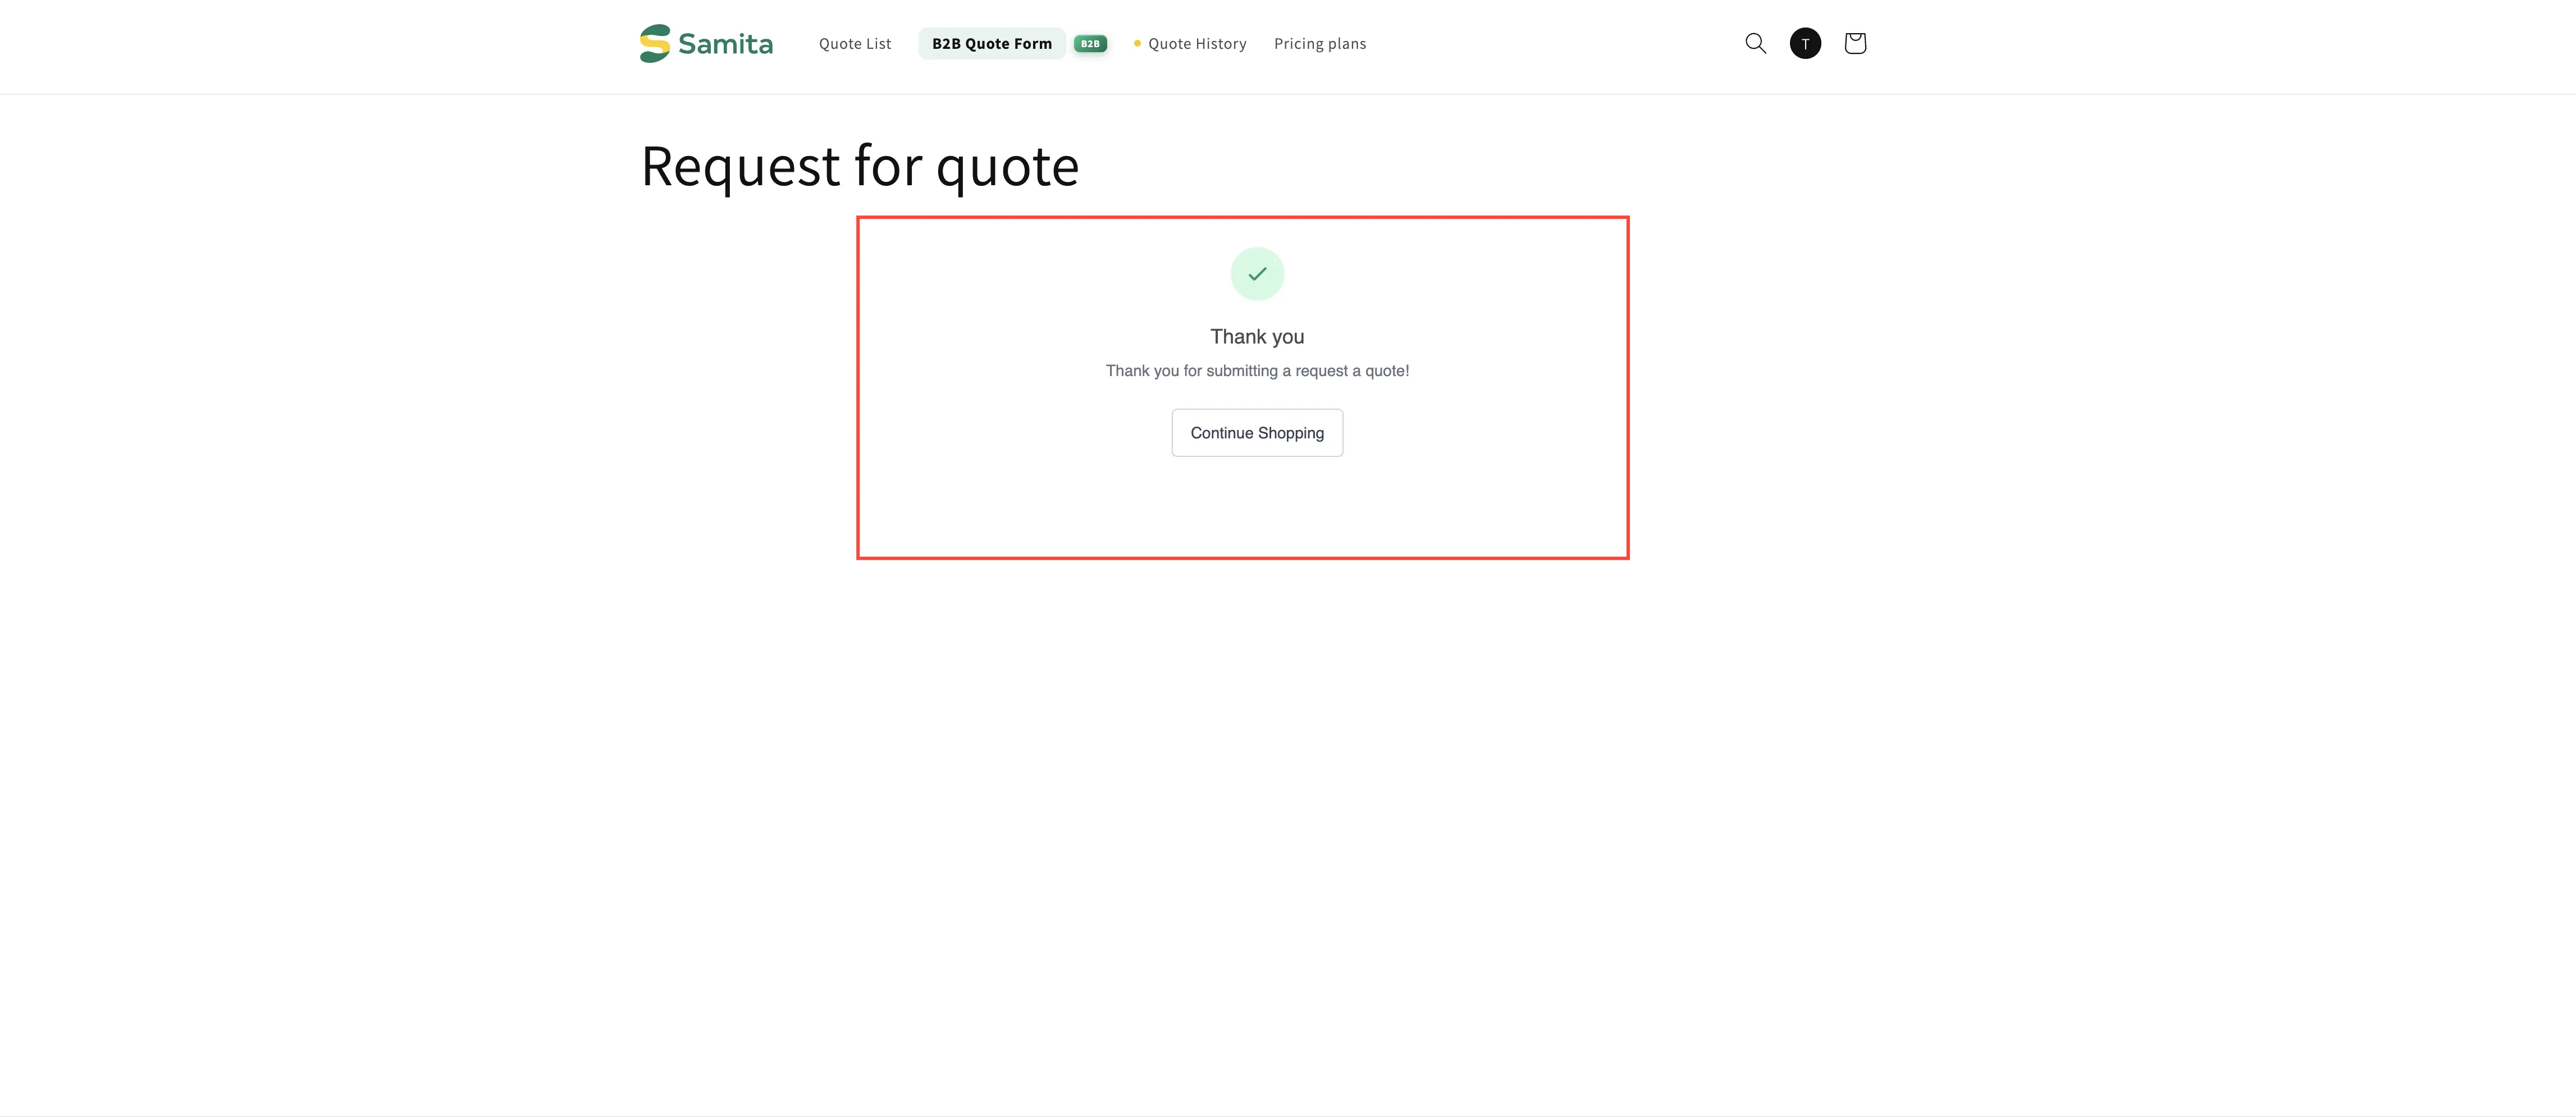
Submit a quote
Go to your storefront and submit a quote request as a customer would.
-
Test the trigger in Zapier
Test trigger asks Zapier to look for your submission.
Back in Zapier, select Test Trigger. Your quote data appears, and Zapier now knows the shape of it.
-
Continue with the record Zapier found
Select Continue with selected record. Zapier keeps that submission as the example it matches your fields against for the rest of the Zap.
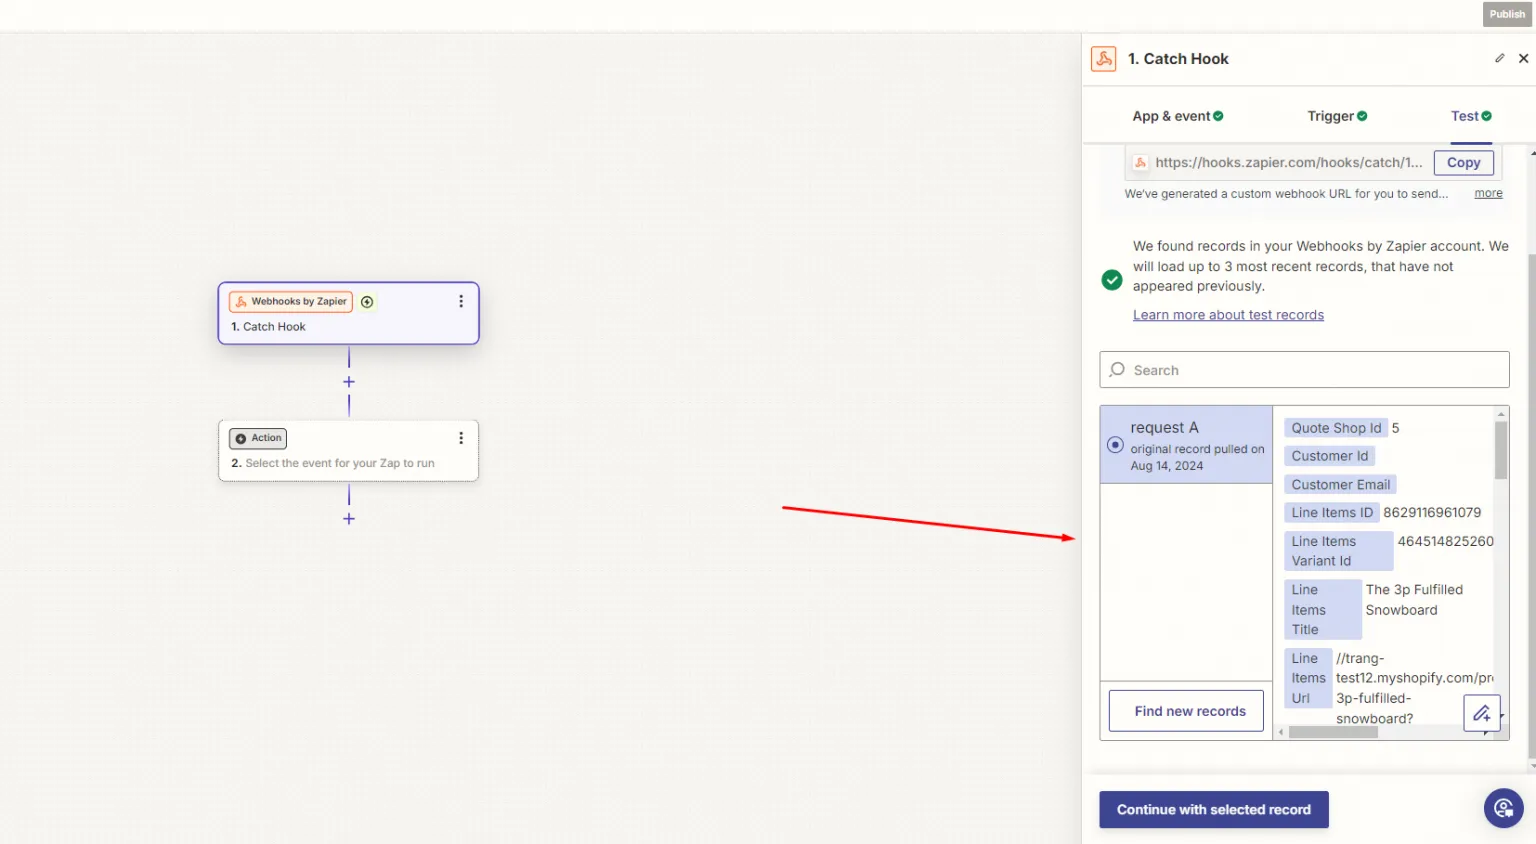
Select Continue with selected record to lock in the example.
Step 4 — Choose where the data goes
Section titled “Step 4 — Choose where the data goes”Now pick the app that receives it. Zapier supports thousands; a spreadsheet is a common first choice because it is easy to check.
Inside Zapier, select your app and the action you want, sign in to that app when Zapier asks, complete the steps on the Action tab so the quote fields line up with that app’s fields, and turn the Zap on. This matching is a Zapier step — there is nothing to map back in the Shopify admin.
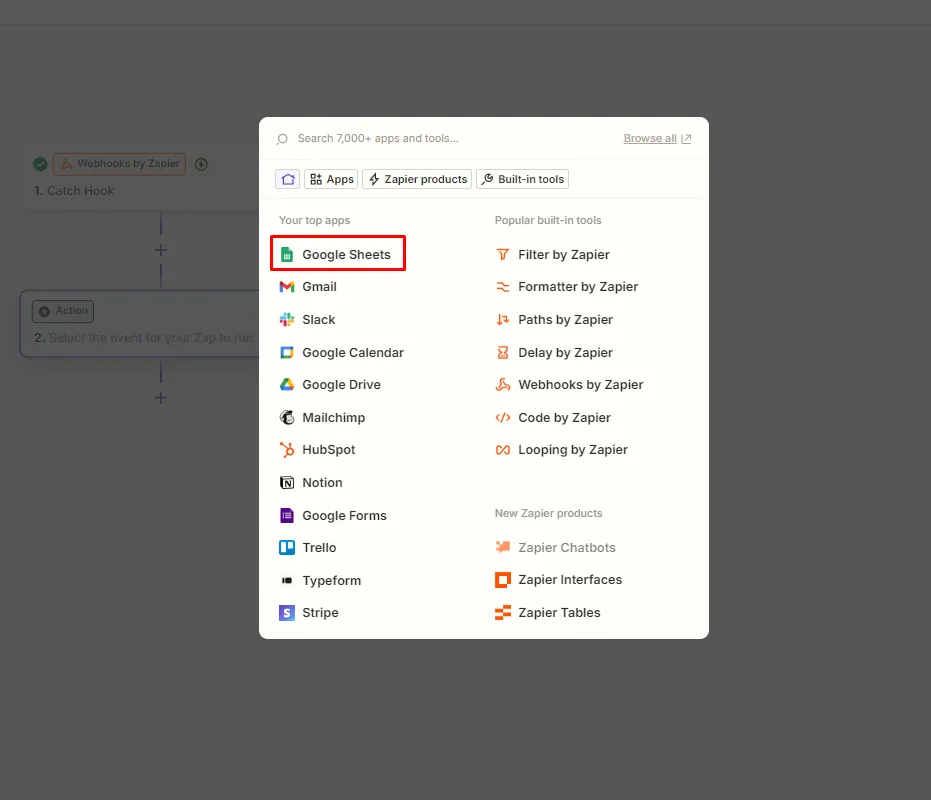
Google Sheets, as the worked example.
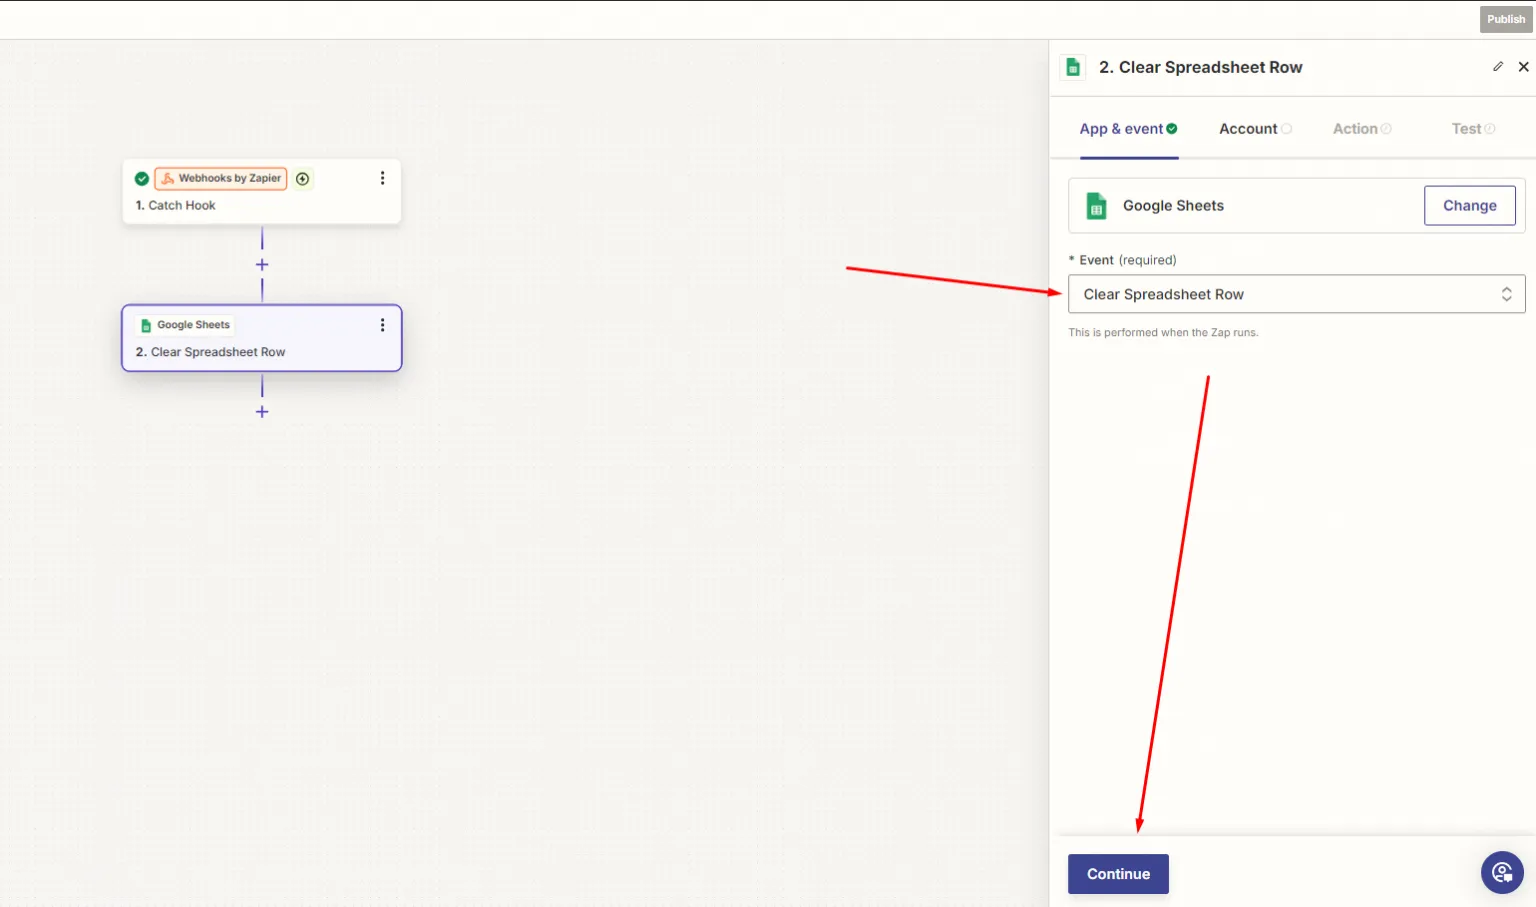
Point the action at your spreadsheet.
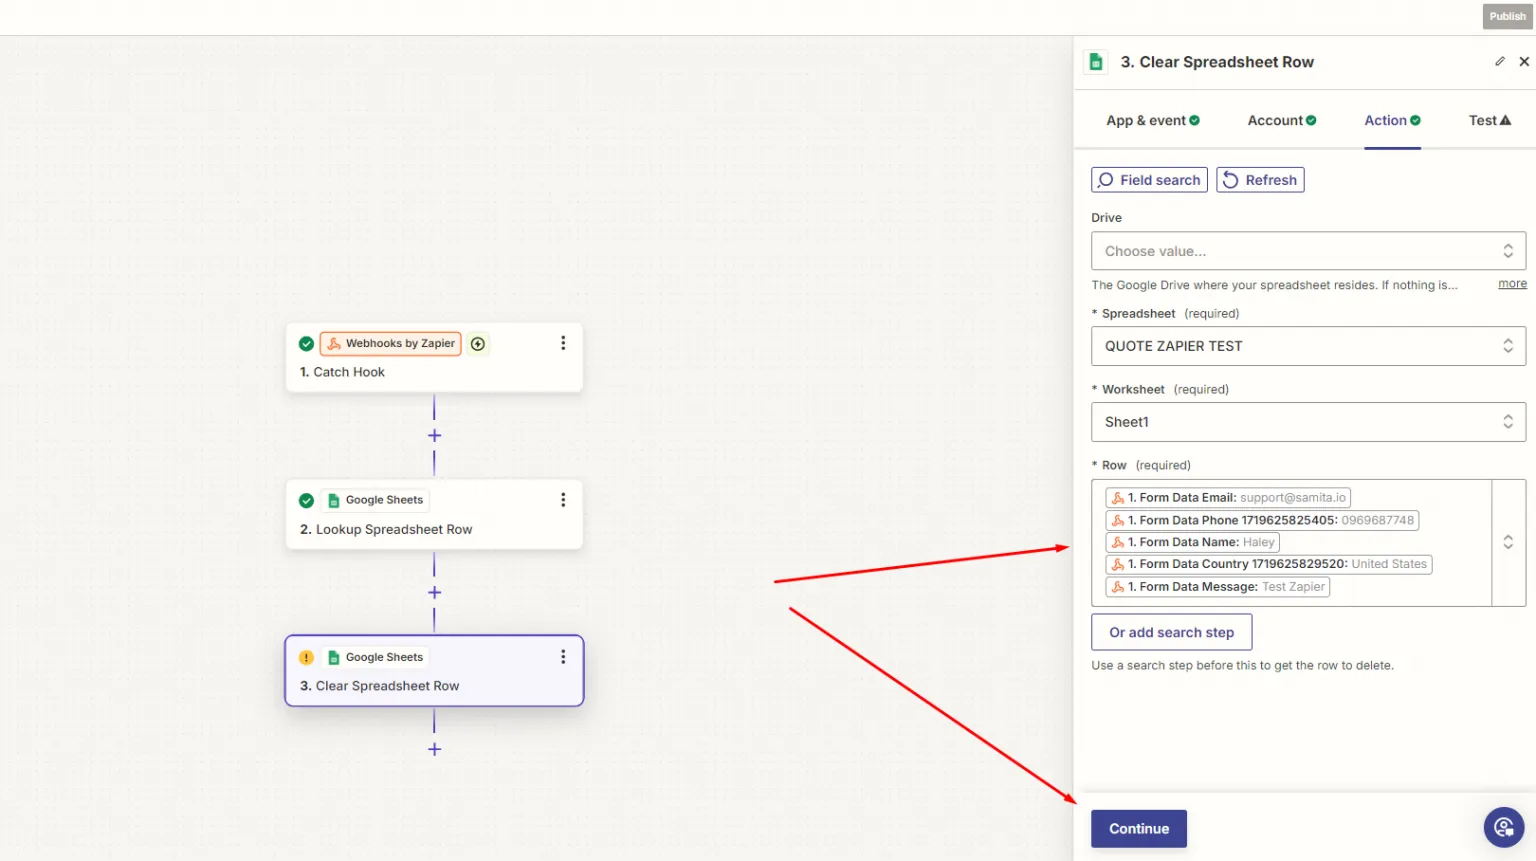
Each quote field lands in its own column — this mapping happens in Zapier, not in the app.
What people use this for
Section titled “What people use this for”| Destination | Why |
|---|---|
| Google Sheets | A running log of every request, easy to filter and share. |
| Slack or Teams | The team sees new quotes immediately without watching an inbox. |
| Your CRM | Quote leads land in the same pipeline as everything else. |
| Accounting software | A head start on invoicing for quotes you expect to win. |
If nothing reaches Zapier
Section titled “If nothing reaches Zapier”- Check you selected Save. The address is not live until you do.
- Check the address is complete. A truncated paste fails silently.
- Check the Zap is turned on in Zapier. A Zap left in draft receives test data but does nothing with real submissions.
Next steps
Section titled “Next steps”- Integrations overview — the providers you can connect directly, no Zapier needed
- Emails sent to admin — get told about new quotes without a third-party tool
- Plan comparison — what the PRO plan includes