
Create a volume pricing based on product quantity
Discount a product automatically as customers buy more of it, using quantity tiers you define.
This is the most common type of volume pricing: the more a customer buys of a product, the lower the price per unit gets.
Steps to manage
Section titled “Steps to manage”-
Start a new rule
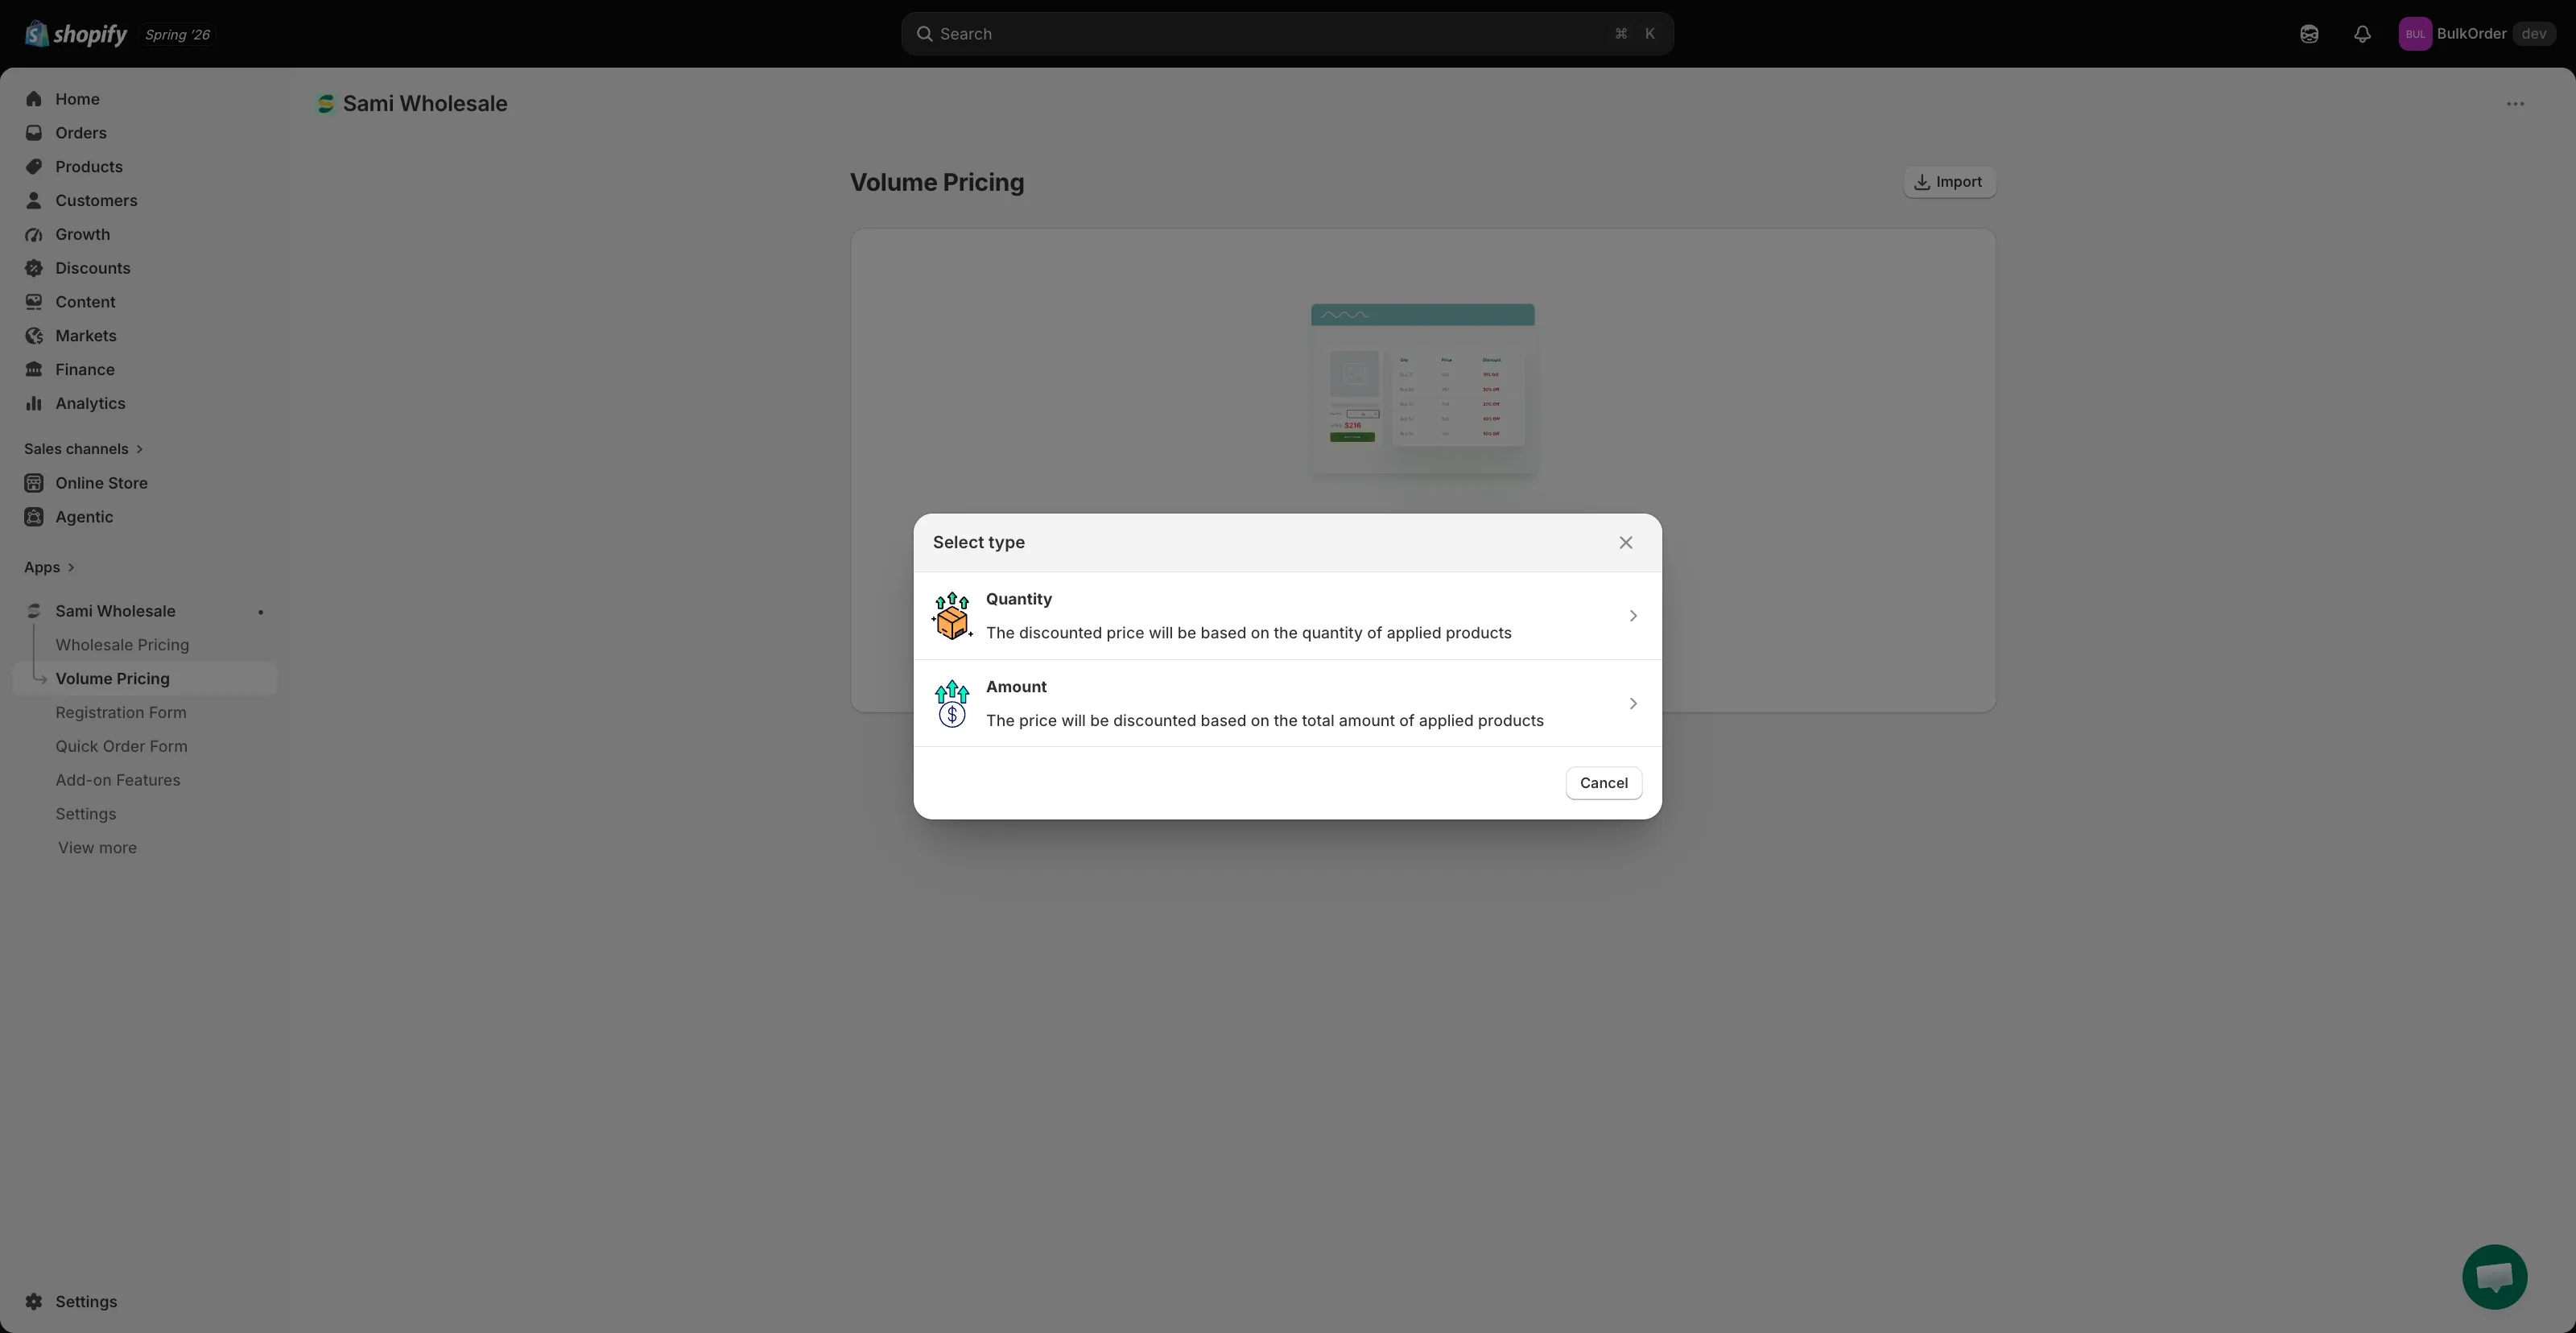
Section titled “Start a new rule”Open the app, click Volume Pricing, click Add new volume pricing (or Create new volume pricing if you already have rules), then choose Quantity in the Select type dialog.
-
Name the rule and set its status
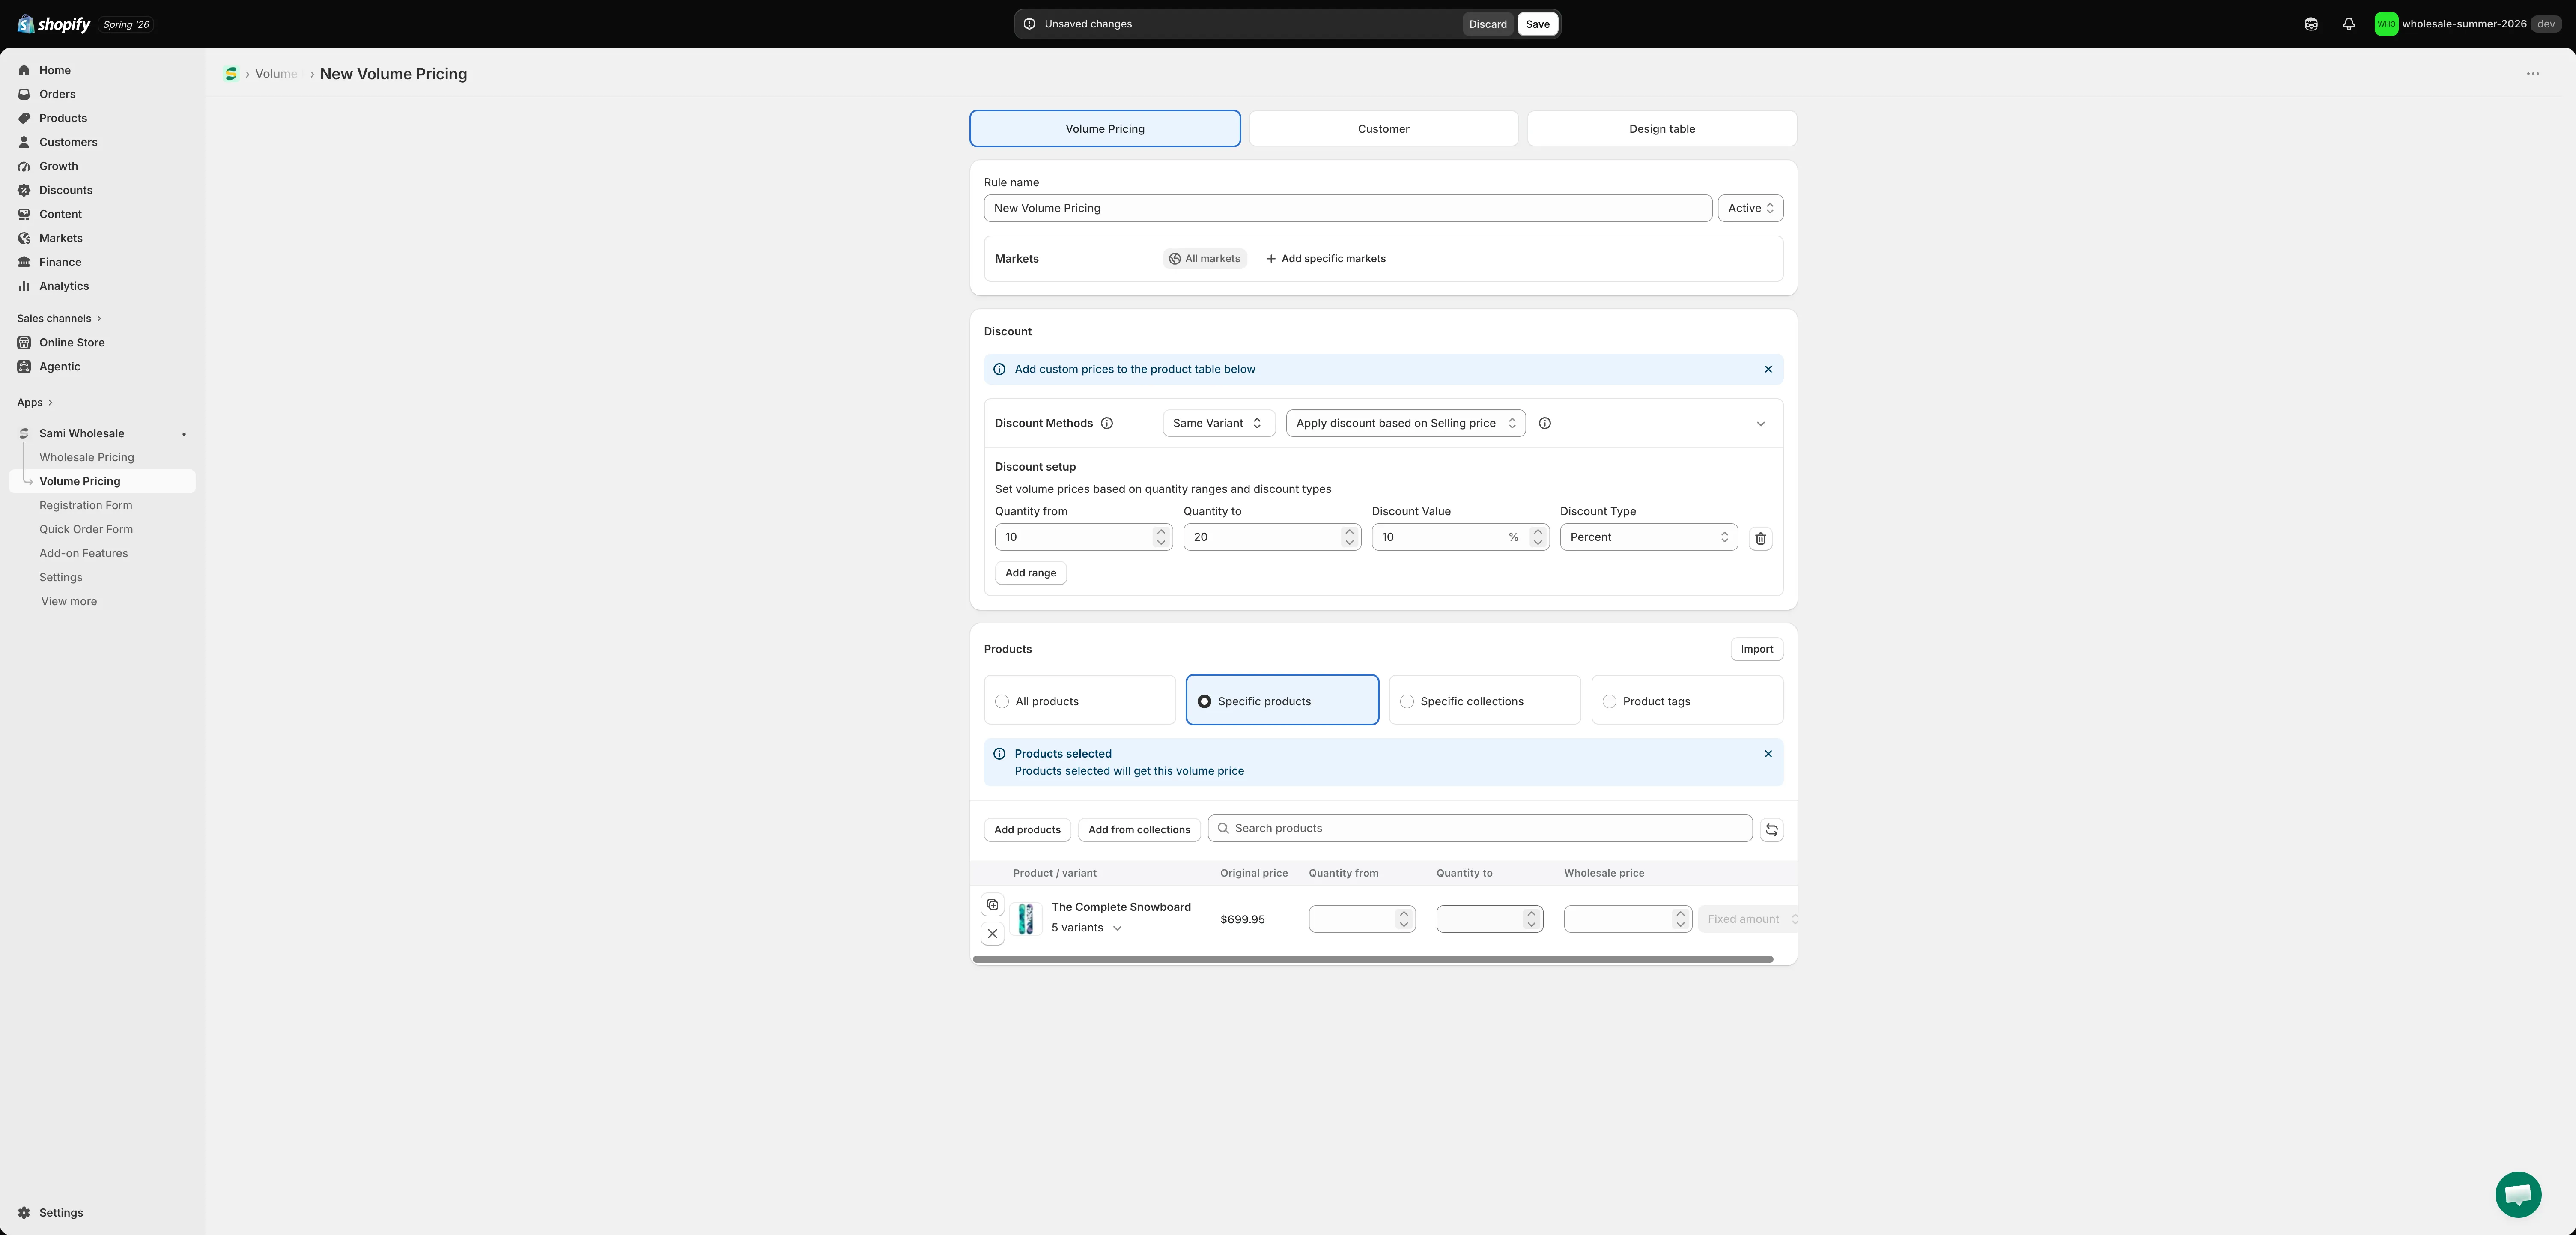
Section titled “Name the rule and set its status”At the top of the Volume Pricing tab, name the rule in Rule name, then use the Status dropdown to choose Active, Draft, or Schedule. Choosing Schedule reveals Start date and End date fields so you can set when the rule turns on and off.
-
Choose a market
Section titled “Choose a market”In Markets, choose All markets or click Add specific markets and pick the ones you want.
-
Set the discount method and pricing source
Section titled “Set the discount method and pricing source”In the Discount section, under Discount Methods, choose Same Variant, Mix Variants, or Mix Products — this controls which items count toward each quantity tier. See Discount Methods for Volume Pricing for details.
Next to it, use Pricing source to choose whether the discount is calculated from the product’s Selling price or its Compare-at price. See Choose pricing source.
-
Set up the quantity tiers
Section titled “Set up the quantity tiers”Still in the Discount section, under Discount setup, add your tiers — Quantity from, Quantity to, Discount Value, and Discount Type (Percent, Amount, or New price). Click Add range for more tiers. For example:
- 10–19 → 10% off
- 20–29 → 15% off
- 30+ → 20% off
The more a customer buys, the better the price they get.
-
Choose which products it applies to
Section titled “Choose which products it applies to”In Products, choose All products, Specific products, Specific collections, or Product tags. If you pick anything other than All products, a table appears below listing each matching product. You can optionally set a custom Quantity from/to and price for individual products or variants directly in that table, overriding the tiers set above just for them.
Note: If you add Specific products, please add a maximum of 500 products per rule to ensure successful metafield updates.
-
Set customer eligibility
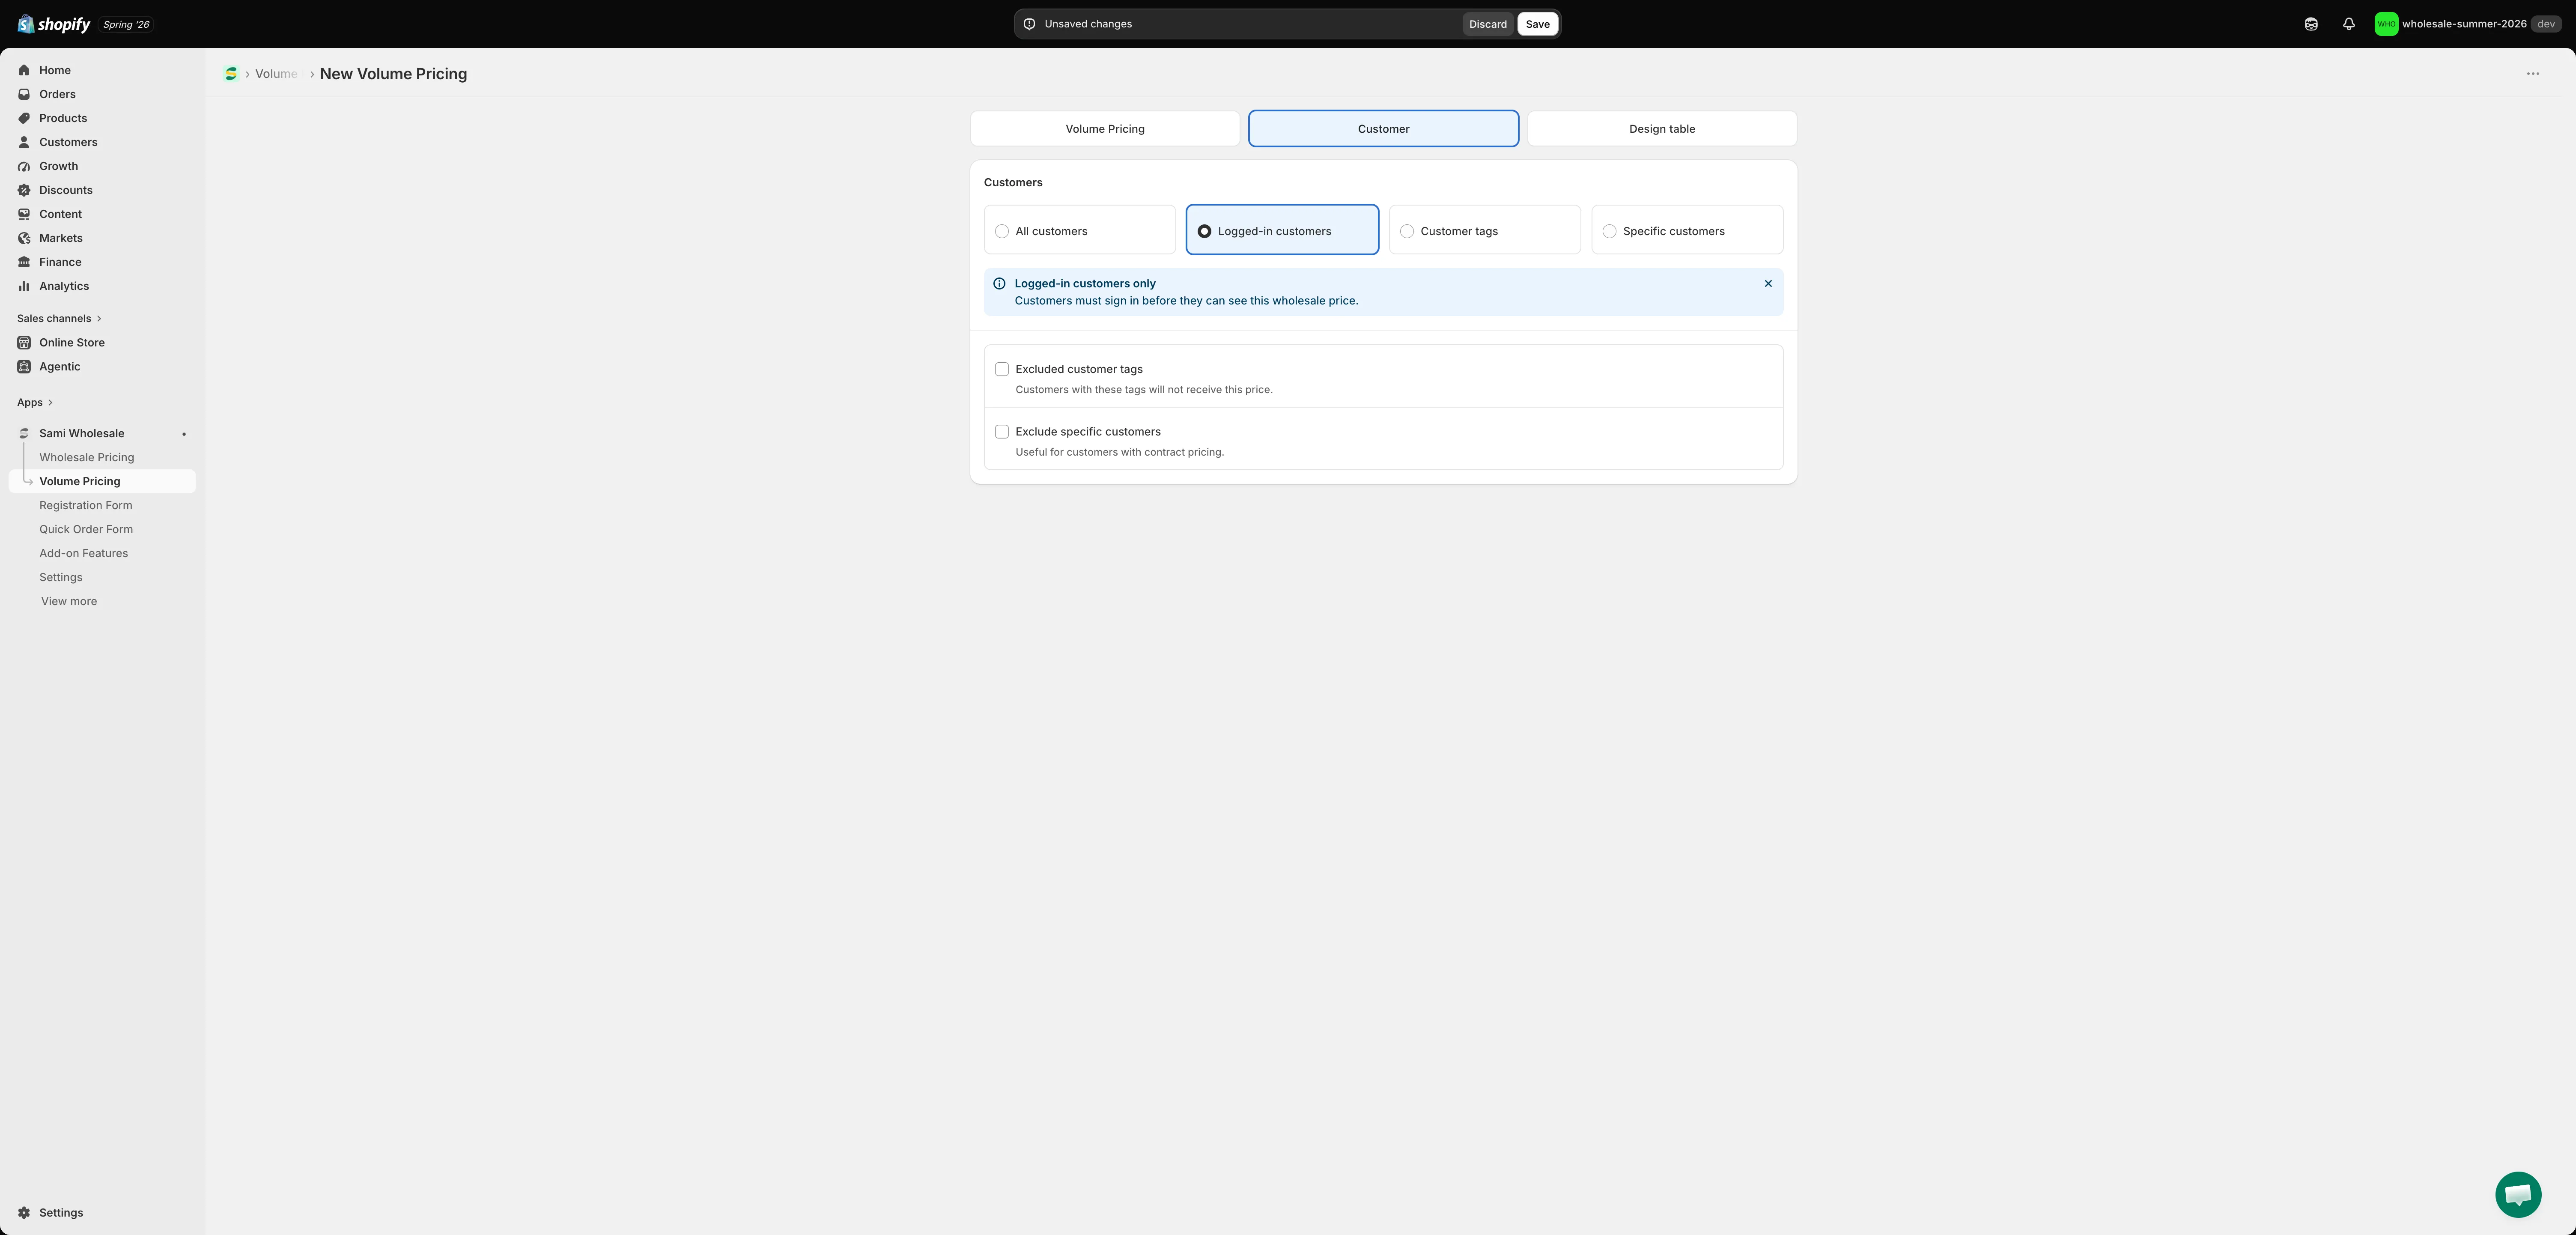
Section titled “Set customer eligibility”Click the Customer tab. Choose All customers, Logged-in customers, Customer tags, or Specific customers. Below that, tick Excluded customer tags or Exclude specific customers if you want to hide the price from certain customers (useful for customers on contract pricing).
-
Design and preview the pricing table
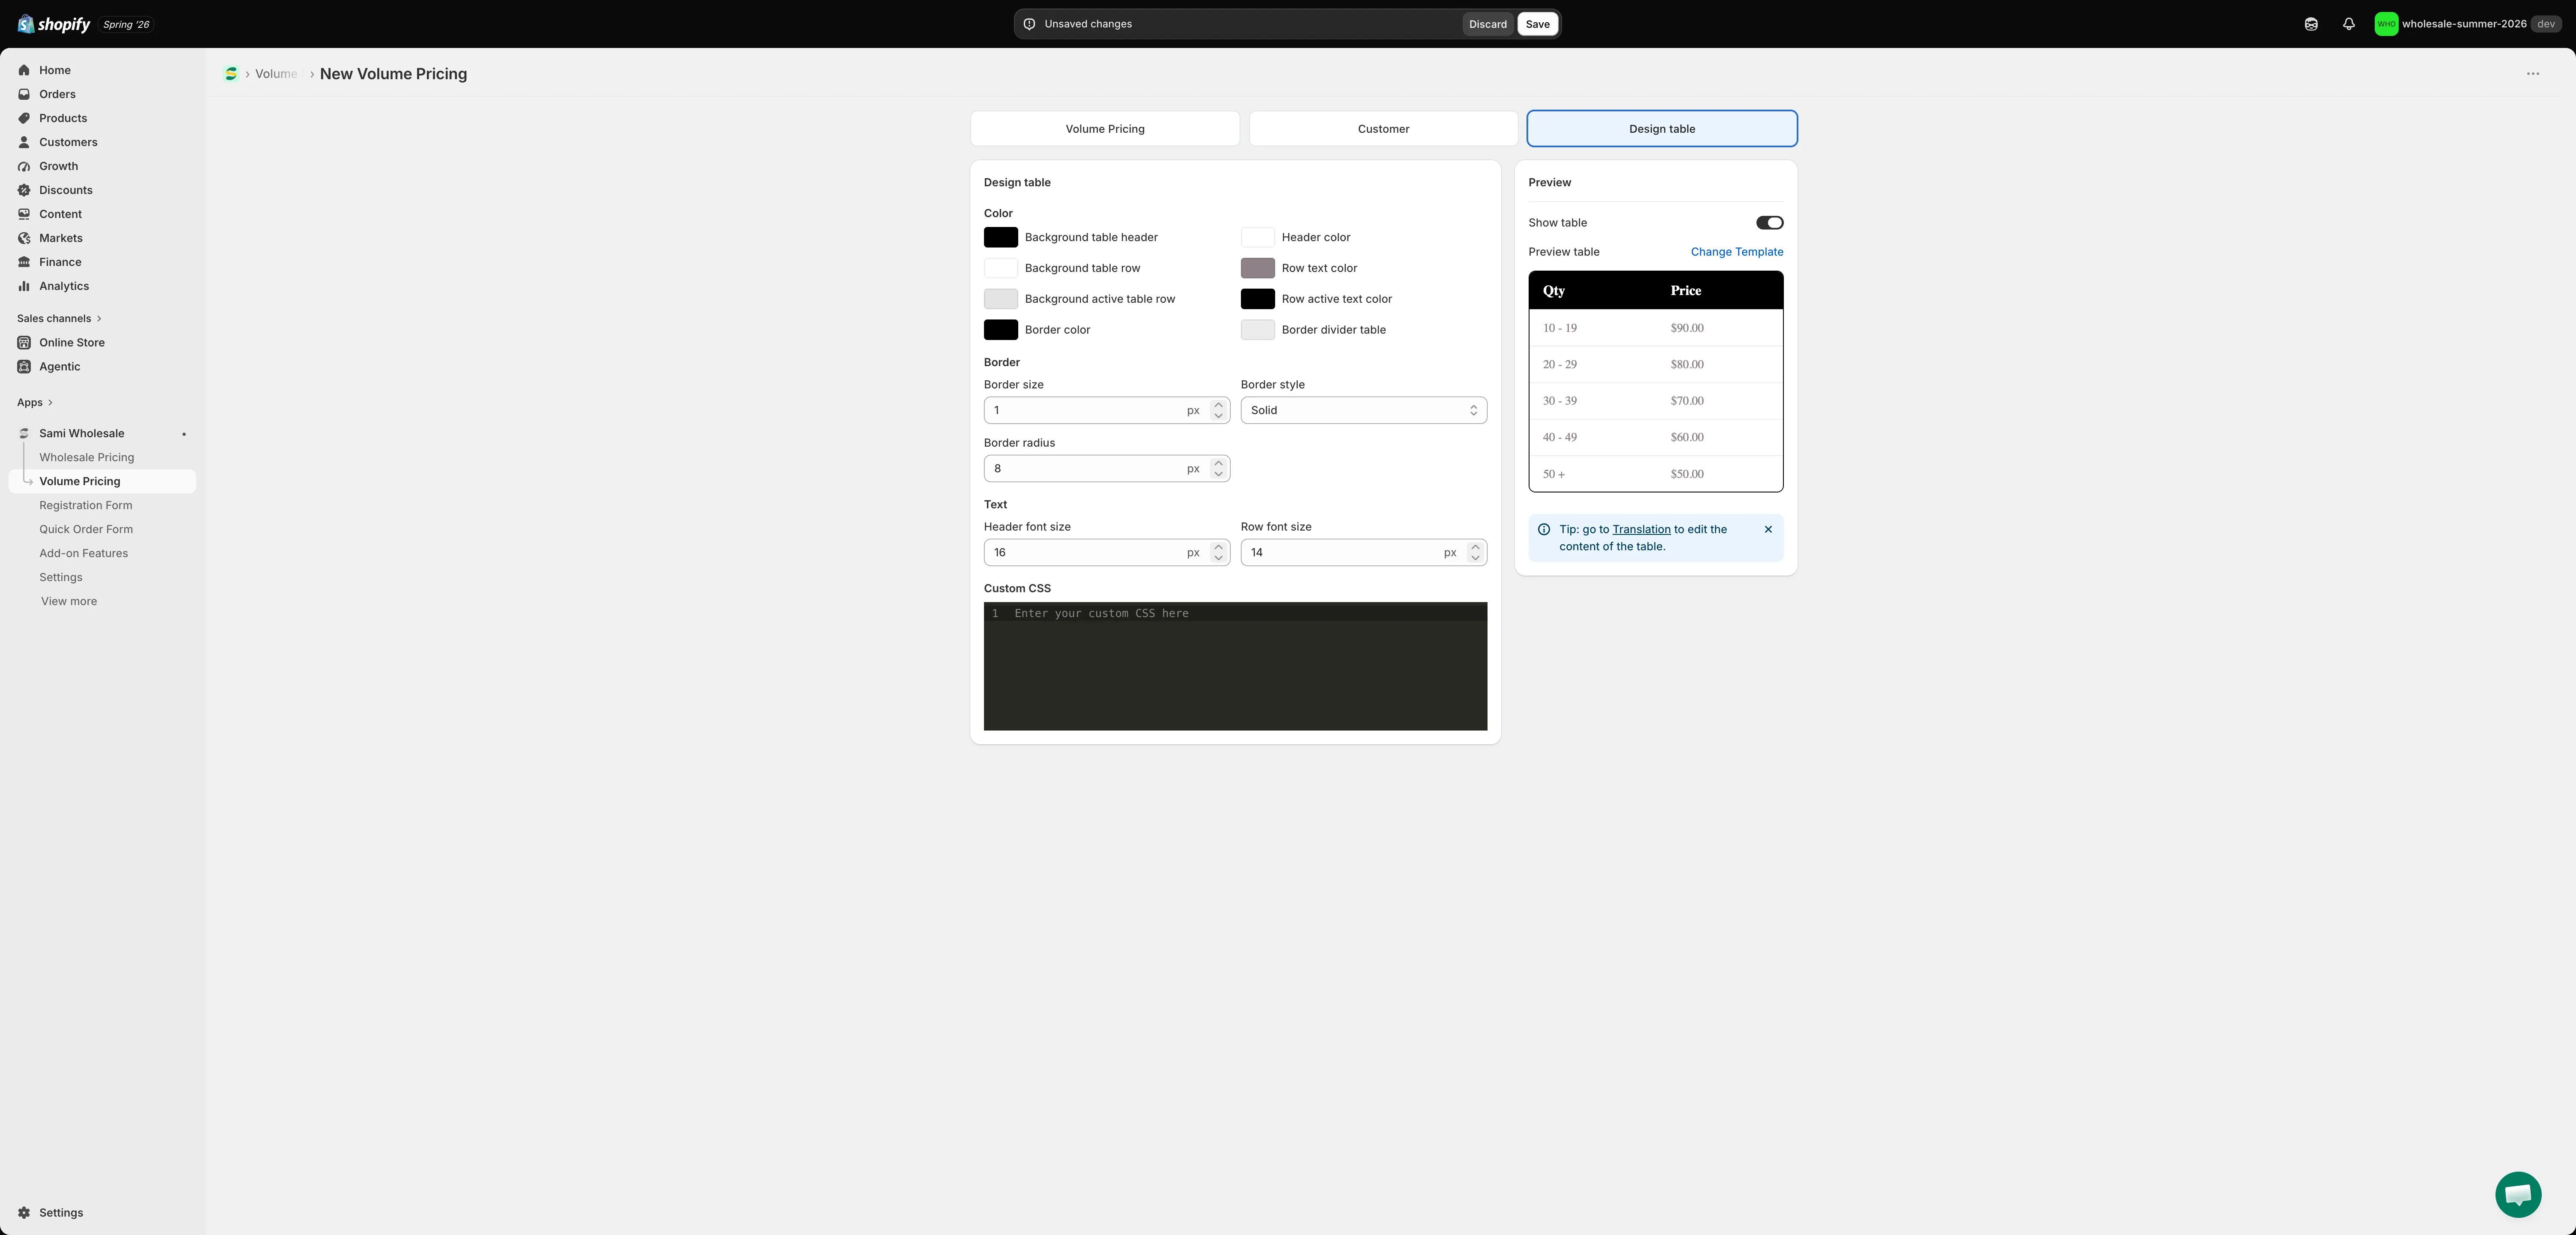
Section titled “Design and preview the pricing table”Click the Design table tab to control colors, borders, and text size for the table shown on your product pages, and to preview it live. Turn off Show table if you don’t want the table displayed on the product page. Click Change Template to try a different table layout.
-
Click Save in the bar that appears at the top of the page once you’ve made changes.