
Choose quotable products
Decide which products show the Request a Quote button — your whole catalogue, or the products and collections you pick.
The quote button only appears on the products you have selected. That choice is made on the Quote settings page itself, not inside the Customize editor.
Make your selection
Section titled “Make your selection”-
Open Quote settings
Section titled “Open Quote settings”In the app, go to Quote settings. The page is headed Request a Quote — “Customize the quote experience and choose which products will show the RFQ button.”
-
Find Select quote products
Section titled “Find Select quote products”Scroll to Select quote products — “Select products or collections that should show the Request a Quote button.” The section shows what is selected at the moment — for example All products, described as “Enable Request for quote feature for all products.”
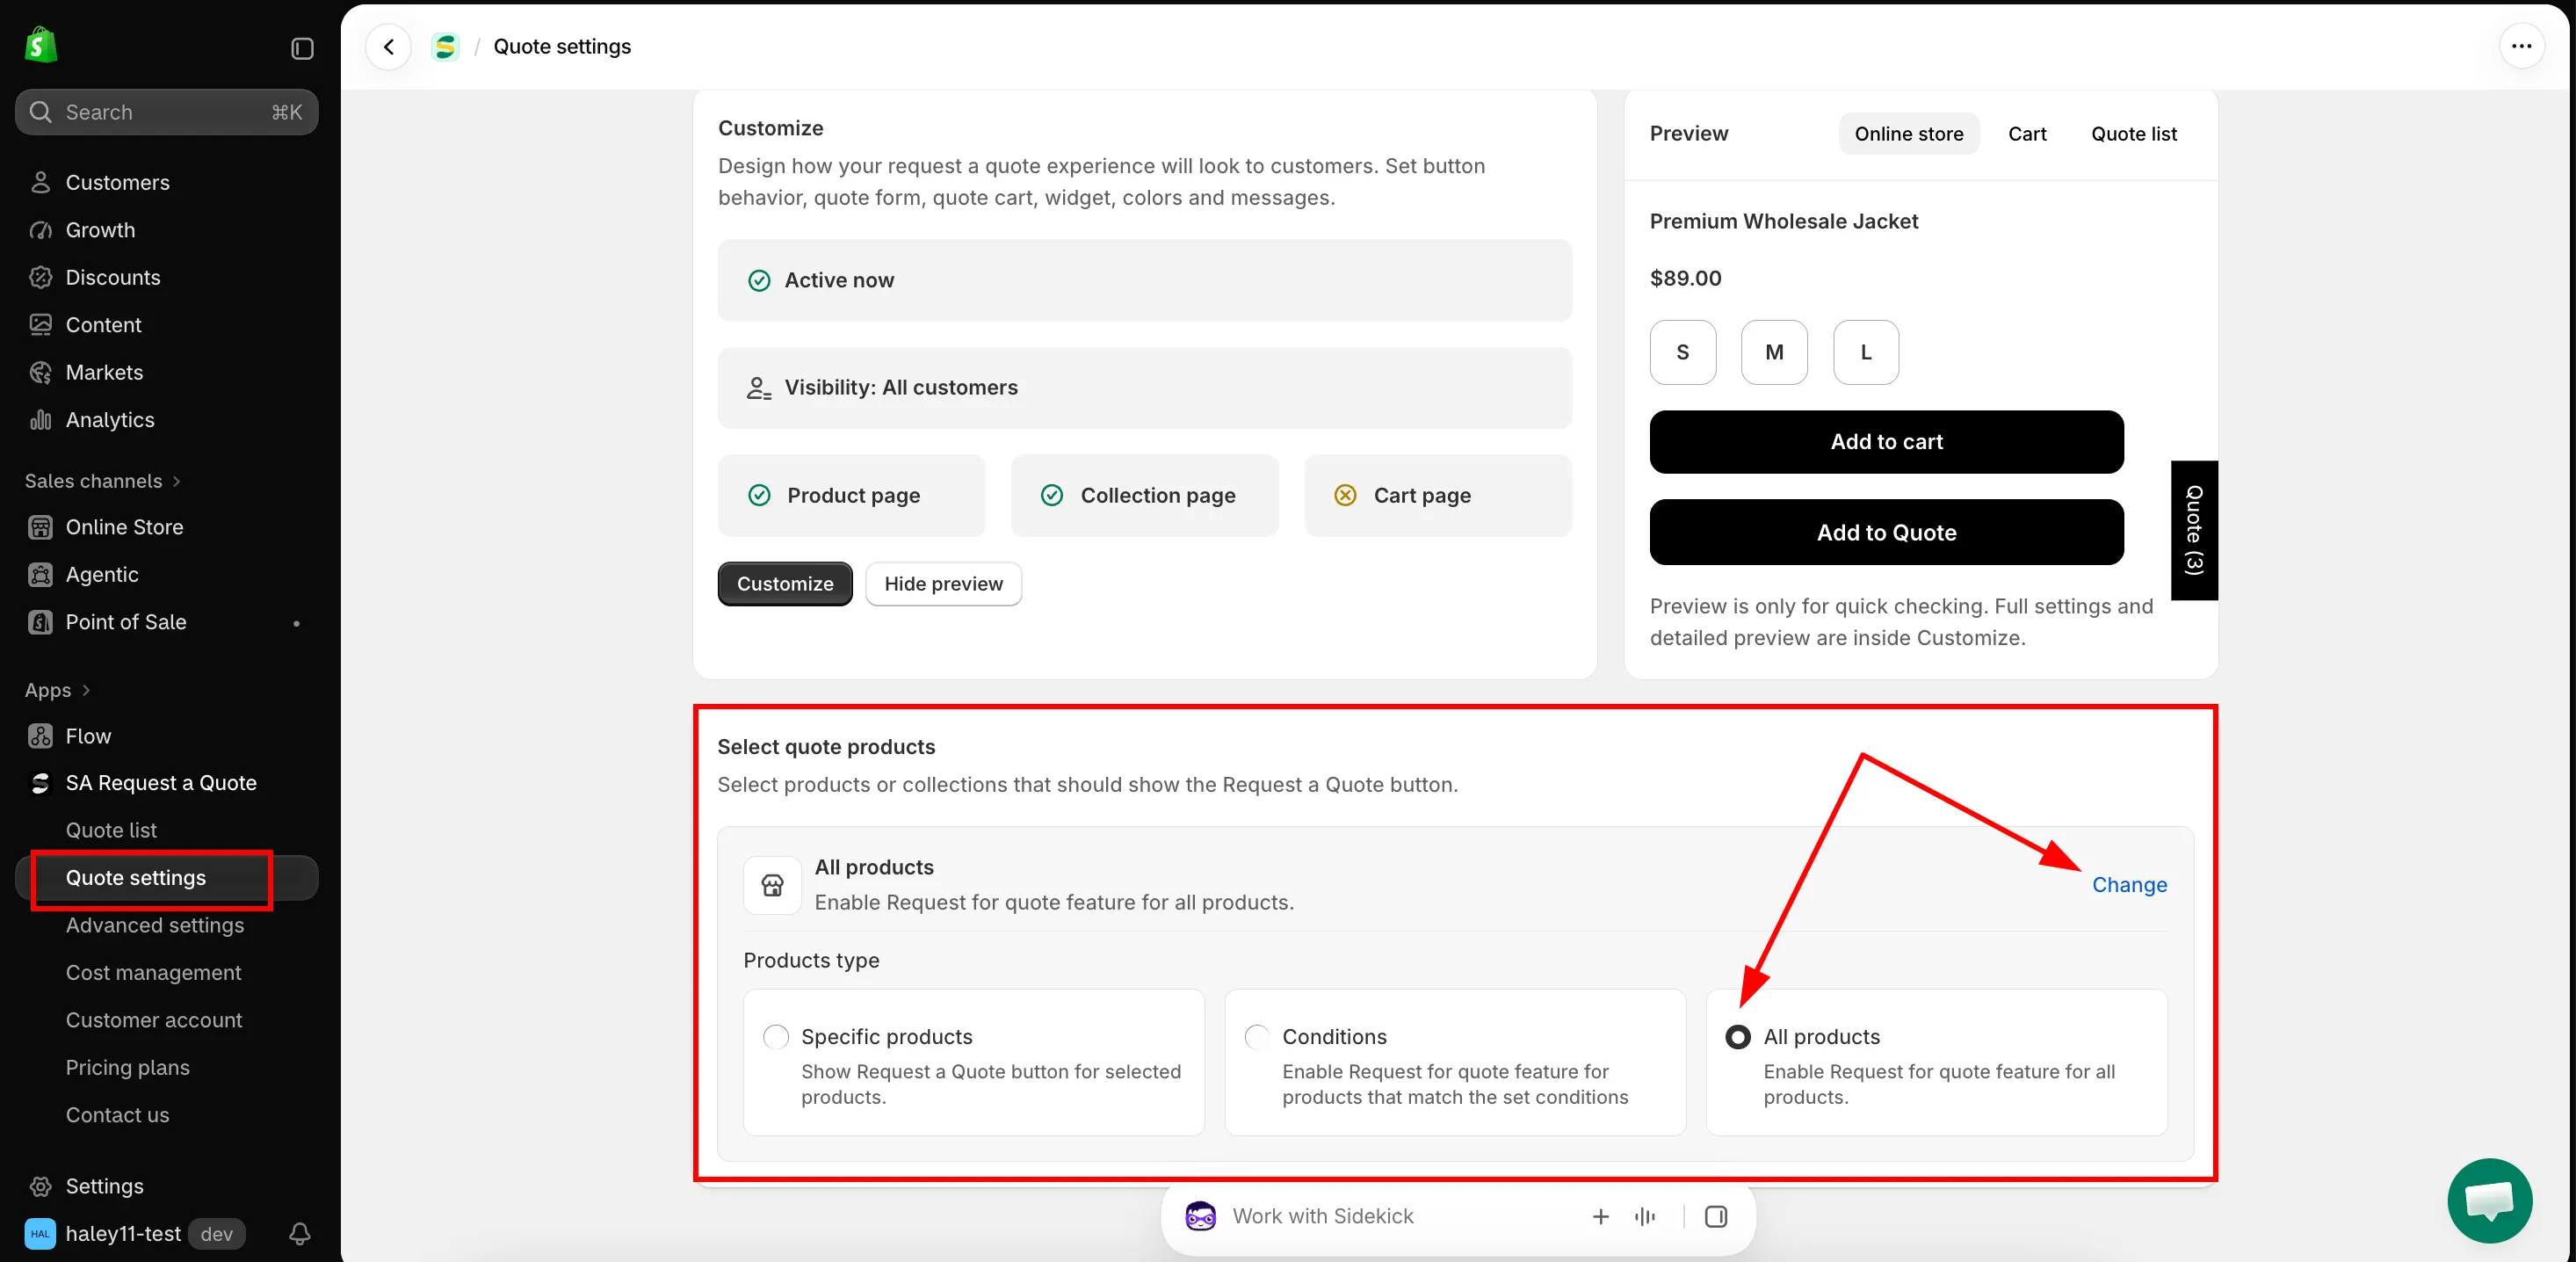
Select quote products decides which products carry the button.
-
Click Change
Section titled “Click Change”Change is the only way into the picker — the row itself just reports what is selected at the moment. Clicking it opens Products type, with the three choices side by side.
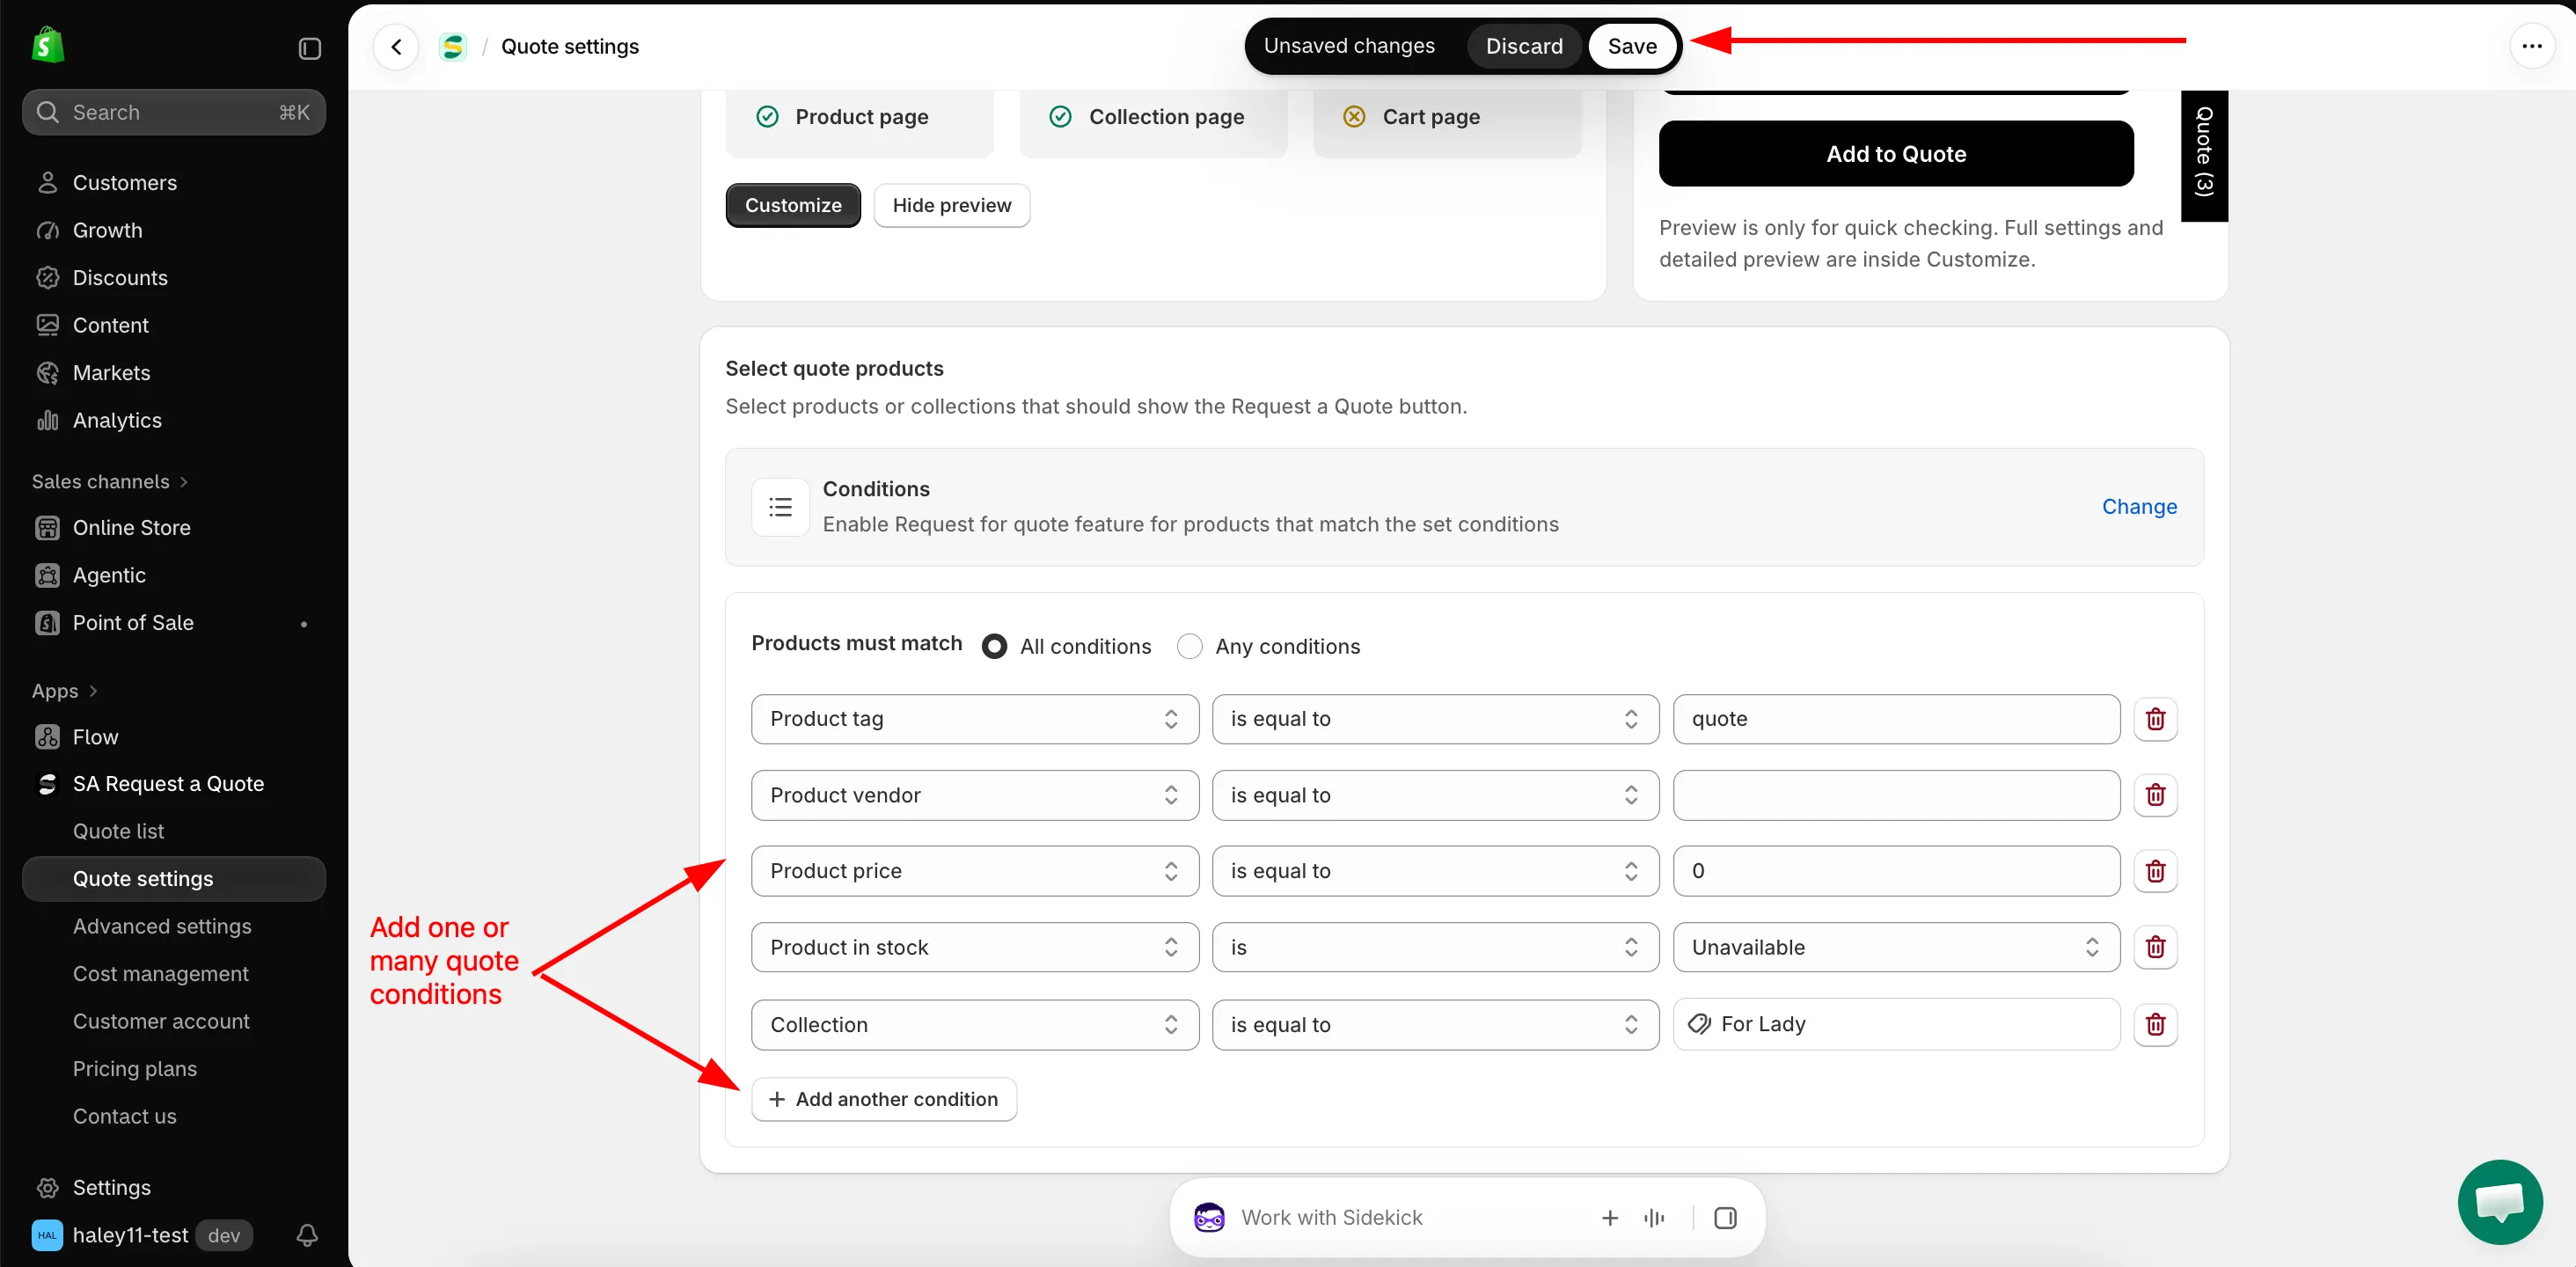
Conditions let the selection follow your catalogue instead of a fixed list.
-
Pick a products type
Section titled “Pick a products type”Click one of the three. The card you pick is applied straight away, and its own setup area opens underneath the Select quote products row.
Products type What the app says What opens underneath Specific products "Show Request a Quote button for selected products." A product table with Add products and More options. Conditions "Enable Request for quote feature for products that match the set conditions" Products must match and the condition rows. All products "Enable Request for quote feature for all products." Nothing — there is nothing left to choose. Set up whichever one you picked using the sections further down this page, then come back here.
-
Save and check a product
Section titled “Save and check a product”Shopify’s top bar shows Unsaved changes with Discard and Save. Click Save — the app confirms with “Settings saved successfully.”
Then open two products on your storefront: one that should show the button, and one that shouldn’t. The button appears in whatever Button position you have set for that page, so check a product page first — on a collection page your theme may only show the button when a shopper hovers the product card.
Which products type to use
Section titled “Which products type to use”| Your situation | What to select |
|---|---|
| Your whole catalogue is sold by negotiation | All products. Common for wholesale and trade stores, and the simplest thing to maintain. |
| One part of the range is quote-only, and it can be described as a rule | Conditions — for example Collection is equal to Wholesale, or Product tag is equal to b2b. |
| A short, stable list of items | Specific products, and add them by hand. |
Build a rule with Conditions
Section titled “Build a rule with Conditions”Pick Conditions and the builder opens under the Select quote products row.
-
Choose how the conditions combine
Section titled “Choose how the conditions combine”Products must match offers two settings:
- All conditions — “Must satisfy all the conditions”. A product has to match every row.
- Any conditions — “Just need to satisfy 1 of the conditions”. Matching one row is enough.
Use All conditions to narrow a selection down, and Any conditions to pull several unrelated groups together.
-
Build the first row
Section titled “Build the first row”Each row is Field, then Operator, then Value. Pick the field first — the operators offered change with it.
Field Operators you can pick The value you enter Product title is equal to, is not equal to, starts with, ends with, contains, does not contain Text you type. Product type The same six Text you type. Product vendor The same six Text you type. Product price is greater than, is less than, is equal to, is not equal to A number. It starts at 0.Product in stock is Available or Unavailable. Product tag is equal to, is not equal to The tag, typed exactly as it is on the product. Collection is equal to, is not equal to A collection you pick — the value is a Select collections button, not a text box. -
Add the rows you need
Section titled “Add the rows you need”Add another condition adds a row. The bin icon at the end of a row removes it.
-
Click Save in Shopify’s top bar.
Hand-pick with Specific products
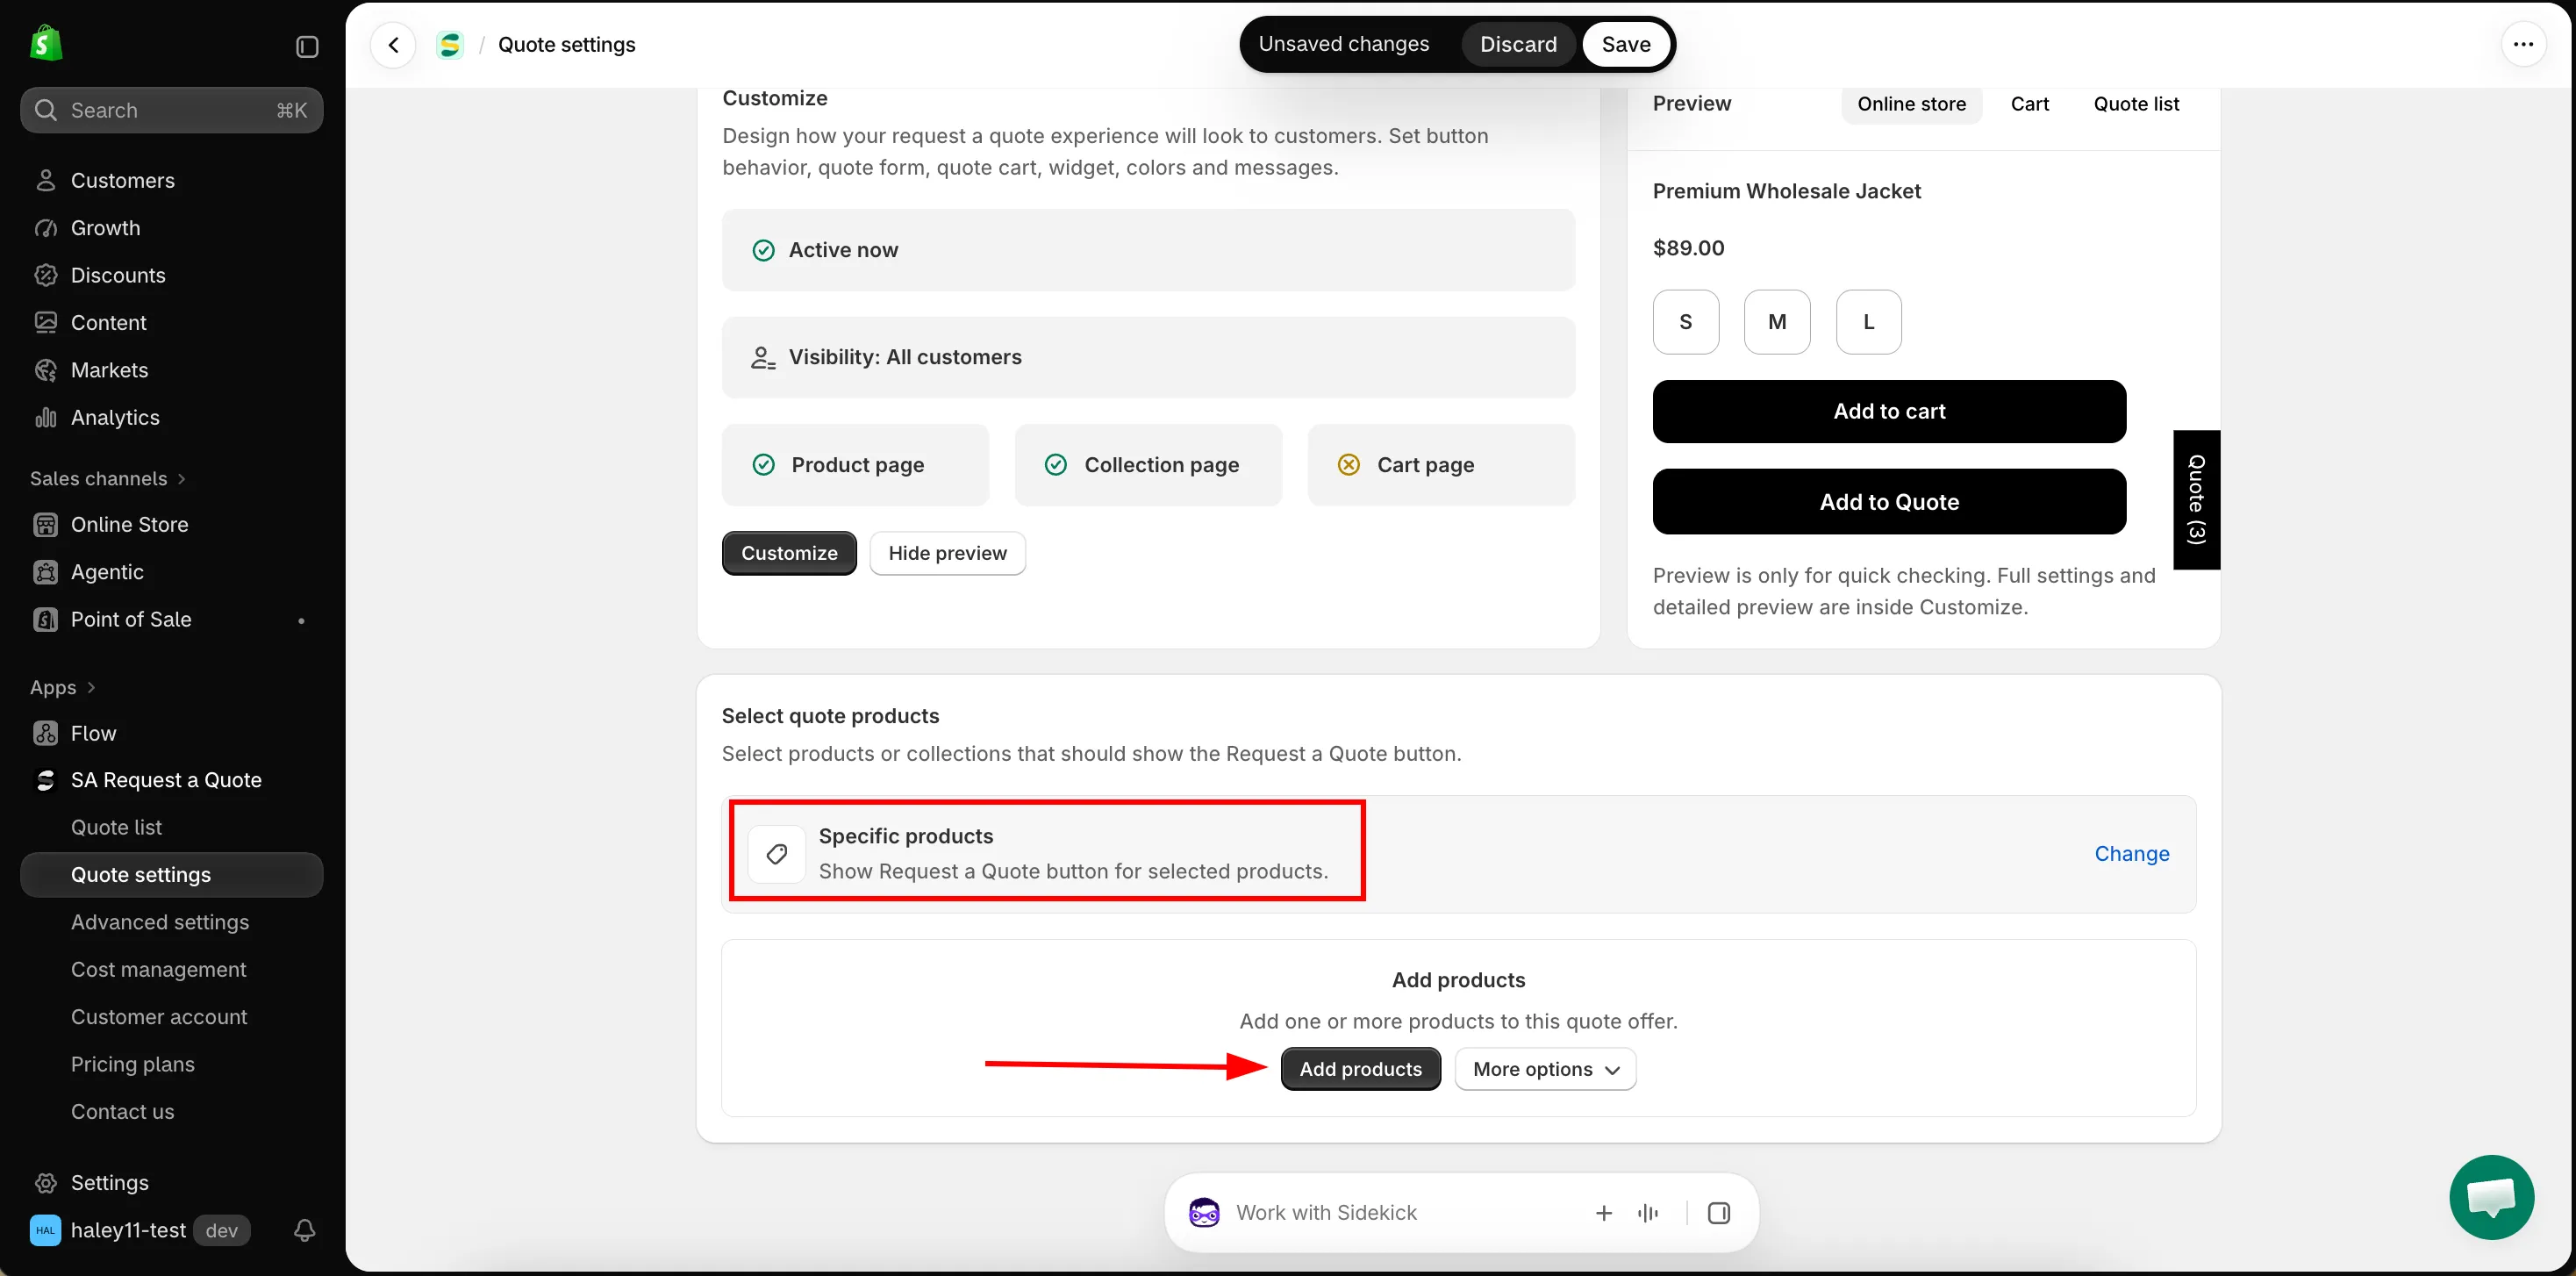
Section titled “Hand-pick with Specific products”Pick Specific products and a product table opens under the Select quote products row. While it is empty it shows Add products — “Add one or more products to this quote offer.”
| Control | What it does |
|---|---|
| Add products | Opens Shopify's product picker so you can search your catalogue and tick products. |
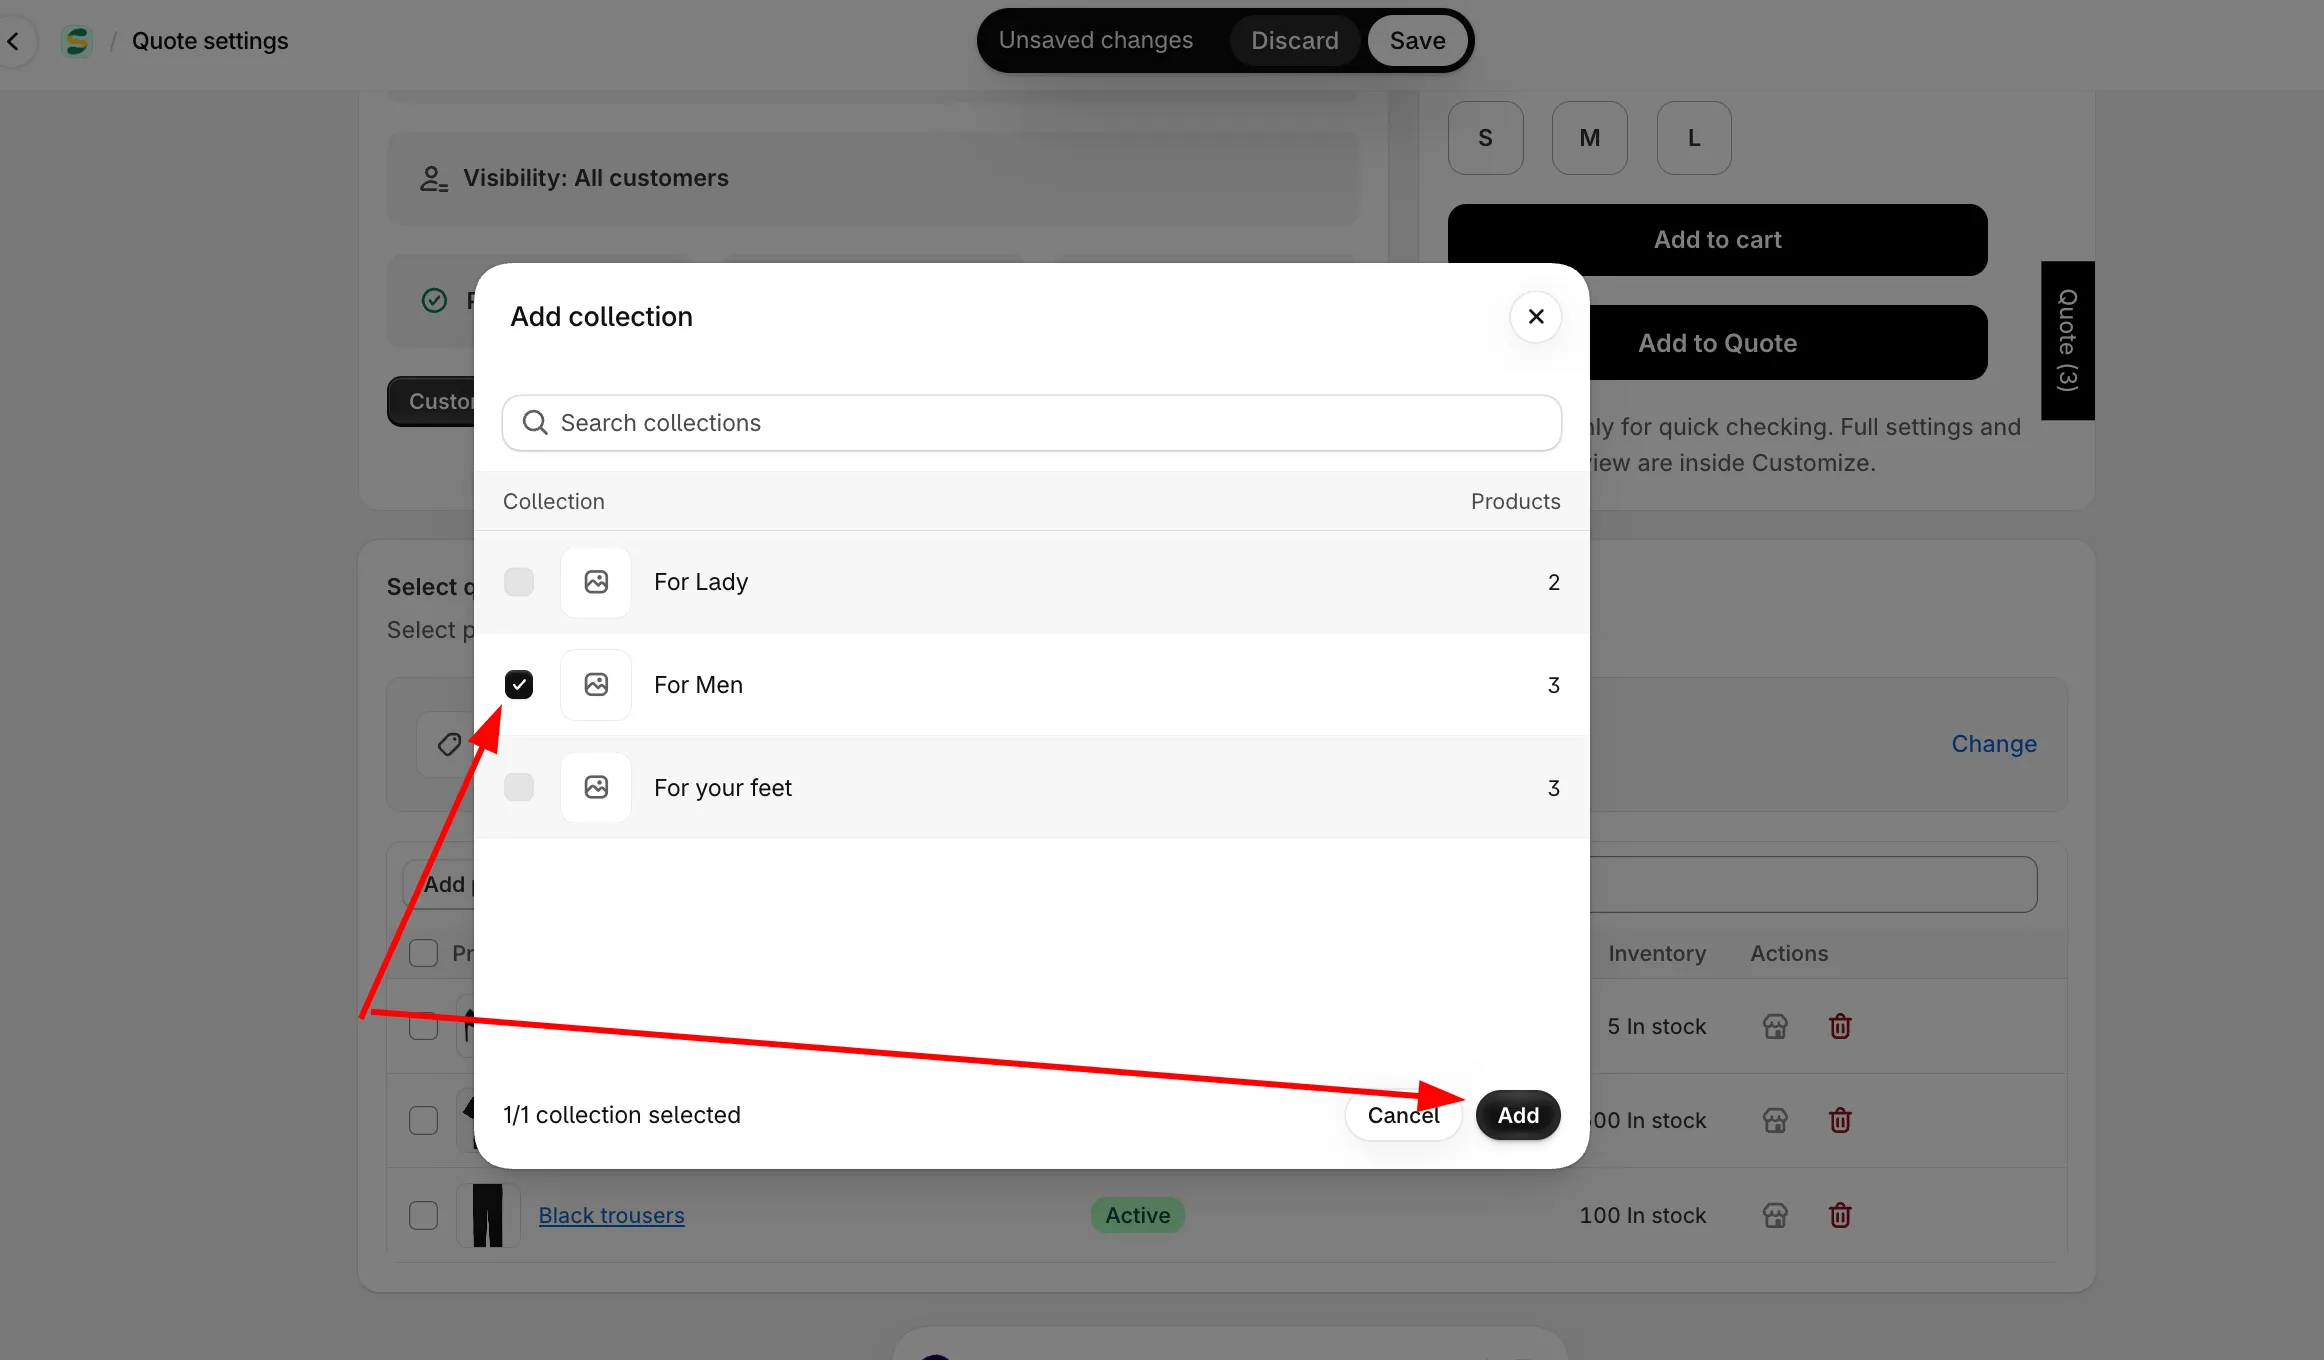
| More options → Add from collection | Choose one collection, then pick products from inside it. The app walks you through it: "Step 1: Choose one collection, then select products from it." and "Step 2: Select products from the chosen collection." Add all products takes the whole collection in one go. |
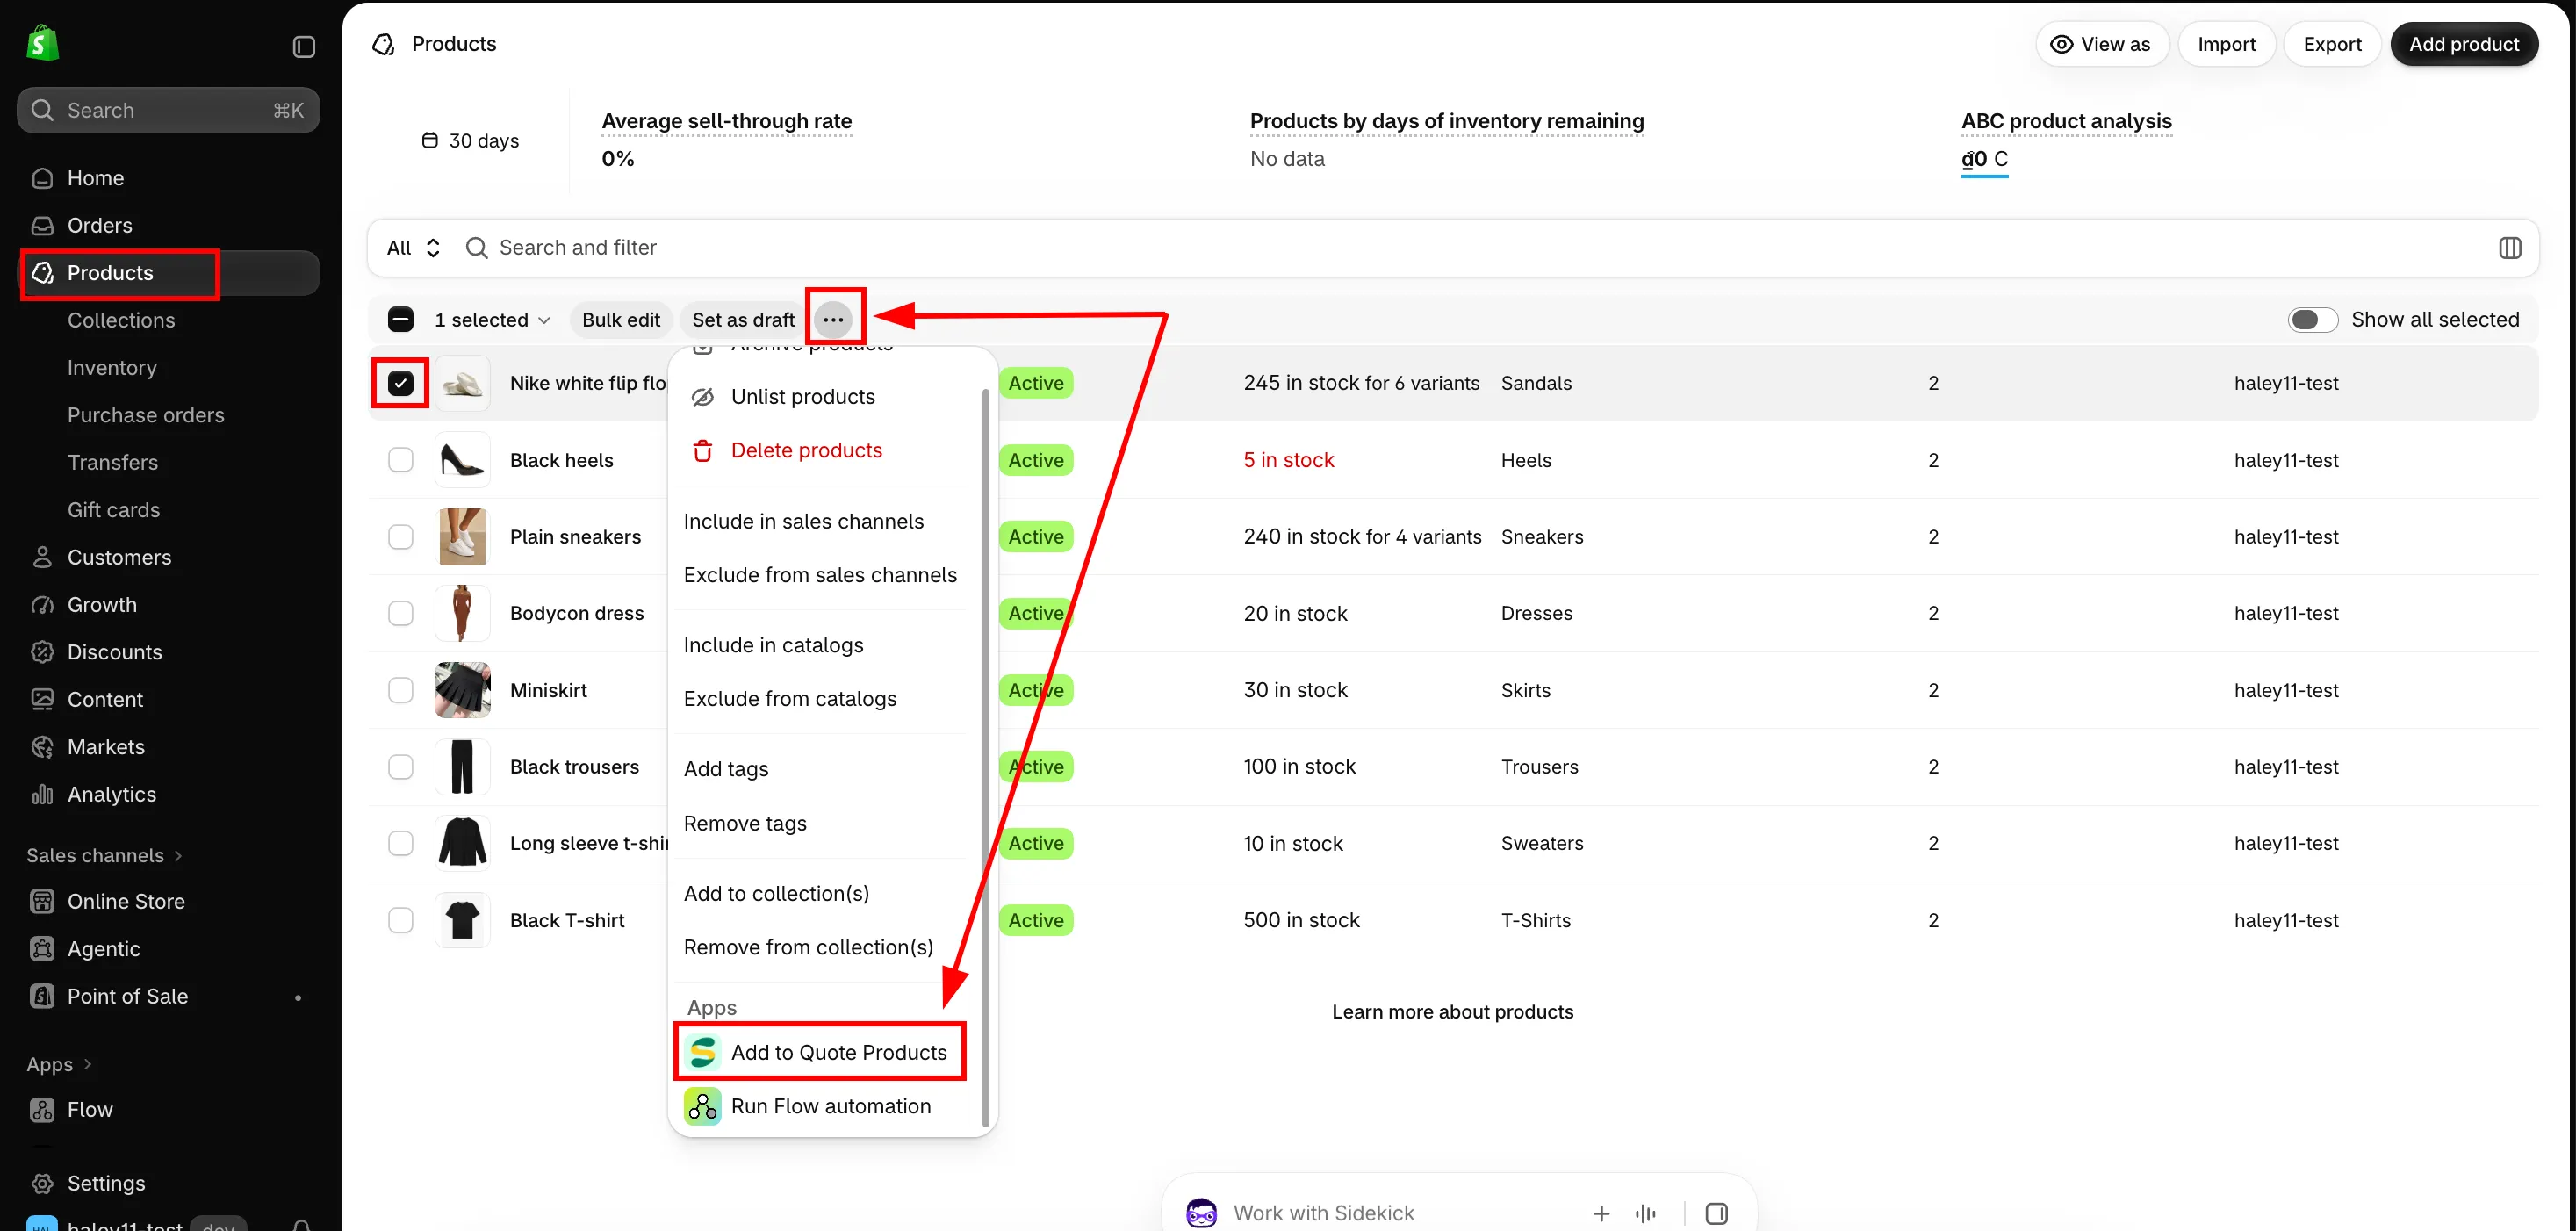
| More options → Add from admin | Use Shopify's own product filters instead. Filter the Products page by vendor, status, tag or anything else, select the results, then More actions → Add to quote offer. |
| Search products | Filters the list you have already built, not your whole catalogue. |
Each row in the table shows the product with its thumbnail, its Status and its Inventory, and two actions: open it in your online store, and remove it from the list. Tick several rows and you get Clear selection and Remove selected items — removing only takes products out of this list, it does not touch the products themselves.
More options → Add from collection
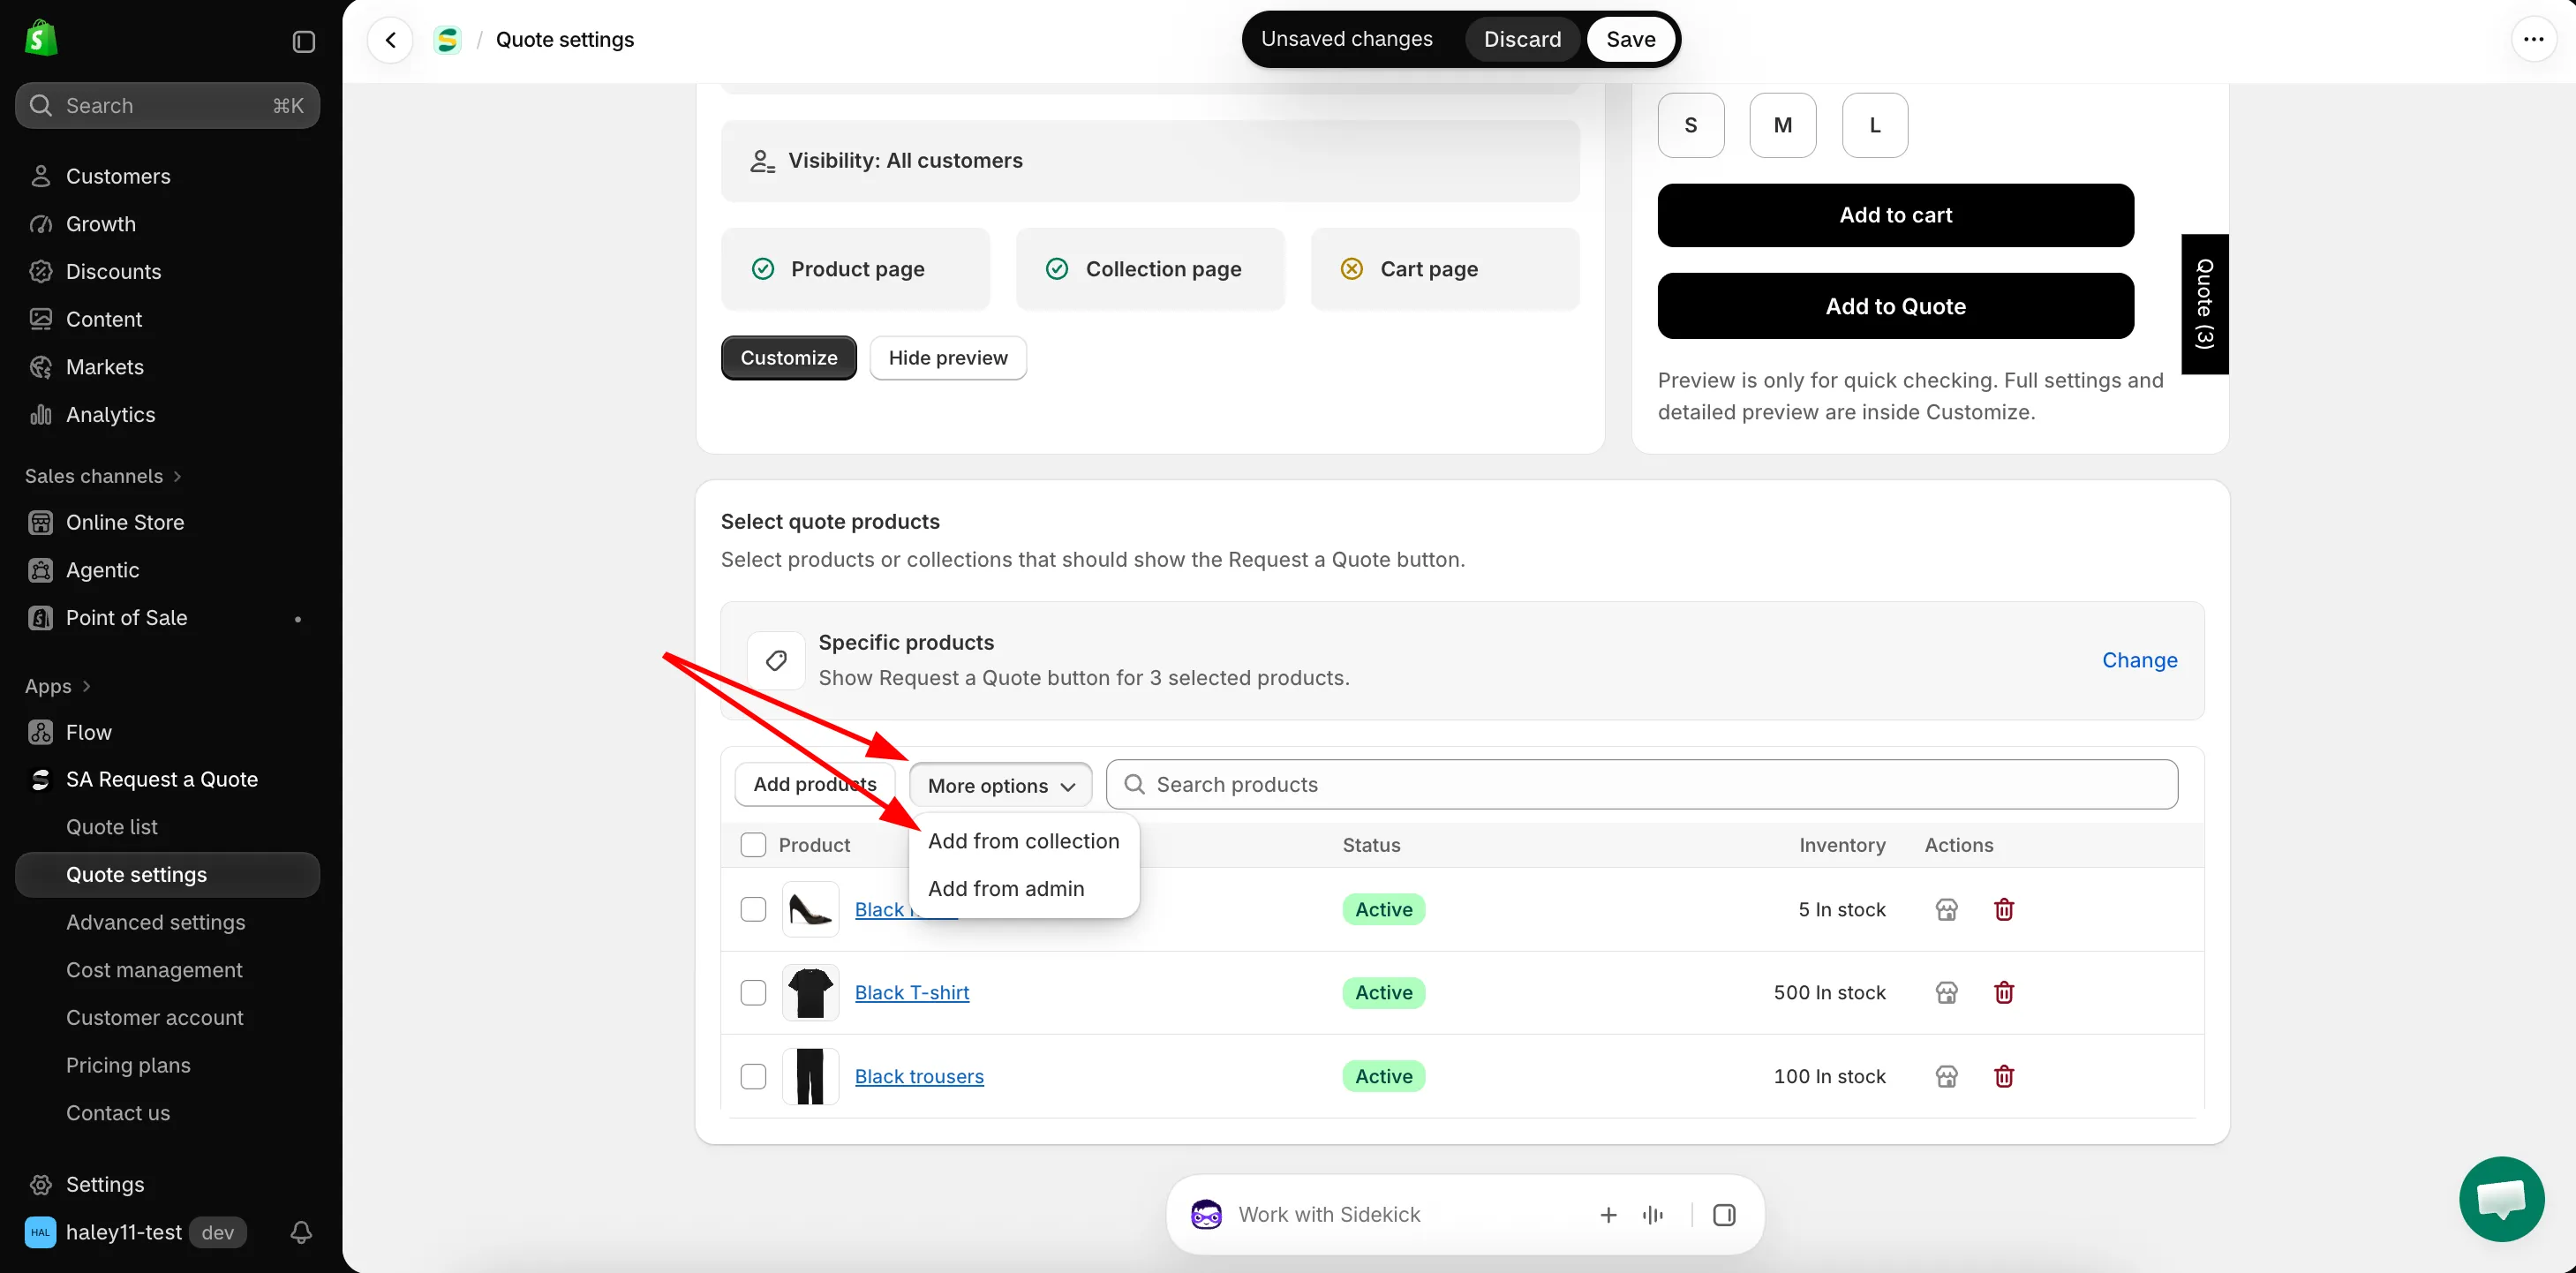
More options → Add from admin
What the selection decides
Section titled “What the selection decides”Select quote products decides which products show the Request a Quote button, wherever the button can appear.
| It decides | Which means |
|---|---|
| Which product pages show the quote button | A product outside the selection never shows it, whatever Product page button position is set to. |
| Which product cards show it on collection pages | The same selection covers your collection grids — see Quote button on collection pages. |
This is separate from where the button appears
Section titled “This is separate from where the button appears”Select quote products decides which products can be quoted. Button position on the Button & widget tab decides where the button shows on those products. Both have to be set before anything appears on your storefront.
If the button is missing on a product you expected it on, check this selection first — see Quote button on product pages.
Need a hand?
Section titled “Need a hand?”If a product that matches your selection still shows no button, send us its URL and your Select quote products setting — see Contact support.
Next steps
Section titled “Next steps”- Hiding prices overview — hide prices on the products you have made quotable
- Quote button on product pages — where the button appears
- Require login to quote — which customers can see it