
Integrations
Mailchimp
Add everyone who requests a quote to a Mailchimp audience, so you can follow up with campaigns.
Connecting Mailchimp means every quote request also becomes a contact you can follow up with, without anyone copying details by hand.
Step 1 — Get your API key
Section titled “Step 1 — Get your API key”In your Mailchimp account, generate an API key. Mailchimp’s own guide walks through it: About API keys.
Keep the key somewhere safe while you finish the setup.
Step 2 — Connect it in the app
Section titled “Step 2 — Connect it in the app”-
Open the Integrations tab
In your Shopify admin, open SA Request a Quote, select Advanced settings, then open the Integrations tab.
-
Select Mailchimp
Under Third-party integration, select Mailchimp — described in the app as “Automatically create new audiences”.
The Mailchimp page opens, with a Third-party breadcrumb to take you back to the list.
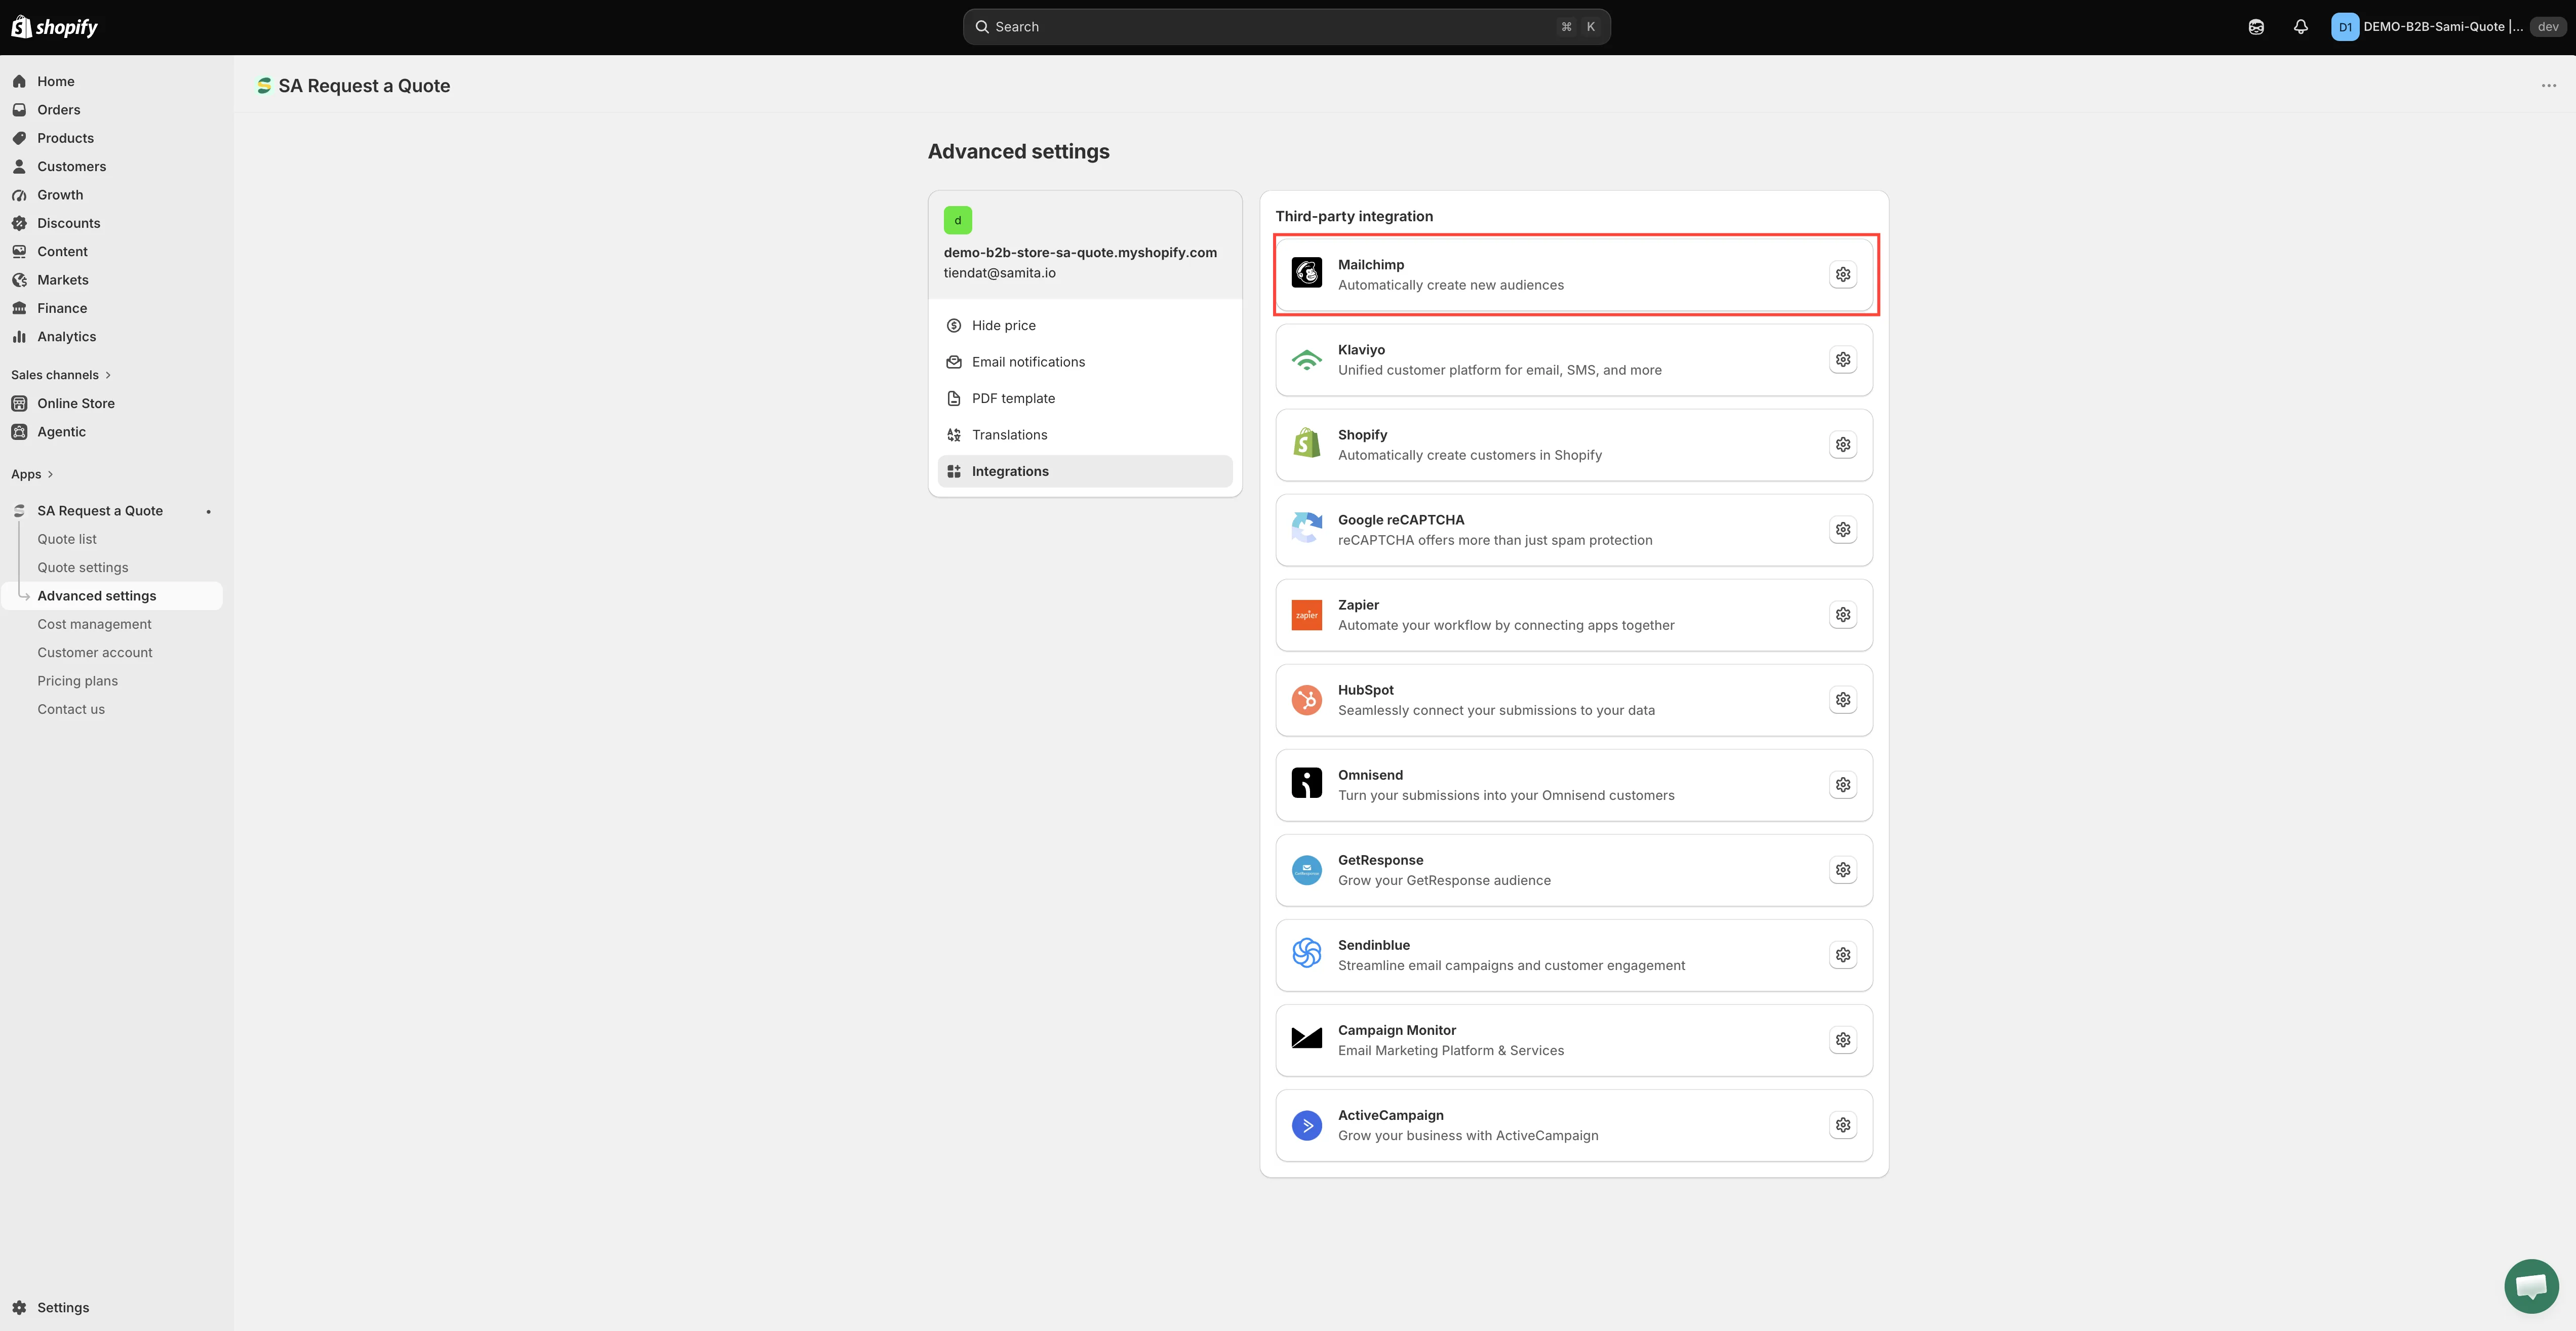
Pick the service, then open its settings.
-
Turn on Enable
Switch on Enable. Nothing is sent to Mailchimp until you do.
-
Paste your API key
Paste the key from Step 1 into the API key field. If you need to go and fetch it, the Find or generate your API key help text takes you to Mailchimp’s own instructions.
-
Choose your audience
Open Select a Mailchimp list to integrate and pick the audience new contacts should join. Until you choose, it reads “Please select a Mailchimp list”.
Create the audience in Mailchimp first. The dropdown can only offer audiences that already exist.
-
Match your form fields
Select Merge fields. This is where you line up the fields on your quote form — the Contact information fields such as Email address, First name and Last name — with the matching fields in Mailchimp.
Email address is the one you cannot skip: without it Mailchimp has no contact to create. The rest are optional — match the ones you will actually use.
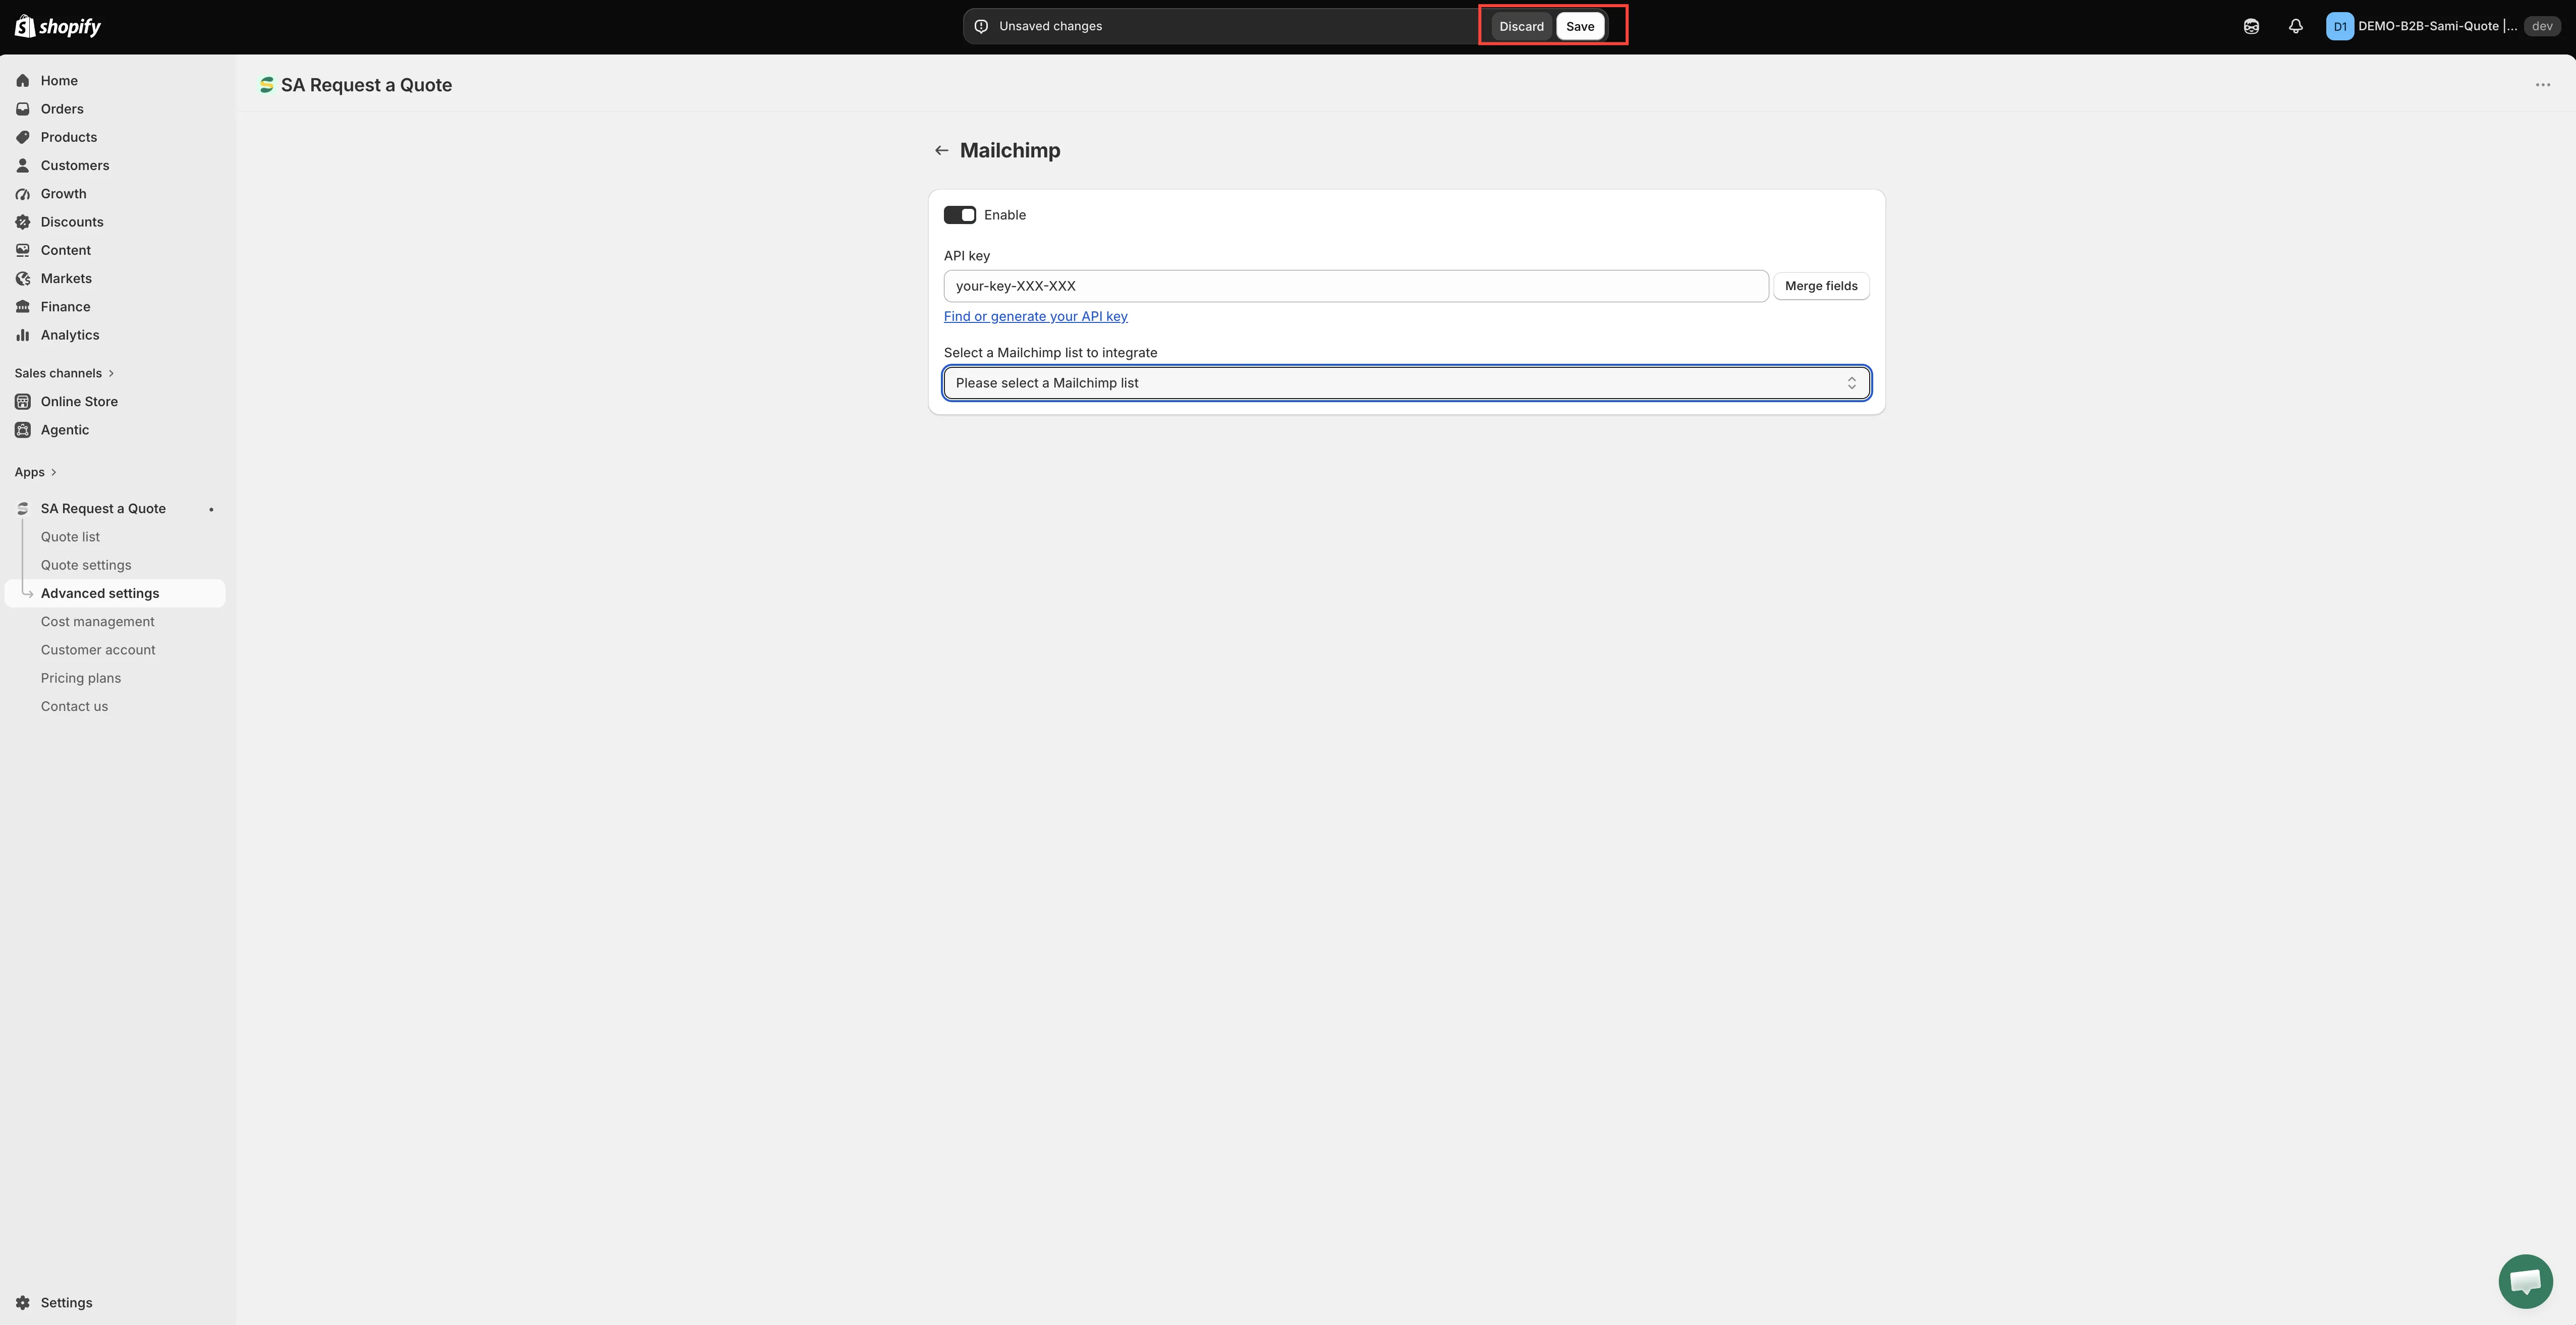
One key connects the app to your Mailchimp audience.
-
Save
Select Save. Nothing is stored until you do, and an unsaved page sends nothing.
Step 3 — Test it
Section titled “Step 3 — Test it”Submit a real quote request from your storefront, then check Mailchimp for the new contact. Confirm the fields you matched actually arrived — not just the email address.
Is this the right tool?
Section titled “Is this the right tool?”Good when you already run newsletters in Mailchimp and want quote leads in the same place.
If you do not already use Mailchimp, do not adopt it just for this — Zapier connects quote data to almost anything, and Create a Shopify customer after submit keeps everything inside Shopify.
If contacts are not arriving
Section titled “If contacts are not arriving”- Check Enable is still on. Nothing is sent while it is off.
- Check the key is still valid. Regenerating a key in Mailchimp breaks the connection until you paste the new one in.
- Check you picked the right audience. Contacts may be arriving somewhere you are not looking.
- Check the email field is matched in Merge fields. Without it there is no contact to create.
Still stuck? Email support@samita.io.
Next steps
Section titled “Next steps”- Integrations overview — the other tools you can connect
- Klaviyo — the other marketing tool on the FREE plan
- Build a standard form — make sure your form collects what you are matching