
Build a standard form
Build your quote form from a template — the questions you ask, where the form appears, and how it looks.
This walks through the whole form, in the order the editor presents it.
-
Open the Customize editor
Section titled “Open the Customize editor”Go to Quote settings. On the Request a Quote page, find the Customize card and click Customize. The editor opens full screen.
-
Open the Quote form tab
Section titled “Open the Quote form tab”The editor has four tabs — Button & widget, Quote form, Quote cart page and Success message. Open Quote form.
-
Start from a template
Section titled “Start from a template”Form template shows the template your form is built on, with a short description of who it suits.
Click Change. A picker opens, headed Choose a form template, with the note “Select a starting point. The form fields will change only after you confirm.” There are three:
Template How the app describes it Tagged Simple quote form "Best for most stores. Includes login autofill, contact details, company, quantity, request message, and file upload." Fast setup · 7 fields Detailed quote form "For custom orders, delivery, installation, or project-based quotes. Includes login autofill guidance." More details · 14 fields B2B customer form "For wholesale or business buyers who need company, shipping, billing, and payment term information" B2B Pick the one whose description matches the work you quote for, then click Use this template to confirm. Cancel leaves your current form alone. Do this now, before you start editing fields.
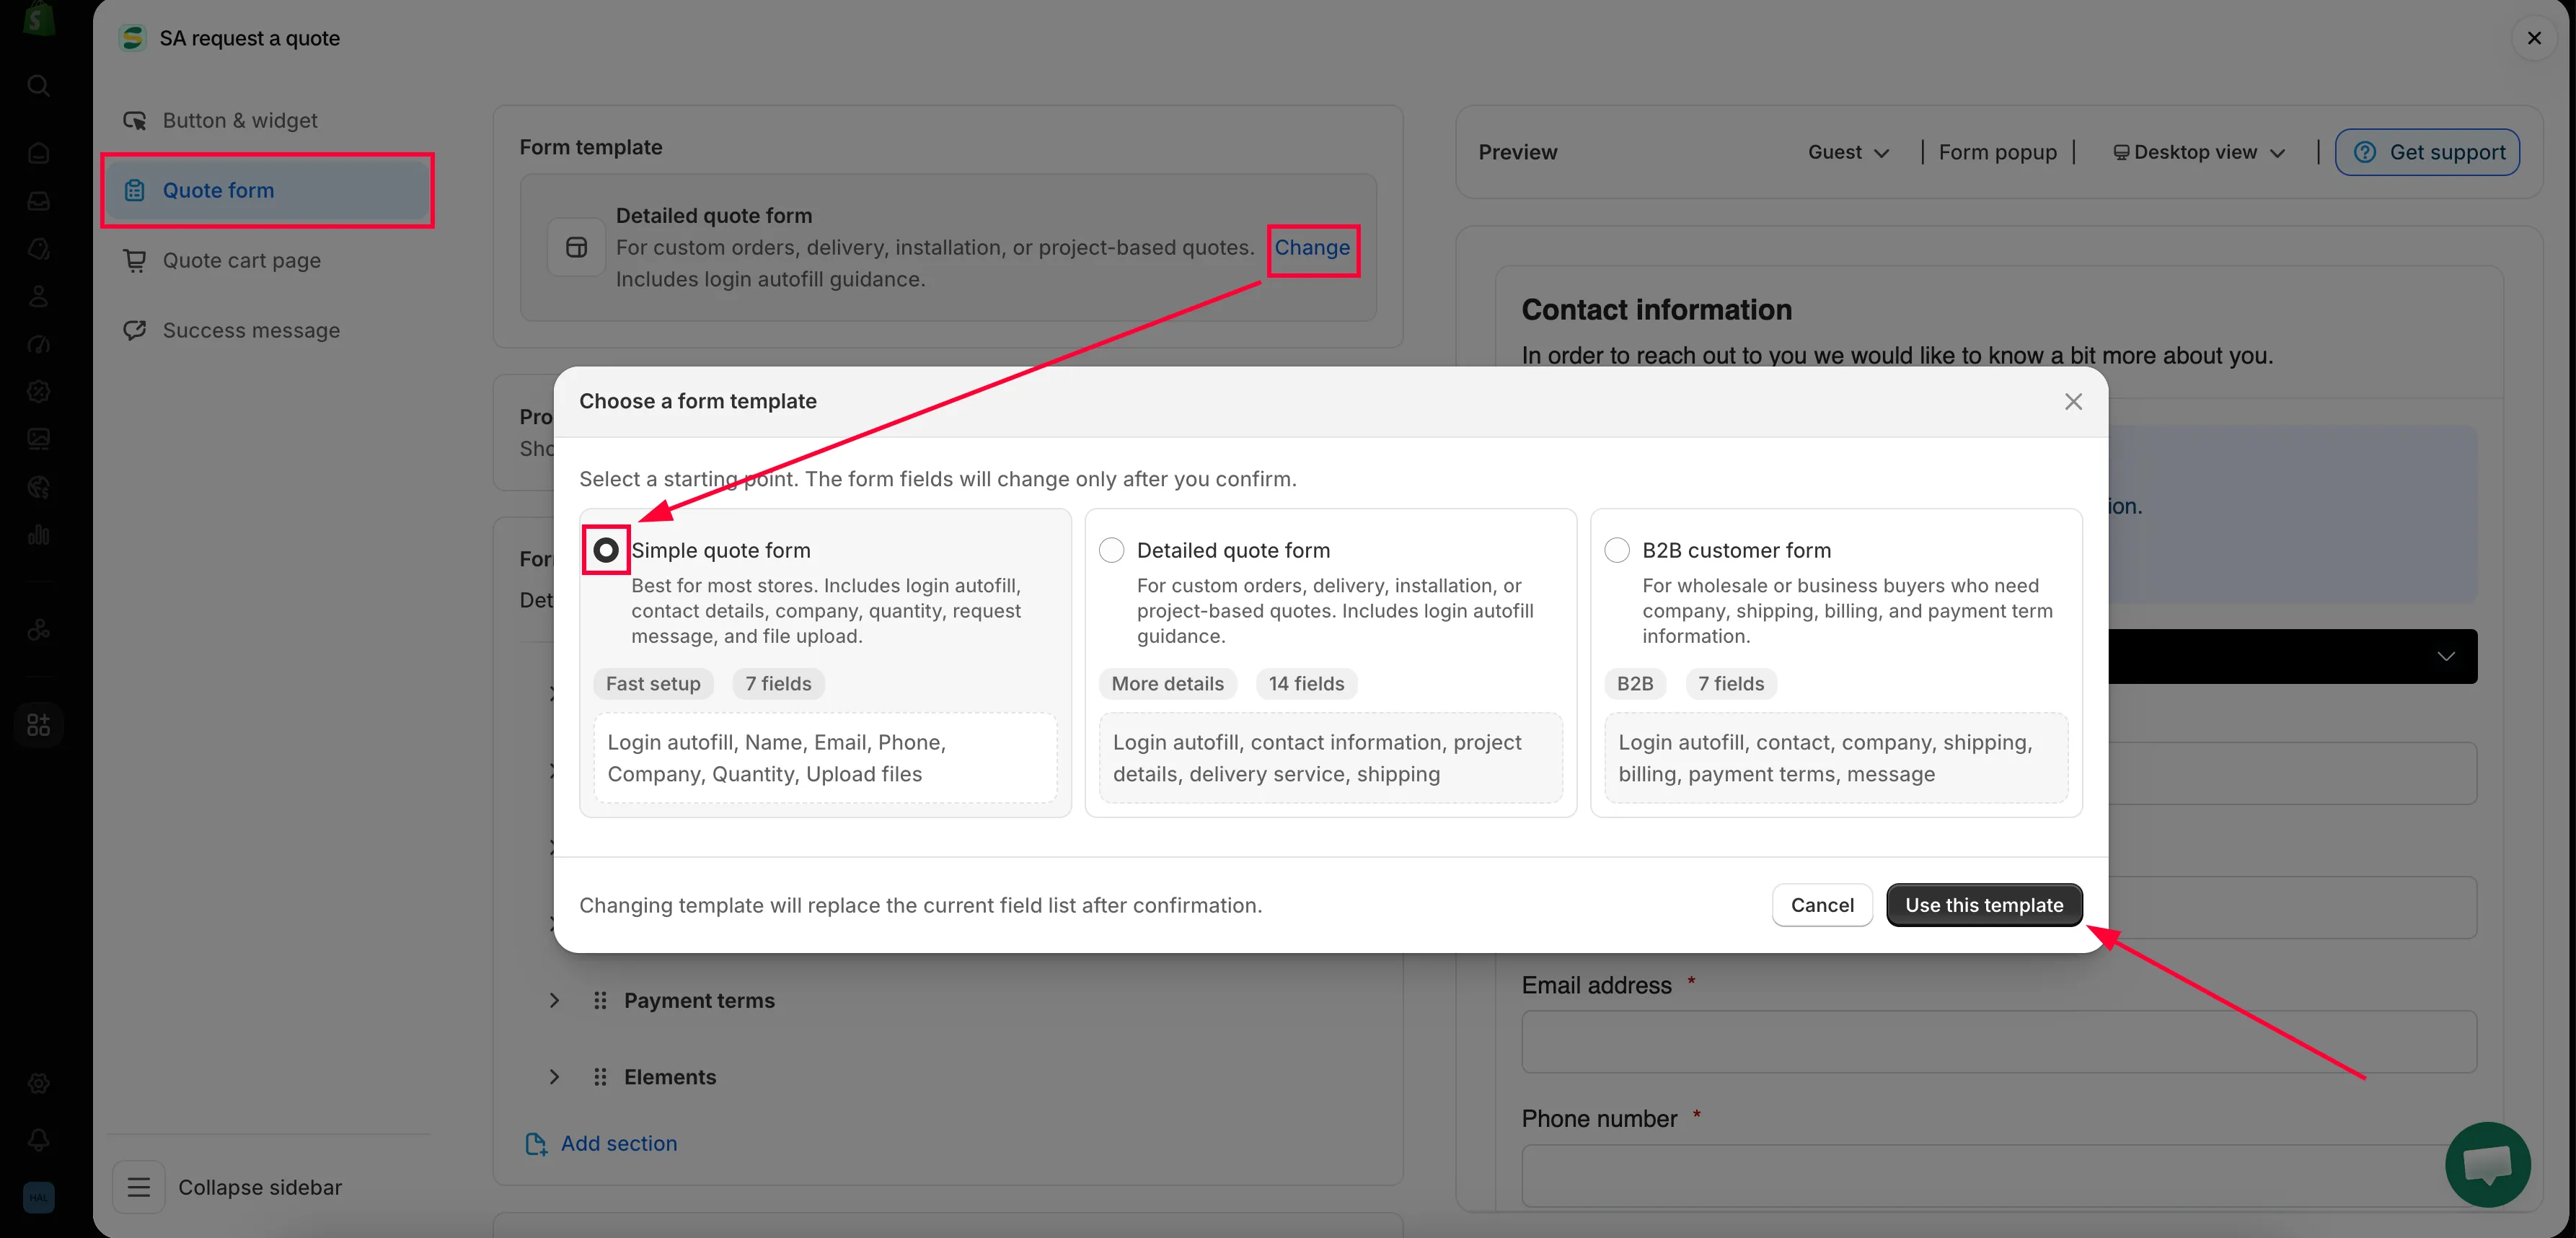
Start from a template rather than an empty form.
-
Decide whether the form shows on product pages
Section titled “Decide whether the form shows on product pages”Under Product page form display — “Show the quote form directly on product pages” — tick Enable product page form display if you want customers to fill the form in without leaving the product.
Ticking it reveals Form position on product page, a dropdown with three choices:
Position Where the form lands Below Add to Cart button High on the page, right under the buy buttons — the most visible option. Below product description After the sales copy, for a buyer who has read it. Below product information At the end of the product information block. 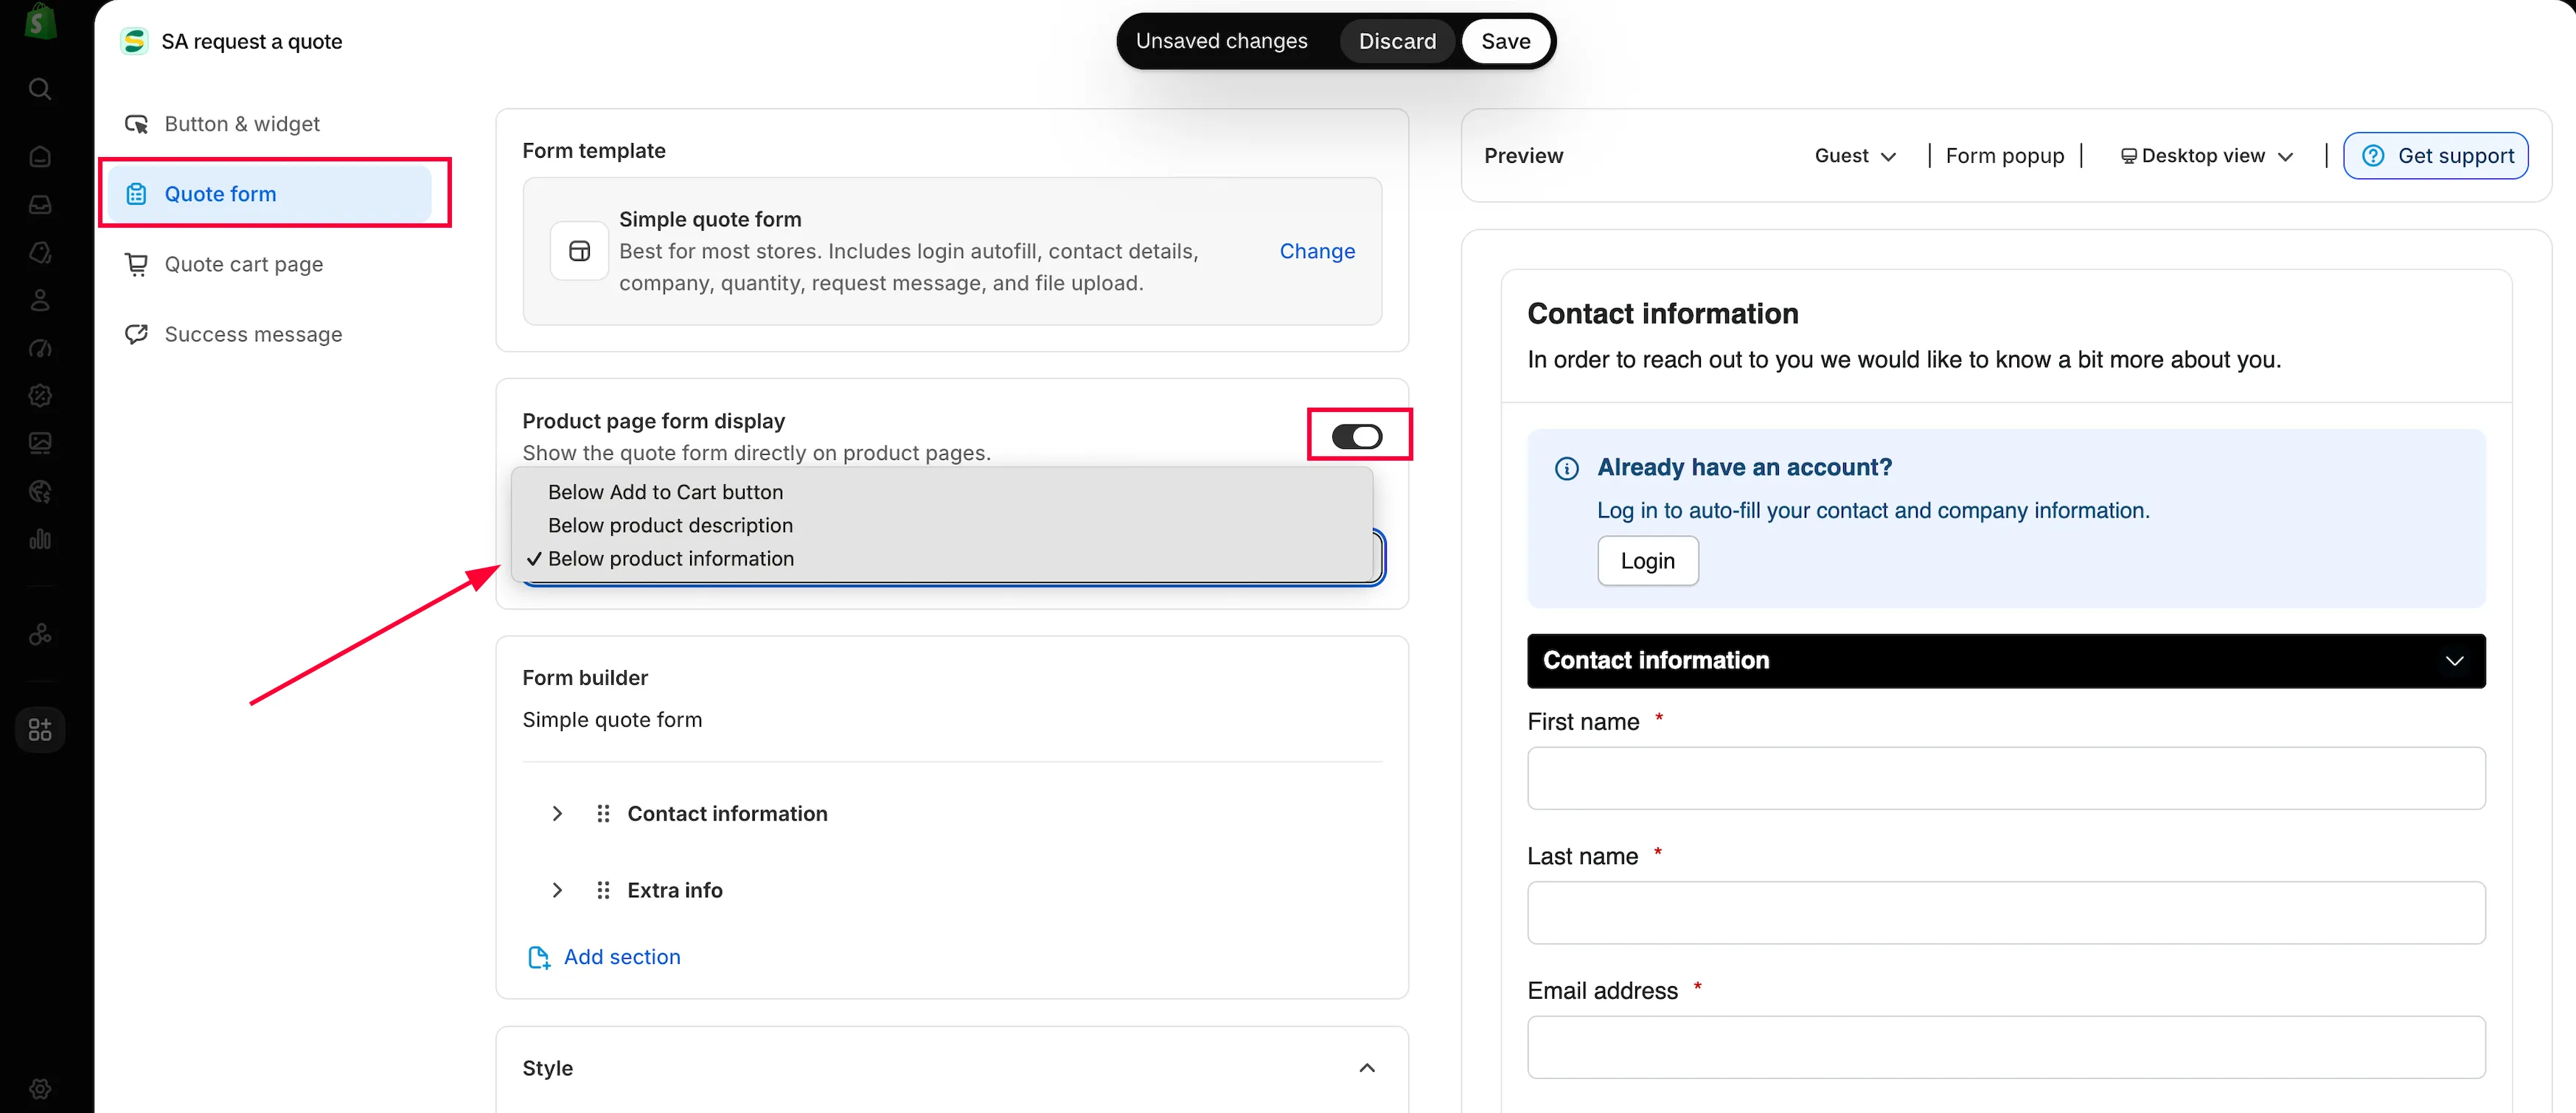
Toggle off this setting if you would rather customers build a quote cart first.
-
Work through the Form builder
Section titled “Work through the Form builder”The Form builder — “Manage sections, rows, fields, and validation with the visual form builder” — holds your questions, grouped into sections. Which sections are there depends on the template you just chose:
Template Sections in the builder Simple quote form Contact information · Extra info Detailed quote form Contact information · Shipping address · Extra info B2B customer form Contact information · Company information · Shipping address · Billing address · Payment terms · Extra info Three things you can do to a section:
- Switch it on or off. Open the section’s settings and tick or untick Enable. A disabled section is not shown to the customer, however many fields it holds.
- Rename it. The same settings panel has a Label — change it to whatever your buyers would call it.
- Move it. Drag the section by its handle to reorder the form.
Expand a section with its chevron to see the fields inside it, and use Add element to add another field to that section.
Contact and address fields are covered in Customer information fields; company, billing and payment terms in Build a B2B form.
-
Edit a field
Section titled “Edit a field”Click any field in the builder and its own settings open, headed with the field’s name and “Customize how this field appears on the form.”
Setting What it does Label The wording the customer reads. This is the setting merchants change most. Hide label Keeps the field but drops the label above it. Placeholder The grey example text inside the empty box. Use it for the format you want — "e.g. 500 units" beats a blank box. Help text A line under the field, for anything too long for a placeholder. Type What kind of field it is, and what the customer can type into it. Required The form will not submit without it. Ask for as few required fields as you can live with. Options / Add option The choices on a select, radio group or checkbox group. Choose default value What the field starts with when the form loads. Limit characters Turns on Min characters and Max characters. Column width How much of the row the field takes, so two short fields can sit side by side. Custom HTML class A class name for your own CSS — see Add custom CSS. Remove Deletes the field. It is on your own fields only: the built-in contact and address fields are protected and have no Remove. 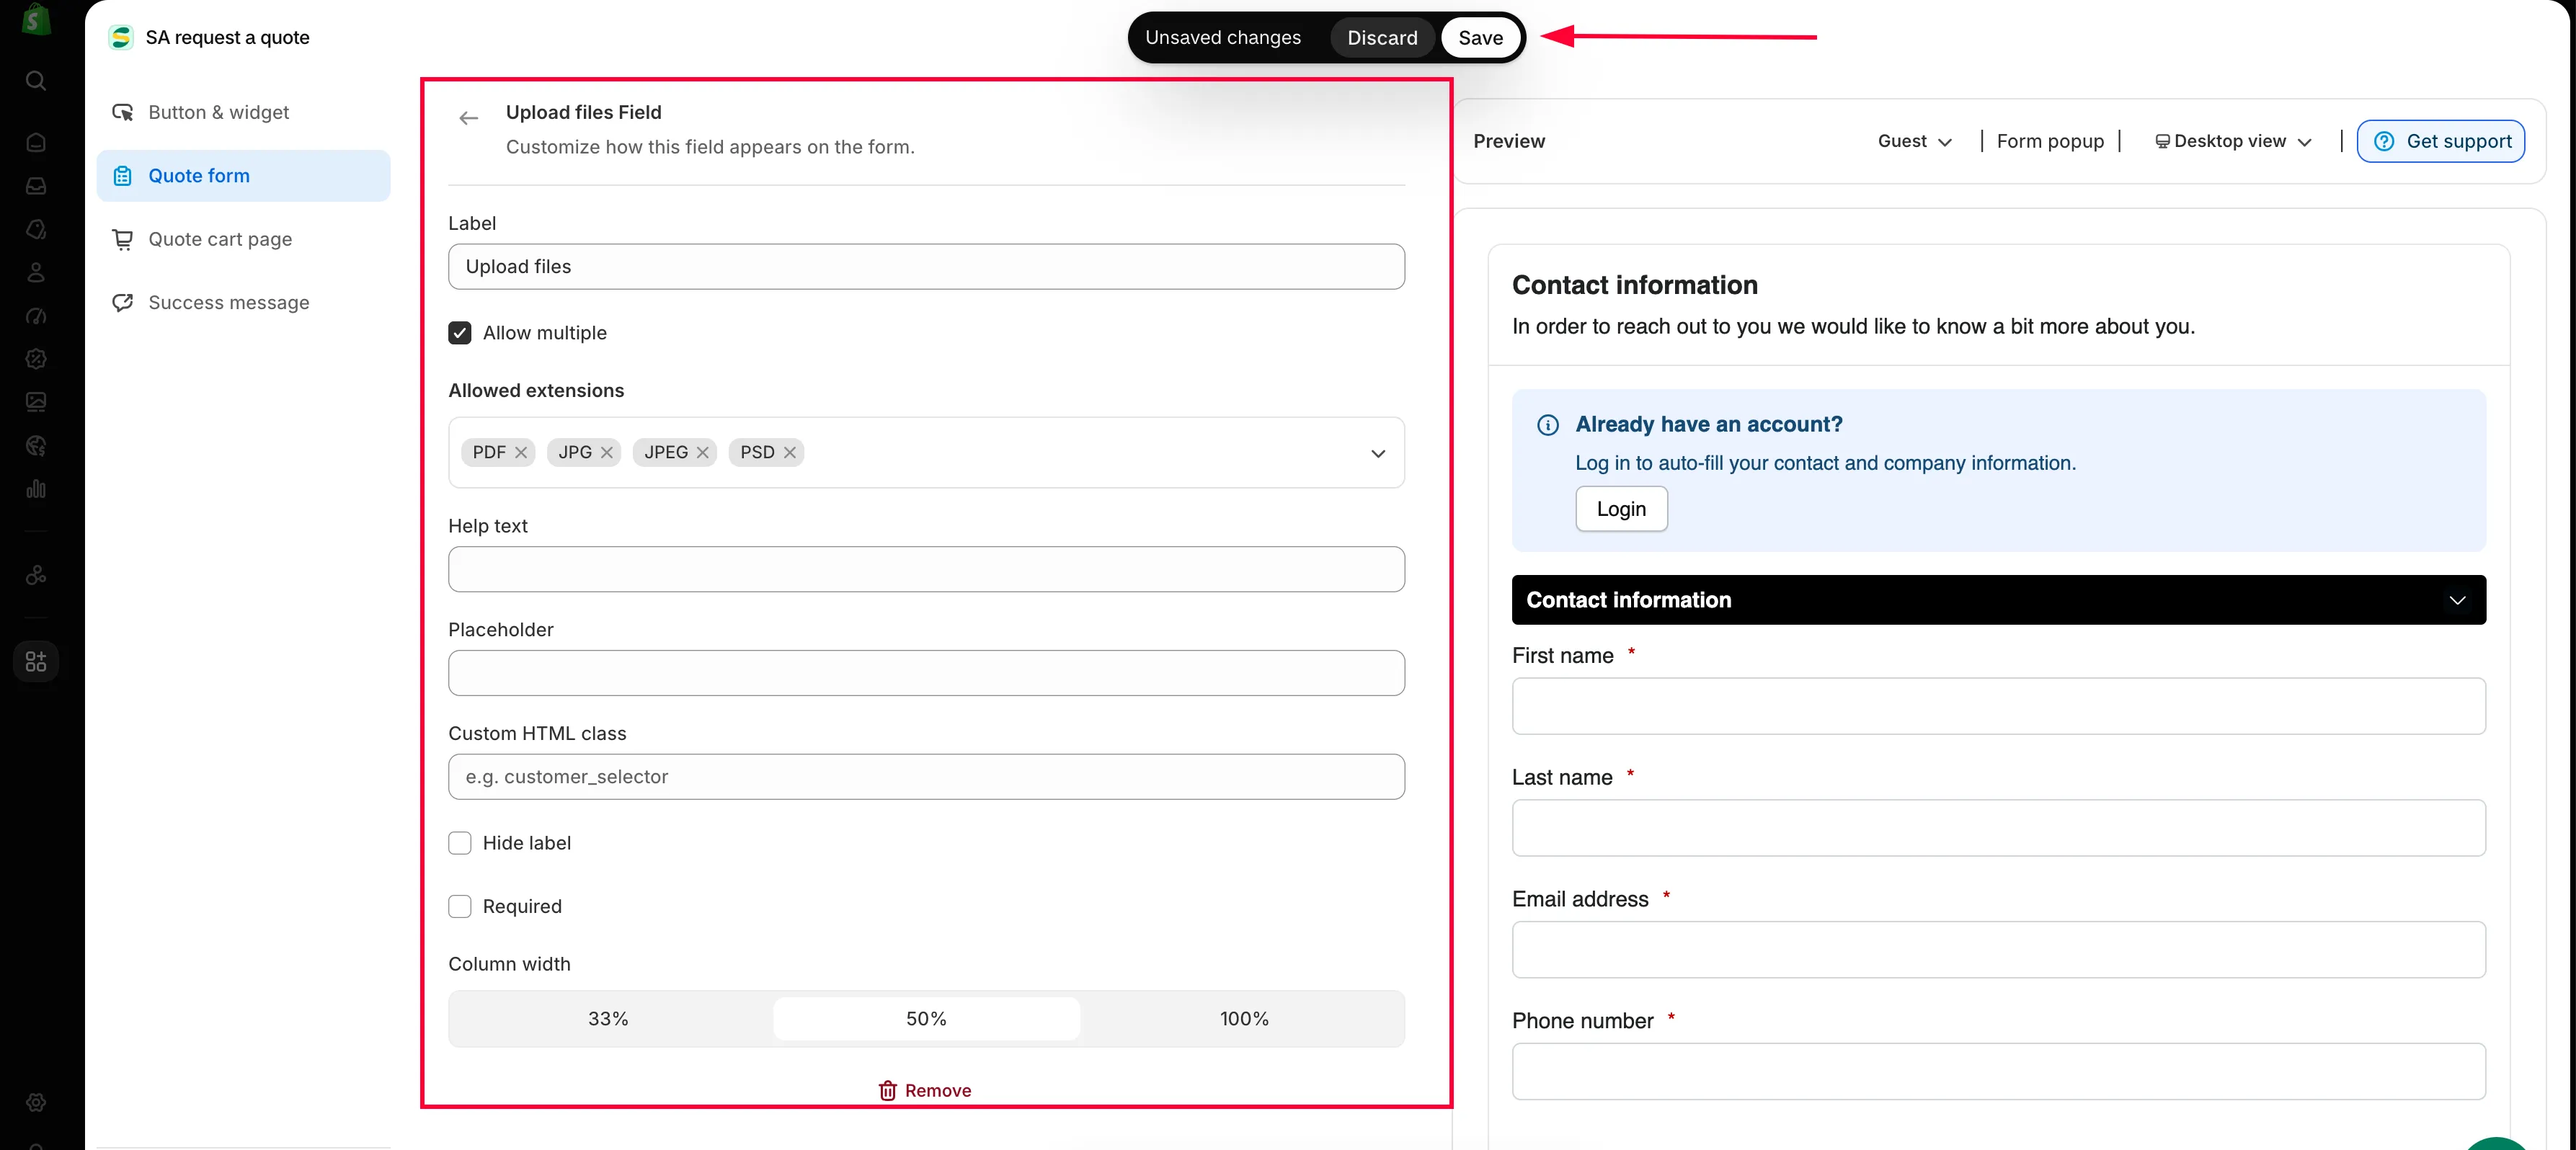
Click on each element and set up further (if needed)
Finish with Save changes in the field panel, or Cancel to drop the edit.
-
Put the fields in the order you want them
Section titled “Put the fields in the order you want them”Fields are reordered by dragging. Grab a field by the drag handle at the left-hand end of its row and drop it where you want it. Sections carry their own drag handle and move the same way.
Order matters more than it looks: a form that asks for a delivery postcode before it asks for a name reads like a database, not a conversation.
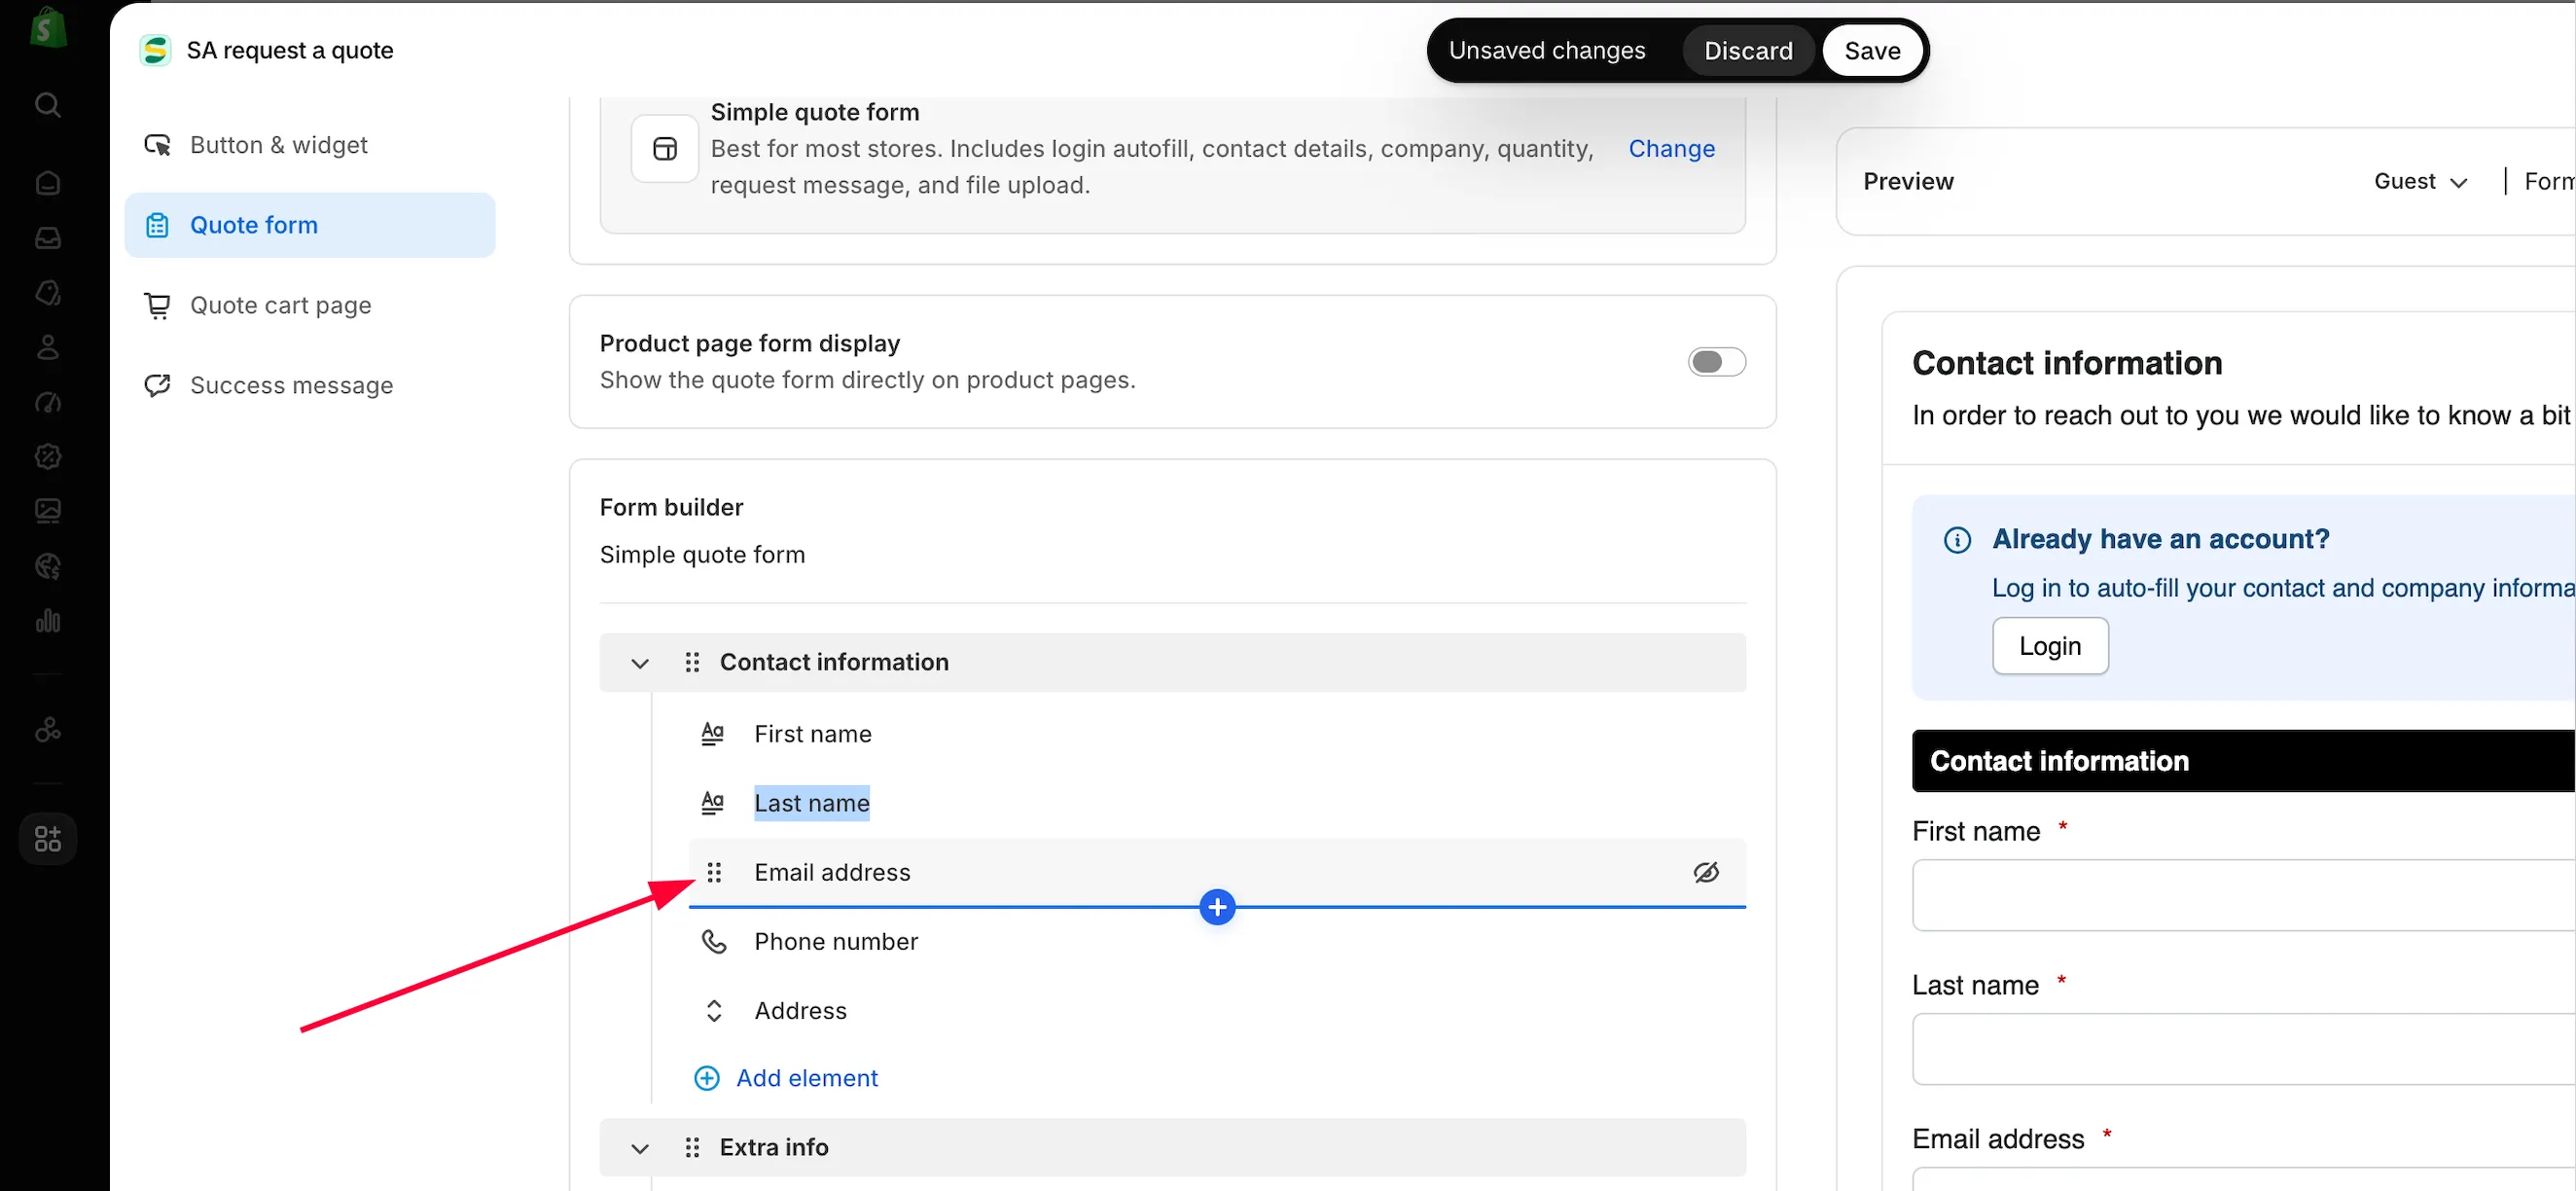
Drag and drop the element to change its position/order in the quote form
-
Add your own questions
Section titled “Add your own questions”Extra info starts with whatever your template puts there, and that differs by template. The Simple quote form arrives with Quantity and Upload files; the Detailed quote form with Project detail and Delivery service; the B2B customer form with Message.
Use Add element to add anything else you need — lead time, delivery date, project reference.
If a group of questions belongs together and doesn’t fit an existing section, use Add section to create a new one.
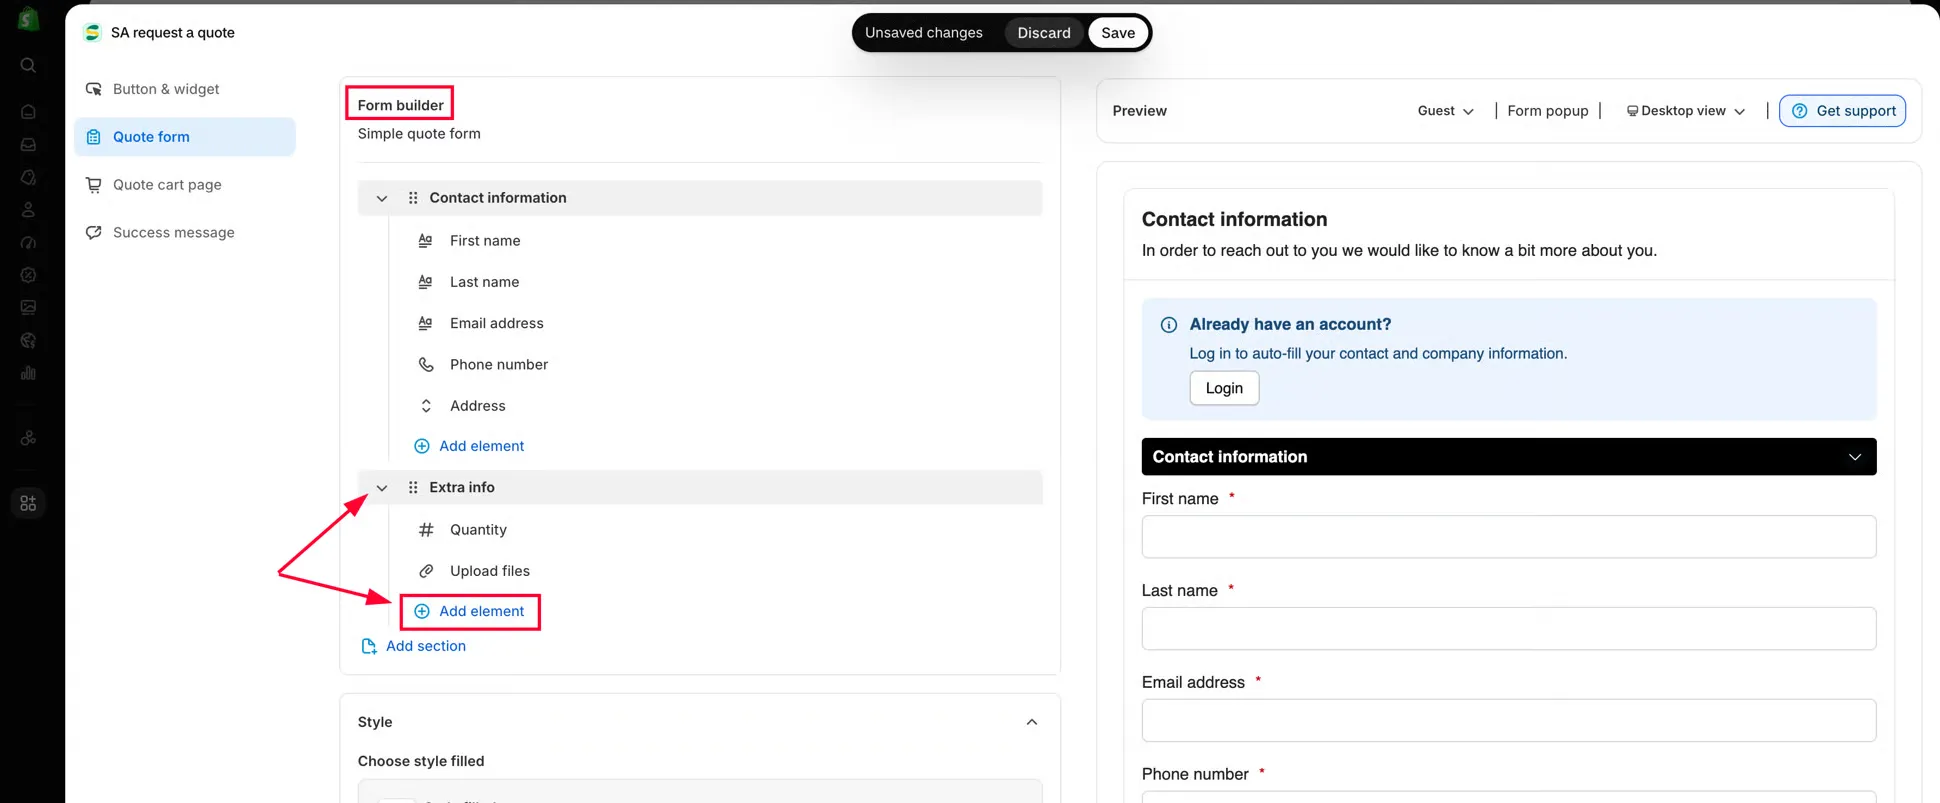
Click Add element to add more custom fields to the quote form
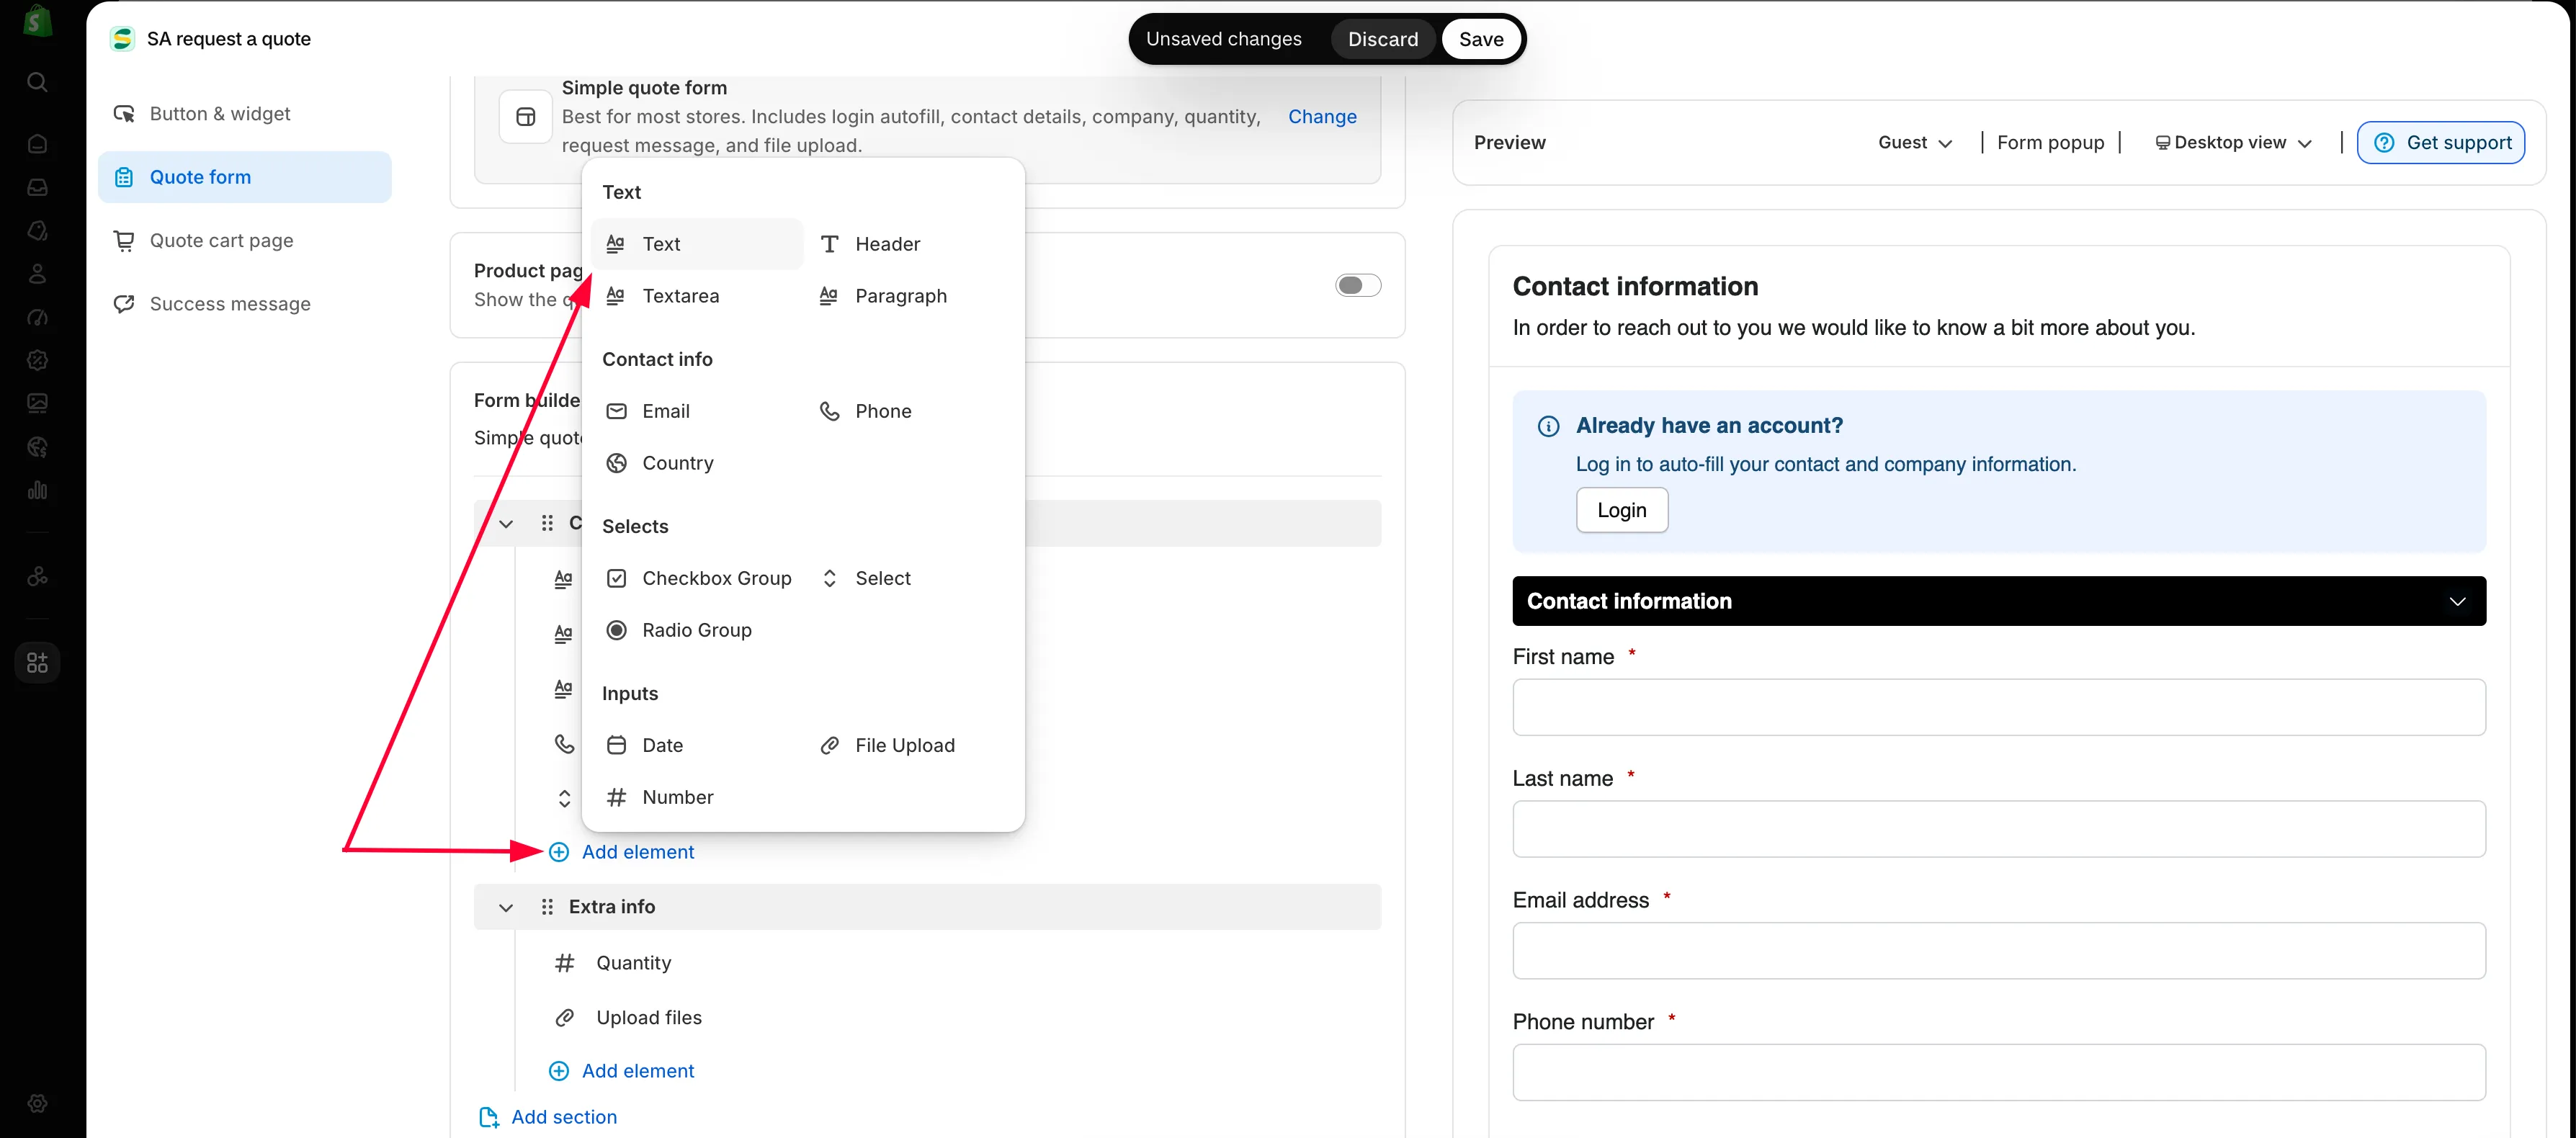
-
Style the form
Section titled “Style the form”Style shows the preset your form is using, with a Change button that opens the rest of them. The presets are Material filled, Classic, Flat, Flat round, Classic round, Line, Line round and Material outlined — each shown as a small picture of the input, so pick by eye rather than by name.
Beside it is Match theme styling if possible. Tick it and the form borrows your theme’s own fonts and inputs instead, which is usually the shortest route to a form that does not look bolted on. The app notes that “Theme styling applies on your storefront and is not shown in this preview”, so judge that one on the storefront, not here.
Customize text sets the Font style, the Title bar font size and the Title bar font weight. Customize form color sets the individual colours — Title bar color, Title bar background, Color, Background color, Border color, Button color, Button background color, Button border and Quote popup primary color.
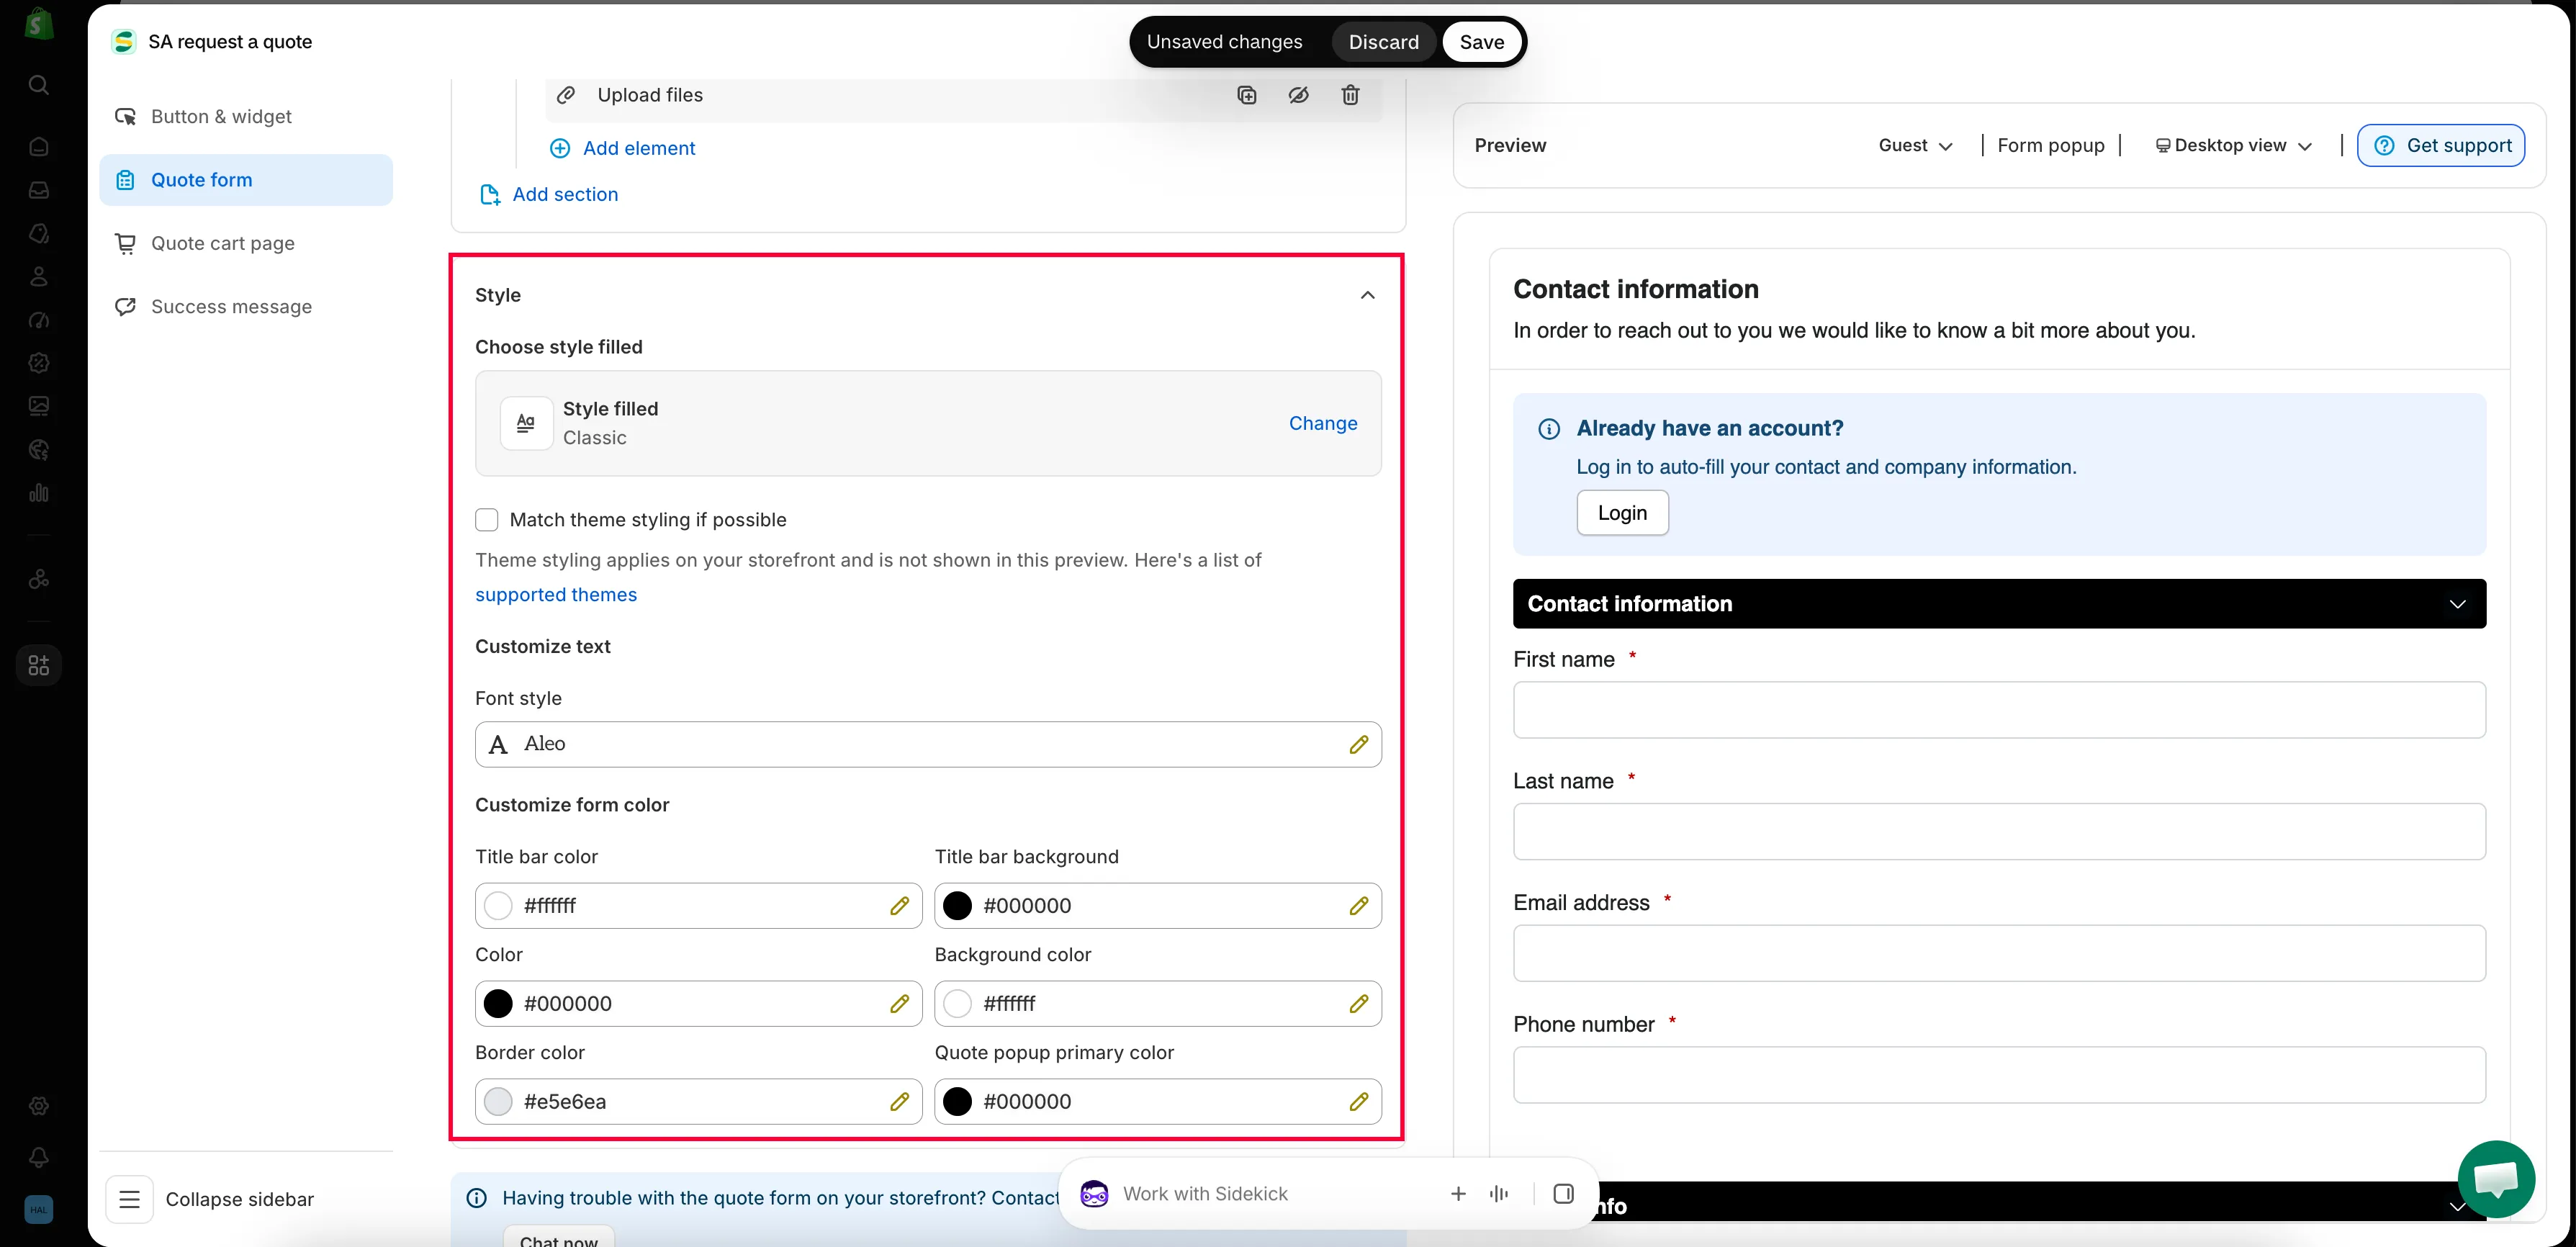
Full detail: Match your theme style.
-
Read the form back in Preview
Section titled “Read the form back in Preview”The Preview panel sits beside the editor and redraws as you work. Two controls on its toolbar are worth using before you save:
- The customer-state button, which switches the preview between Guest and Logged-in — they see different forms.
- The desktop / mobile toggle, because a long form is a different thing on a phone.
-
Save and test it yourself
Section titled “Save and test it yourself”Change anything and Shopify’s save bar appears with Save and Discard changes. Click Save. If a field still has a validation error the editor refuses and says “Please resolve validation errors before saving.” — fix the field it names and save again.
Then go to your storefront and submit a real test request. Check it arrives in Quote list with everything you expected.
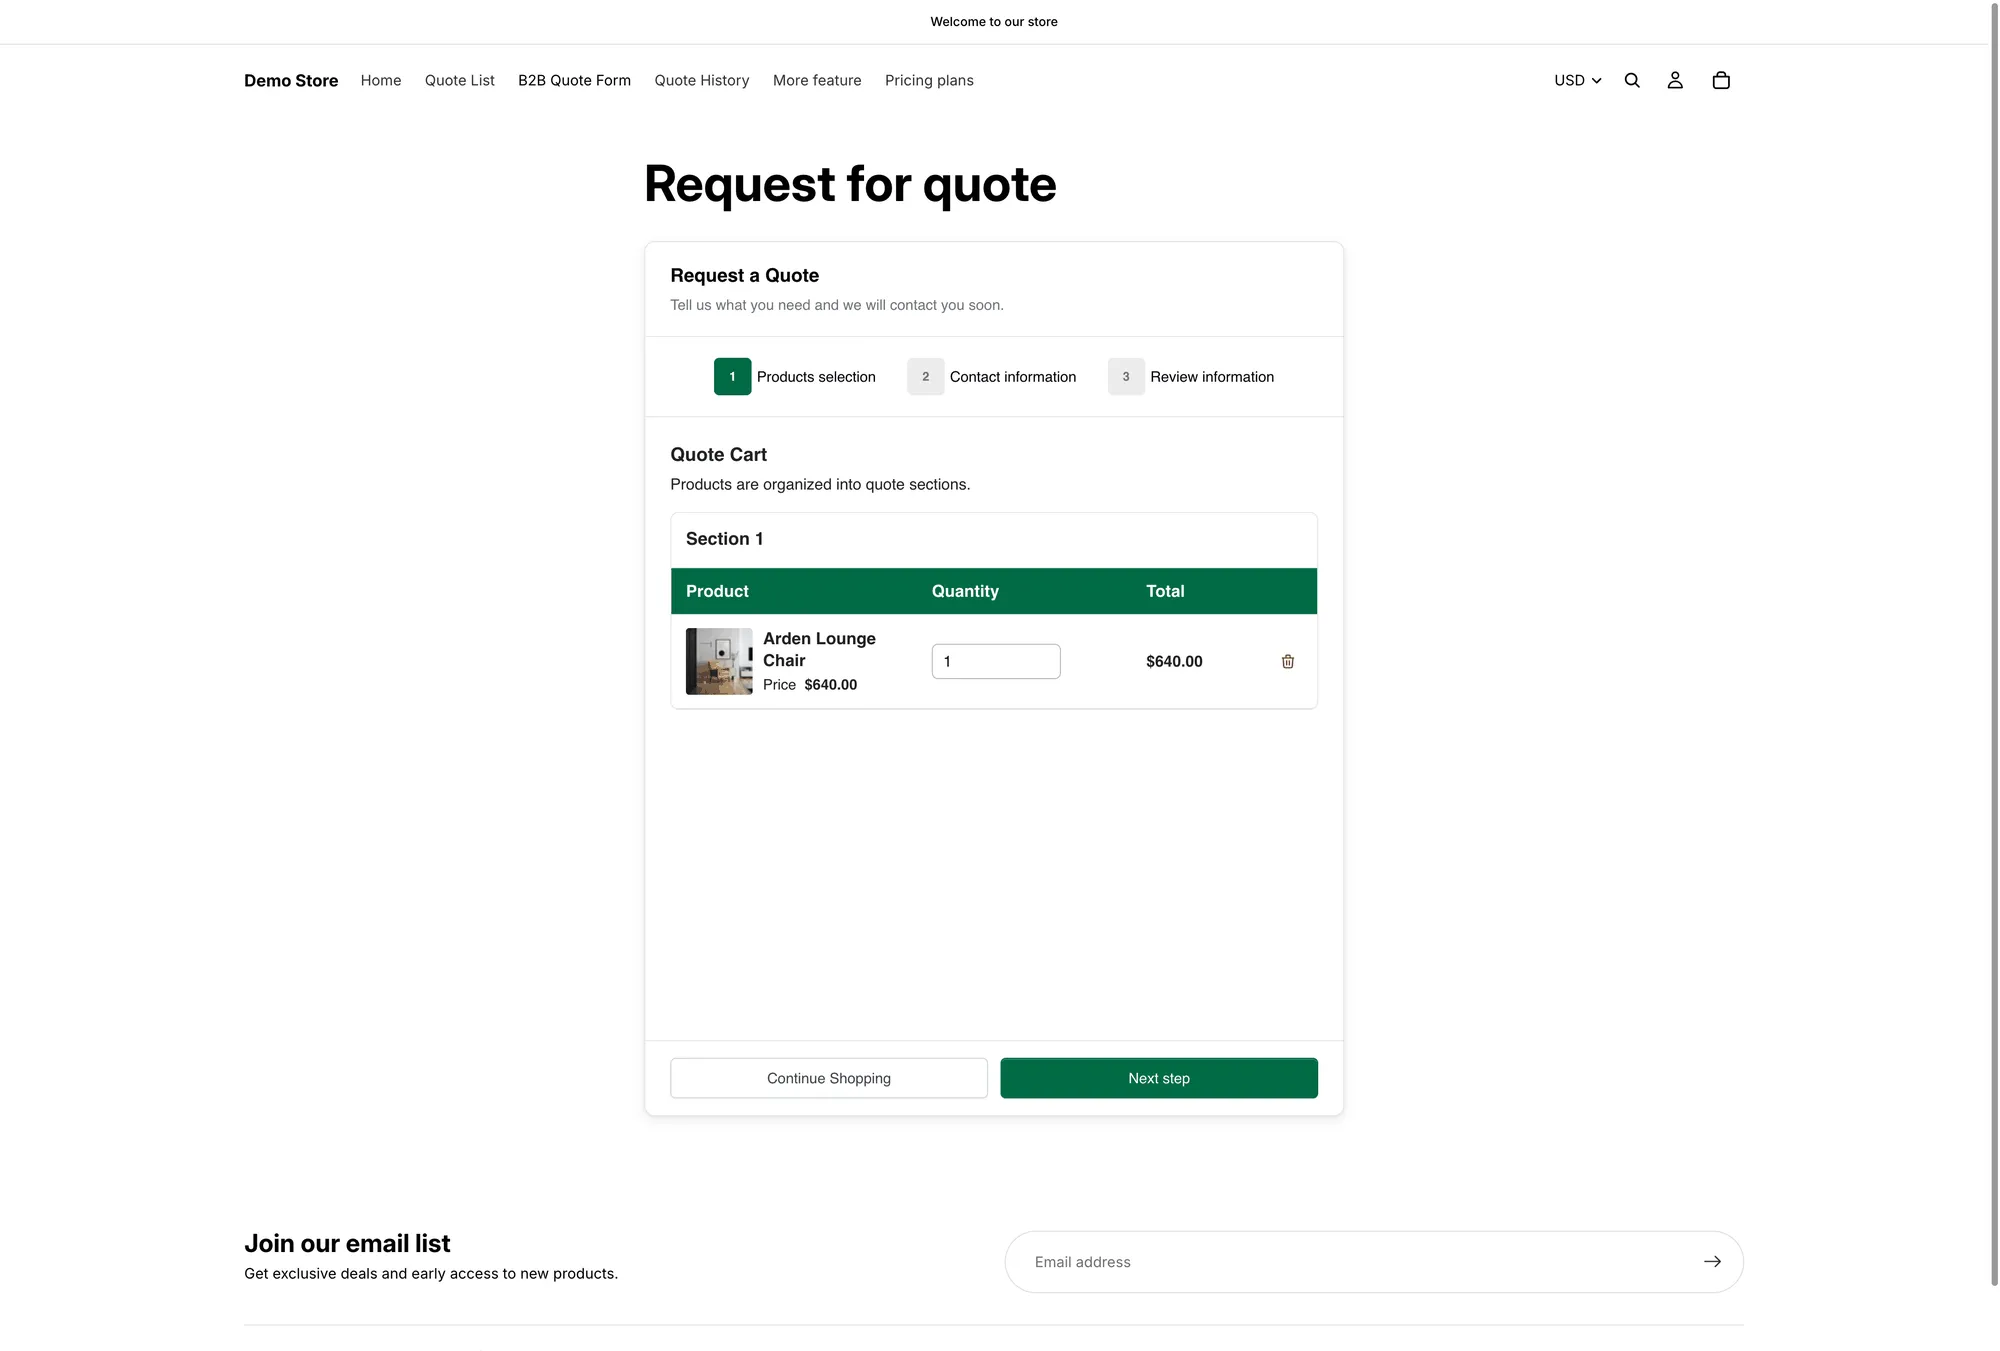
The form on the storefront, with Quote form appearance set to Multiple step.
Where the rest of the settings live
Section titled “Where the rest of the settings live”The Quote form tab is only the questions. Several things merchants come looking for here are on the other tabs of the same editor:
| What you want | Tab | What you will find |
|---|---|---|
| The form as one page or as steps | Quote cart page | Quote form appearance — "Controls how the quote form looks on the quote cart page" — set to Multiple step or Single page. |
| What the product rows show | Quote cart page | Product list columns — "The product details shown as columns in the customer's quote cart" — see Quoted product group. |
| Letting customers group products | Quote cart page | Enable Quote Sections — "Lets customers group the products in their quote cart into named sections" — see Quoted product group. |
| The button's wording and placement | Button & widget | Button text, click action, button position and who can see it. |
| What happens after submitting | Success message | The thank-you wording and Redirect to custom URL. |
Next steps
Section titled “Next steps”- Customer information fields — fine-tune what you ask for
- Quoted product group — product columns and quote sections on the quote cart page
- Add reCAPTCHA — protect the form from spam
- Build a B2B form — the template for trade buyers