
Build a B2B form
Use the B2B customer form template to collect company details, a billing address, payment terms and a deposit.
Trade buyers need to tell you things a consumer doesn’t — who they’re buying for, where the invoice goes, and how they intend to pay. The B2B customer form template asks for all of it.
The app describes it as “For wholesale or business buyers who need company, shipping, billing, and payment term information”.
Is it the right template?
Section titled “Is it the right template?”Form template offers three starting points, and they ask for genuinely different things:
| Template | Sections it arrives with | What sits in Extra info |
|---|---|---|
| B2B customer form | Contact information · Company information · Shipping address · Billing address · Payment terms · Extra info | Message |
| Detailed quote form | Contact information · Shipping address · Extra info | Project detail and Delivery service |
| Simple quote form | Contact information · Extra info | Quantity and Upload files |
The one you are most likely weighing B2B customer form against is Detailed quote form — “For custom orders, delivery, installation, or project-based quotes. Includes login autofill guidance.”
If you quote jobs rather than orders — installation, a delivery window, a project brief — Detailed quote form is the better starting point, and Build a standard form walks through it.
Set it up
Section titled “Set it up”-
Open the Quote form tab
Section titled “Open the Quote form tab”Go to Quote settings, click Customize on the Customize card, then open the Quote form tab.
-
Switch the template
Section titled “Switch the template”In Form template, click Change. A picker opens, headed Choose a form template, with the note “Select a starting point. The form fields will change only after you confirm.”
Pick the B2B customer form card — it is tagged B2B, and its summary line reads “Login autofill, contact, company, shipping, billing, payment terms, message”. Then click Use this template to confirm. Cancel leaves your current form untouched.
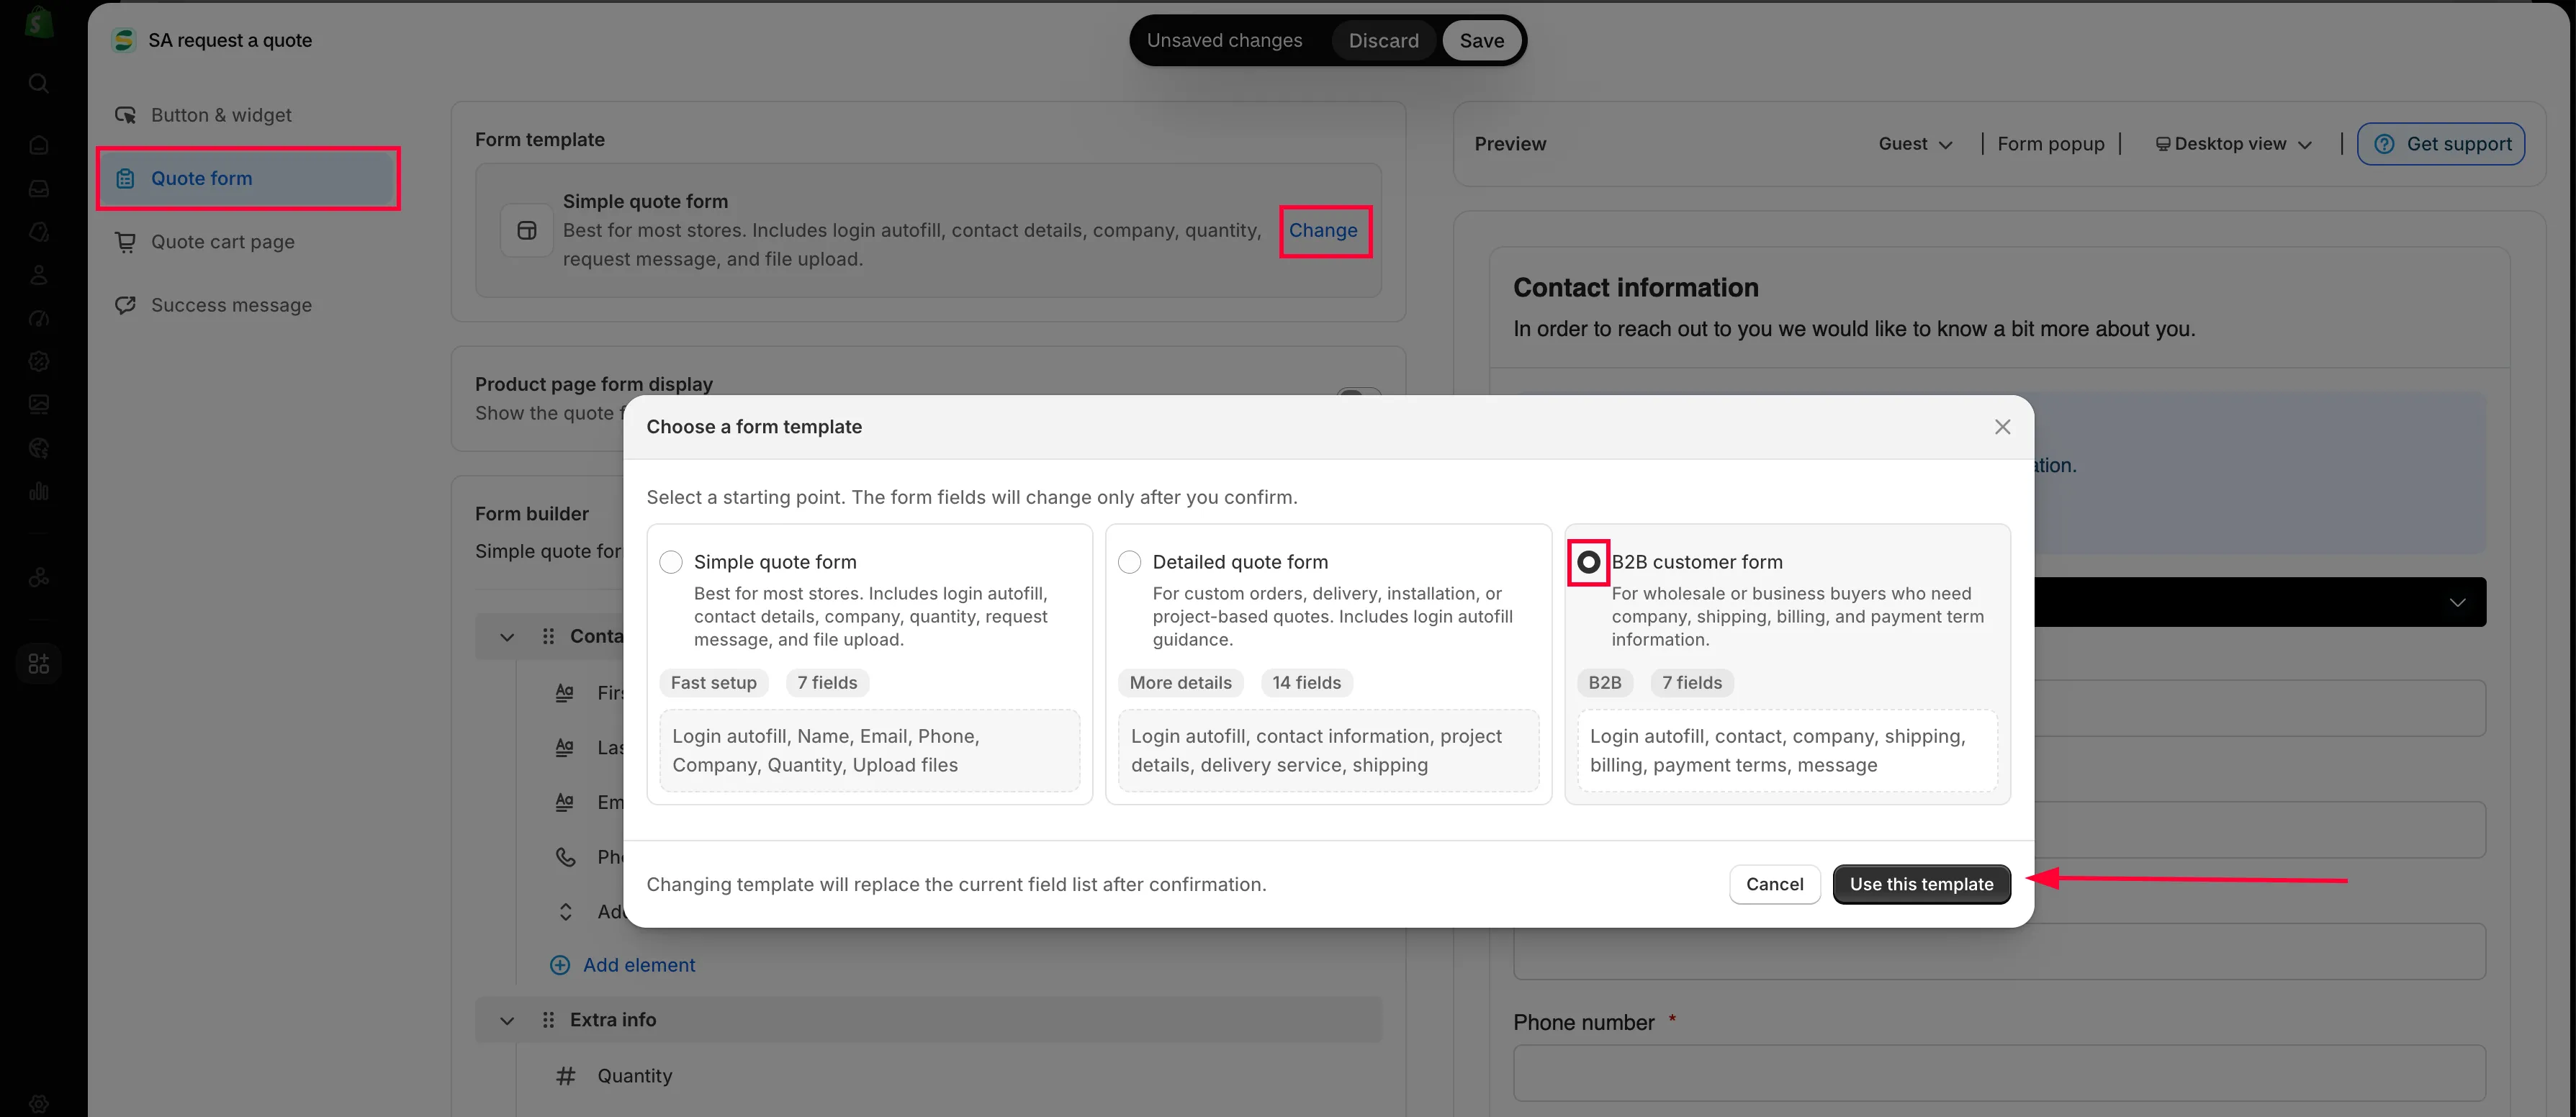
Change opens the template picker.
-
Turn the business sections on
Section titled “Turn the business sections on”The Form builder now lists six sections in this order: Contact information, Company information, Shipping address, Billing address, Payment terms and Extra info. The three in the middle are what the Detailed quote form does not have — they are the reason to be on this template at all.
Each section is switched on separately. Click a section’s settings control, tick Enable, and set its Label if you want to call it something else. A section left disabled is not shown to the customer at all, however many fields it holds.
Expand a section with the chevron to see its fields, and click any field to edit it.
-
Set up the billing address
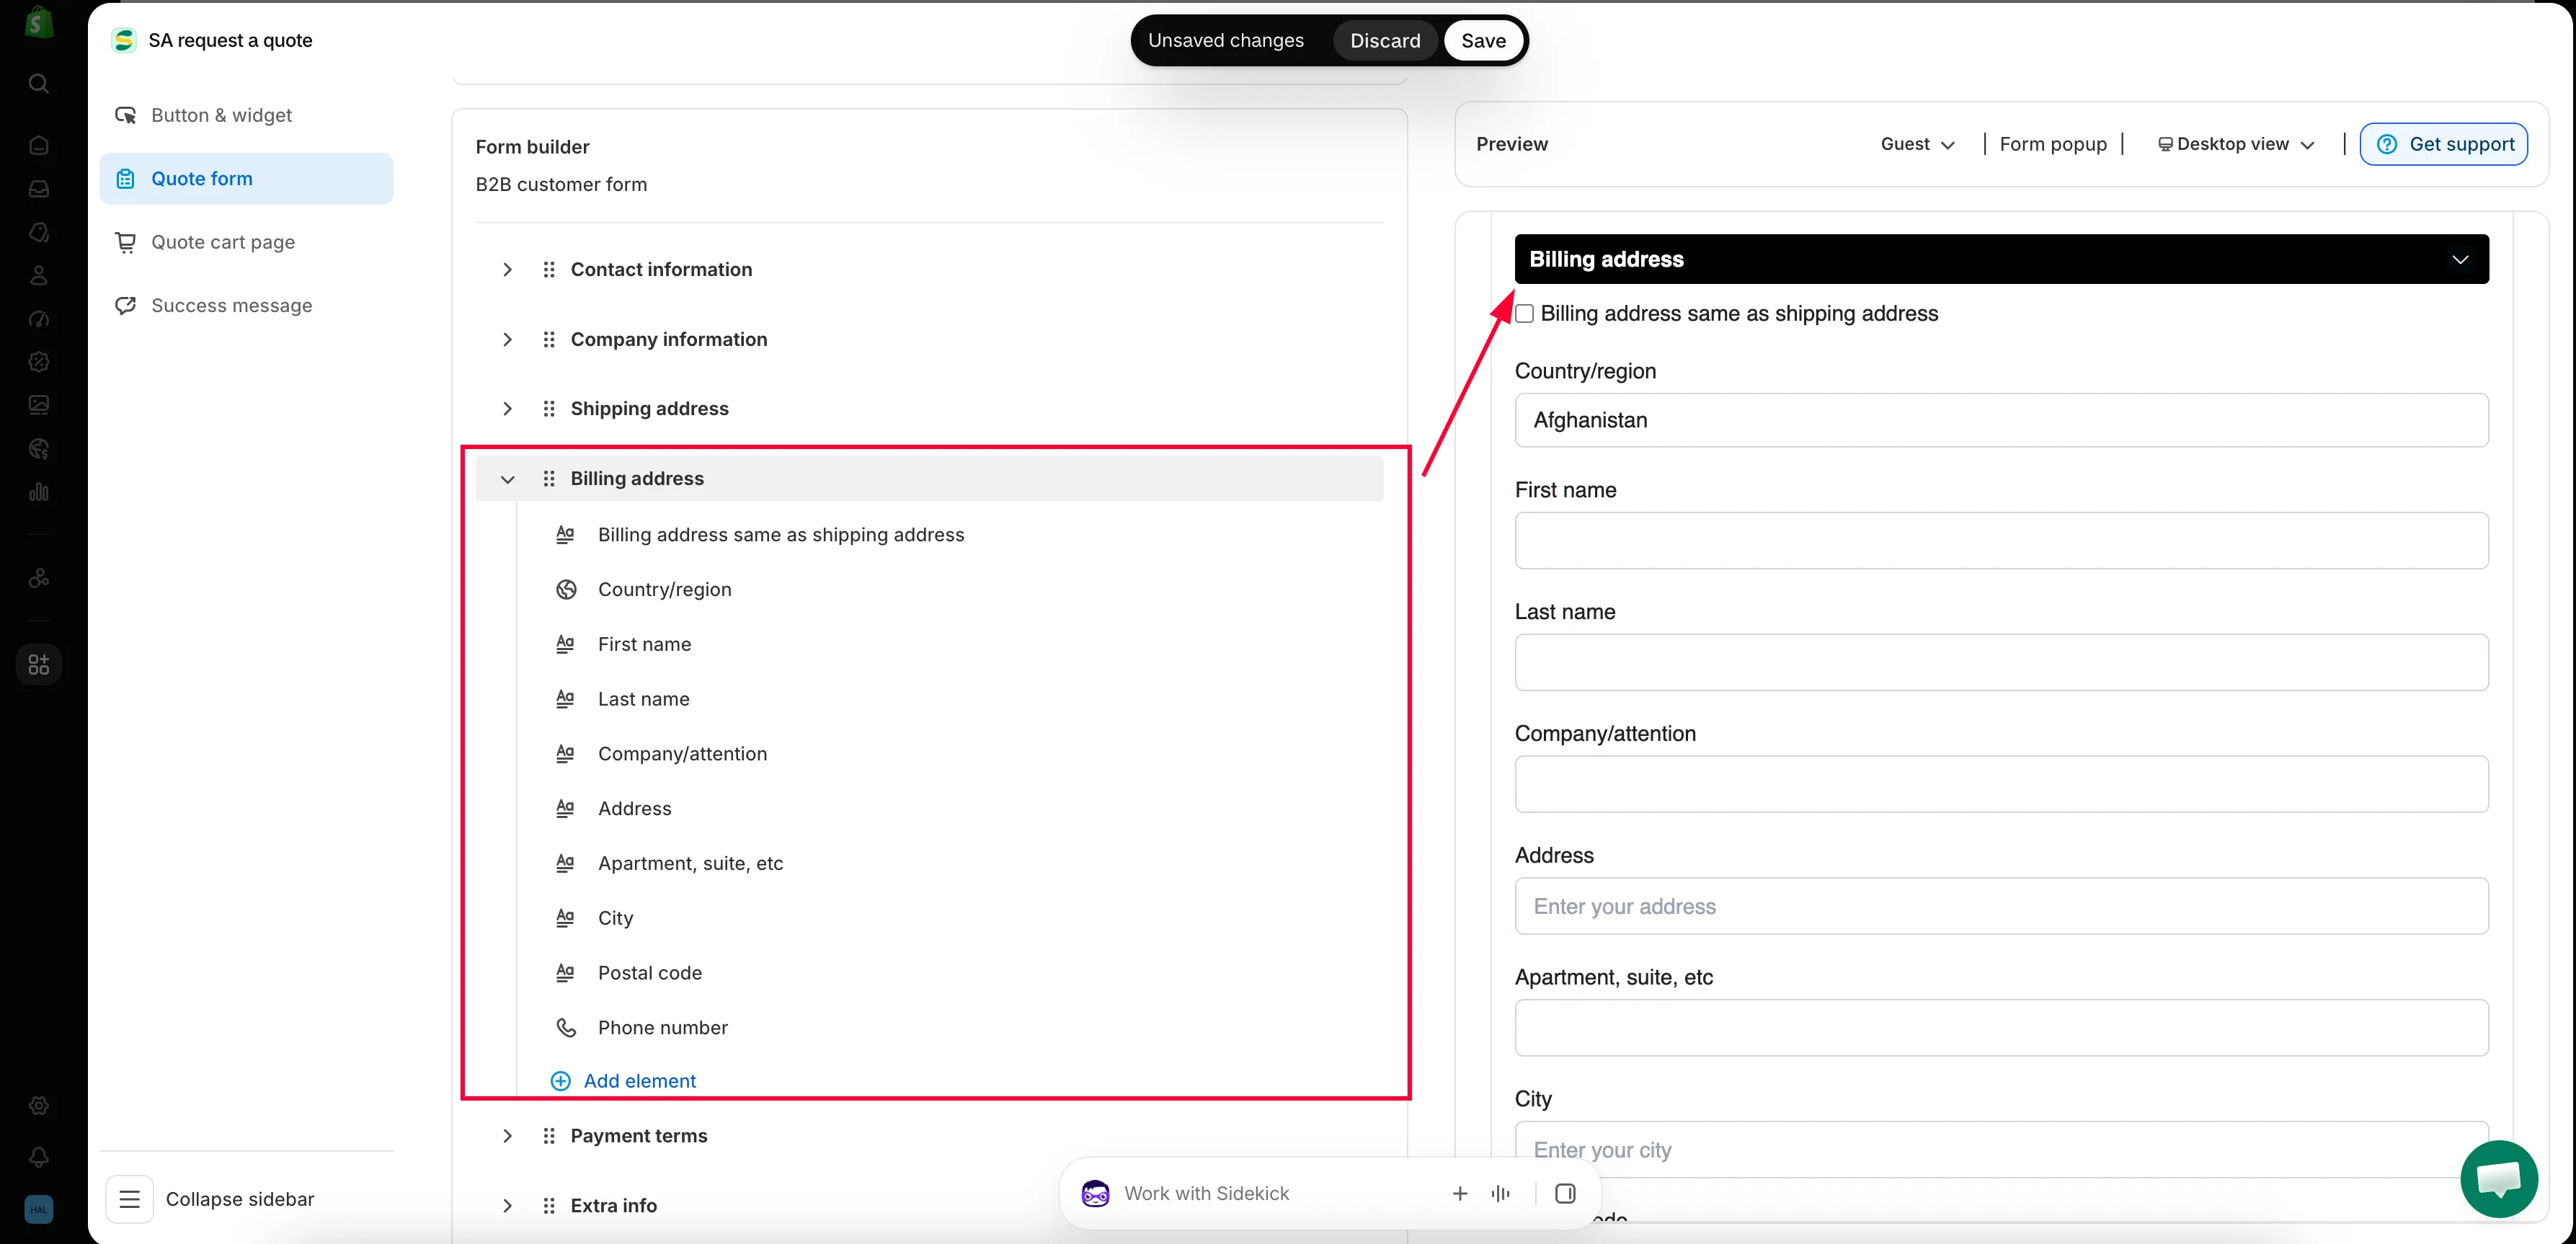
Section titled “Set up the billing address”Billing address starts with a Billing address same as shipping address checkbox, then repeats the address fields underneath. Most buyers tick the box; the ones who don’t are exactly the ones whose invoice goes somewhere else.
-
Set up payment terms and the deposit
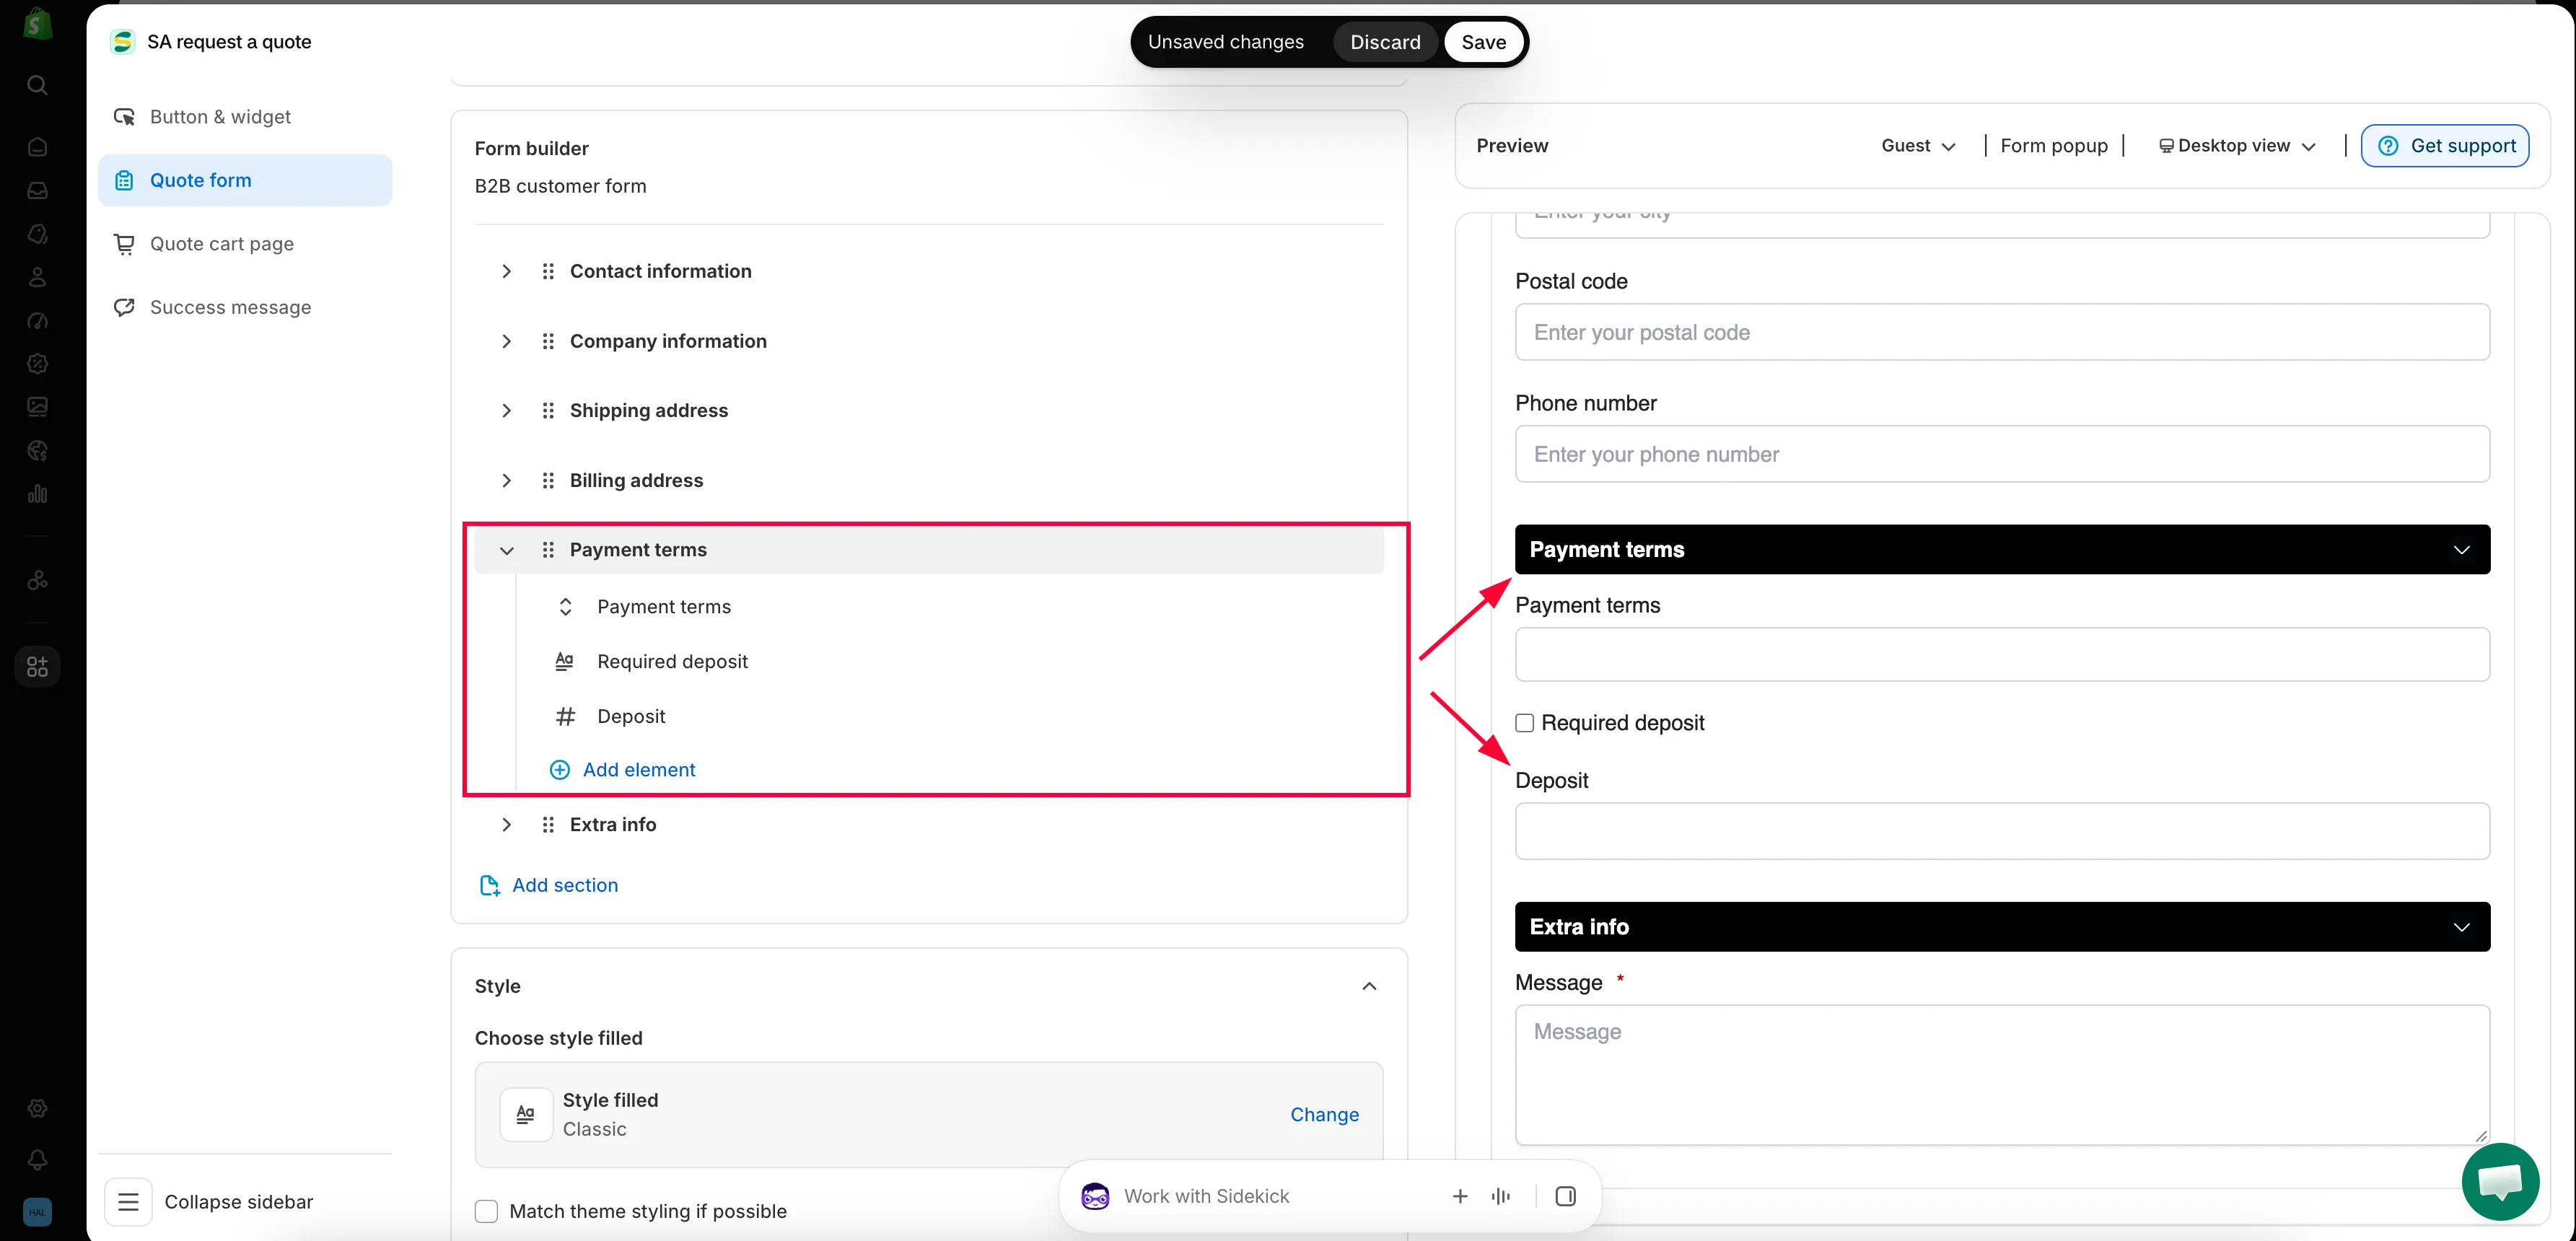
Section titled “Set up payment terms and the deposit”Payment terms holds the Payment terms field, a Required deposit checkbox and a Deposit field. See below.
-
Add anything else you need
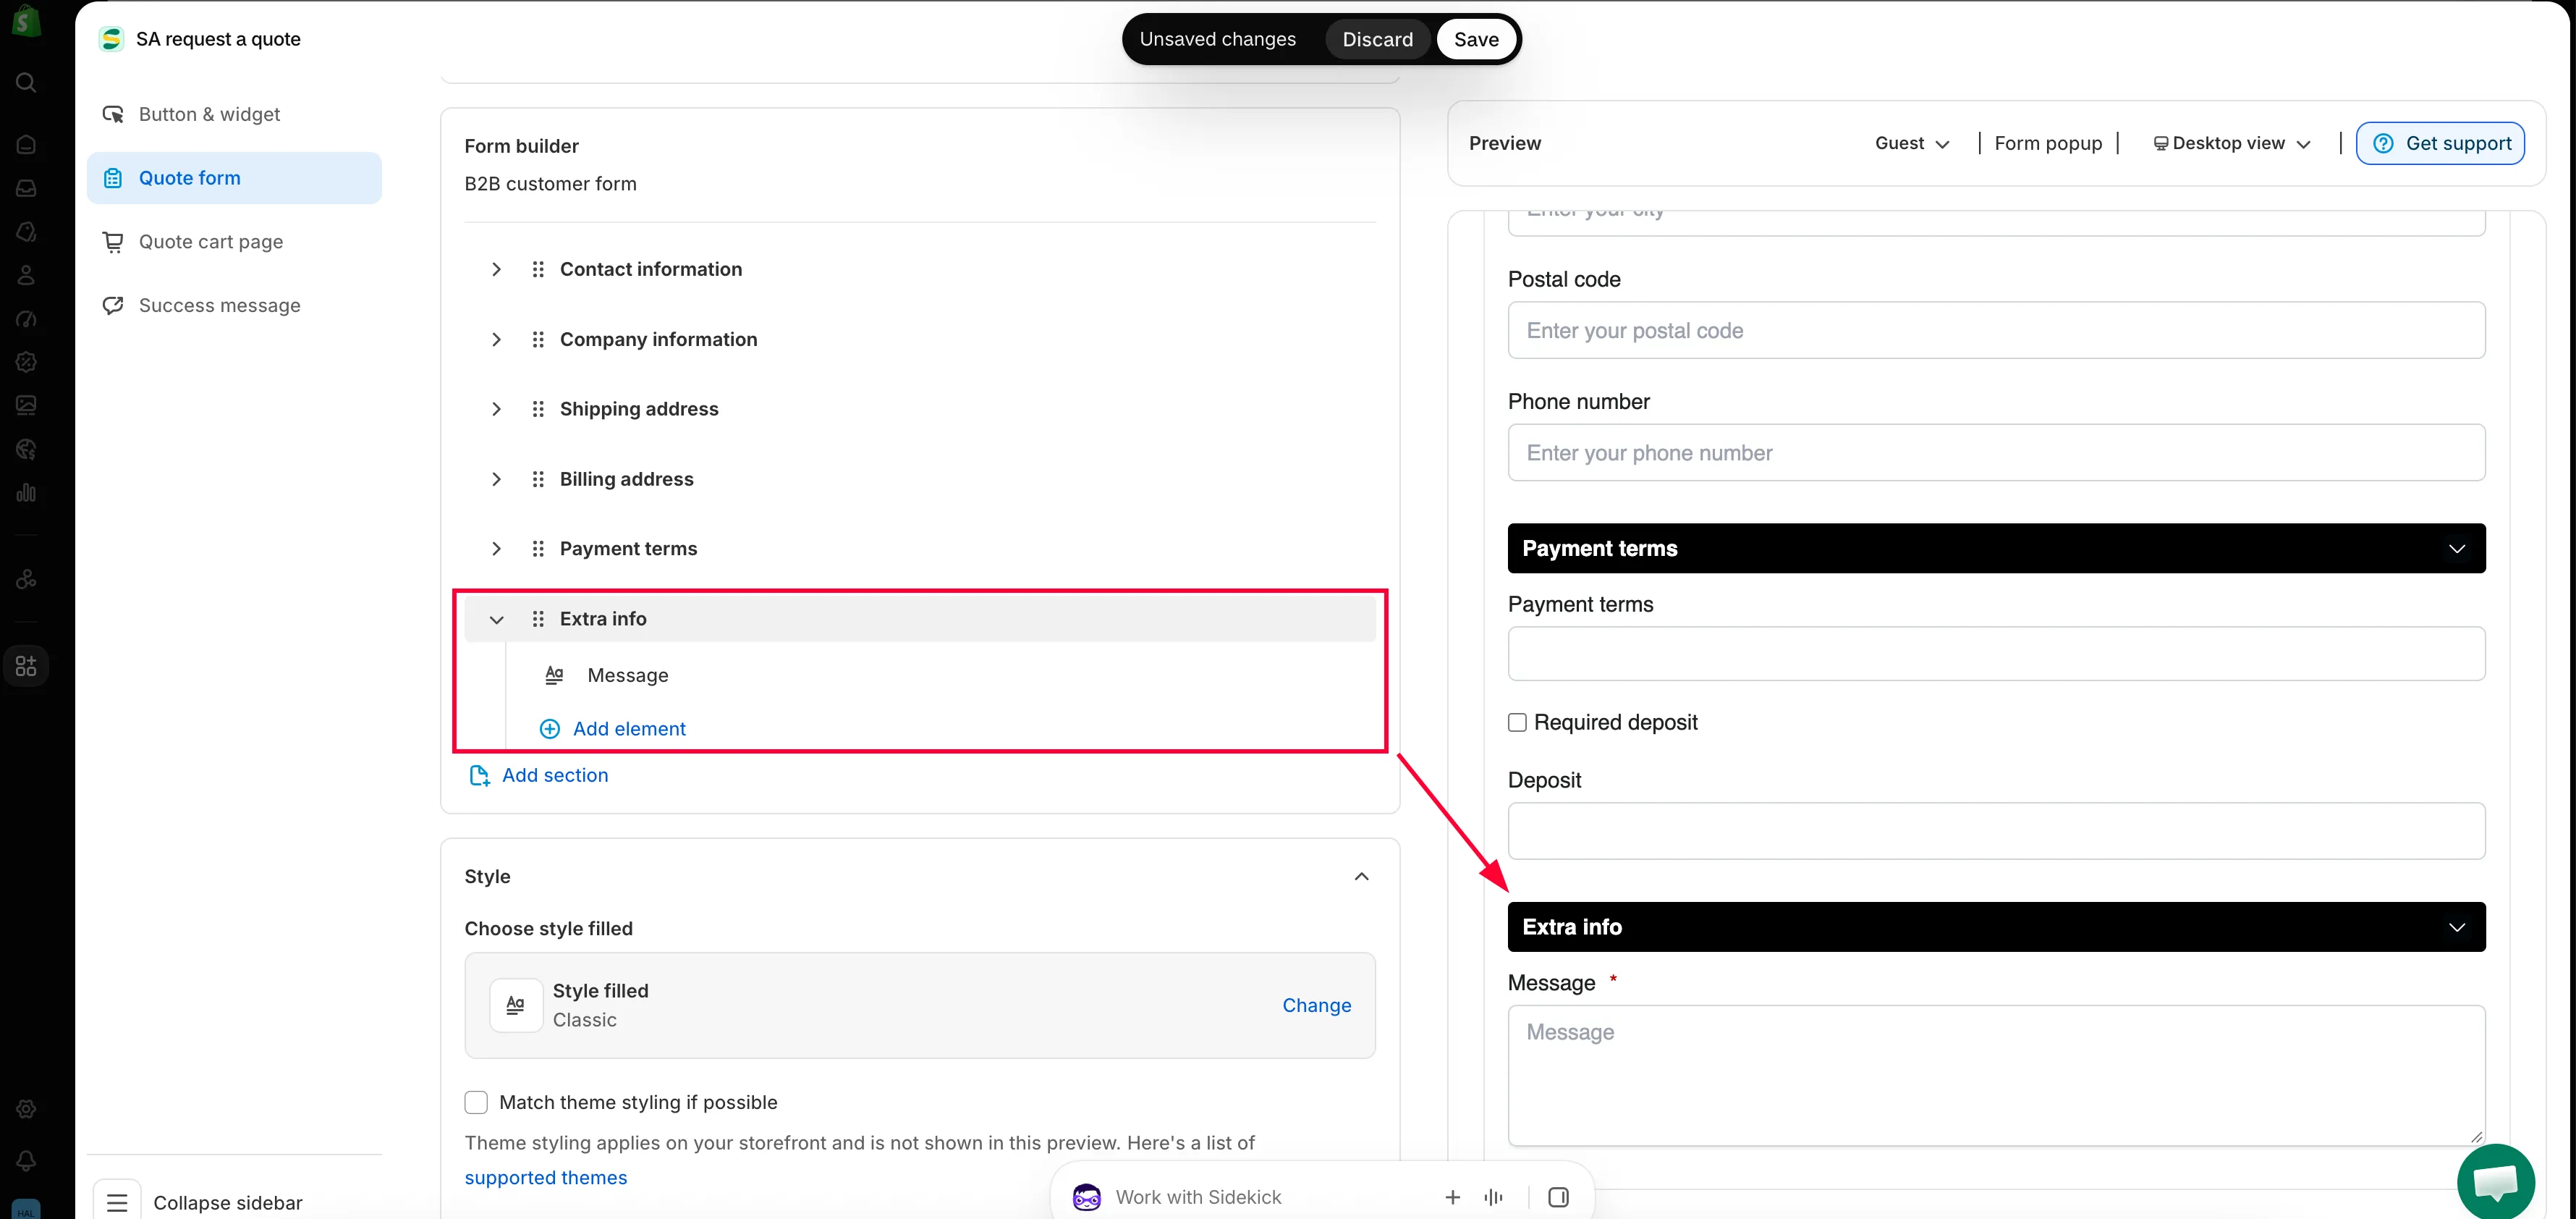
Section titled “Add anything else you need”On this template Extra info holds a single Message field, set to required. Use Add element inside a section for one more question, or Add section for a whole new group.
-
Preview it as a logged-in buyer
Section titled “Preview it as a logged-in buyer”This is the step most people skip, and it is the one that matters most on a B2B form — because a logged-in trade buyer sees a different form from a first-time visitor.
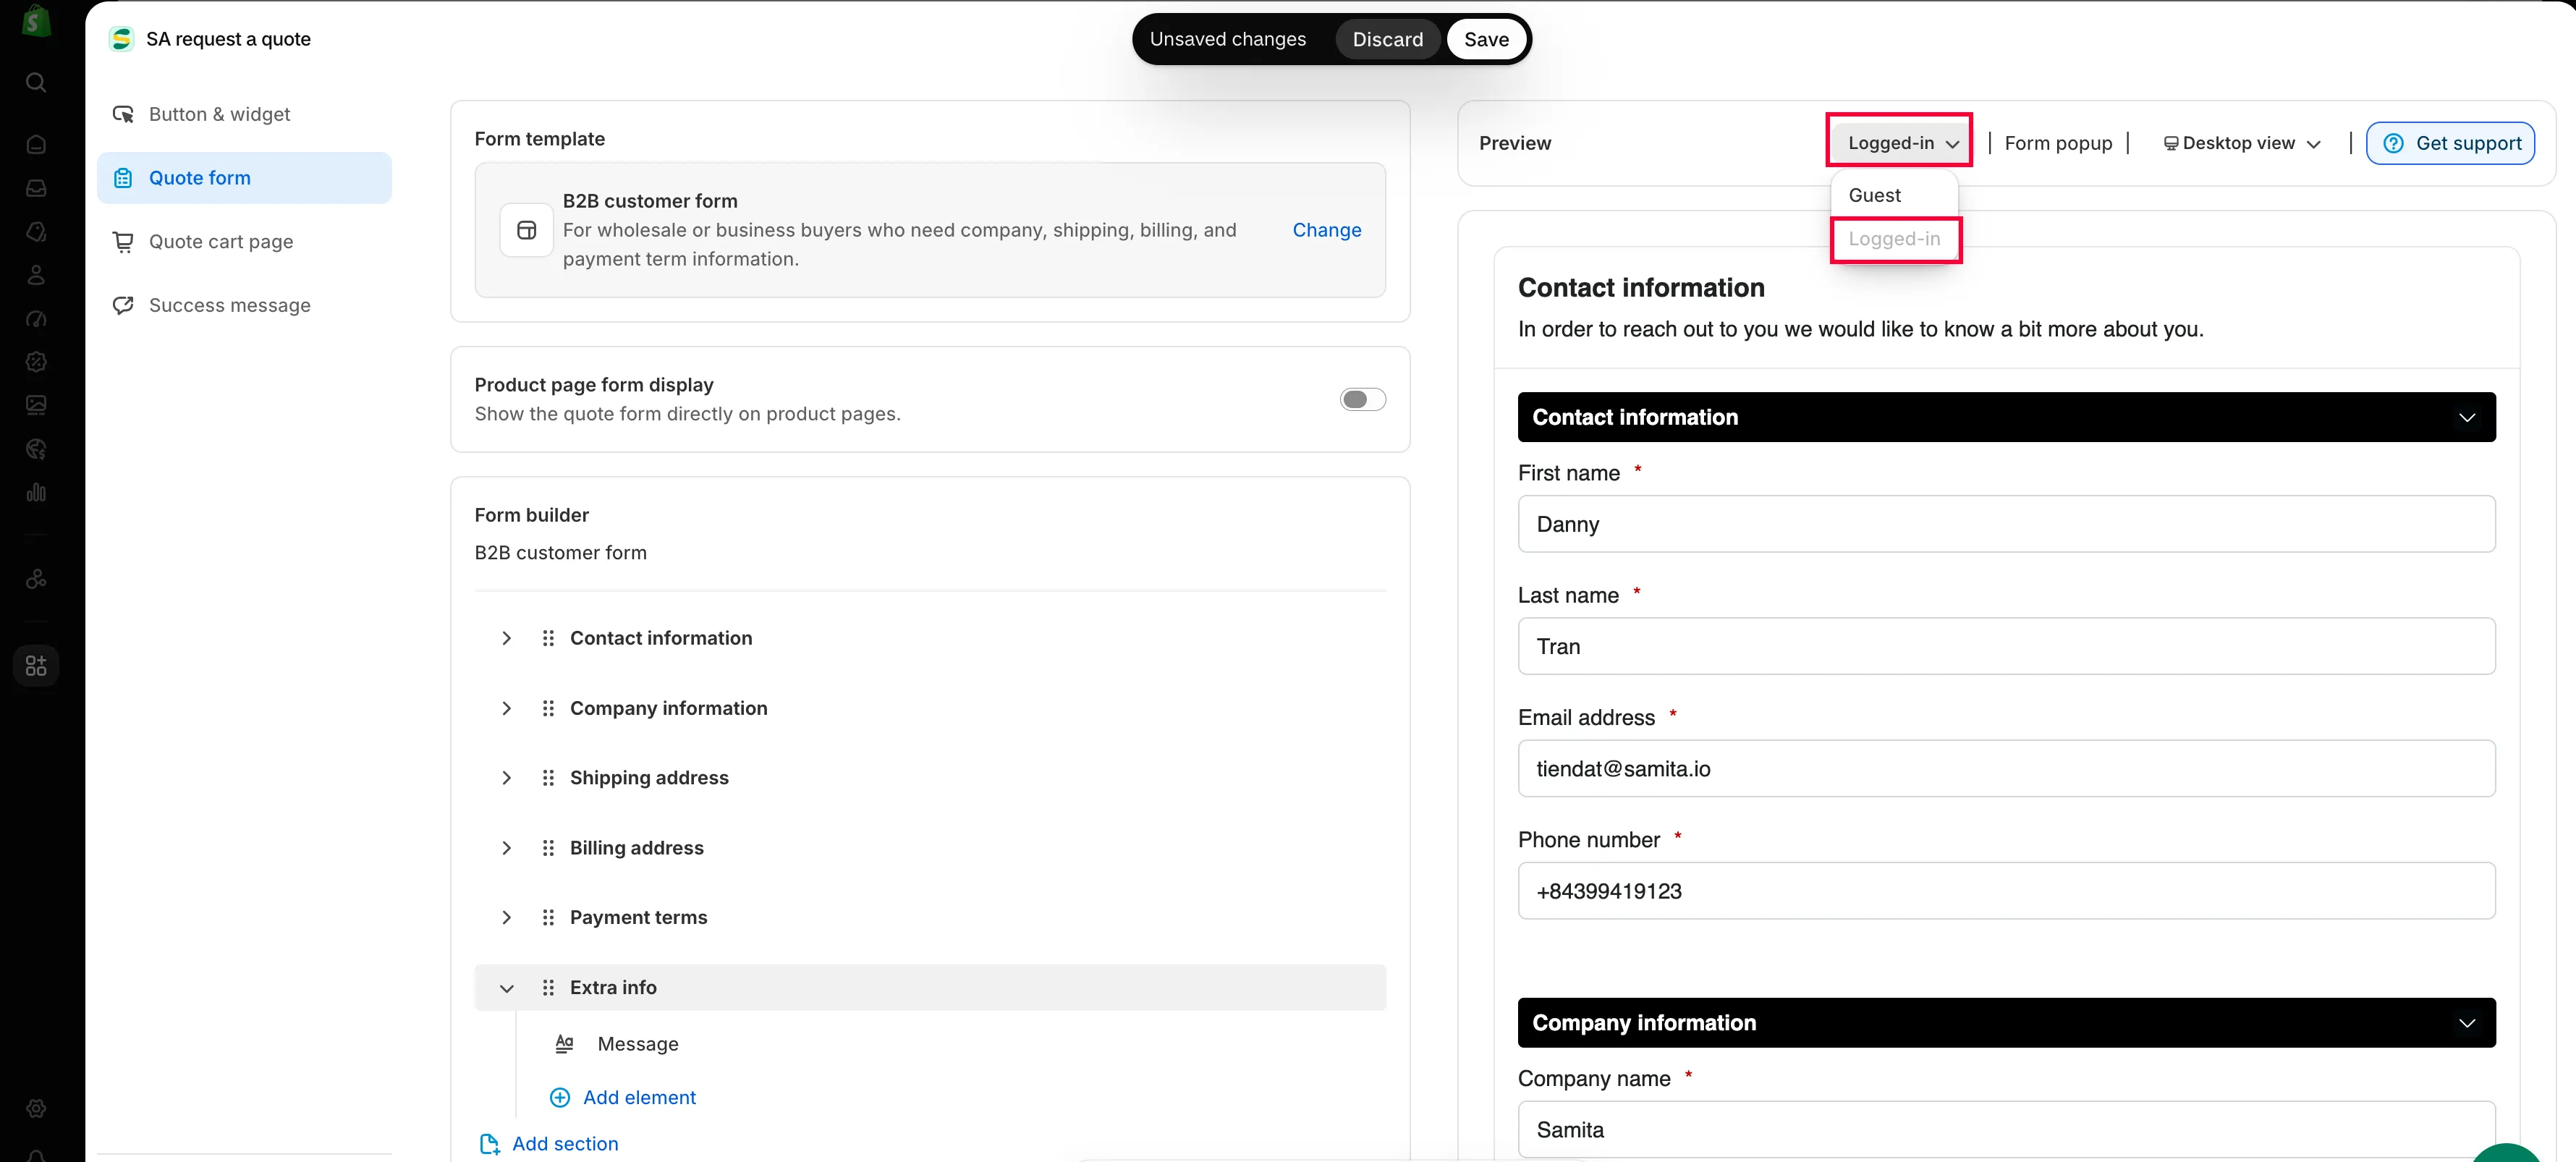
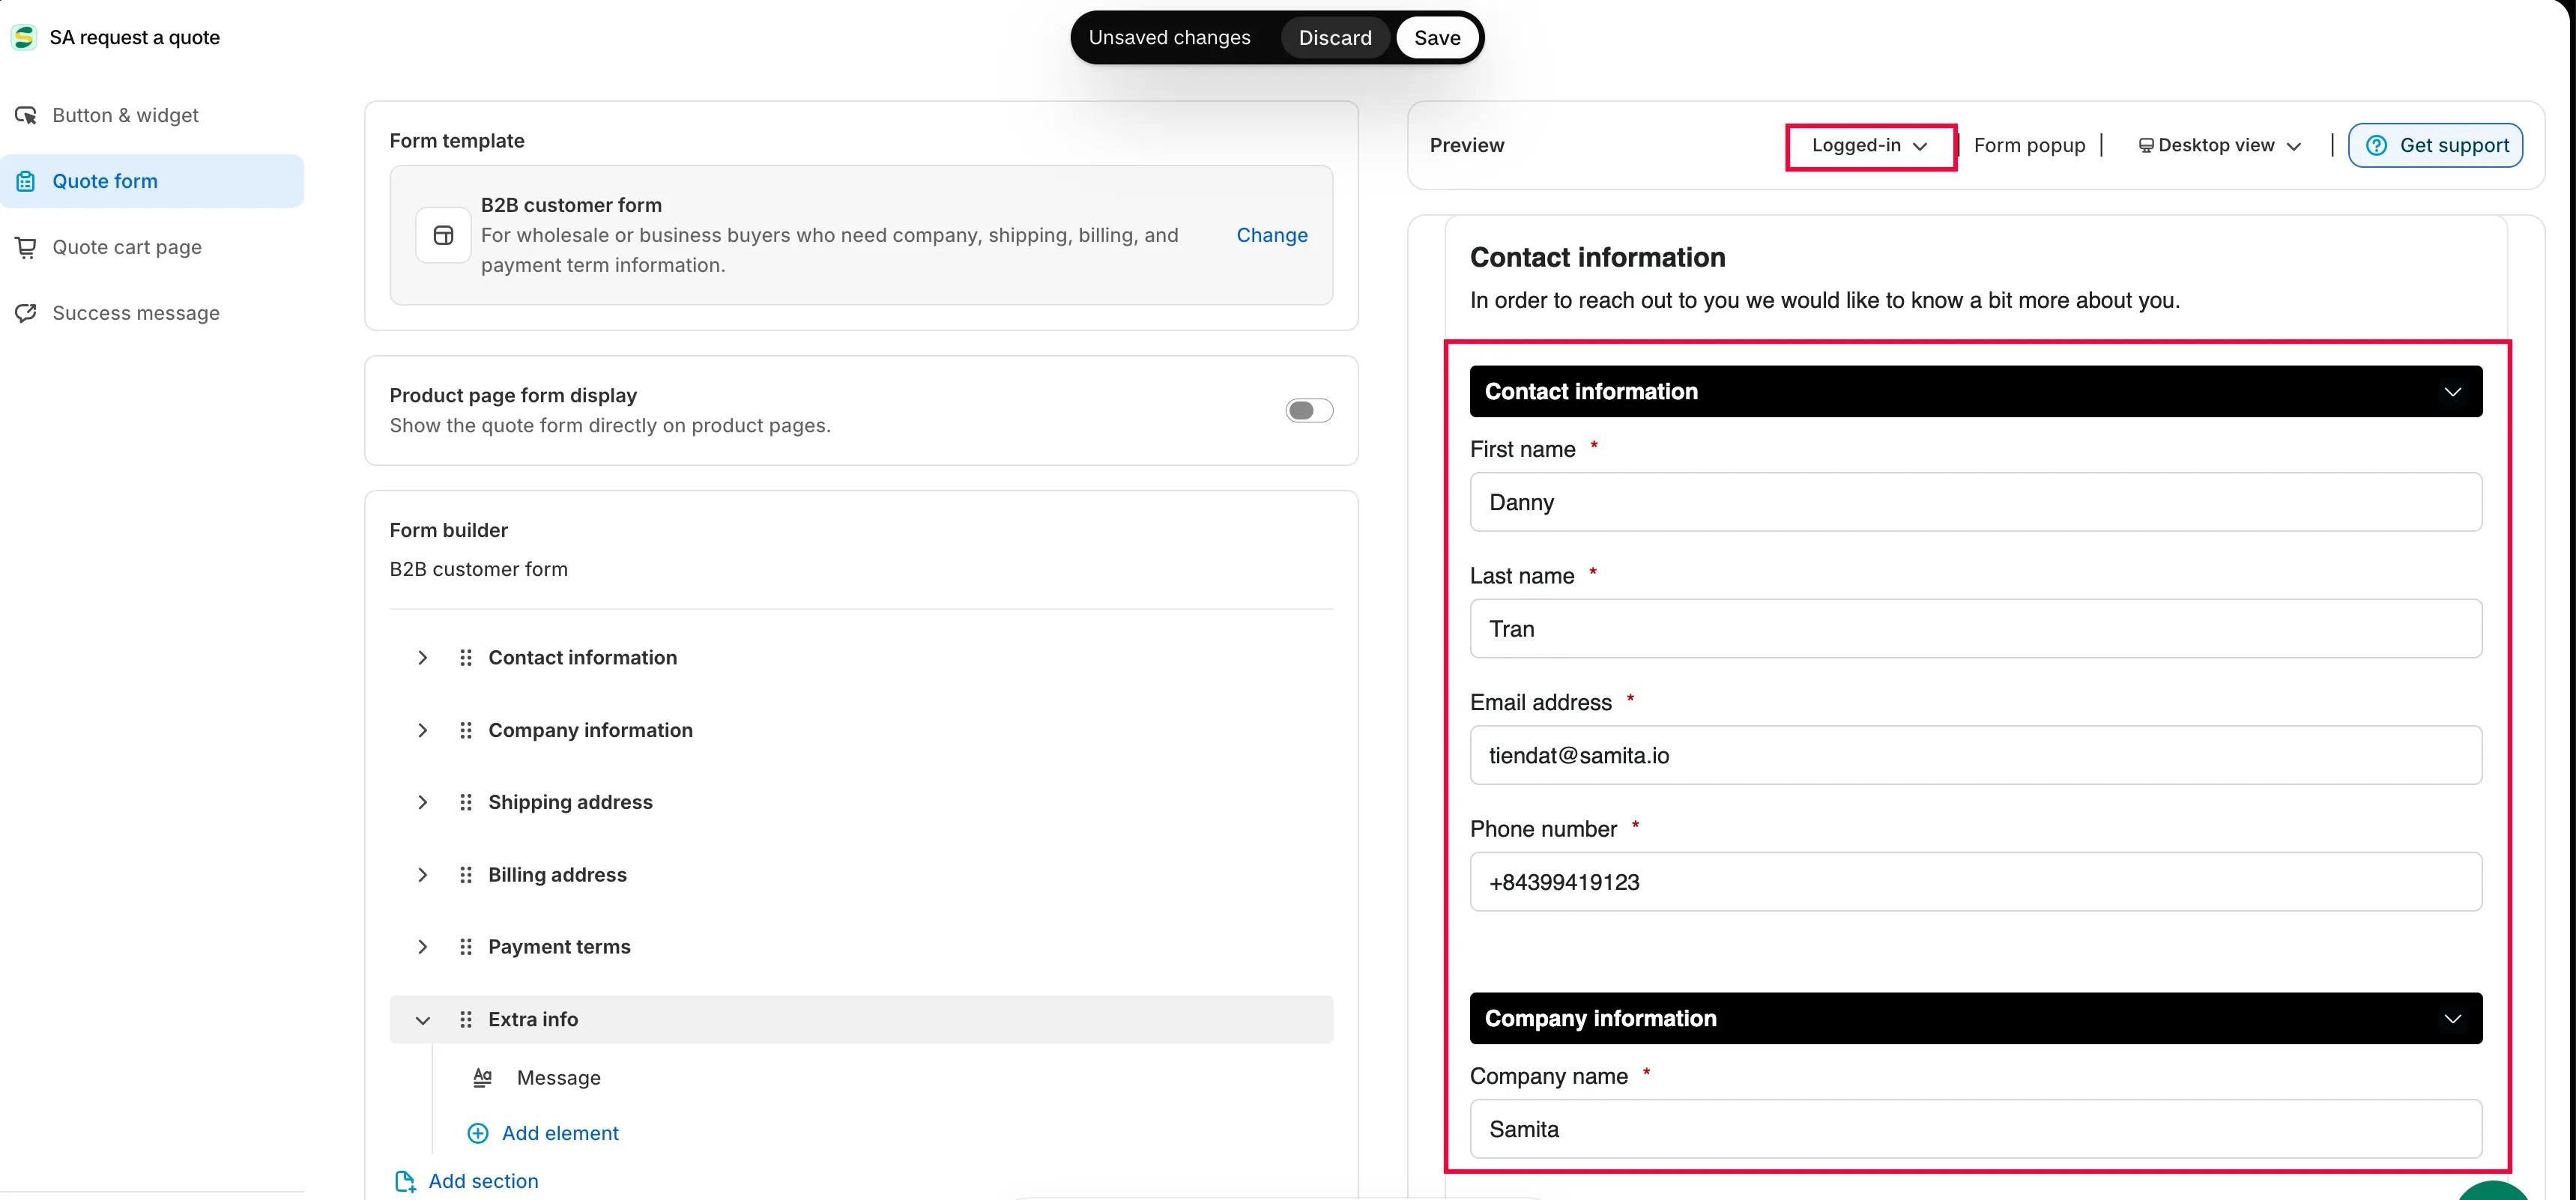
In the Preview panel beside the editor, use the customer-state button on the toolbar to switch from Guest to Logged-in, and read the form back. The desktop and mobile toggle beside it is worth a look too: a six-section B2B form is a long scroll on a phone.
-
Save and check
Section titled “Save and check”Changing anything brings up Shopify’s save bar. Click Save — the editor will not let you save while a field still has a validation error, and says “Please resolve validation errors before saving.” if one does.
Then open the form on your storefront and send yourself a real test request, and confirm it arrives in Quote list with the company, billing and payment-terms answers on it.
What the business sections are for
Section titled “What the business sections are for”| Section | What it collects |
|---|---|
| Company information | Company name — the business the buyer represents. |
| Billing address | Where the invoice goes, which is often not where the goods go. |
| Payment terms | Payment terms, plus an optional deposit, so you can price and schedule the work properly. |
Payment terms and Required deposit
Section titled “Payment terms and Required deposit”Payment terms is where the buyer tells you how they expect to pay — the difference between a job you can start on Monday and one you’re funding yourself for sixty days.
Tick Required deposit when you want a payment up front, then set the amount in the Deposit field. Use it for made-to-order work, long lead times or first-time accounts.
Less typing for logged-in buyers
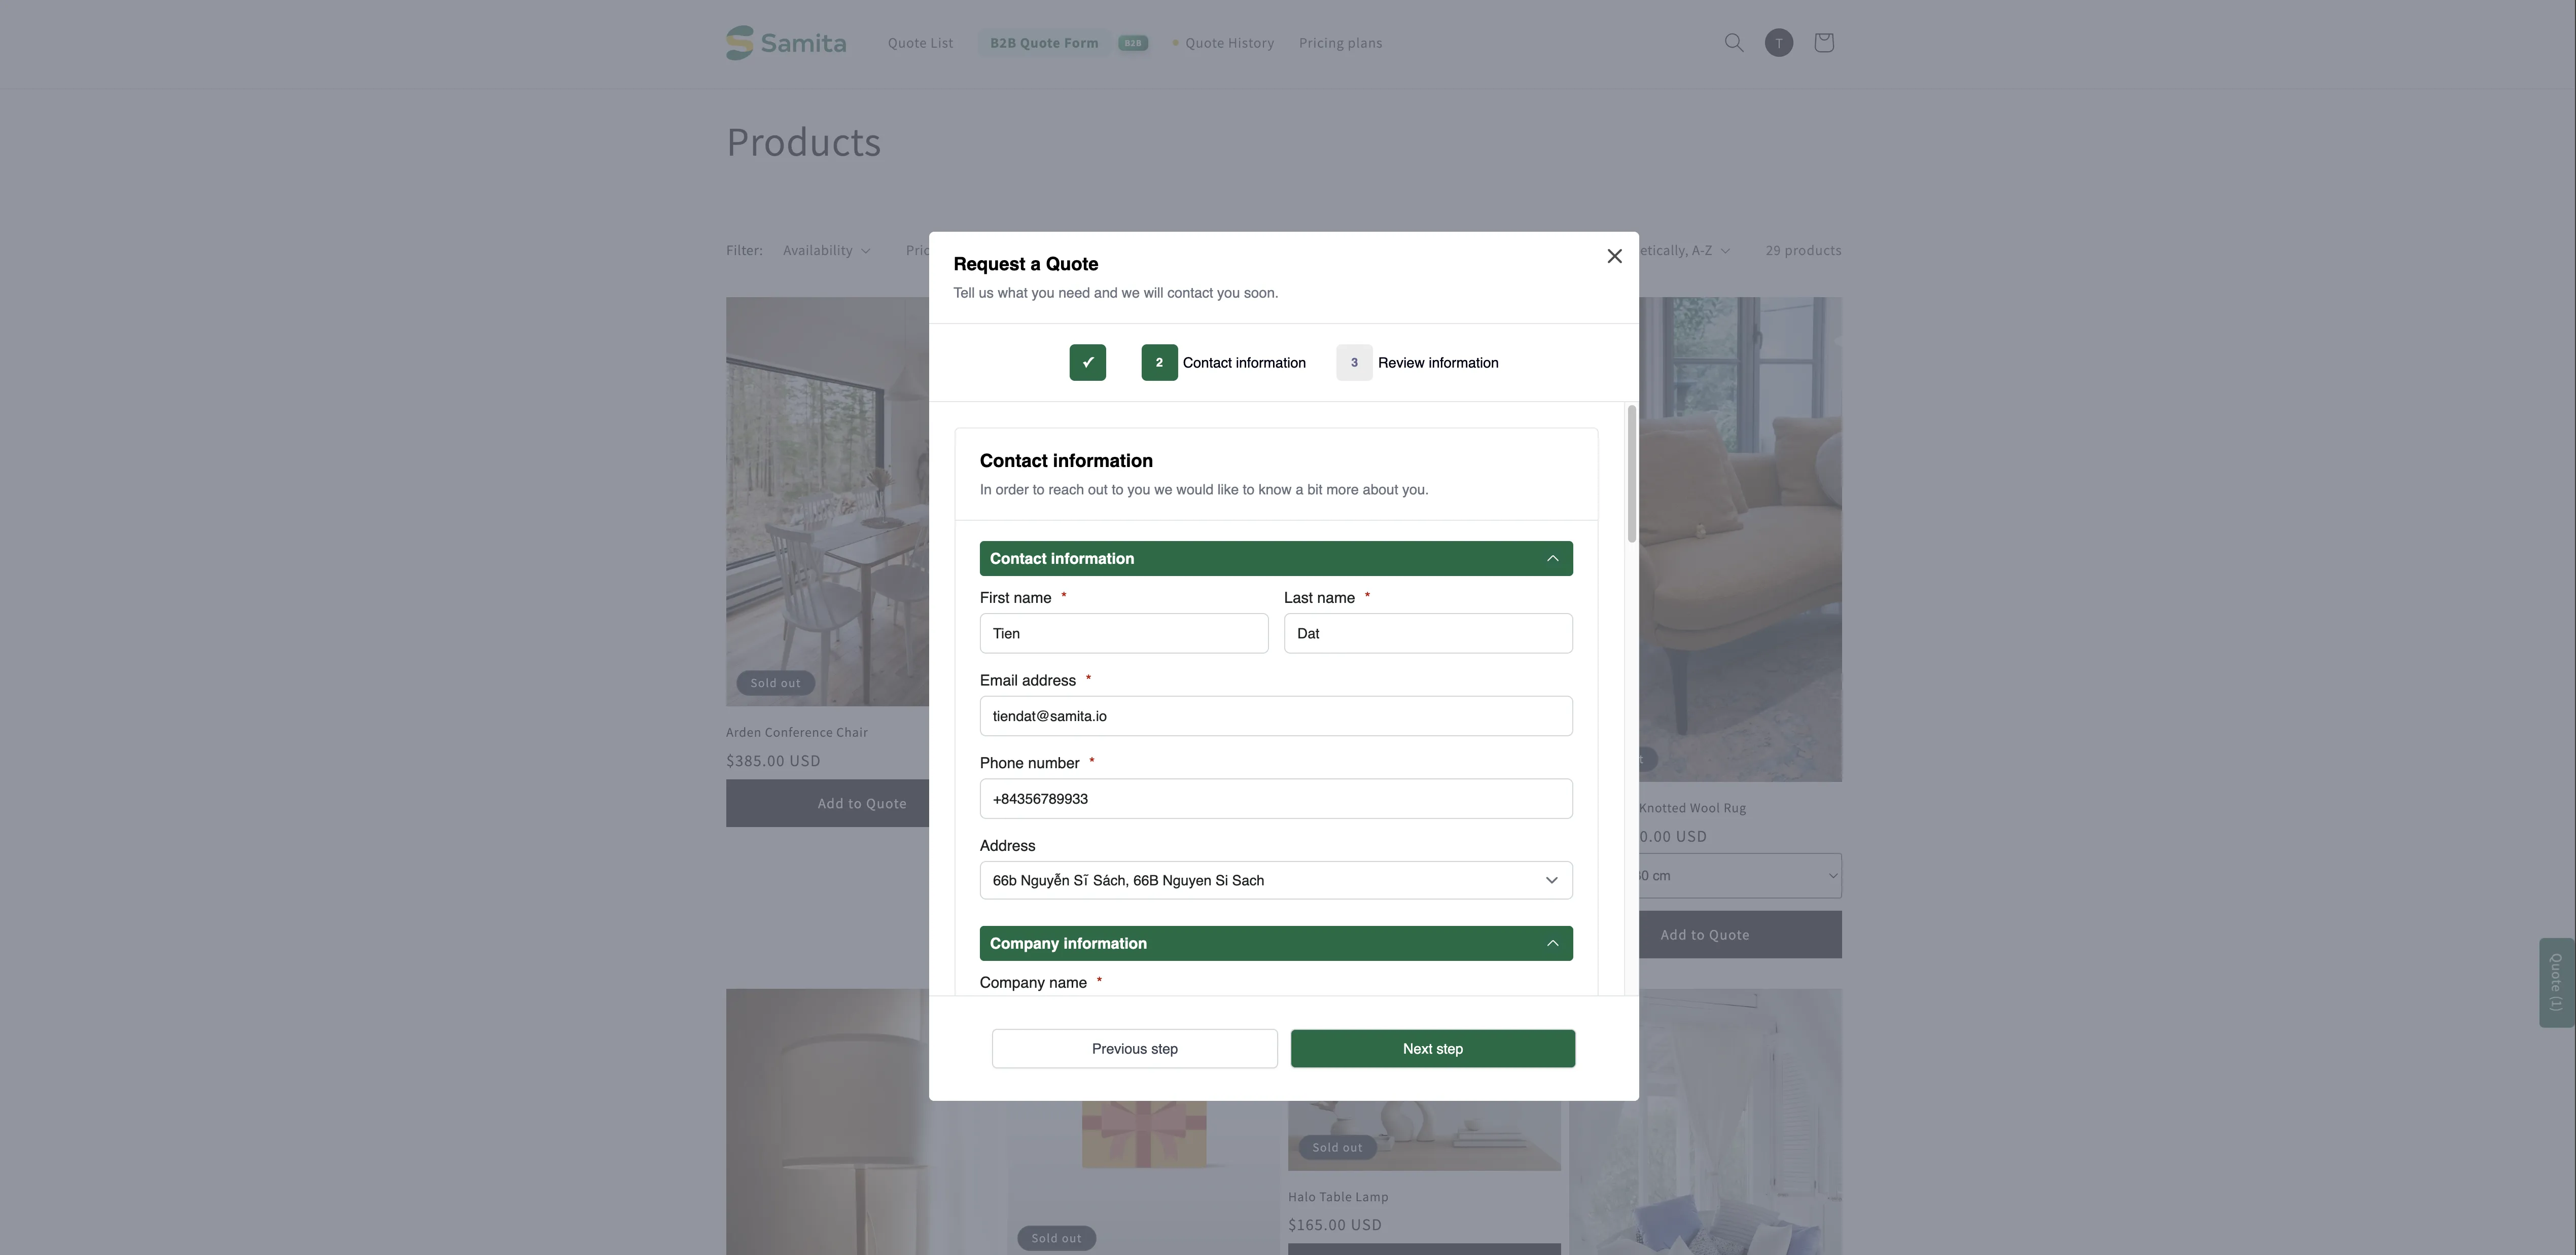
Section titled “Less typing for logged-in buyers”On the storefront the form invites customers to sign in, with a Login link next to the prompt:
Already have an account? Log in to auto-fill your contact and company information.
Once they do, their details fill in for them, so a repeat request is a couple of fields rather than a whole form. The PRO plan goes further, auto-filling logged-in B2B customer data — company, location, and payment terms.
You do not have to log in to a test account to check this. In the Preview panel inside the editor, switch the customer-state button on the toolbar from Guest to Logged-in and the preview redraws as a signed-in buyer would see it.
Next steps
Section titled “Next steps”- Customer information fields — the contact and address fields behind the automatic filling
- Convert to a draft order — turn an agreed quote into an order
- Build a standard form — the rest of the form, step by step