
Display by device and page
Control which pages and devices your badge appears on, exclude theme elements, and decide which badge wins when several apply to the same product.
The Display tab of the badge editor decides where and when a badge shows, after the Products tab has decided which products it applies to.
The tab is a list of collapsible sections:
| Section | What it controls | Documented in |
|---|---|---|
| Customer conditions | Which shoppers see the badge (logged in, tags, specific customers) | Target by customer |
| Page conditions | Which page types the badge appears on | This page |
| Language conditions | The storefront language the visitor is browsing in | Target by country & language |
| Country conditions | The visitor’s country | Target by country & language |
| Other conditions | Product image, device, and excluded theme elements | This page |
| Visibility Date & Countdown | Start/end dates and countdown timers | Schedule visibility |
| Priority conditions | Which badge wins when several apply to one product | This page |
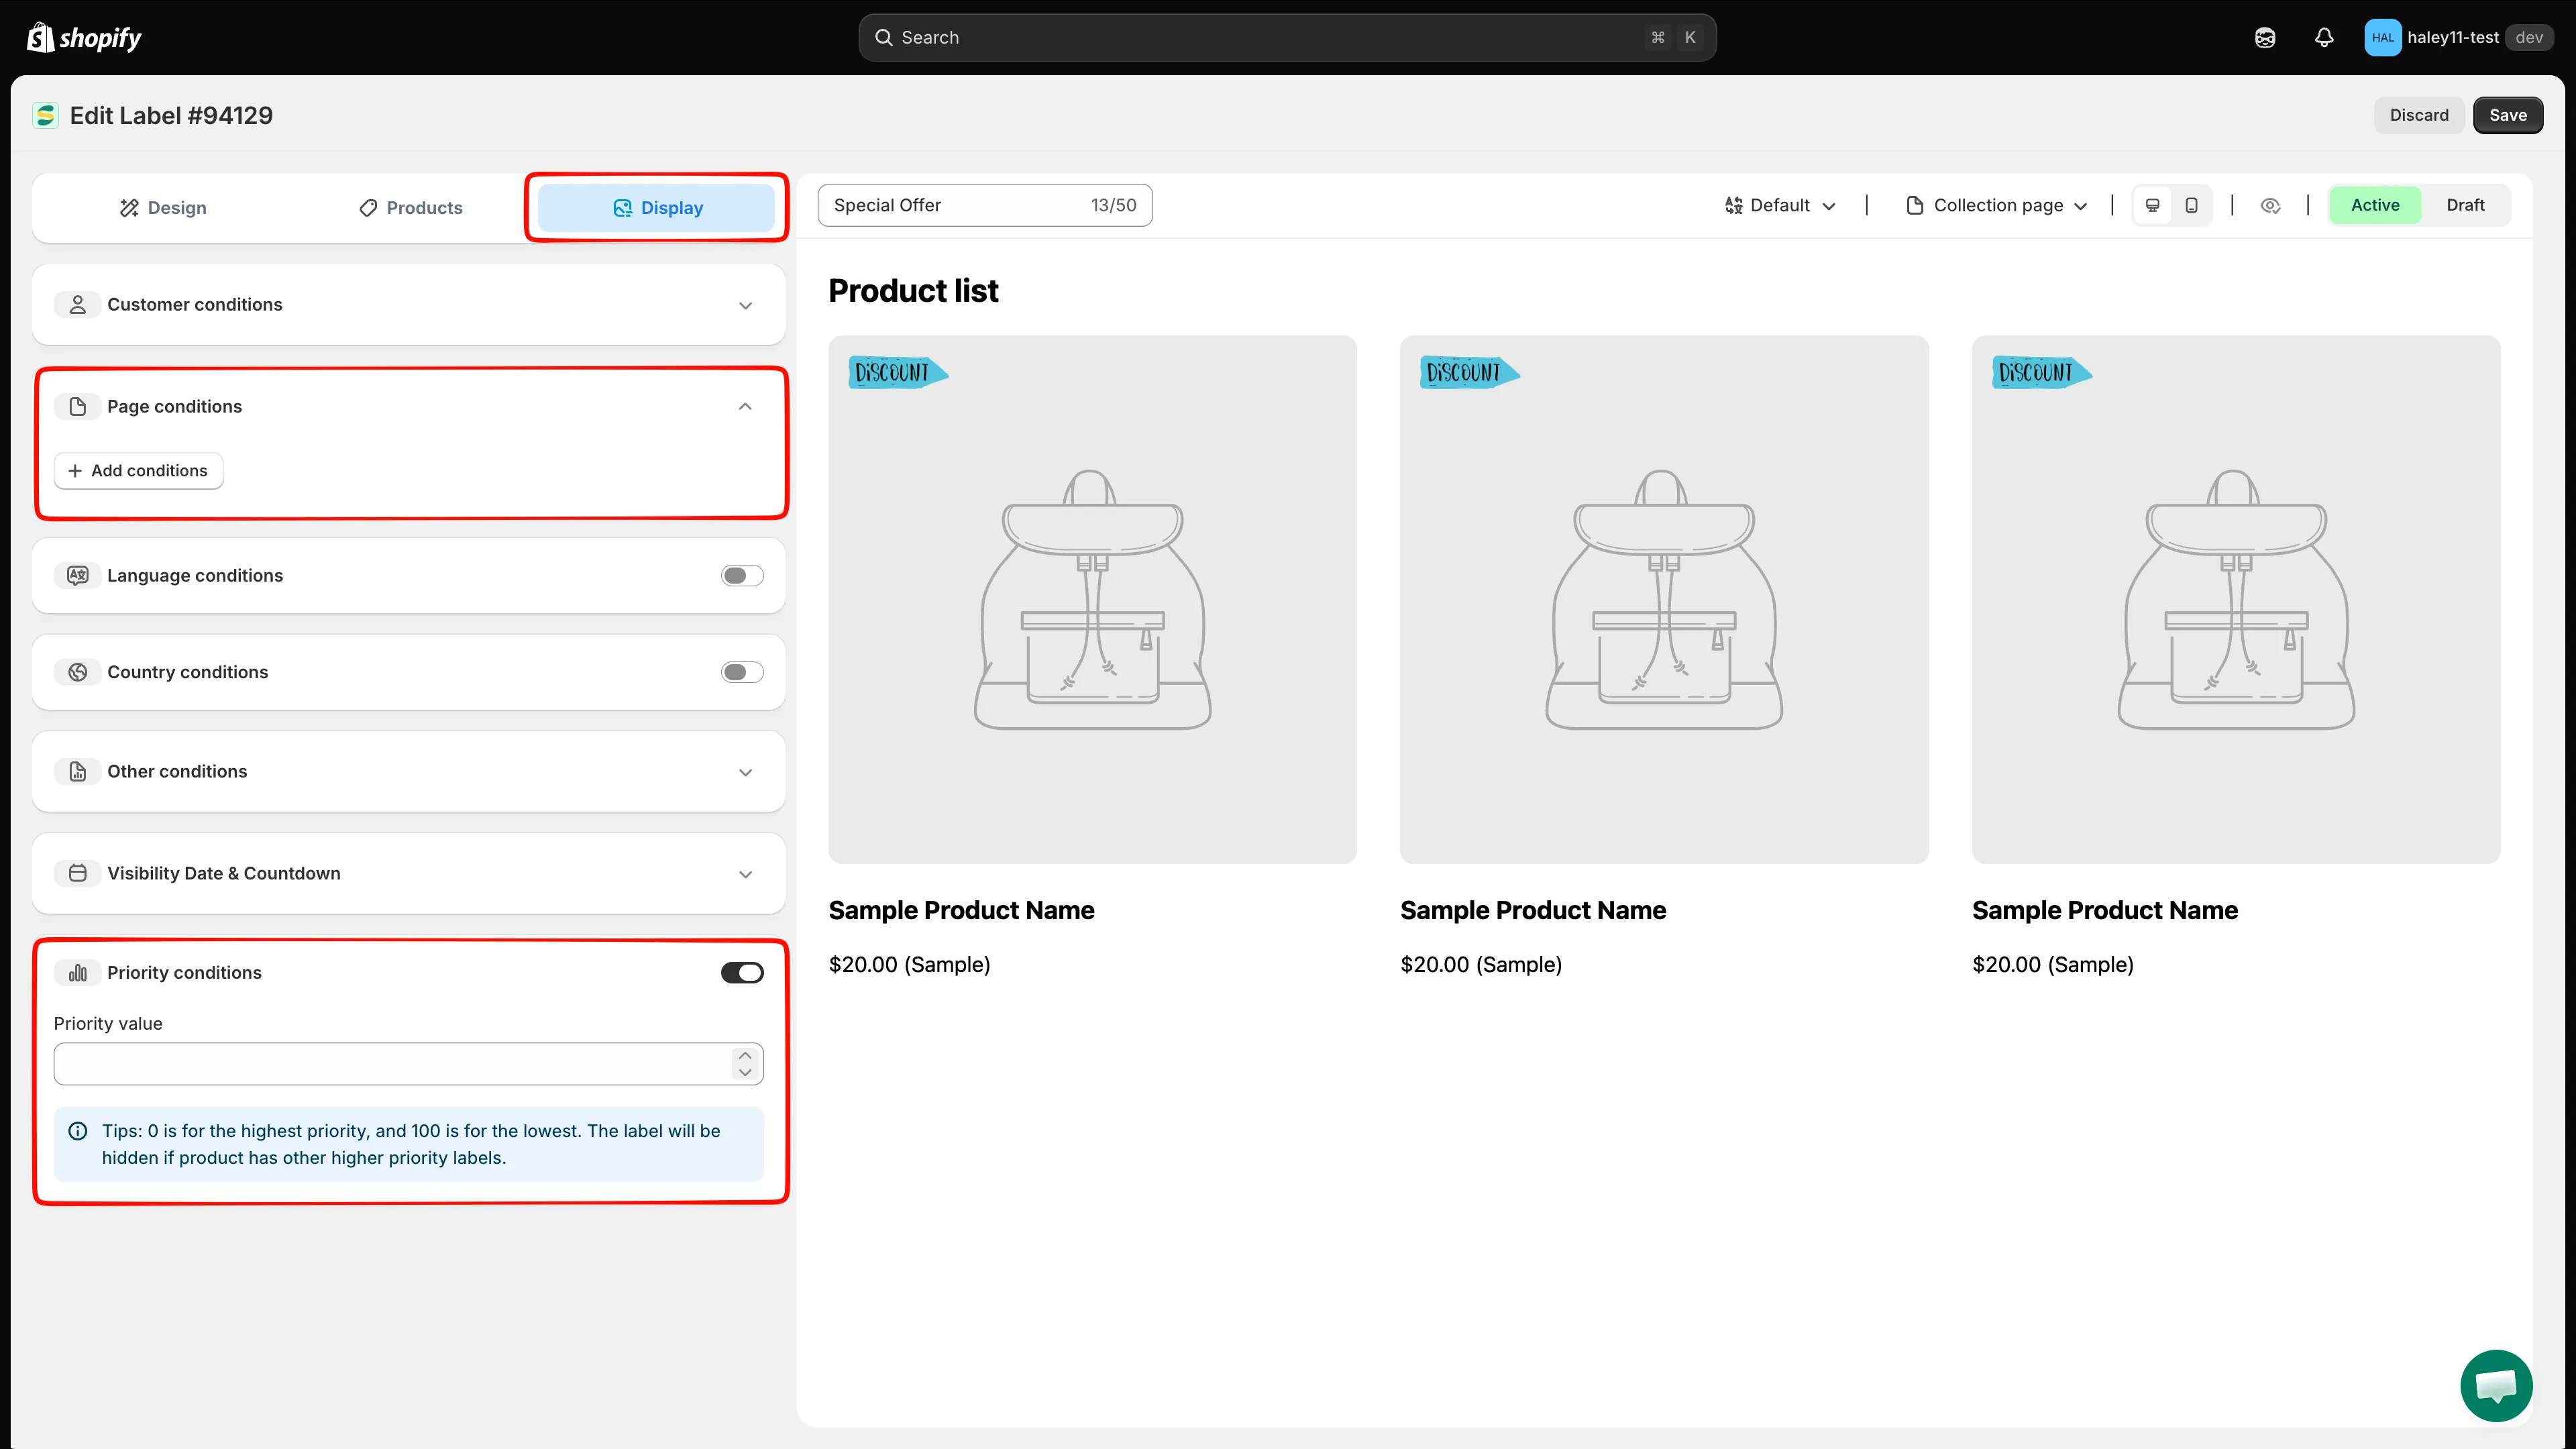
The Display tab. Sections with a chevron expand; sections with a switch are turned on first.
Open the Display tab
Section titled “Open the Display tab”-
Open the app
Section titled “Open the app”In your Shopify admin, go to Apps → Sami Product Labels.
-
Open Badges & Labels
Section titled “Open Badges & Labels”In the app’s left menu, click Badges & Labels. The list shows every badge with its Id, name, preview, type, priority, position, and status.
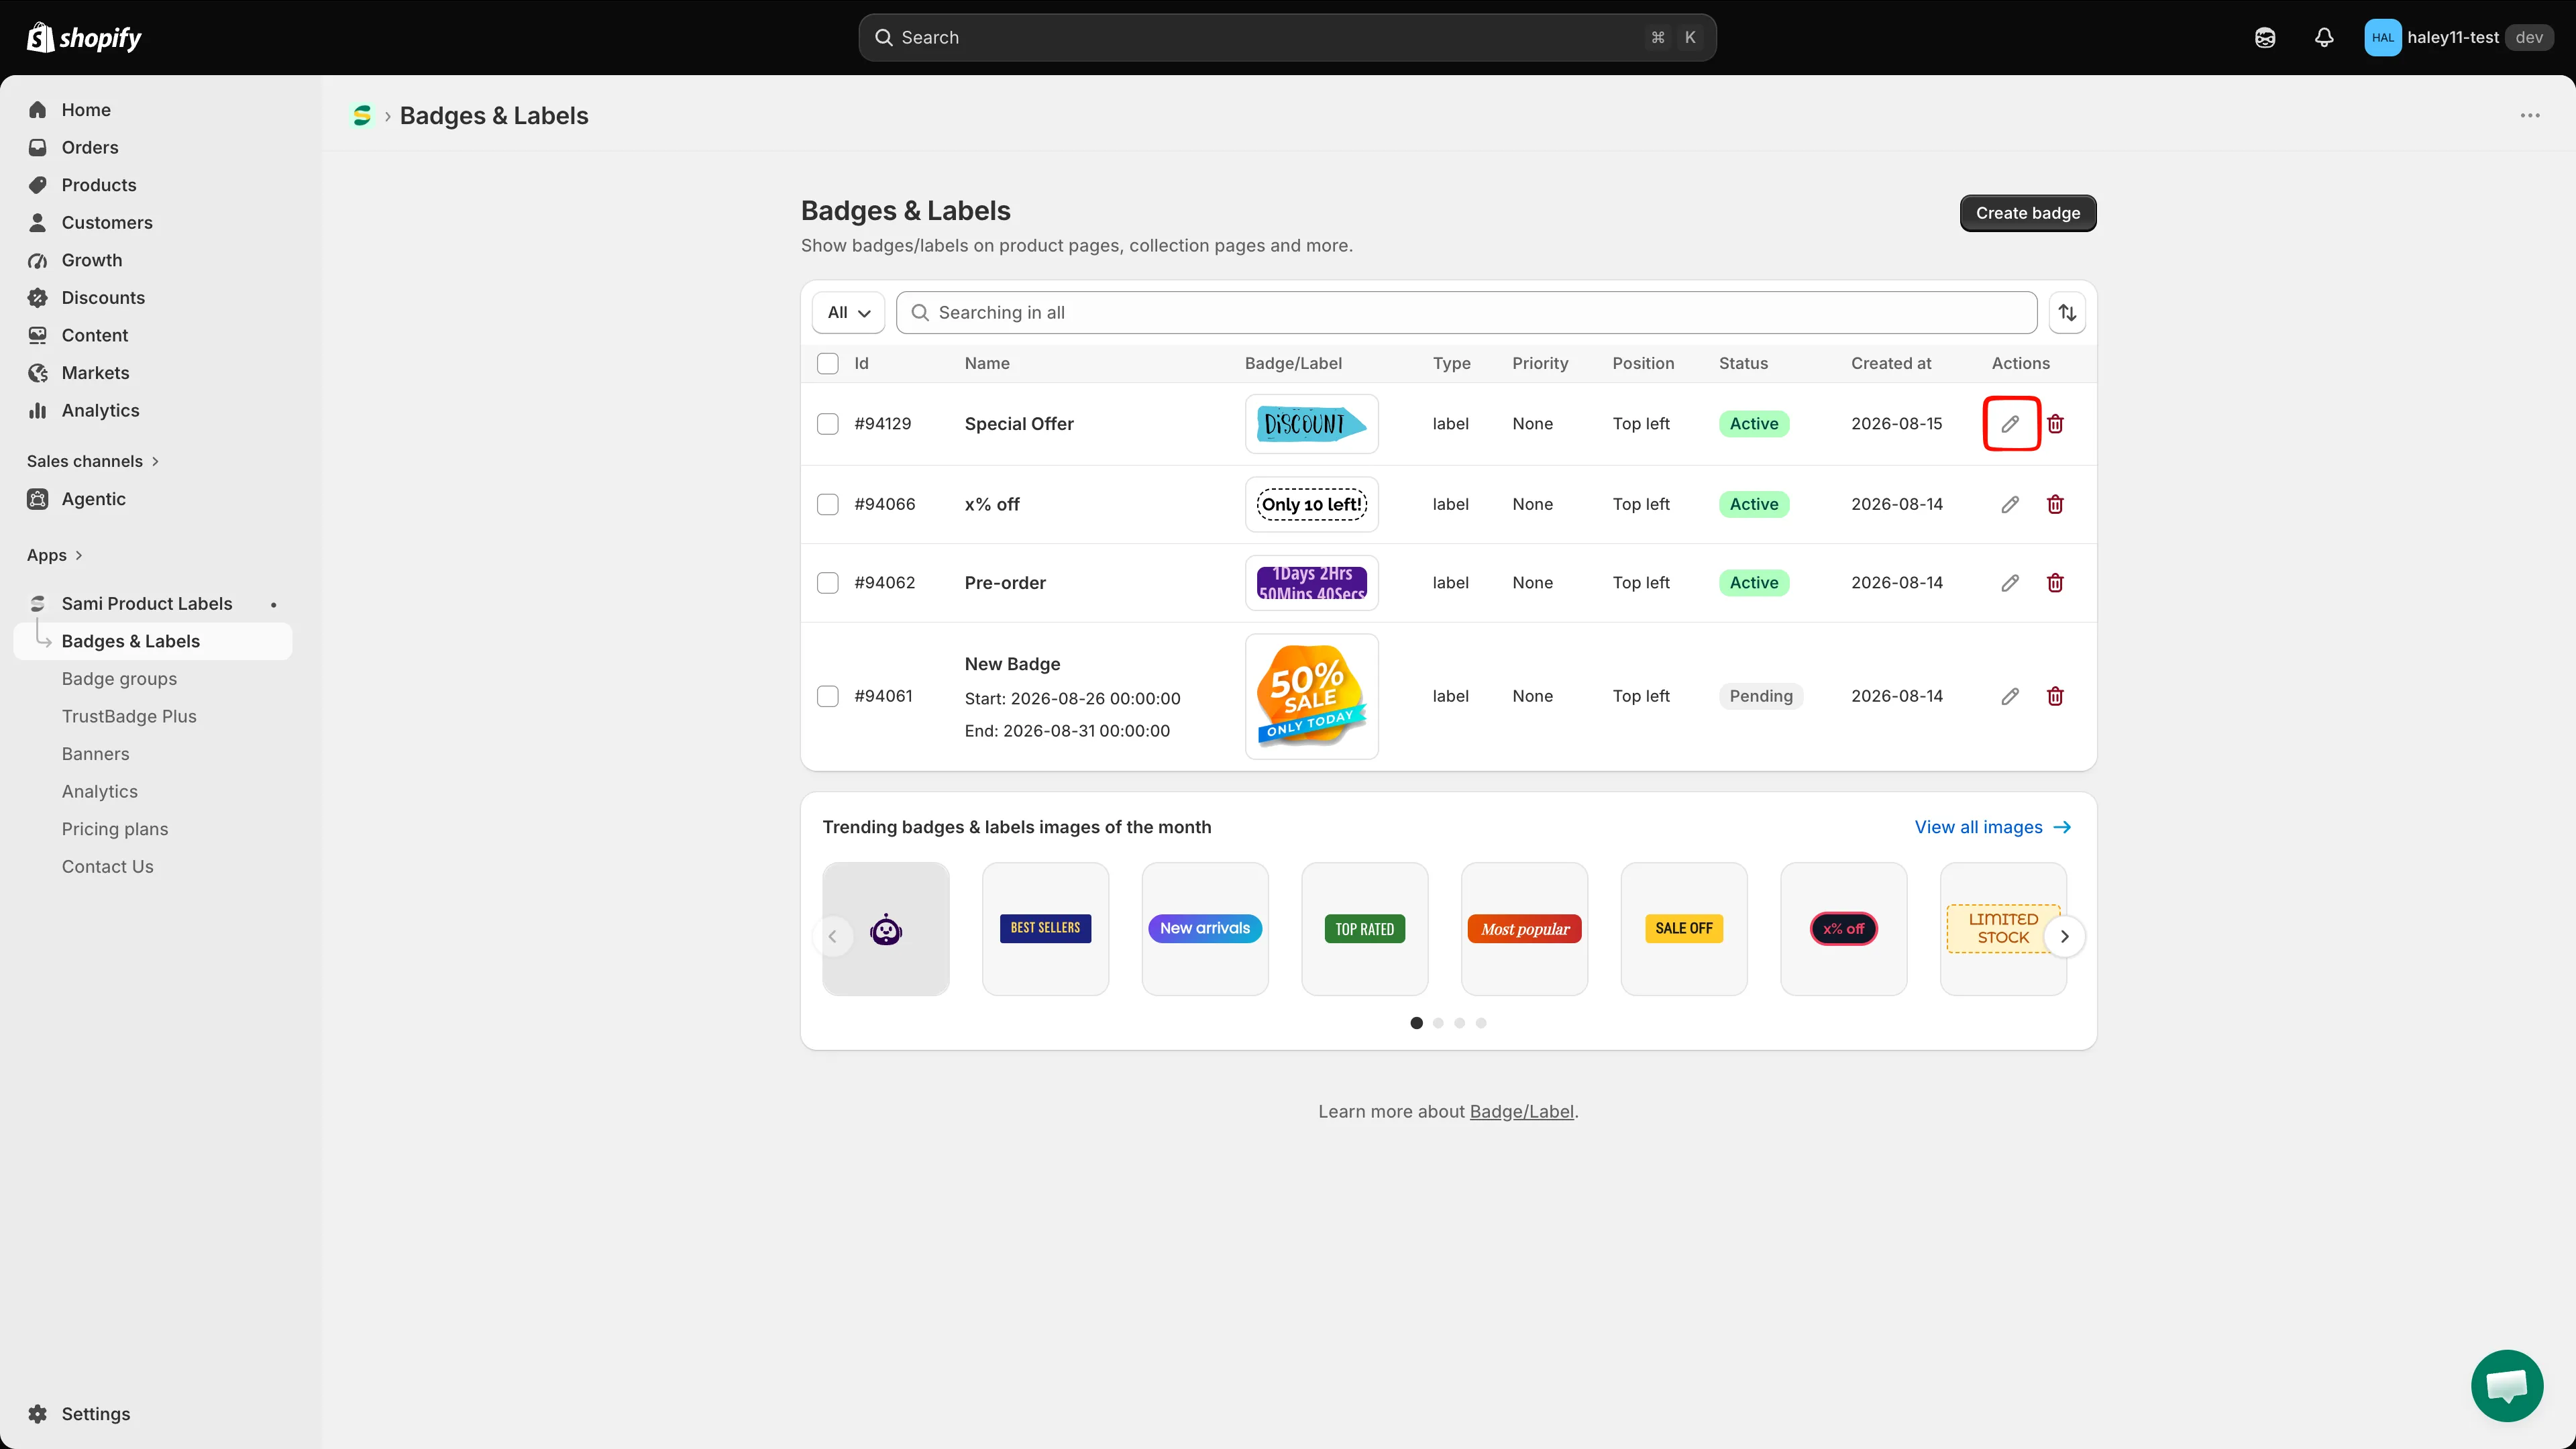
The Badges & Labels list. Click the pencil icon in the Actions column to edit a badge.
-
Edit the badge
Section titled “Edit the badge”Click the pencil icon in the Actions column of the badge you want to configure. The editor opens with three tabs: Design, Products, Display.
-
Go to Display
Section titled “Go to Display”Click the Display tab.
Page conditions
Section titled “Page conditions”By default a badge shows on every page where the product appears. Add a page condition to limit it to certain page types.
How to add a page condition
Section titled “How to add a page condition”-
Expand Page conditions
Section titled “Expand Page conditions”Click the Page conditions row to expand it. An + Add conditions button appears.
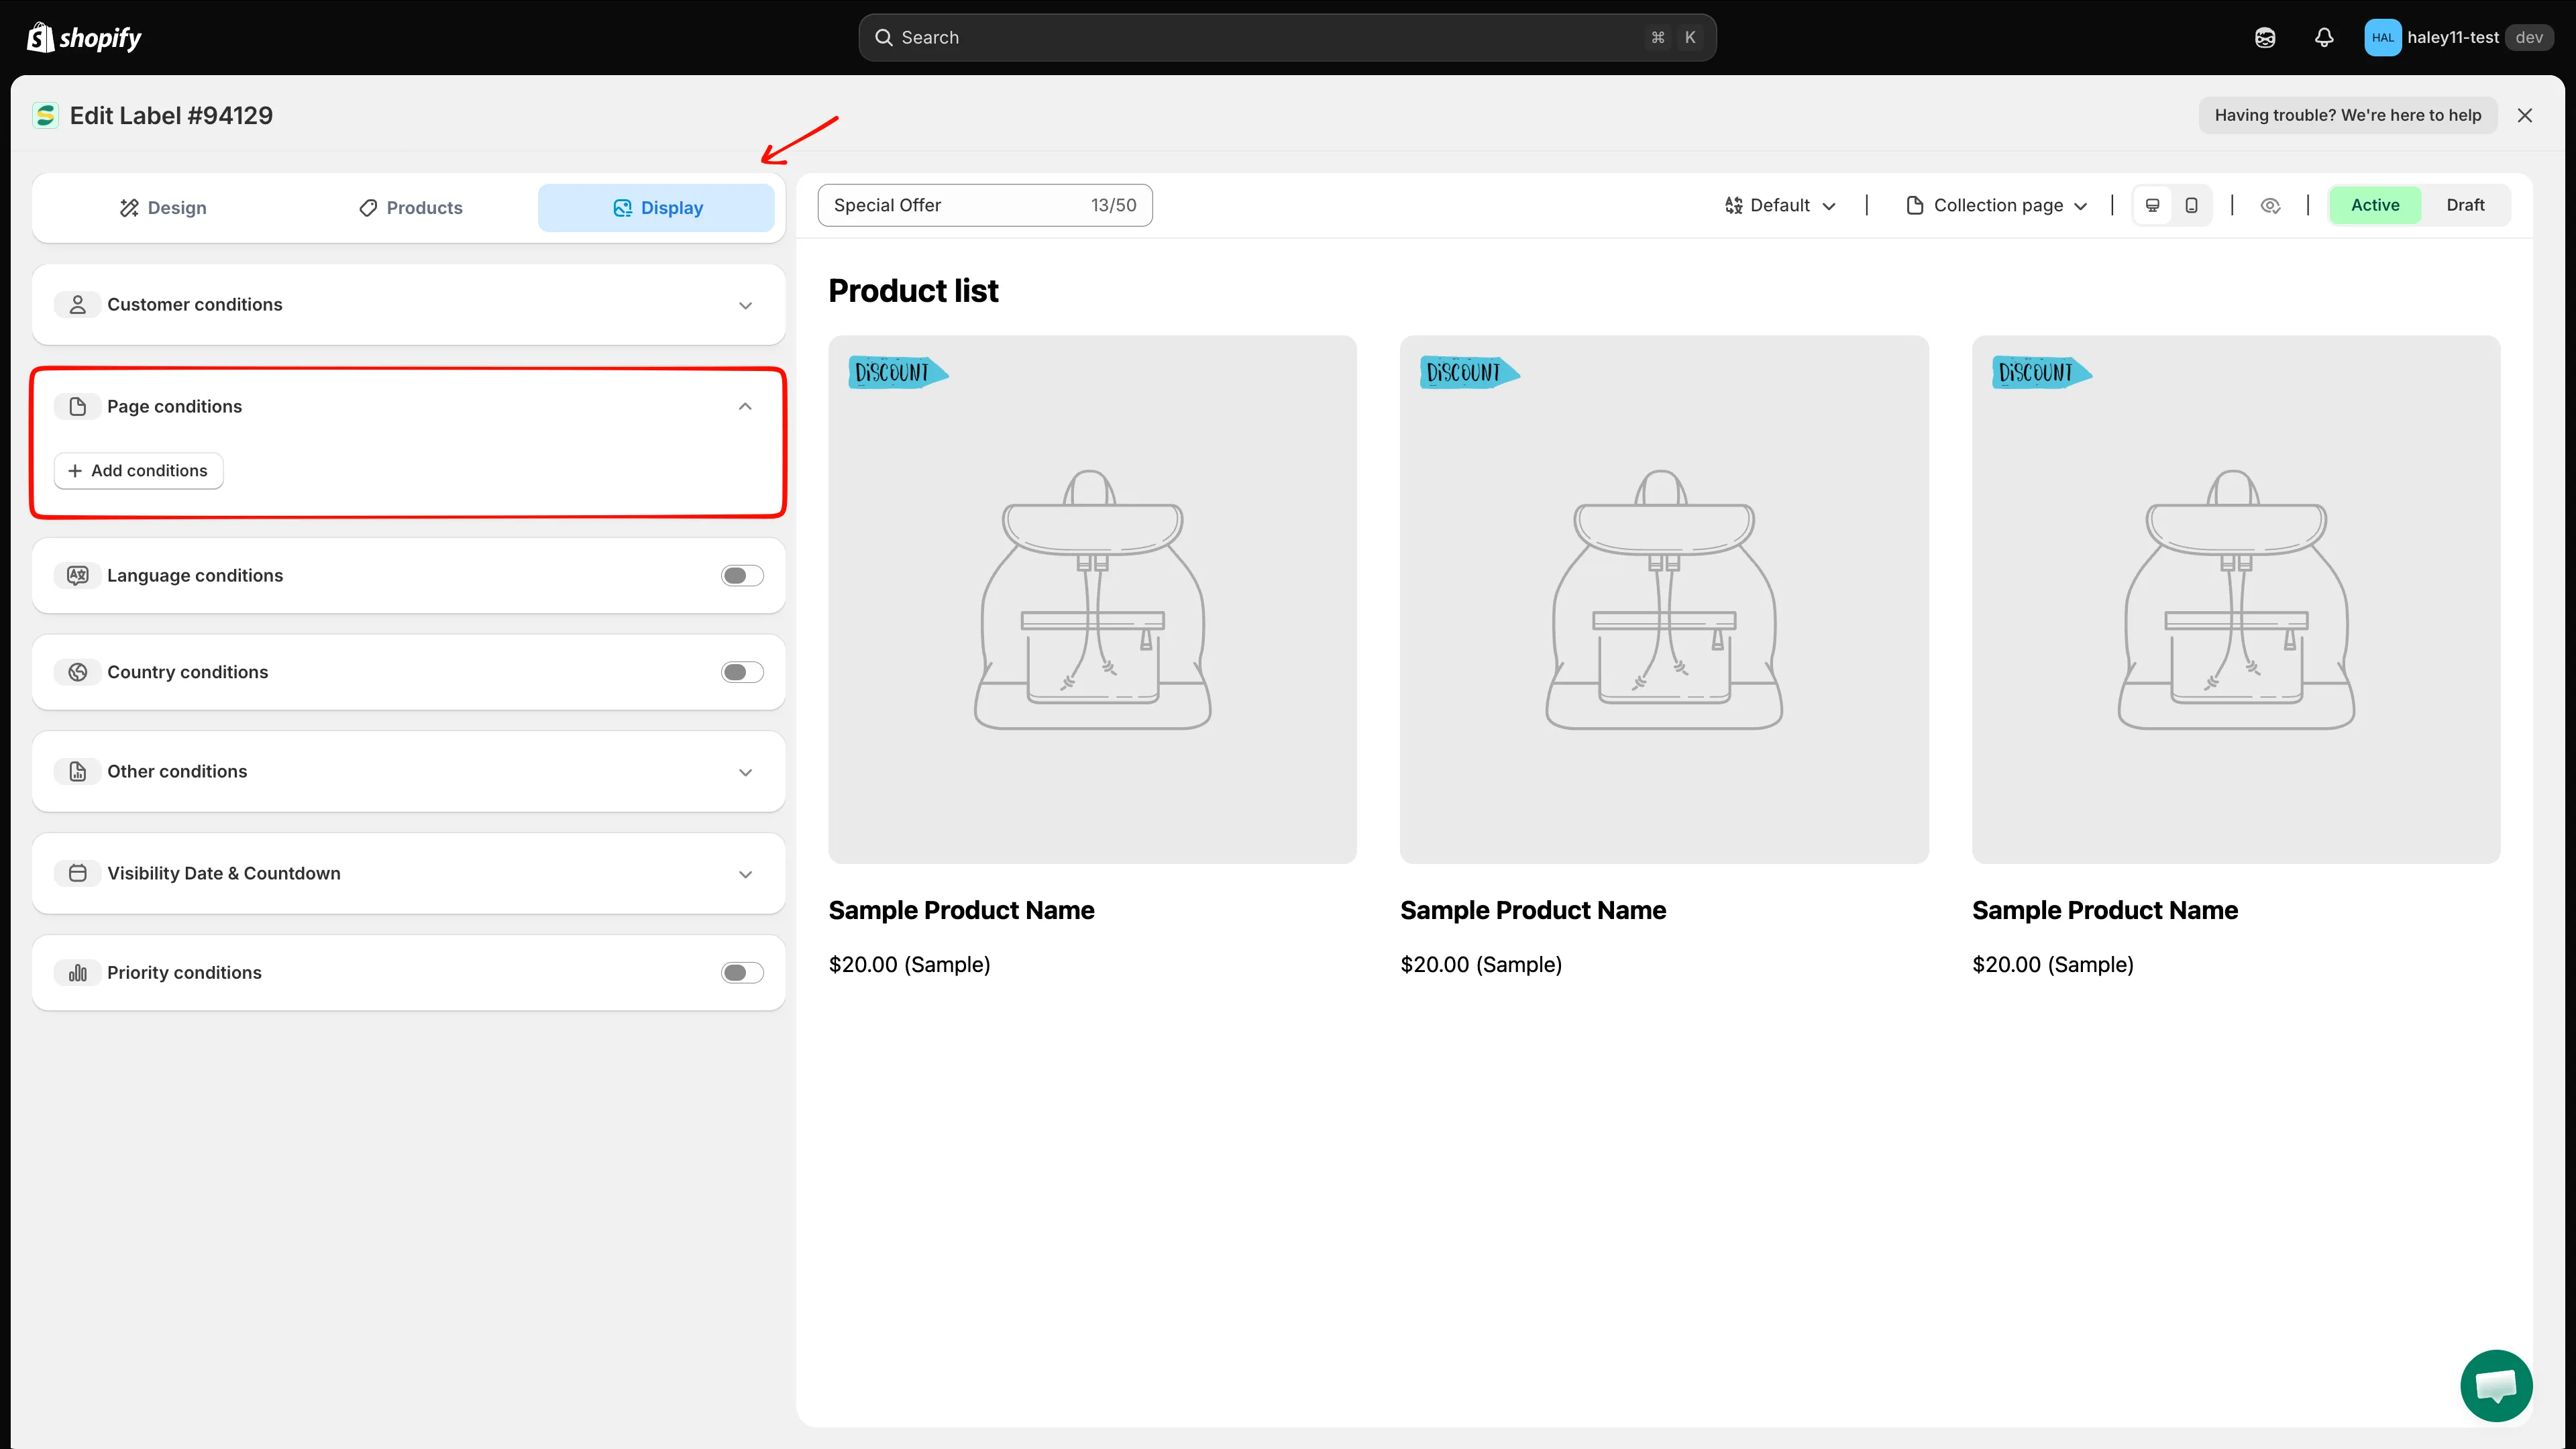
An empty Page conditions section — no rule yet, so the badge shows everywhere.
-
Click + Add conditions
Section titled “Click + Add conditions”A condition row appears with three fields: Page (fixed), an operator, and a page type. The defaults are
Pageis equal toIndex page.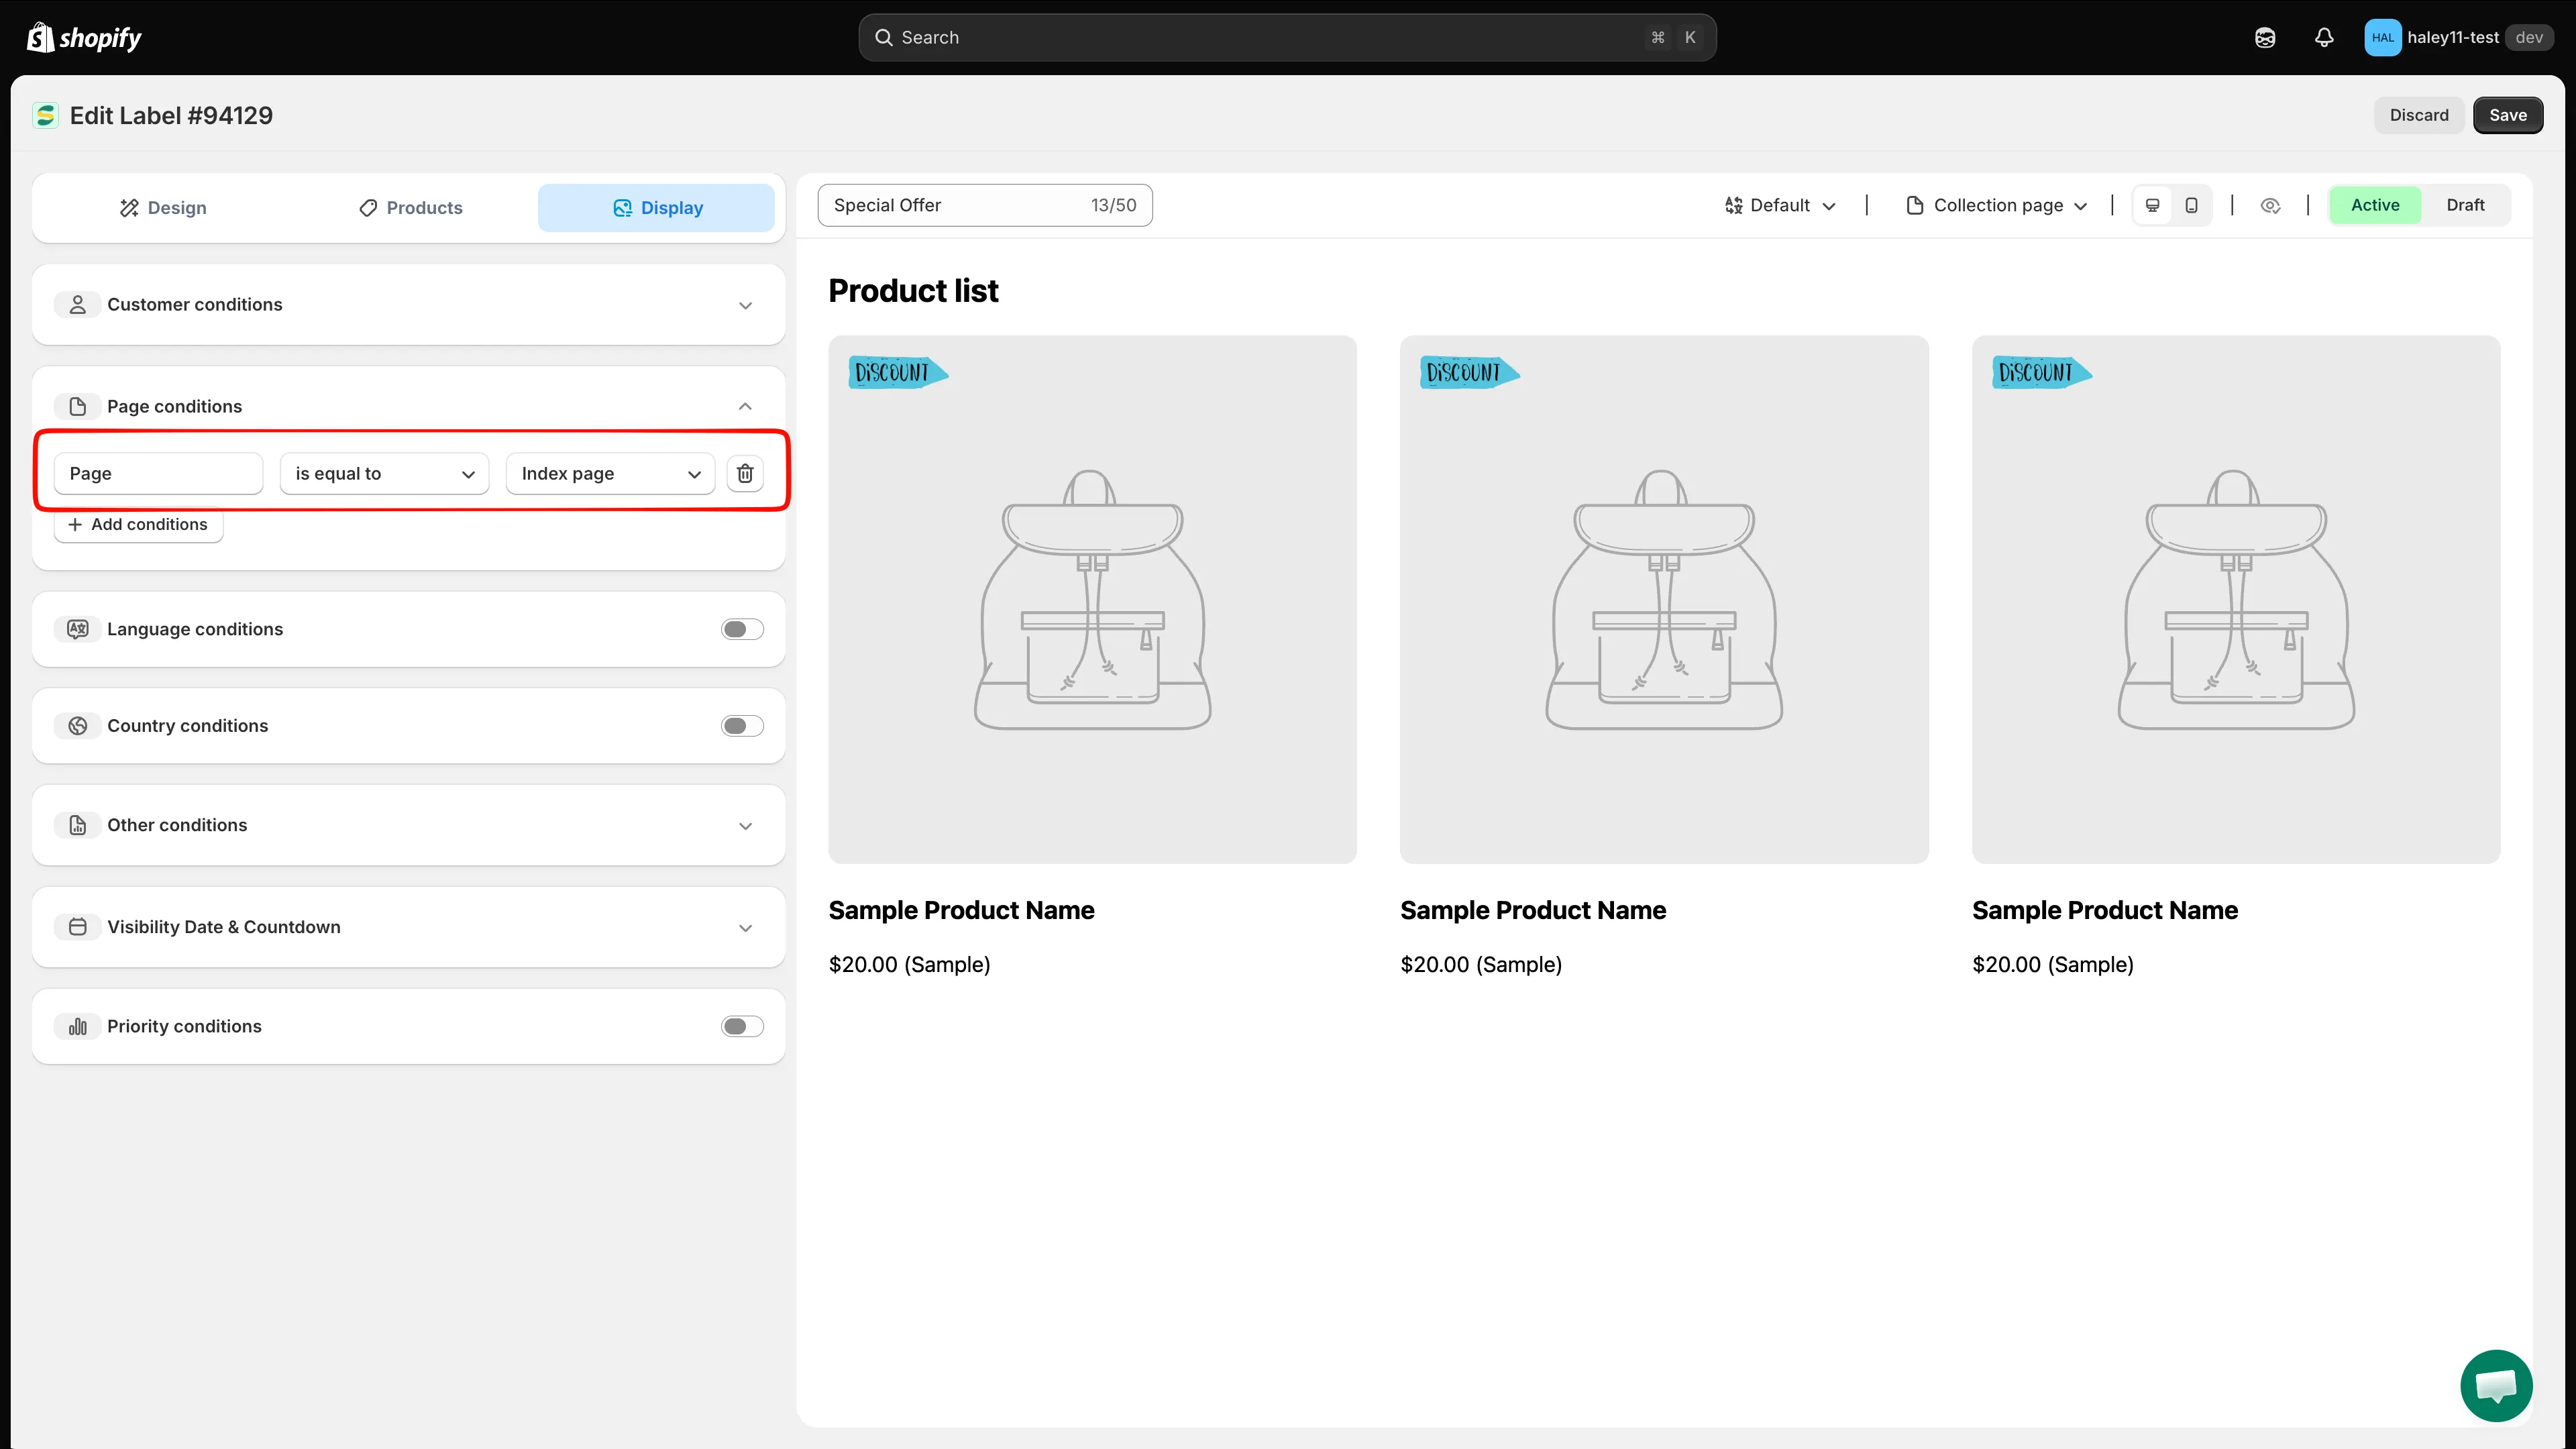
Each click on + Add conditions adds one row. Use the trash icon at the end of a row to remove it.
-
Choose the operator
Section titled “Choose the operator”- is equal to — show the badge only on the selected page type.
- is not equal to — show the badge everywhere except the selected page type.
-
Choose the page type
Section titled “Choose the page type”Option Where the badge appears Index page Your storefront home page Collection page Collection / category listing pages Product page Individual product pages Article Page Blog article pages Blog page Blog listing pages Cart page (including cart drawer) The cart page and the slide-out cart drawer Search page Search results pages Specific pages Only the exact URL you enter (see next step) 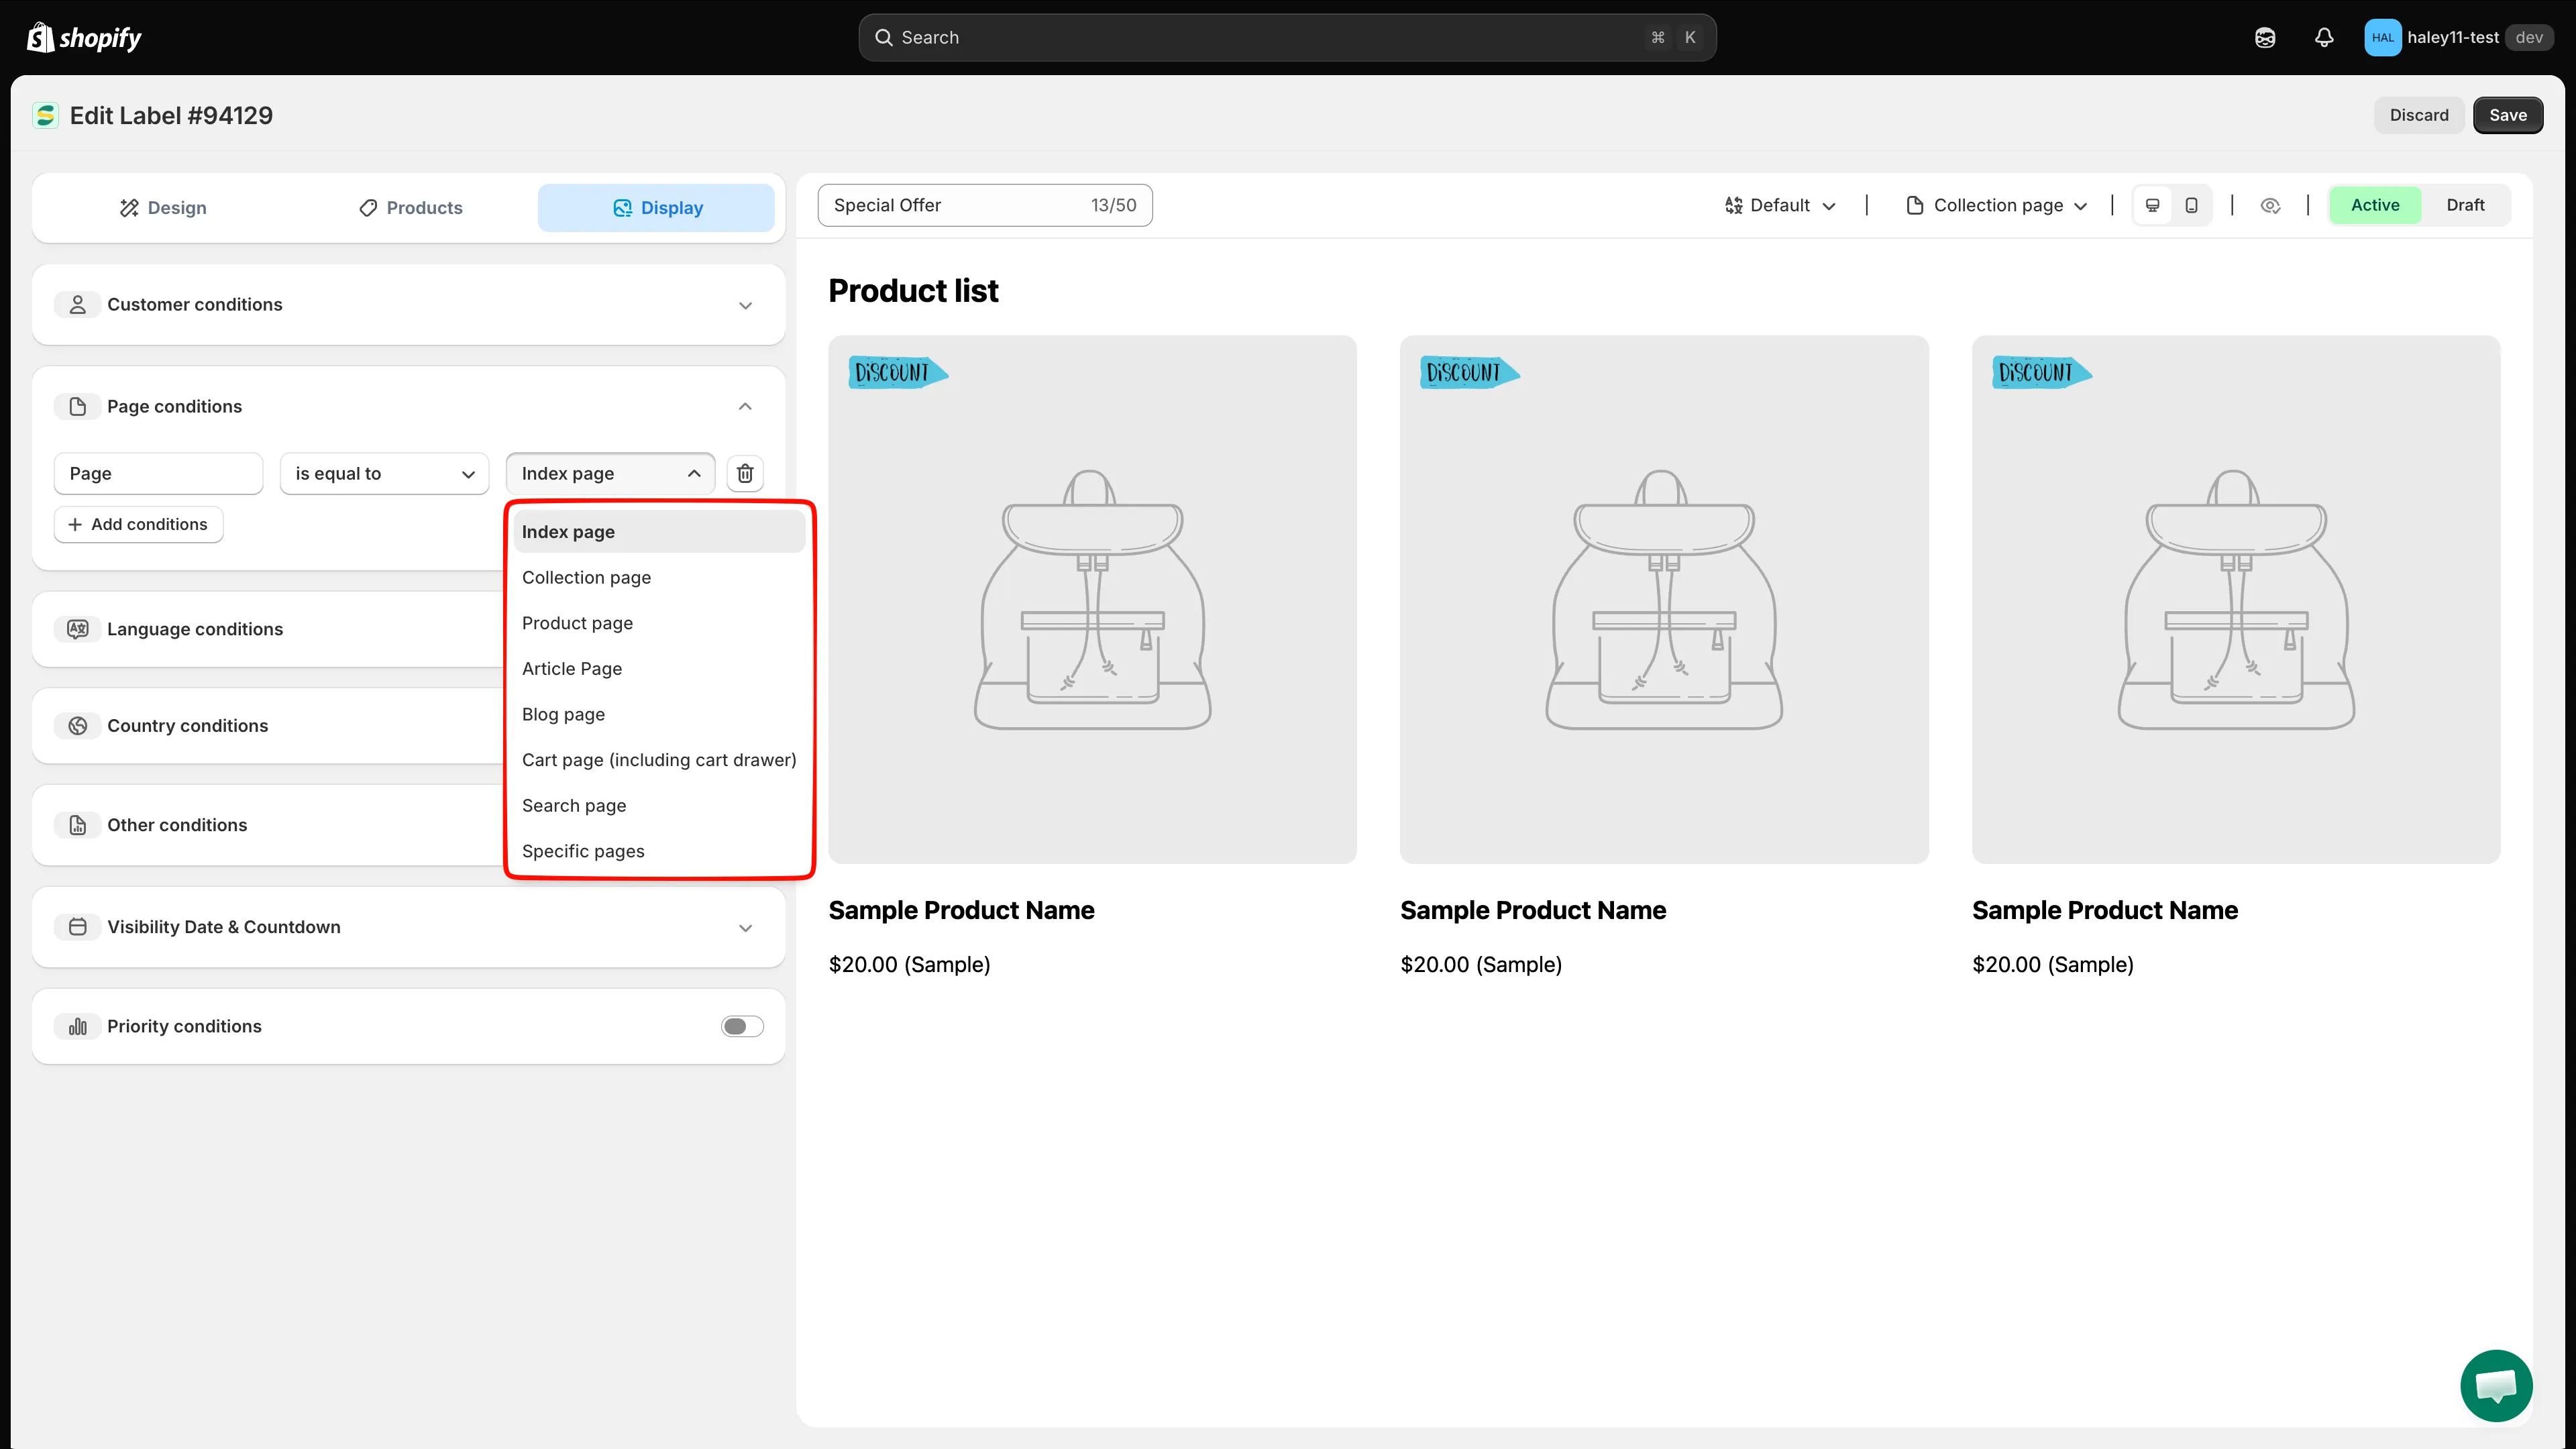
The eight page types available for a page condition.
-
For Specific pages, enter the URL
Section titled “For Specific pages, enter the URL”Choosing Specific pages adds a fourth field. Enter the full storefront URL of the page, for example
https://your-store.myshopify.com/pages/summer-sale. The placeholder shows your own store’s URL as a guide.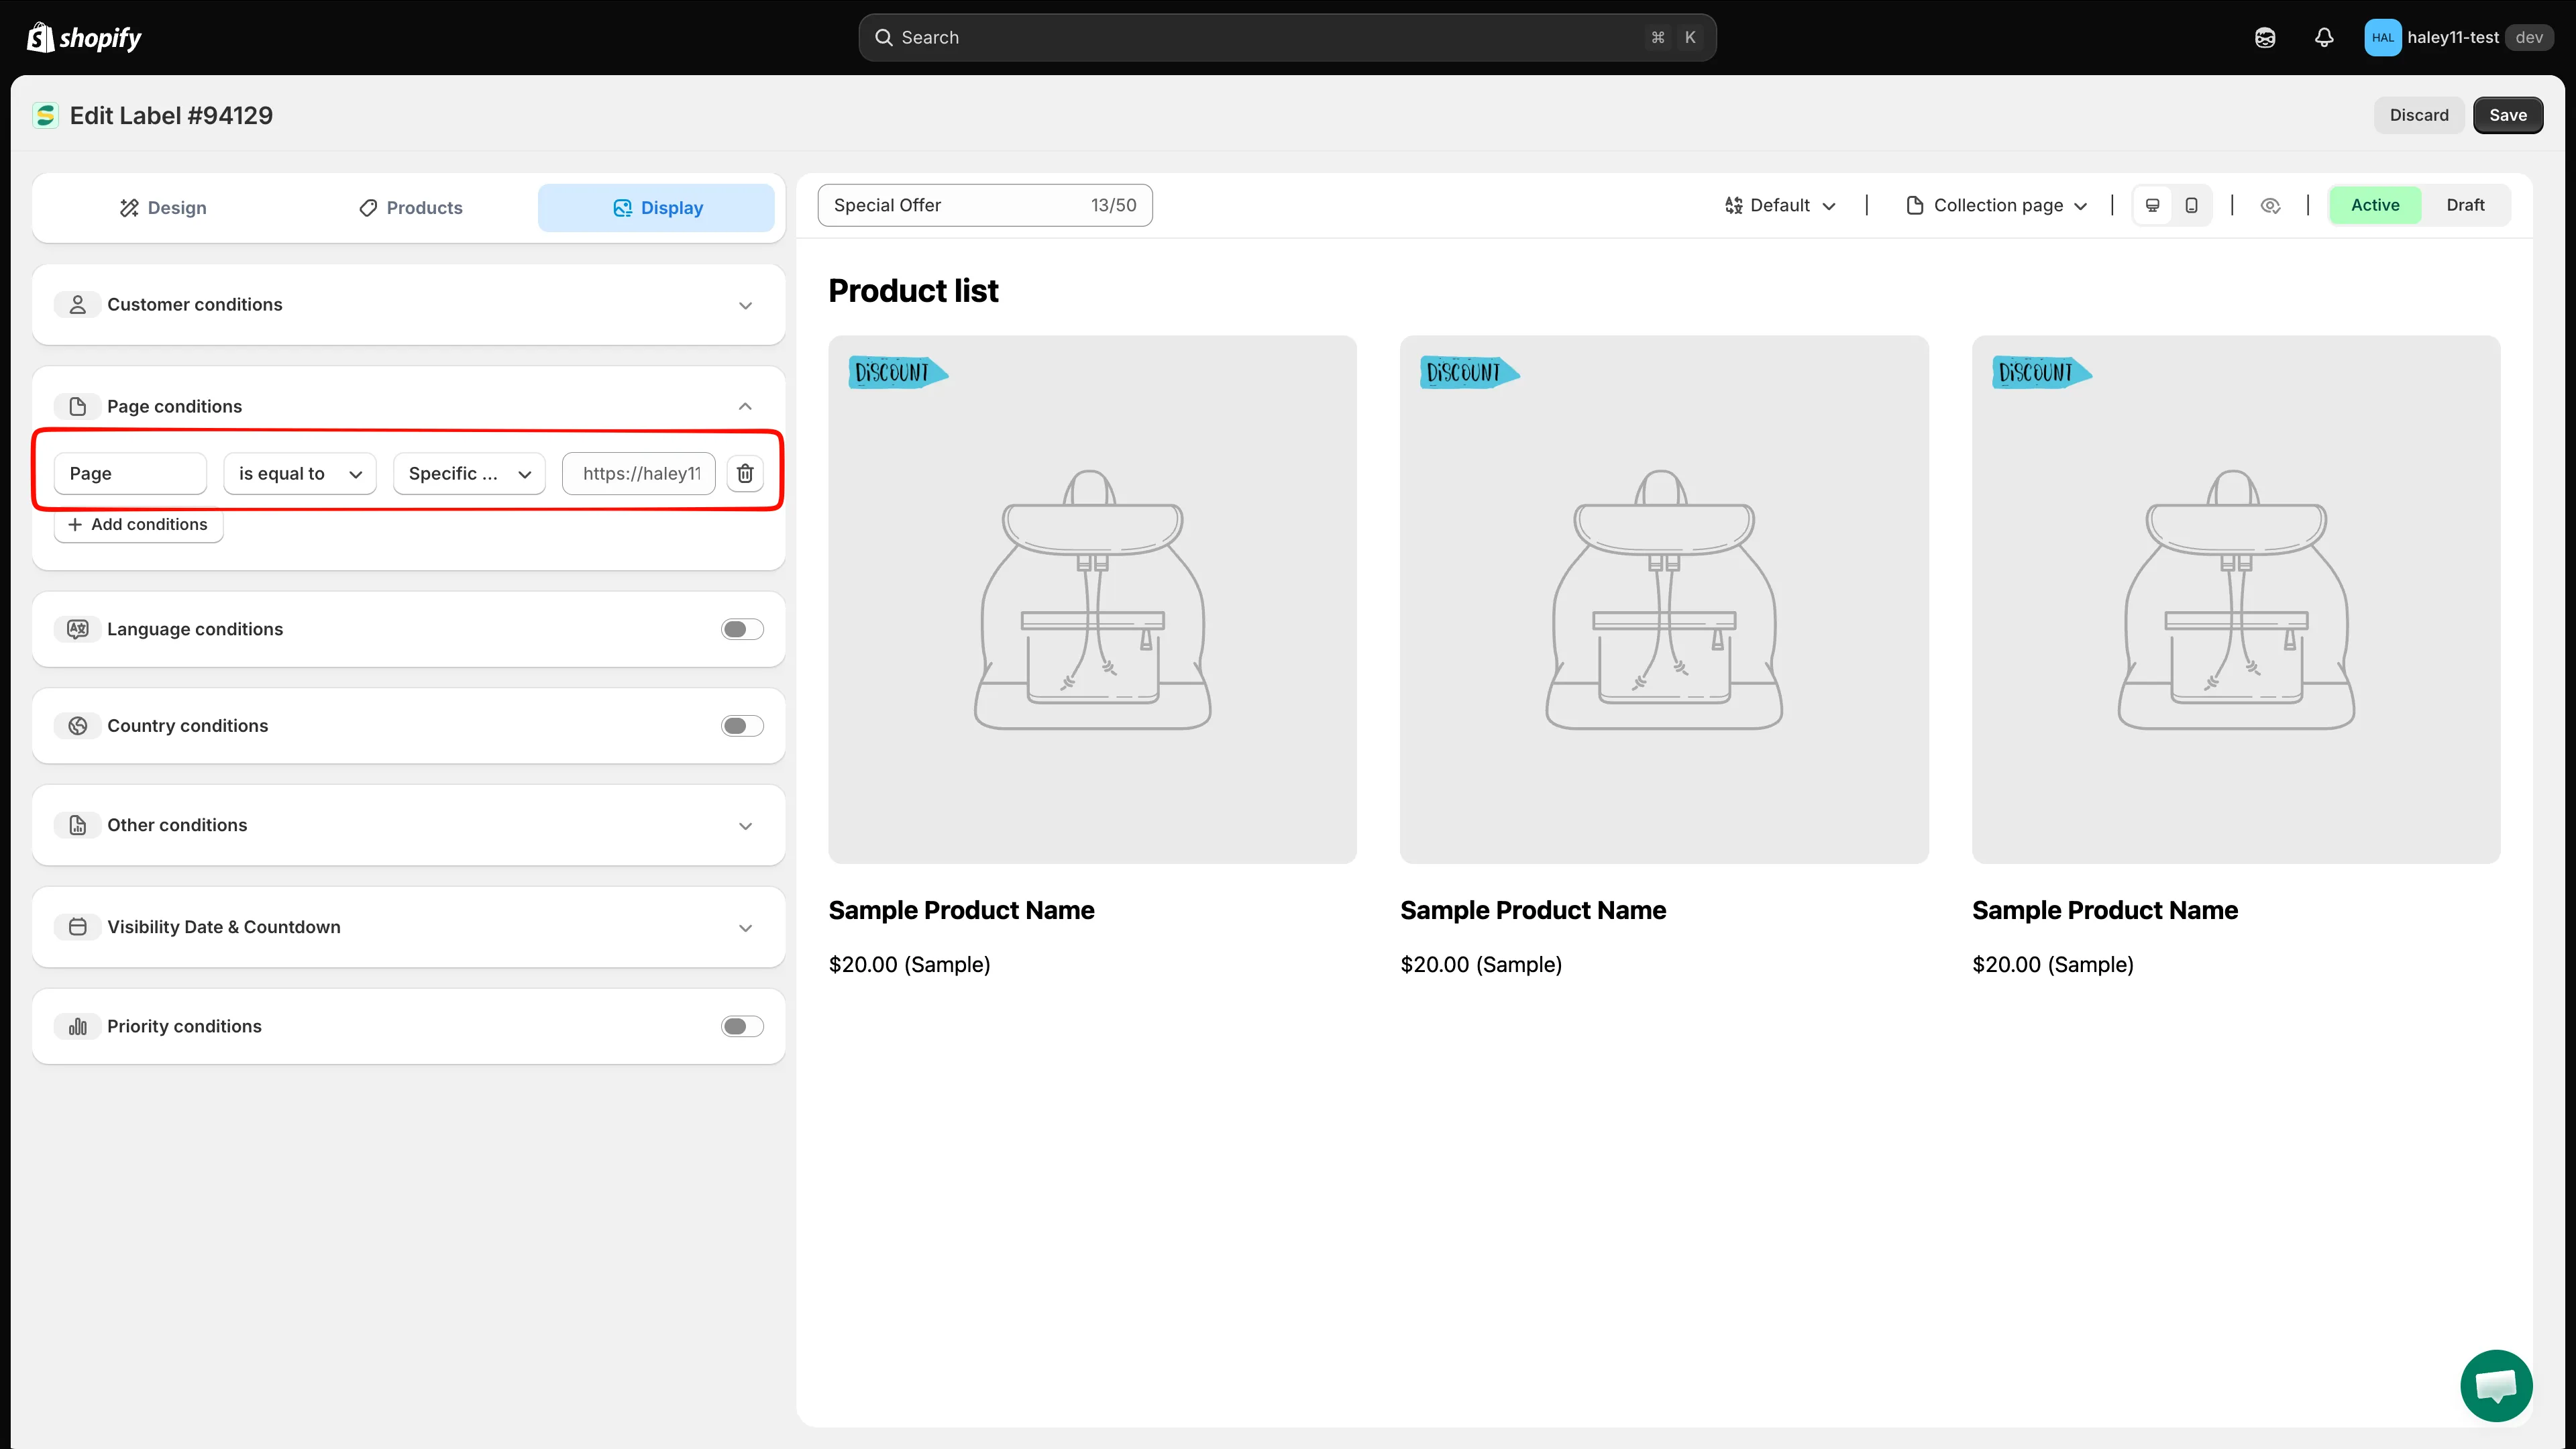
Specific pages adds a URL field — paste the full page URL, not just the path.
-
Click Save in the top-right corner.
Other conditions
Section titled “Other conditions”Expand Other conditions to control which product image carries the badge, which devices see it, and which theme elements to skip.
| Setting | Options | Behavior |
|---|---|---|
| Show on (product page) | All images / First image | Show the badge on every gallery image, or only on the first (main) product image. |
| Device targeting | All devices / Desktop / Mobile | Limit the badge to desktop or mobile shoppers, or show it on all devices. |
| Do not show label on | CSS class list — .CLASS1, .CLASS2,... |
The badge is not rendered on any element matching these classes. Useful when a slider, quick-view, or upsell section in your theme doesn’t suit badge placement. |
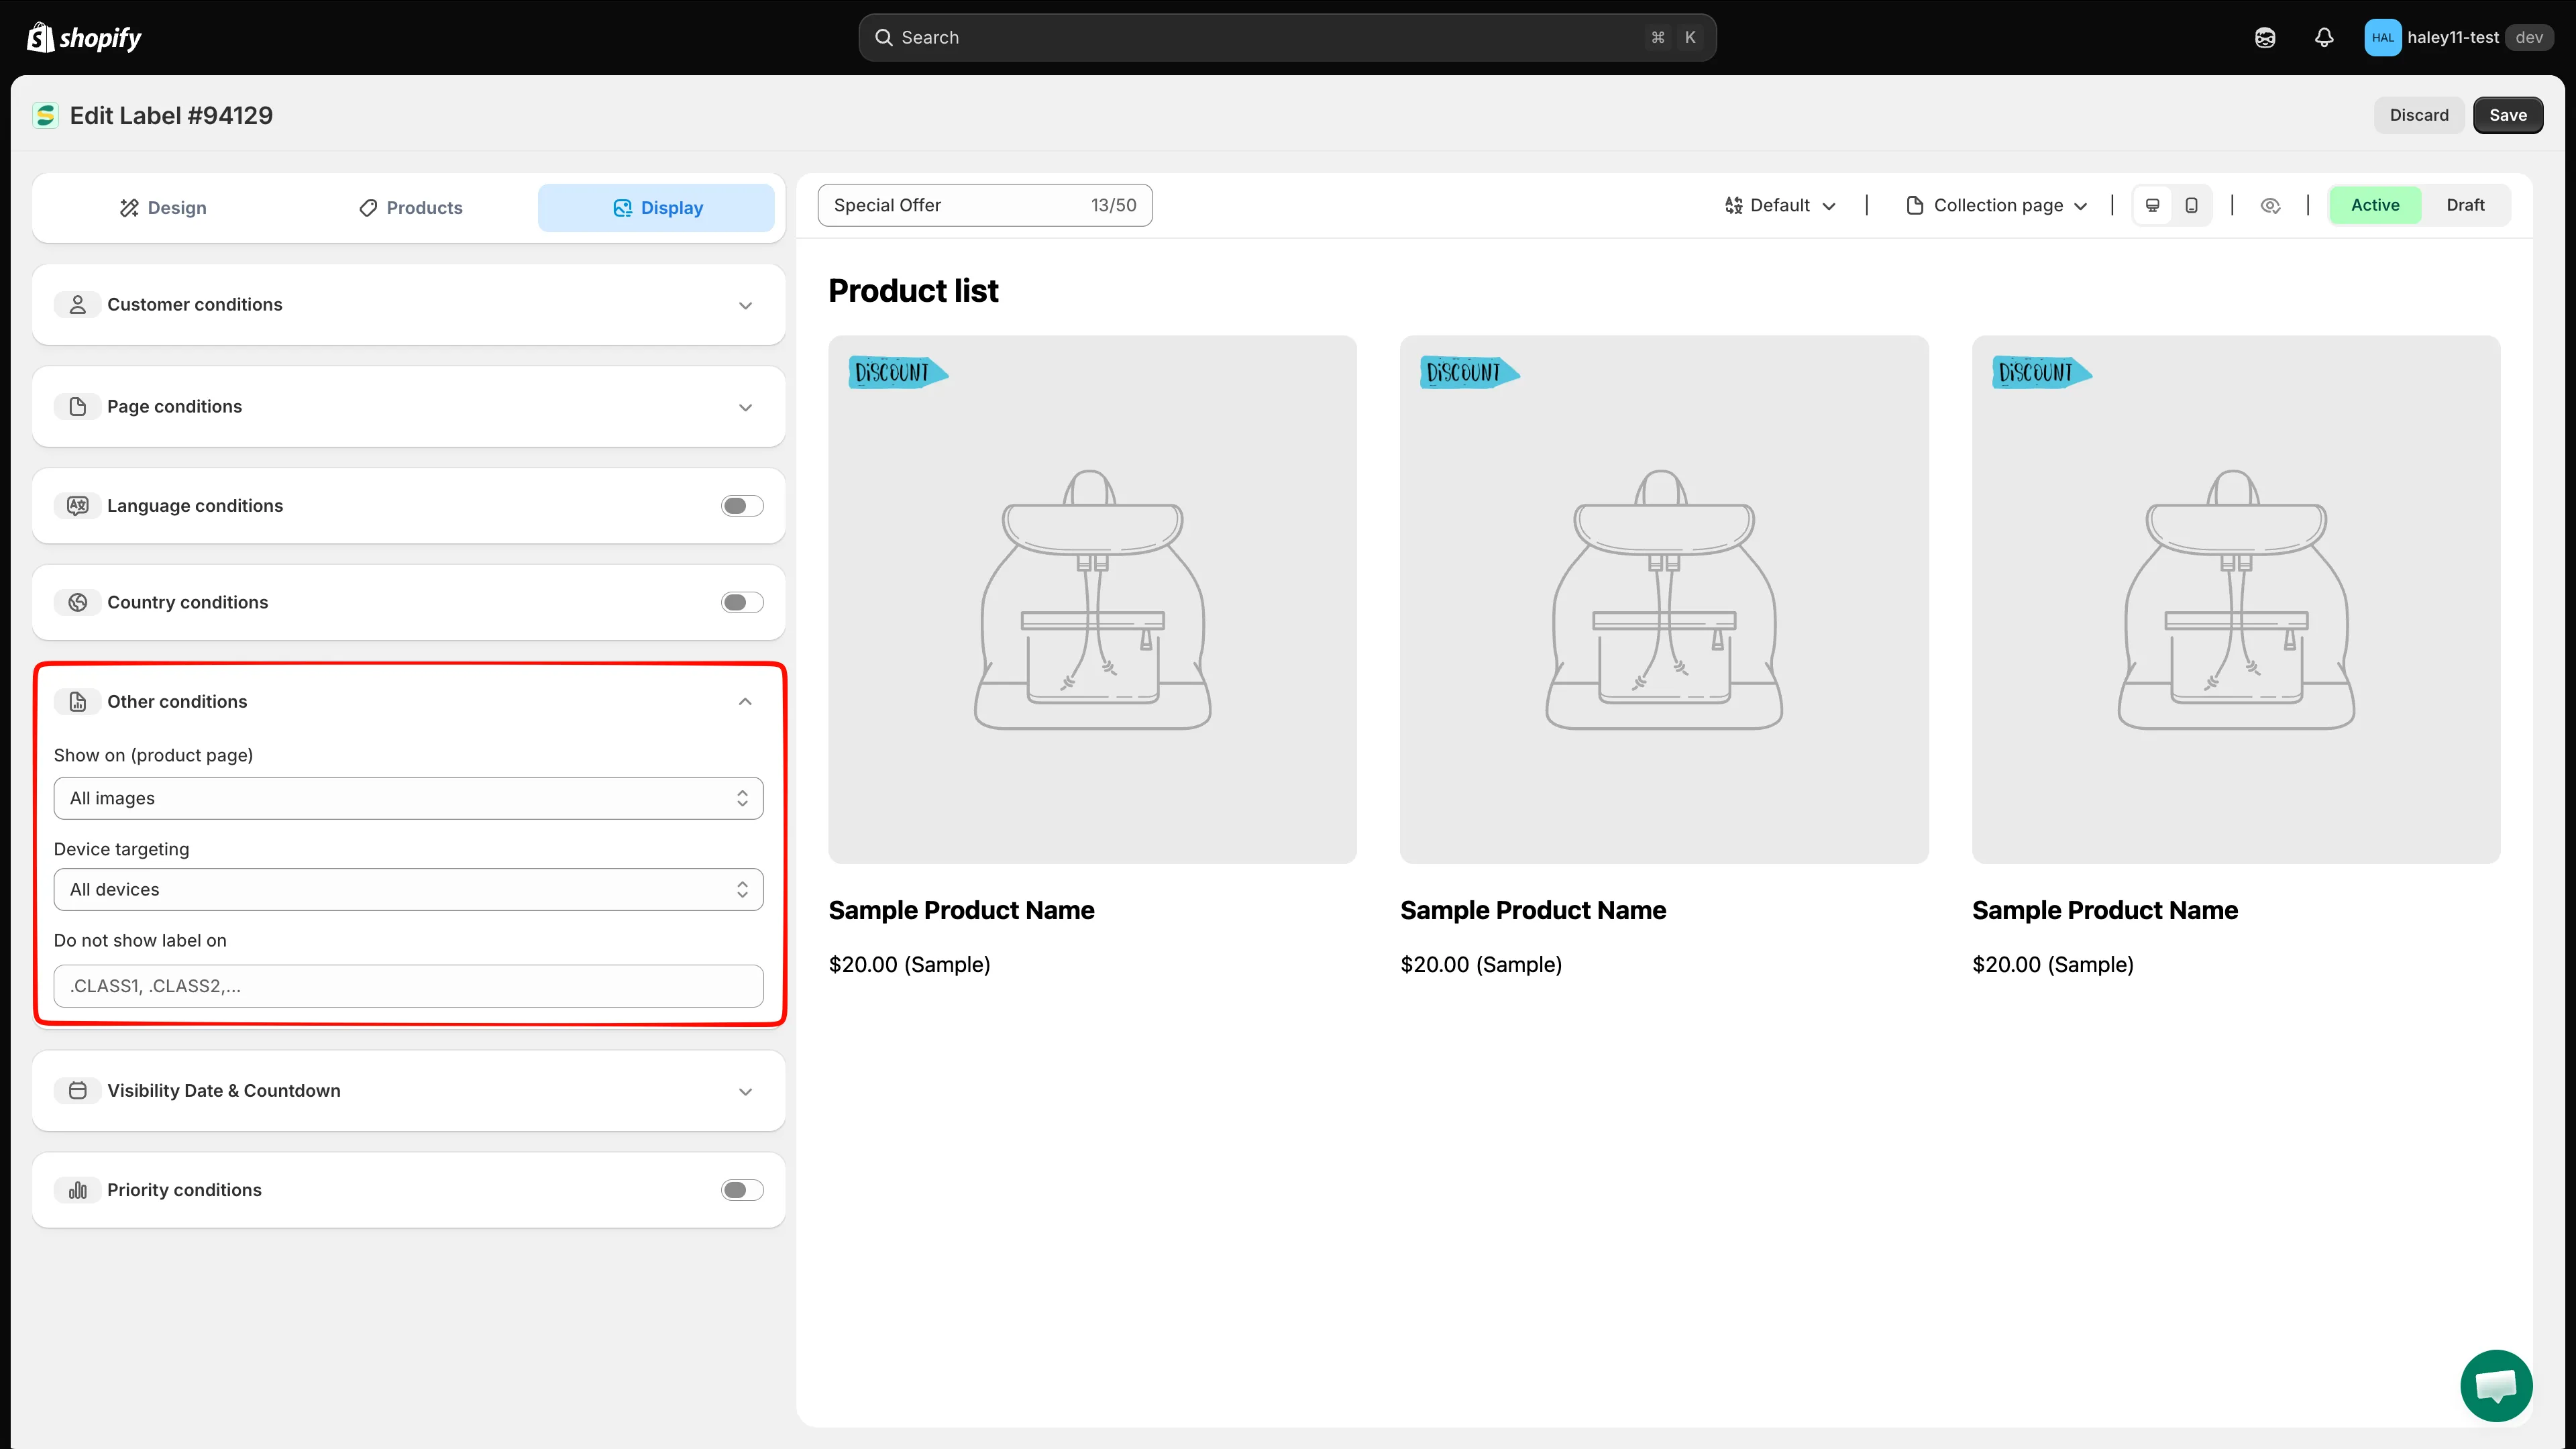
Image, device, and exclusion settings all live under Other conditions.
Priority conditions
Section titled “Priority conditions”When several badges match the same product, priority decides which one is displayed.
-
Turn on Priority conditions
Section titled “Turn on Priority conditions”Click the switch on the Priority conditions row. A Priority value field appears.
-
Enter a priority value
Section titled “Enter a priority value”Type a number from 0 to 100. 0 is the highest priority, 100 is the lowest. The app shows the same tip under the field.
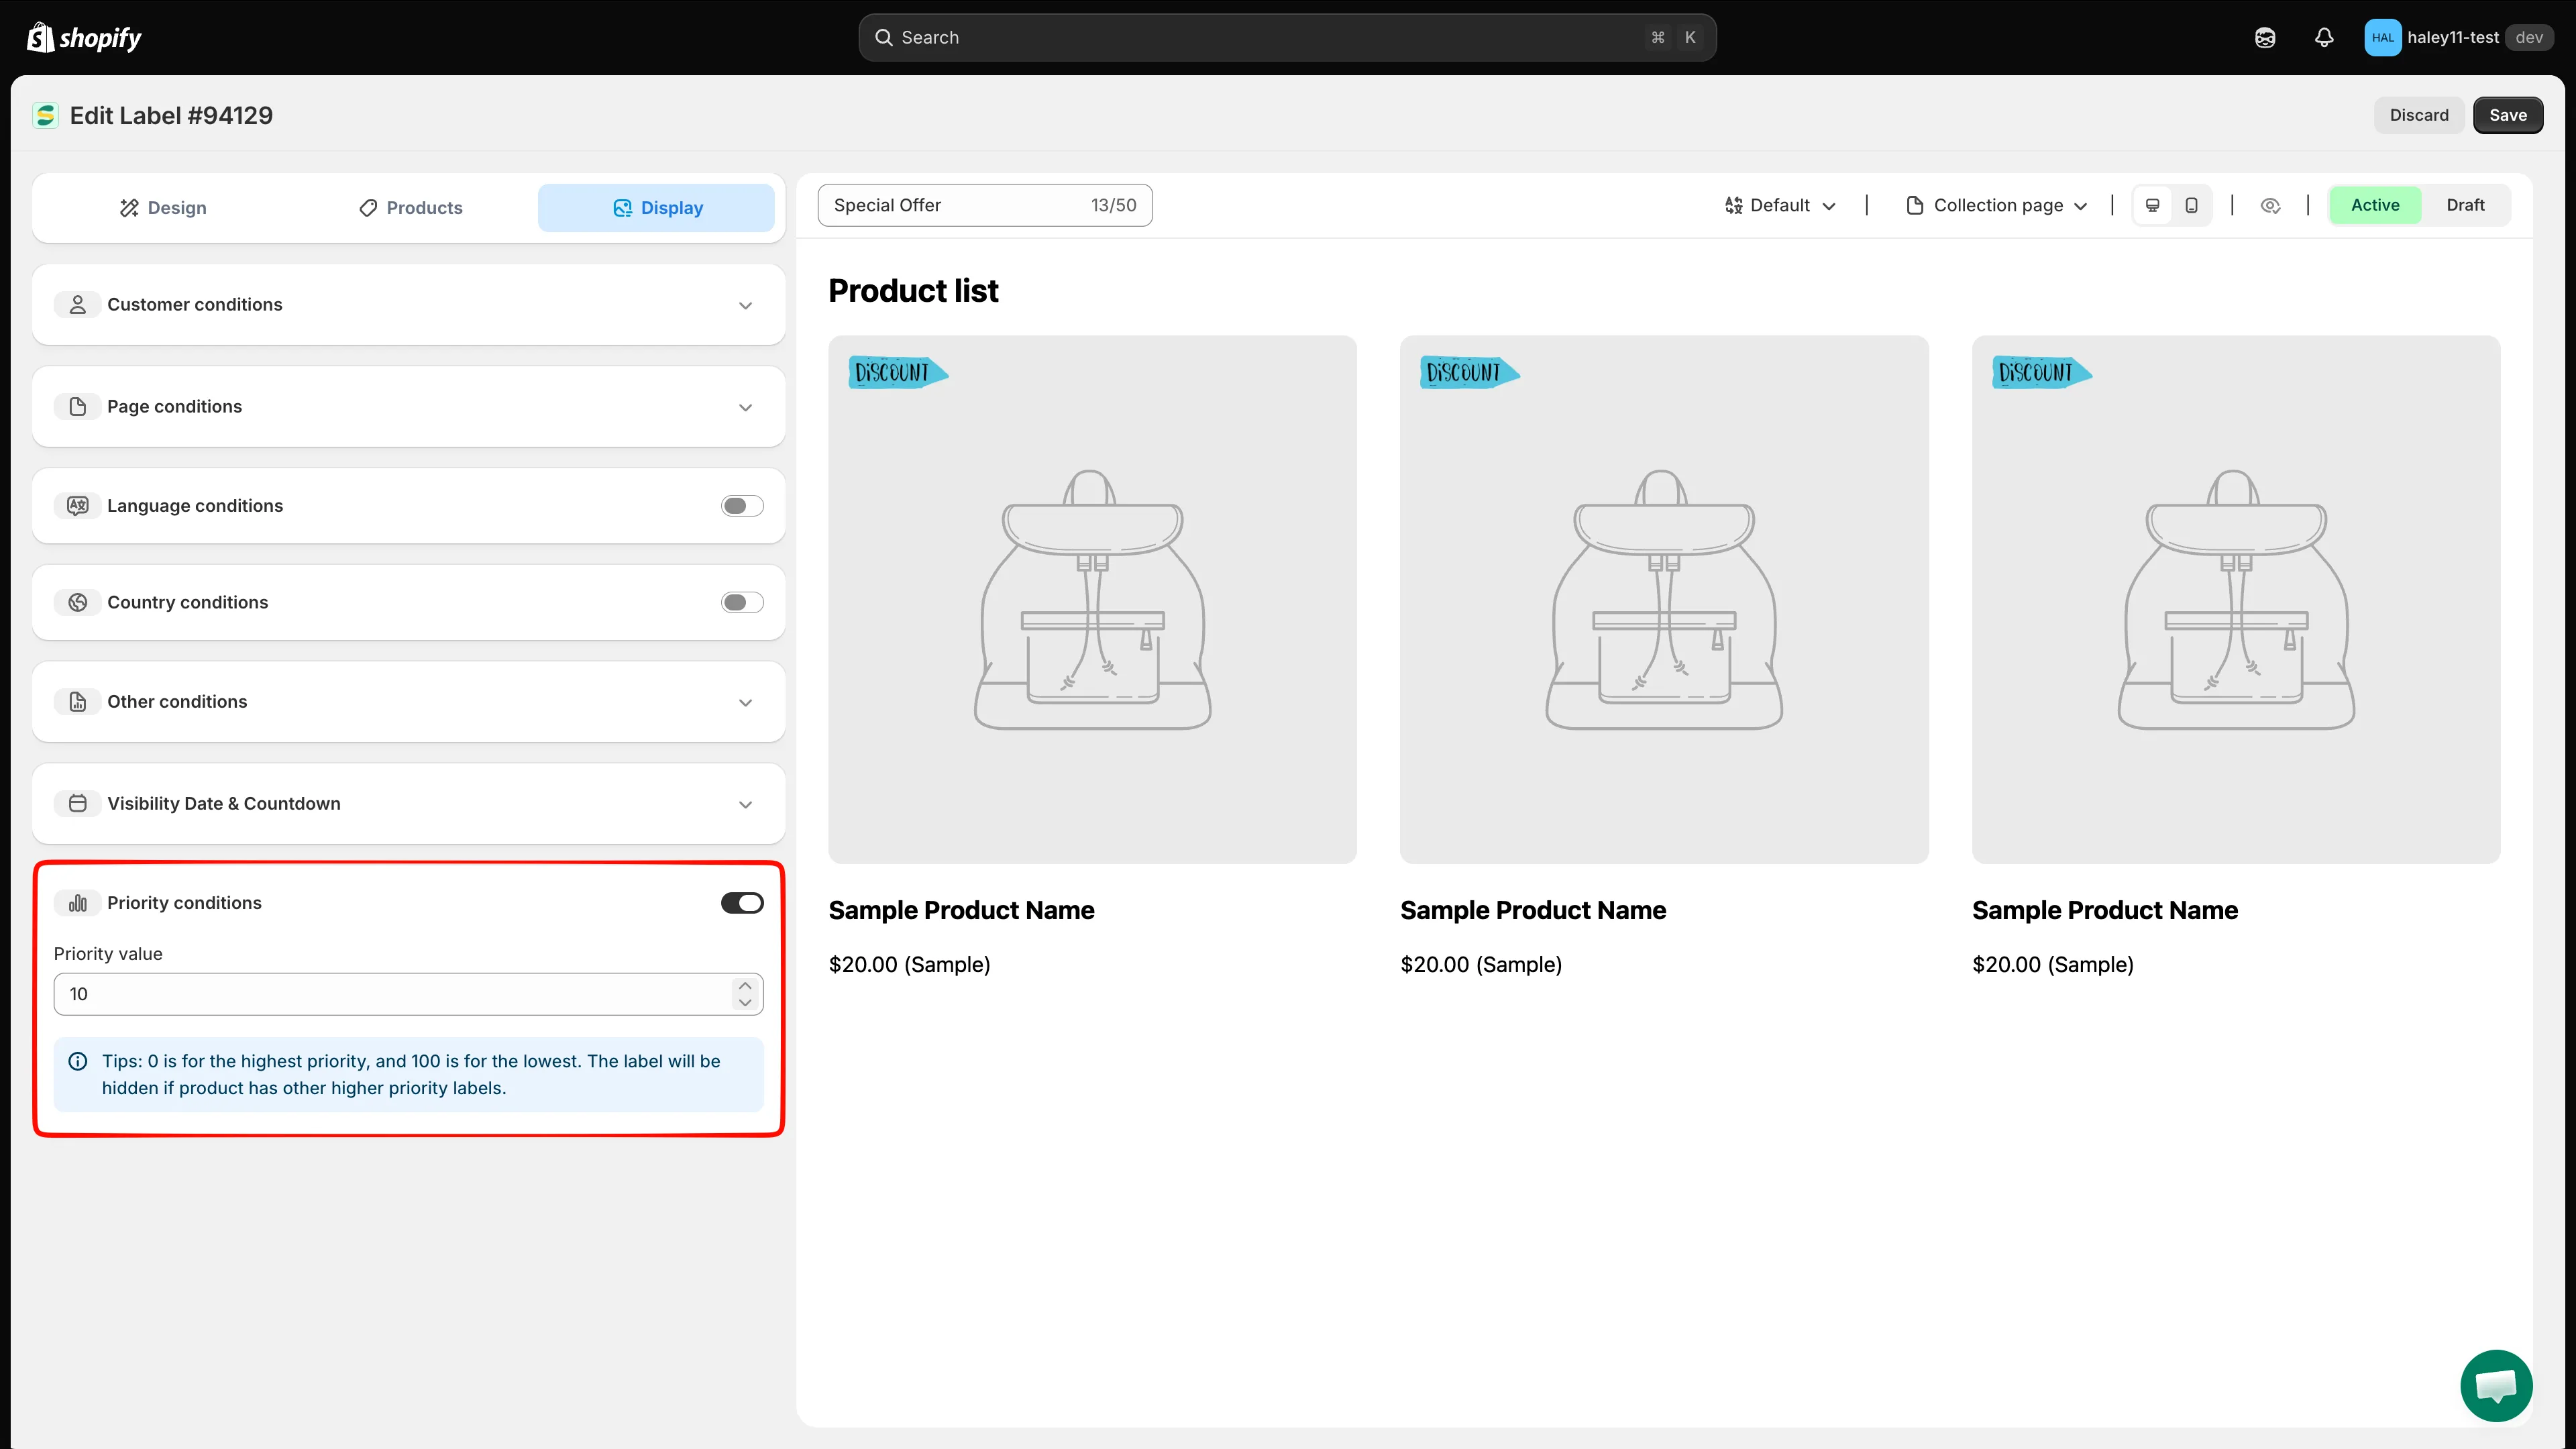
Lower number = higher priority. A badge is hidden if the product already has a higher-priority badge.
-
Click Save. The value now shows in the Priority column of the Badges & Labels list, so you can compare all your badges at a glance.
Priority example
Section titled “Priority example”| Badge | Priority value | Result on a product matching both |
|---|---|---|
| Sale off | 0 |
Shown |
| Best seller | 10 |
Hidden |
Next steps
Section titled “Next steps”- Change badge position — Adjust where the badge sits on the product image.
- Target products — Choose which products display your badge.
- Schedule visibility — Set start and end dates for a badge.