
Create an estimated delivery date
Build a delivery-date widget end to end, from layout and message through to your live product page.
This guide builds a complete estimated delivery date: a message with a real delivery window, an order-progress bar, and the dispatch and delivery rules behind them.
Make sure the app embed is on before you start, or the result won’t appear on your storefront.
Steps to set it up
Section titled “Steps to set it up”-
Create the countdown
Section titled “Create the countdown”Click Create countdown from the dashboard or the Countdowns page.
-
Pick a Delivery date layout
Section titled “Pick a Delivery date layout”On the Countdown templates page, switch the type tab to Delivery date. There are four layouts:
Layout Shows Message and progress bar The message above the progress bar Progress bar and message The progress bar above the message Message only Just the delivery text Progress bar only Just the Ordered → Dispatched → Delivered strip Click Select on the one you want. You can switch layout later from the Layout control in the builder.
-
Name it
Section titled “Name it”Give it a name like “Standard UK delivery”. Only you see it.
-
Write the message
Section titled “Write the message”On the Settings tab, open the Content section. The Message field is a rich-text editor — you can bold, color, and add line breaks, and you can drop in variables that the app replaces with real dates.
A new delivery date starts with a message along these lines:
🚚 Free Shipping to {country_flag} {country_name} ✅ Order within the next {cutoff_time} for delivery between {delivered_min_date} - {delivered_max_date}
Edit the wording to suit your store, keeping the variables you want. The full list is in Delivery variables.
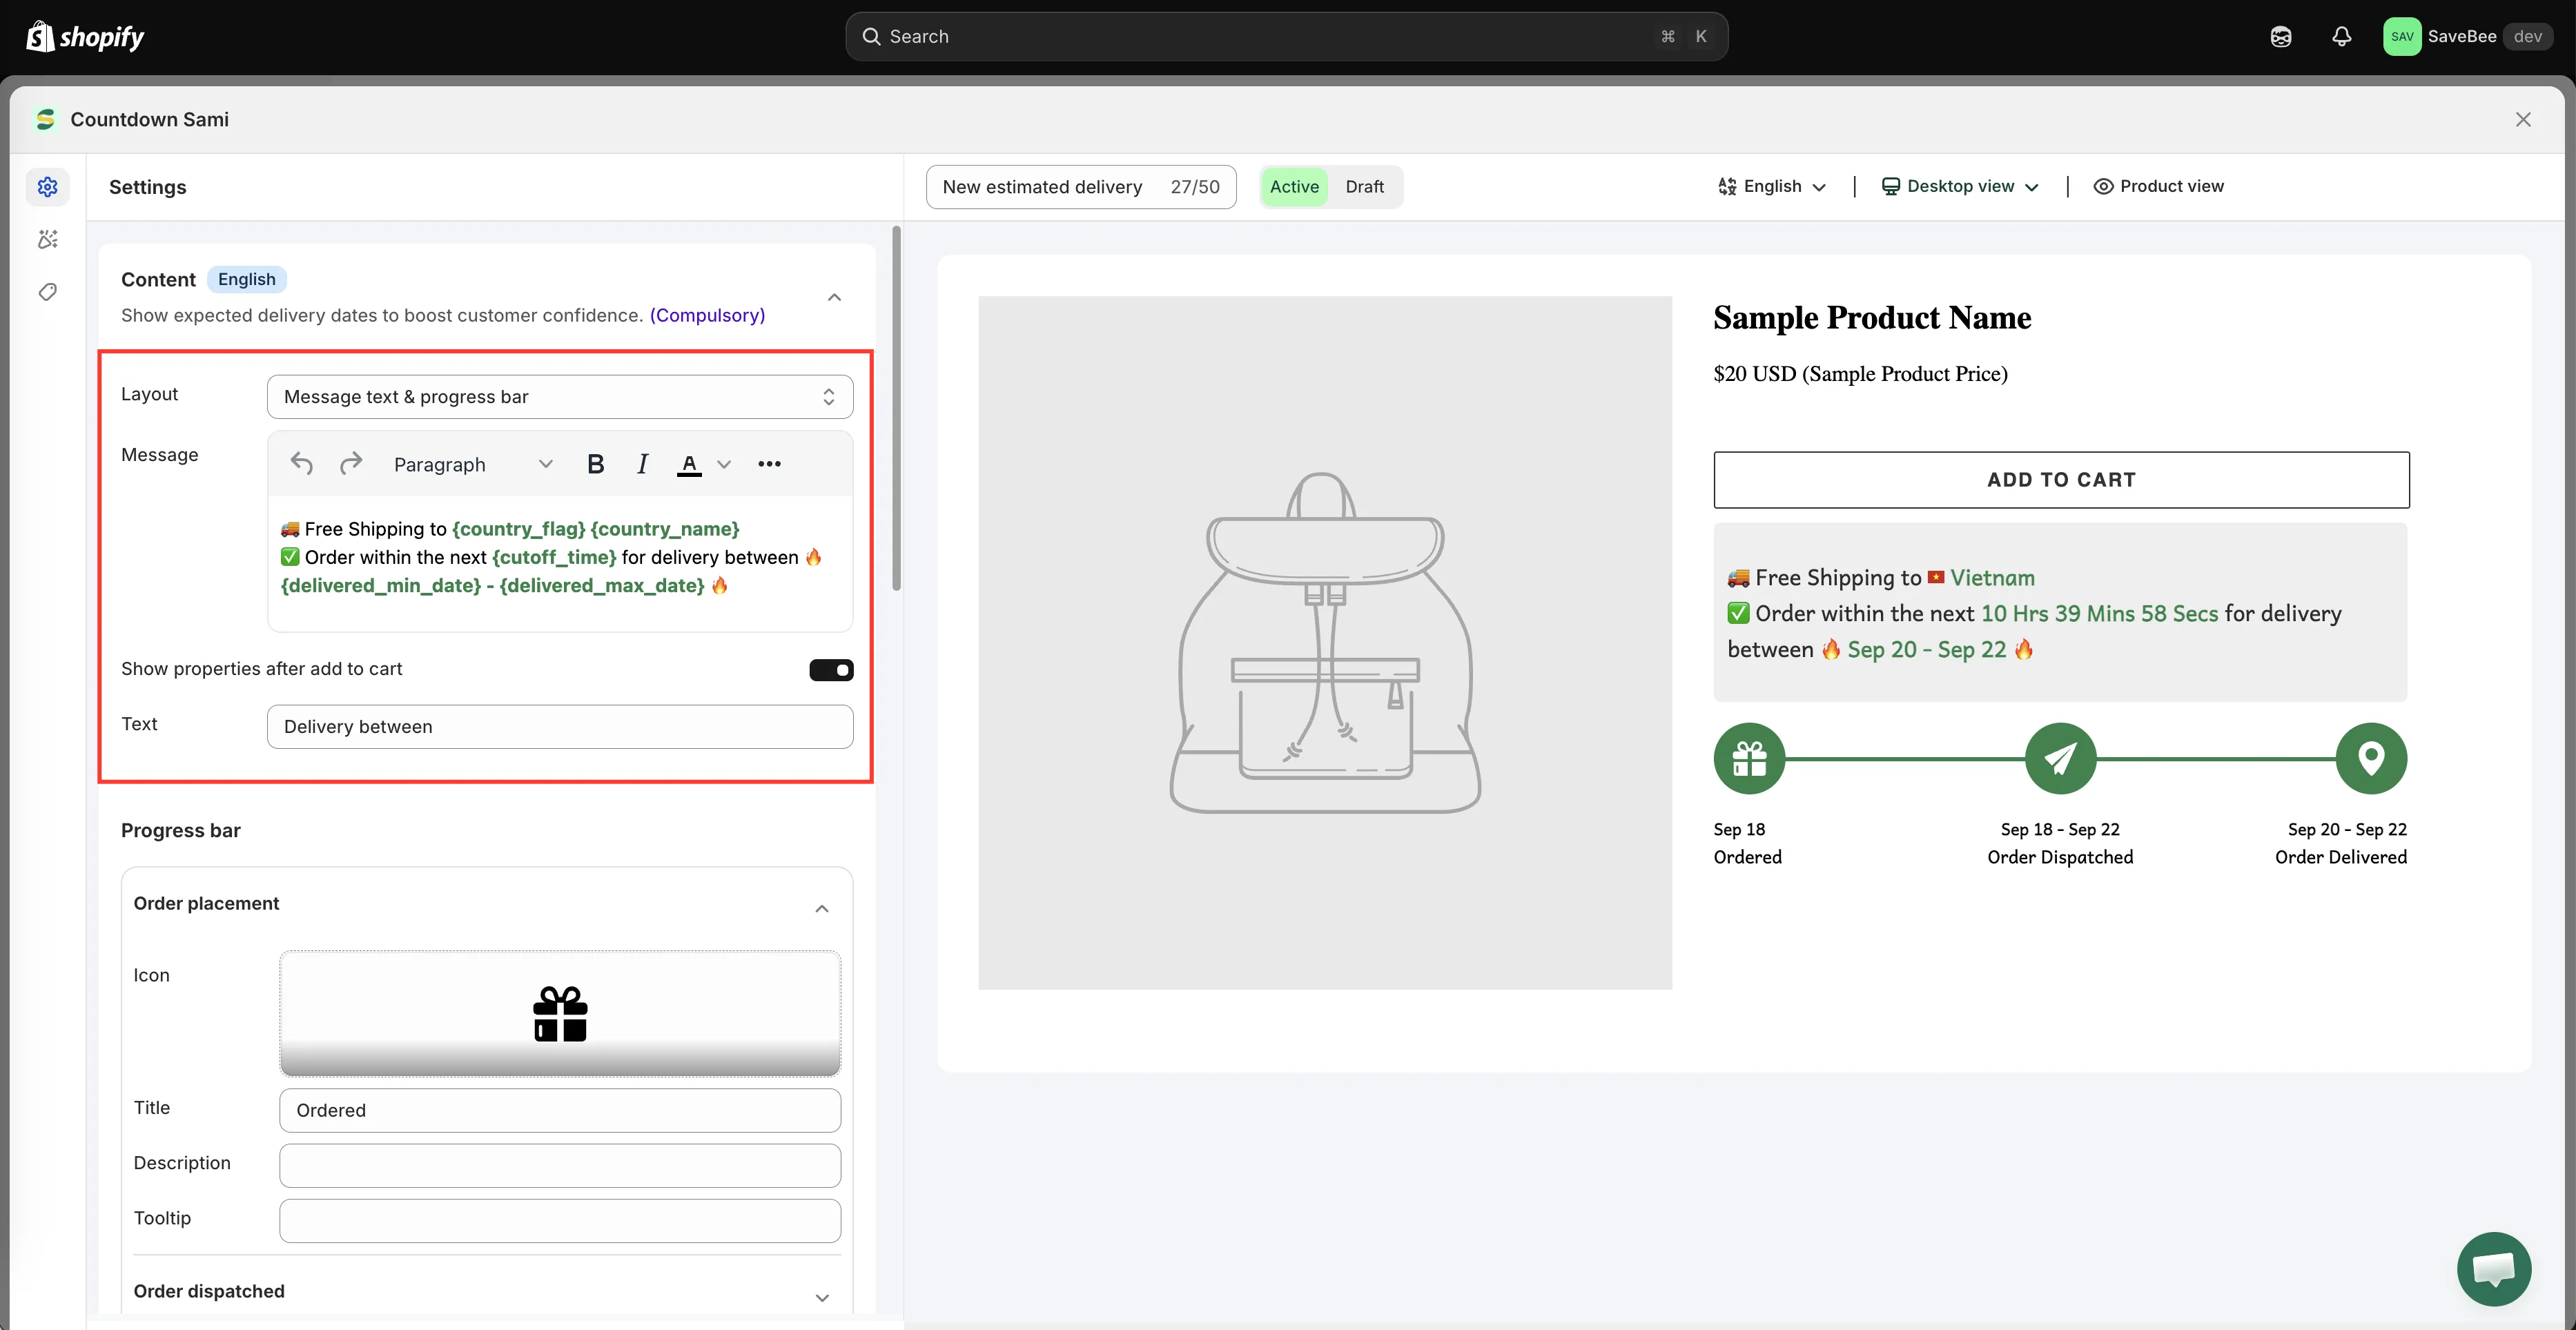
The Message field mixes your own wording with date variables.
-
Set up the progress bar
Section titled “Set up the progress bar”Still in Content, open the Progress bar section. It has three stages, each with the same four fields:
Stage Default title Order placement Ordered Order dispatched Order Dispatched Order delivered Order Delivered For each stage you can set:
- Icon — pick from the app’s icon library
- Title — the label under the icon
- Description — an optional line beneath the title
- Tooltip — text shown when a shopper hovers the stage
The Order dispatched stage can be switched off if you’d rather show a two-stage bar.
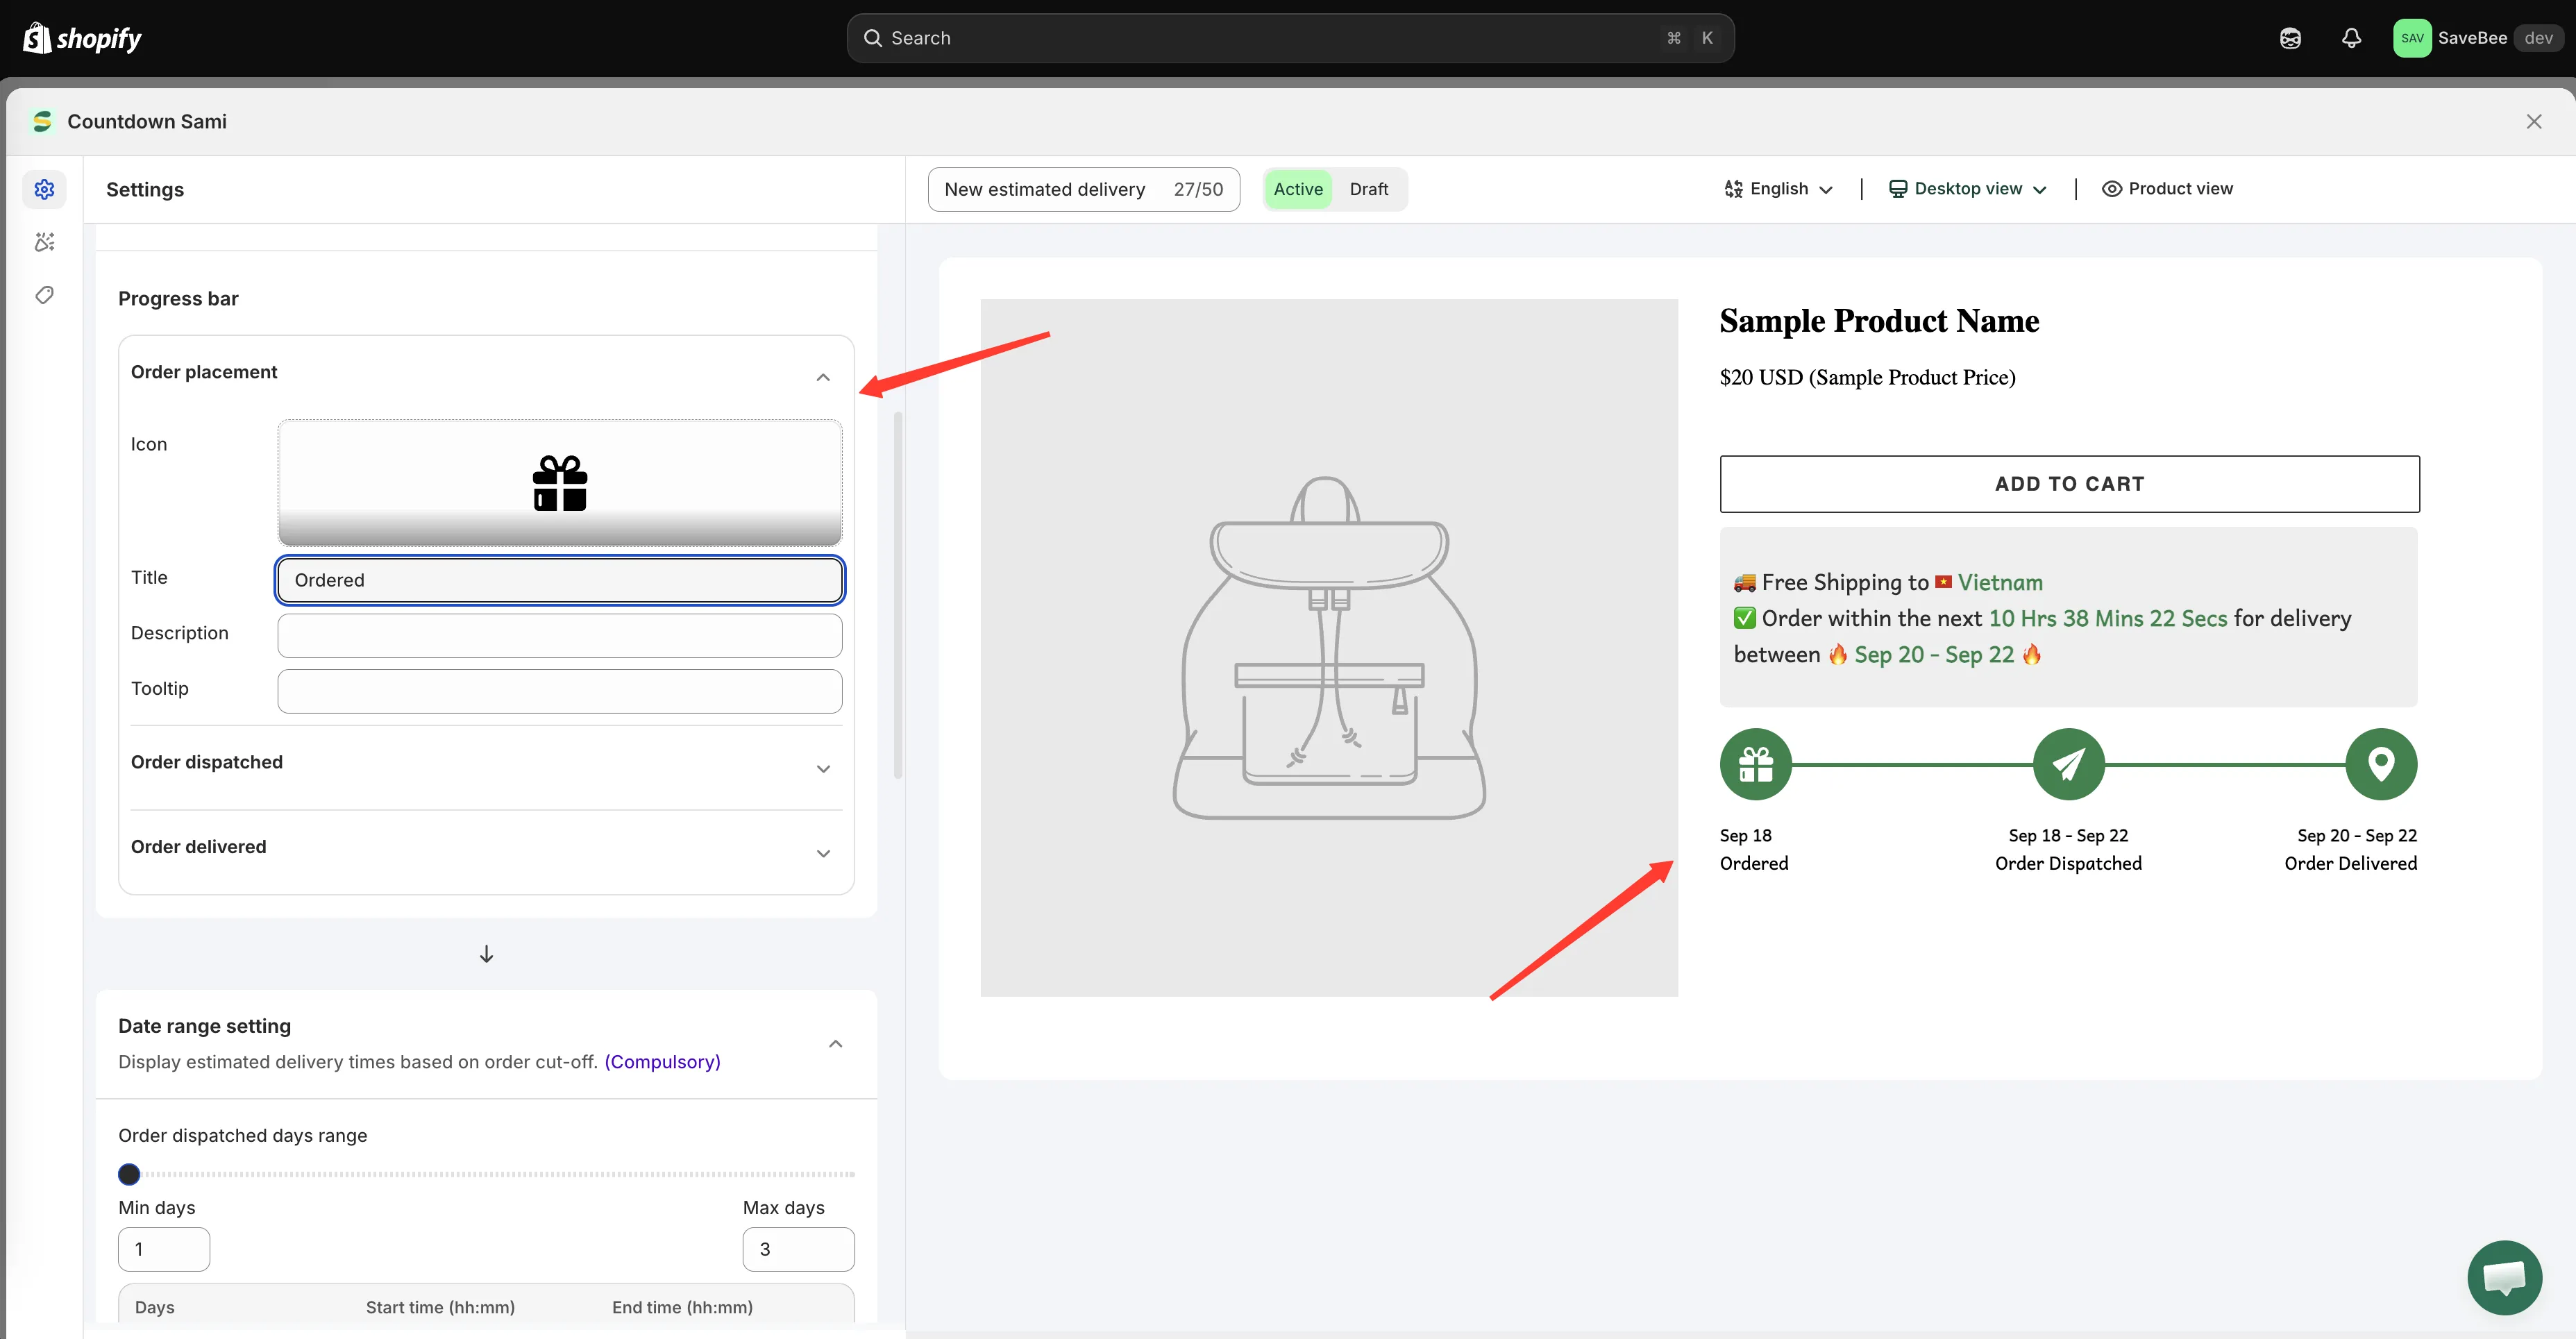
Each progress-bar stage has an icon, title, description, and tooltip.
-
Set the dispatch and delivery ranges
Section titled “Set the dispatch and delivery ranges”Open the Date range setting section and set how long each stage takes:
- Order dispatched days range — Min days and Max days before the order leaves you, plus the weekdays you dispatch on. Defaults to 1–3 days, Monday to Friday.
- Order delivered days range — Min days and Max days in transit, plus the weekdays deliveries arrive on. Defaults to 3–5 days, every day.
Full detail, including holidays and date formats, is in Date range settings.
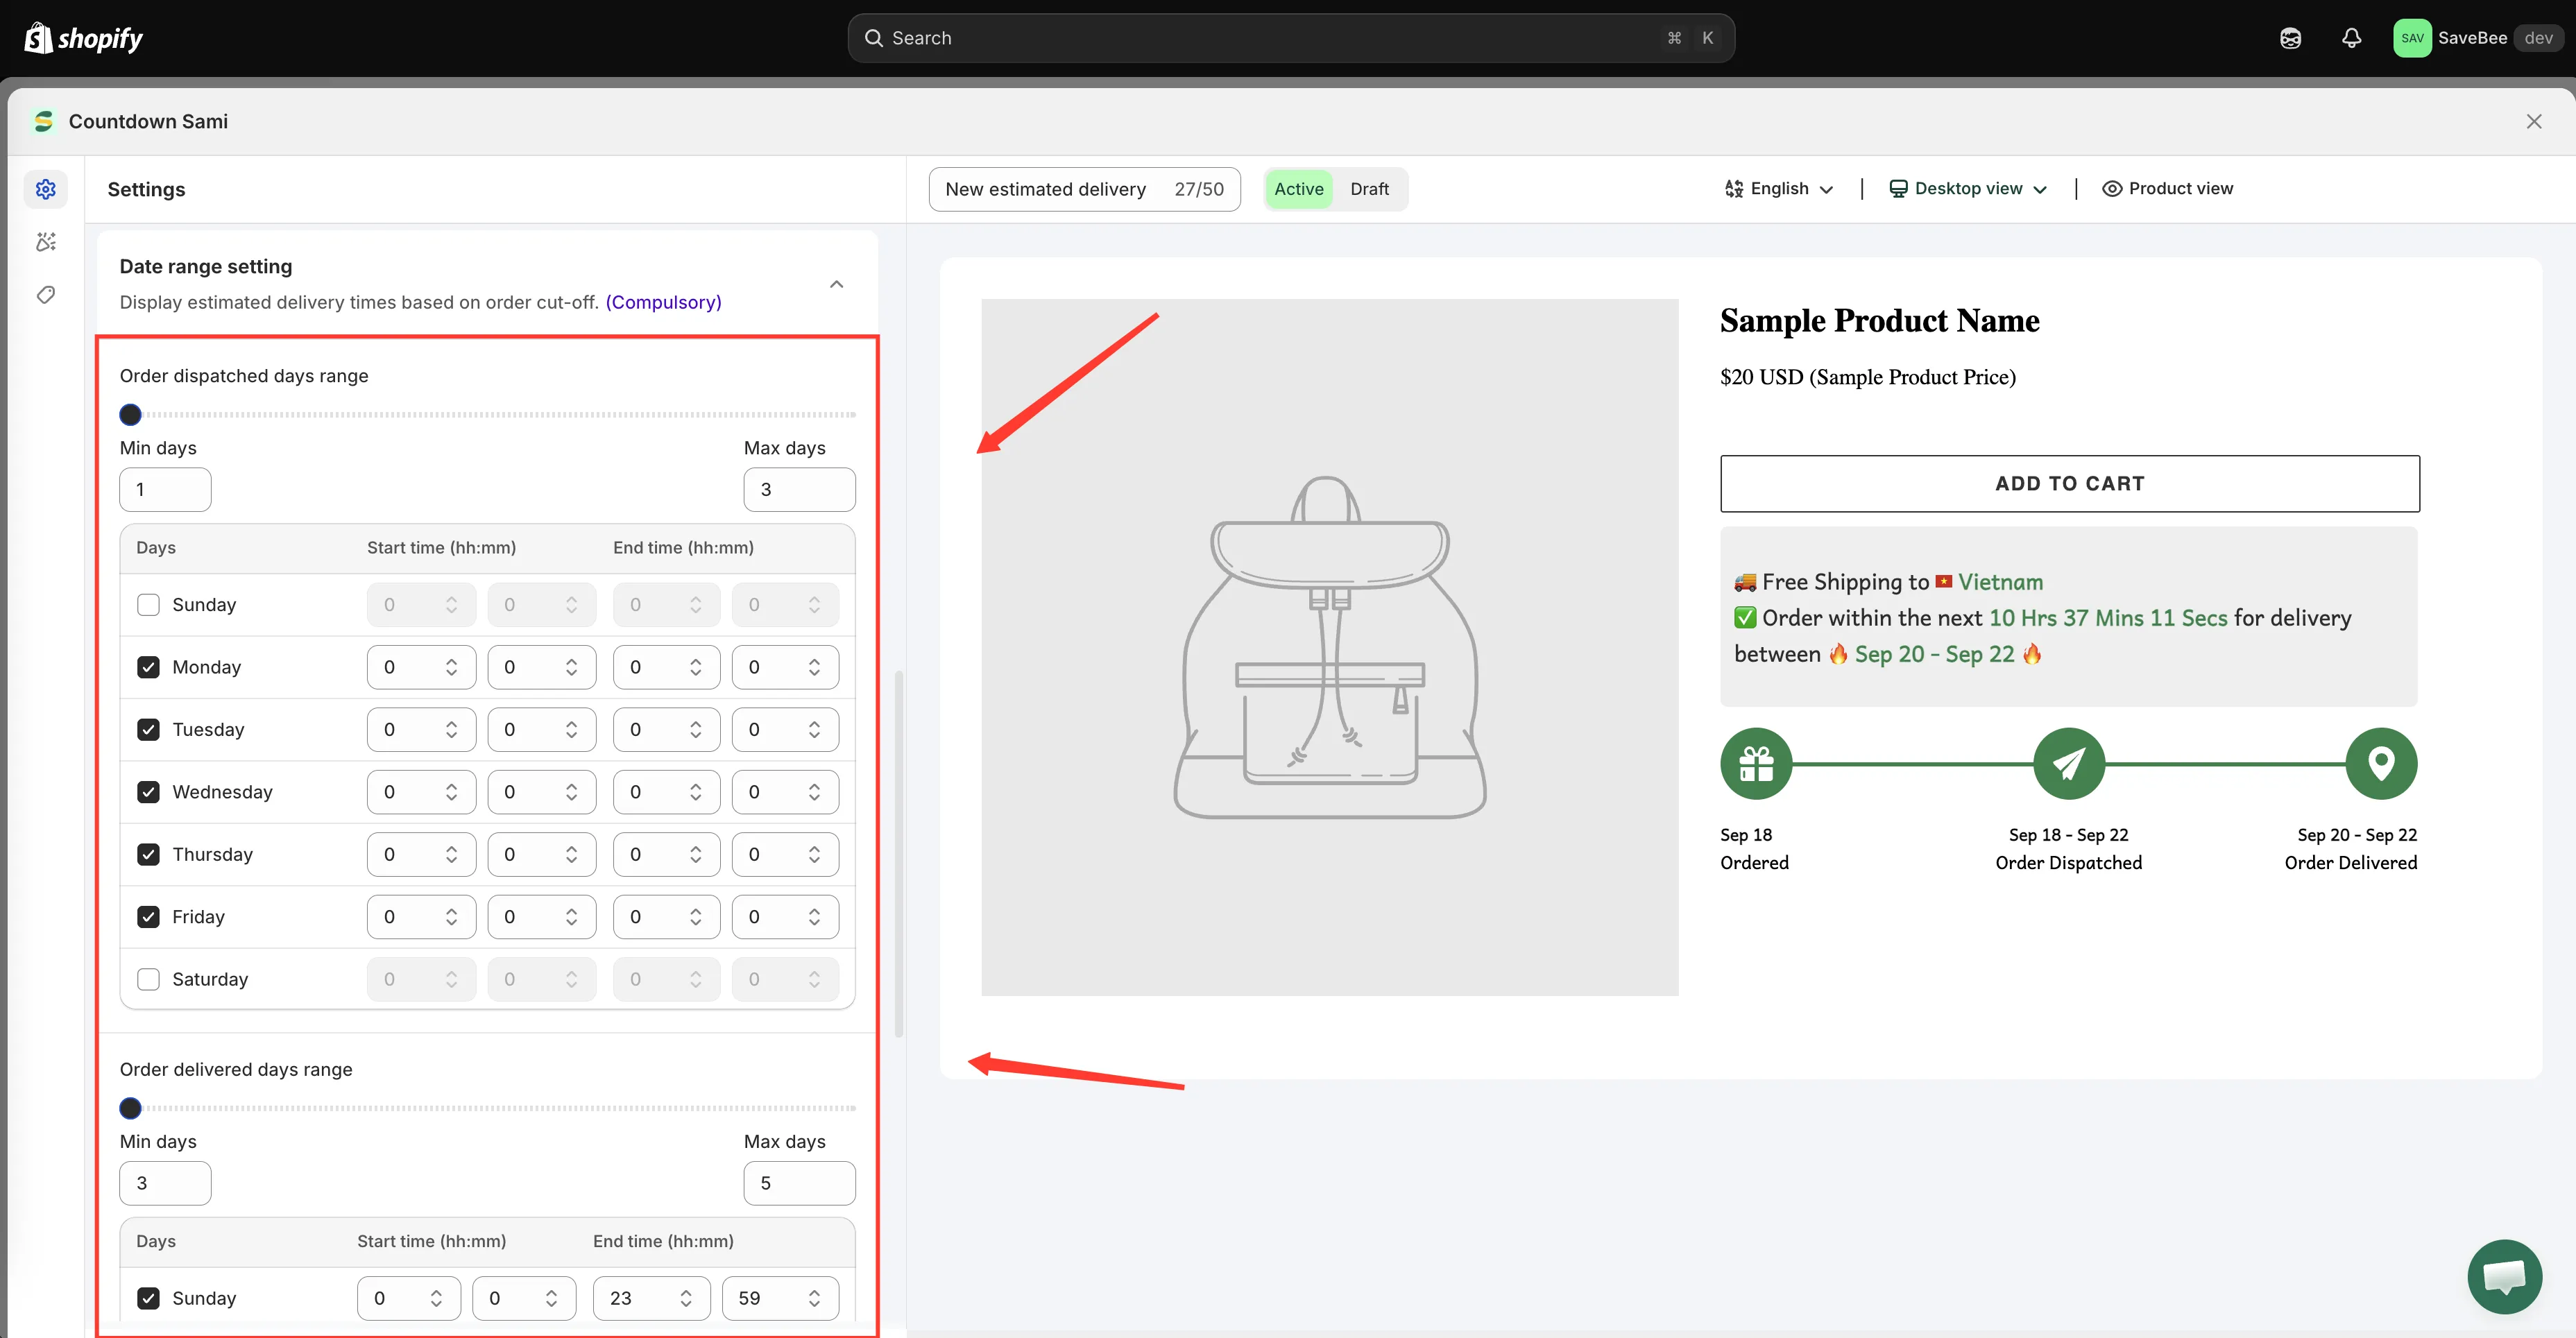
The dispatch and delivery ranges produce the window shown in the message.
-
Set the cut-off time
Section titled “Set the cut-off time”Still in Date range setting, set the daily cut-off — the time after which an order counts as tomorrow’s. It defaults to 23:59, which effectively means “all day”.
If your real cut-off differs by weekday, you can set one per day. See Cut-off time.
-
Choose the date and time format
Section titled “Choose the date and time format”Under Date & time settings, pick a Date format and a Time format.
Date formats range from
MMM DD(the default, “Mar 14”) throughDD/MM/YYYYtodddd, MMMM DD, YYYY(“Friday, March 14, 2026”). Time formats control how the{cutoff_time}countdown reads — fromHrs, Mins, Secsdown toH, M, S.Pick the convention your customers expect.
DD/MMandMM/DDmean different things to different countries. -
Style it on the Design tab
Section titled “Style it on the Design tab”Switch to Design to adjust the message widget and the progress widget — fonts, colors, sizes, spacing. See Design a countdown.
-
Choose where it shows
Section titled “Choose where it shows”On the Display tab, tick Product page under Show countdown on, or copy the Shortcode to place it exactly where you want.
Use Conditions to limit it — a delivery promise that’s true for one collection often isn’t true for another. See Display conditions.
-
Save it as Active
Section titled “Save it as Active”Set the status to Active and click Save.
-
Check it on your storefront
Section titled “Check it on your storefront”Open a matching product page on your live storefront. Check that:
- The dates make sense — not in the past, not absurdly far out.
- The country name and flag match where you’re browsing from.
- The cut-off countdown is running.
Then check it again after your cut-off time has passed. The window should have moved on by a day.