
Existing Shopify customers
Choose what an approval does when the buyer's email already belongs to a Shopify customer, and add tags to every customer a form approves.
Many wholesale buyers already shop at your store as retail customers. When you approve their application, Sami B2B Onboarding finds that customer by email instead of creating a second one. Each form’s Shopify panel decides whether the approval keeps that customer’s details or replaces them with the answers, and which extra tags the customer gets.
When the app looks for the customer
Section titled “When the app looks for the customer”Nothing is written to Shopify when a buyer submits. The app writes the customer when the application is approved, whether by someone on your team, by a rule or by a Shopify Flow workflow. It does the same when you add the buyer to a company you already have with Add buyer.
At that moment, the app:
- Looks for a Shopify customer with the same email as the application. Upper and lower case don’t matter, but the whole address must match.
- Creates a customer from the mapped answers if there’s none.
- Applies If the customer already exists if there is one.
- Marks the customer as approved either way: the B2B approved metafield is turned on and the tag
b2b-approvedis added.
A buyer who was signed in to their customer account when they applied is already linked to that account. Approving them uses that customer and marks them as approved, but leaves their details as they are and adds no other tags, whatever this setting says.
Choose what happens to an existing customer
Section titled “Choose what happens to an existing customer”-
Open the Shopify panel
Section titled “Open the Shopify panel”Go to Forms and click Edit beside the form. In the rail on the left, click Integrations. Under Connected apps, click Manage on the Shopify row.
The Shopify panel opens. Its first section, Customer, lists the answers that fill the customer, with two settings below them.
-
Pick an option
Section titled “Pick an option”In If the customer already exists, choose one of the options in the table below.
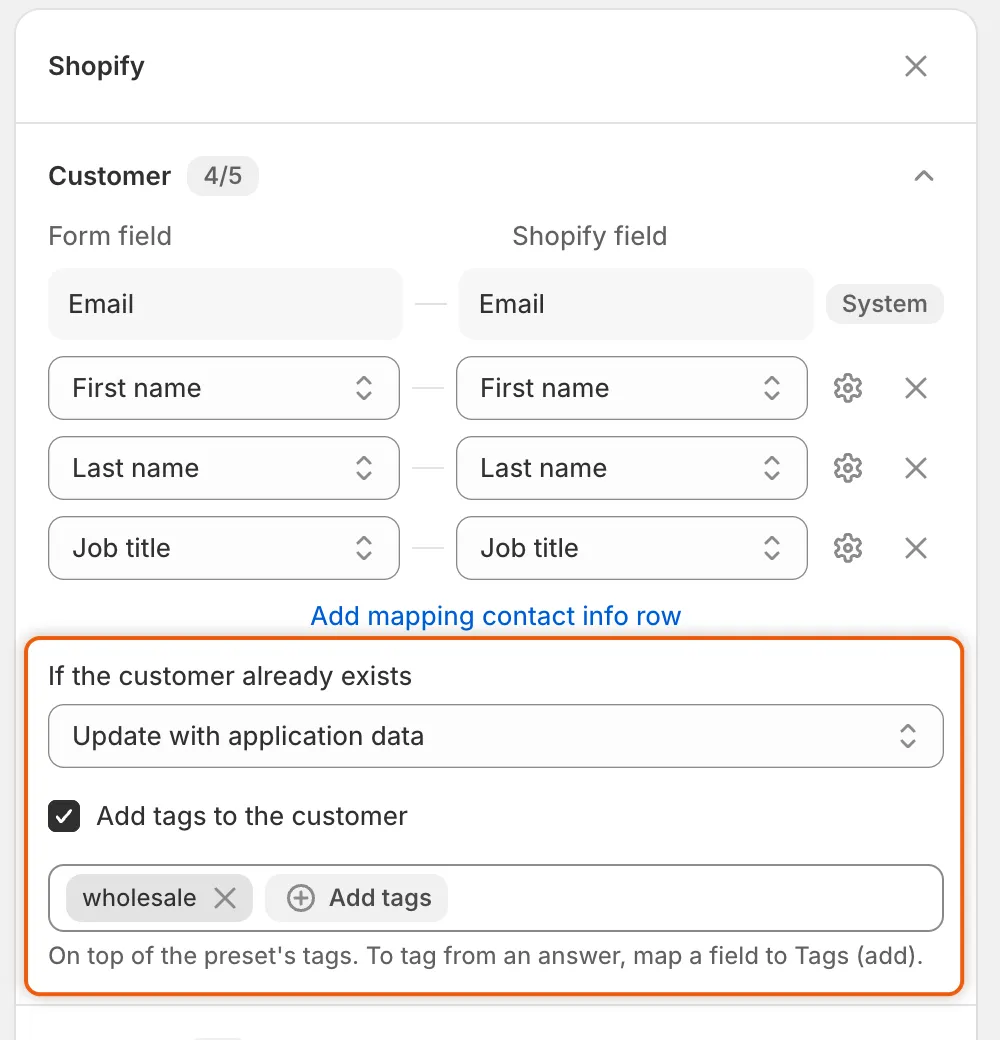
These two settings, below the Customer rows, decide what approval does to the Shopify customer.
-
Click Save in the save bar. You see Form saved.
| Option | What approval does to a customer who already exists |
|---|---|
| Keep existing customer data (default) | Links the application to the customer and changes nothing on them: not their name, phone, tags or metafields. No tags are added, not even the preset’s or this panel’s. They only get the approved flag and the b2b-approved tag. |
| Update with application data | Writes the mapped first name, last name, phone and customer metafields over the customer’s own. Adds the approval preset’s tags, this panel’s tags and any tags from answers, and keeps the tags the customer already had. The email doesn’t change. |
A new customer always gets everything: the mapped details and all the tags.
If Shopify refuses only the phone number, for example because of its format, the app saves the customer without it. The phone stays on the application.
Add tags to every customer this form approves
Section titled “Add tags to every customer this form approves”-
Turn on the tags
Section titled “Turn on the tags”In the Customer section of the Shopify panel, tick Add tags to the customer. A tag box appears.
-
Type the tags
Section titled “Type the tags”Type a tag and press
Enteror,. The box suggests tags your store’s customers already have. The note under it reads On top of the preset’s tags. To tag from an answer, map a field to Tags (add). -
Click Save in the save bar.
The tags go on every new customer this form approves. They go on existing customers only with Update with application data. To tag buyers by what they answered, map a field to Tags (add) or give a choice its own customer tags. See Map answers to Shopify.
Separate billing address
Section titled “Separate billing address”The Company location section of the same panel has a Separate billing address box. It decides whether the company’s first location gets its own billing address.
- Off: the billing address is the shipping address. Only the shipping fields are listed for mapping.
- On: the Billing · fields are added to the list, so you can map your form’s billing questions to them.
While any billing field is mapped, the box stays ticked and can’t be cleared.
What else the Shopify panel holds
Section titled “What else the Shopify panel holds”| Section | What it holds |
|---|---|
| Customer | The answers that fill the customer’s email, name, phone, job title and tags, plus the two settings on this page. |
| Company | The answers that fill the company’s name, external ID, note and tags. |
| Company location | The answers that fill the location’s shipping and billing address. |
| Metafields | Answers saved in your own customer or company metafields. |
A note at the bottom reminds you where the rest comes from: Activation email: Settings → Email. Catalog, payment terms and role: the preset chosen at approval. The approval email itself, Account approved, is edited in the form builder’s Email section. See Edit email templates. To set up the mapping, see Map answers to Shopify.
Check what happened
Section titled “Check what happened”After you approve, open the application in Companies › Applications. On its Timeline, click the Shopify customer entry to see the result:
| Result | What it means |
|---|---|
| Created Shopify customer | No customer had this email, so the app created one. |
| Matched an existing Shopify customer and kept its data | Keep existing customer data linked the existing customer. |
| Updated the existing Shopify customer with the application data | Update with application data wrote the answers over the customer’s details. |
| Shopify didn’t create the customer, or Shopify didn’t update the customer, followed by Shopify’s reason | Shopify refused the change. The reason says which detail it didn’t accept. |
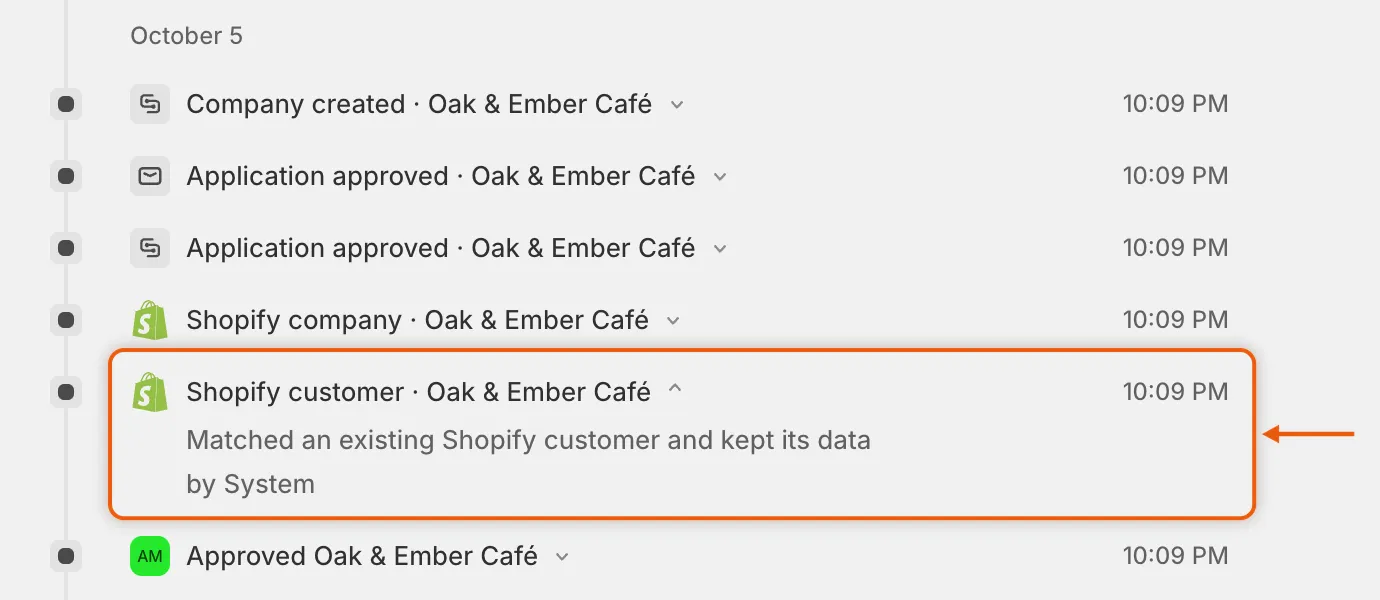
The Shopify customer entry tells you whether the app created, kept or updated the customer.
In the Shopify admin, go to Customers and open the buyer. The B2B approved metafield is on, and the b2b-approved tag is there.
Next steps
Section titled “Next steps”- Map answers to Shopify — choose which answers fill the customer, the company and its location.
- Approval presets — set the tags, catalog and terms an approval gives.
- Approve an application — see everything an approval does, step by step.
- Block checkout until approved — see how the approved flag lets the buyer check out.