
Decide several applications at once
Approve or reject a batch of applications from the list, retry the ones that are refused, and export applications to CSV.
When several applications need the same decision, tick them in the list and decide them together. Sami B2B Onboarding sends each one in turn and tells you which ones didn’t go through, and why.
Select applications
Section titled “Select applications”-
Open the list
Section titled “Open the list”In the Shopify admin, open Sami B2B Onboarding and click Companies in the app menu. The Applications tab opens. Pick a view, search or filter to narrow the list first if you like.
-
Tick the rows
Section titled “Tick the rows”Tick the checkbox at the start of each row you want. The header row turns into a selection bar: 3 selected, Approve, Request info and a … menu with Export selected and Reject. Ticked rows are tinted.
-
Adjust the selection
Section titled “Adjust the selection”Click 3 selected to pick Select all 25 on page or Unselect all. The checkbox in the header ticks or clears every row on the page.
Your selection covers the rows on the page you’re looking at. On a narrow screen, the selection bar sits under the search bar instead of the header row.
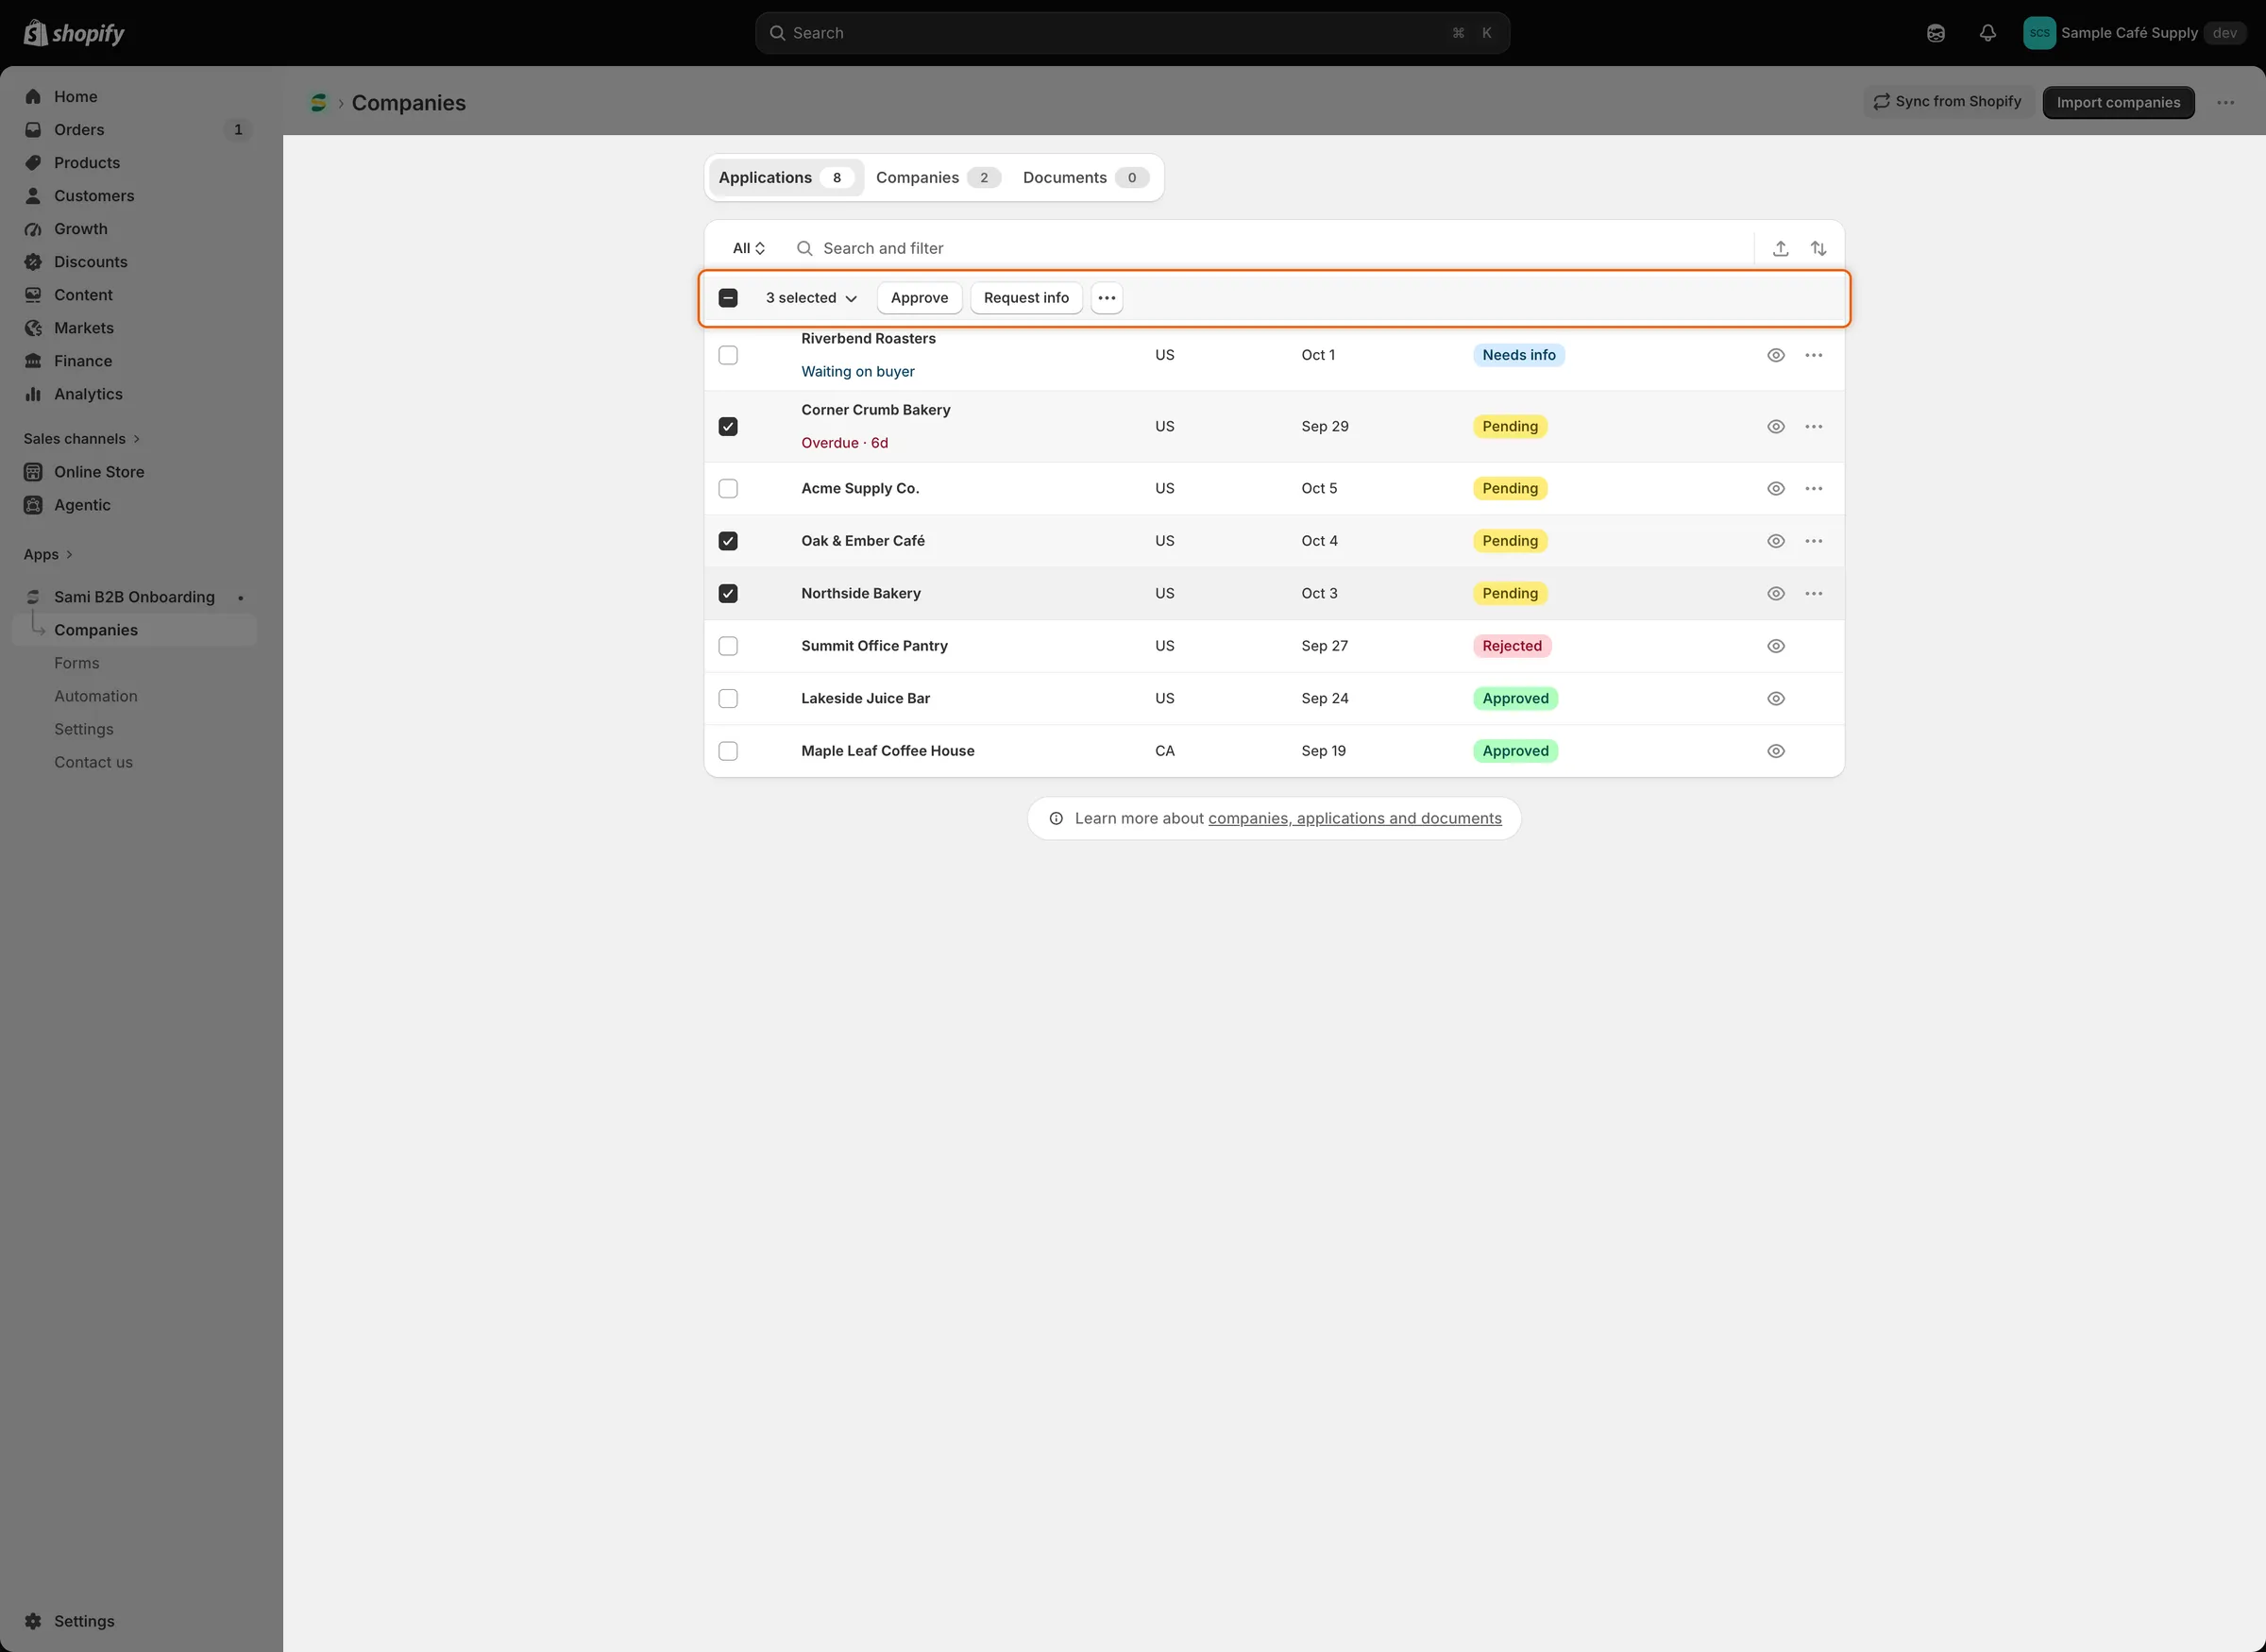
Ticking rows turns the header into a bar with the actions for the whole selection.
Approve several with one preset
Section titled “Approve several with one preset”-
Open the dialog
Section titled “Open the dialog”With the rows ticked, click Approve in the selection bar. The Approve 3 applications dialog lists the companies and says “Each application gets the preset you choose below. You can change any application individually afterwards.”
-
Pick the preset
Section titled “Pick the preset”Under Apply a preset, your default preset is already picked. Pick another one, or No preset. With No preset, each application uses the terms saved on its own Approval card, if any.
-
Approve
Section titled “Approve”Click Approve 3 applications and leave the dialog open while the app works. “Approved 3 applications” confirms it.
Each application gets everything a single approval does: the Shopify customer and company, the terms, the approved flag and the Account approved email. See Approve an application.
Approve is turned off when your Shopify staff account lacks the Companies or Customers permission.
Reject several
Section titled “Reject several”-
Open the dialog
Section titled “Open the dialog”With the rows ticked, click … in the selection bar and pick Reject. The Reject 3 applications dialog opens.
-
Fill it in once
Section titled “Fill it in once”Pick the Reason, add Details, choose under After rejecting and decide on Email the buyer about this decision. Your choices apply to every application in the batch. See Reject an application for what each option does.
-
Reject
Section titled “Reject”Click Reject 3 applications. “Rejected 3 applications” confirms it.
The Application declined email is off by default. The bulk dialog can’t tell whether it’s on, so the email tick starts ticked either way. Before you rely on it, turn the email on in each form’s Email section in the form builder. See Reject an application.
Request information
Section titled “Request information”Request info goes to one application at a time. If several rows are ticked, it goes only to the first ticked row, and the dialog doesn’t name it. Tick only one row before you click it, or use the row’s … menu. See Request more information.
When some are refused
Section titled “When some are refused”The app sends the applications one after another, and a refusal doesn’t stop the rest. Common reasons are answers the form requires before approval, or a Shopify permission your staff account lacks.
When some are refused:
- The ones that went through are saved, and a message says how many.
- The dialog stays open with a red banner, for example “Approved 2 of 3 applications. This one wasn’t approved:”, followed by a line per refused application with its company name and the reason.
- Only the refused applications stay ticked.
- Click the dialog’s button again to retry only the refused ones, for example once the store owner has added a missing permission to your Shopify account. For missing answers, close the dialog, fill them in with Edit answers on each application’s page, then approve it there or tick it again in the list.
If you close the dialog before the app has finished, the refusals appear in a banner on the page instead.
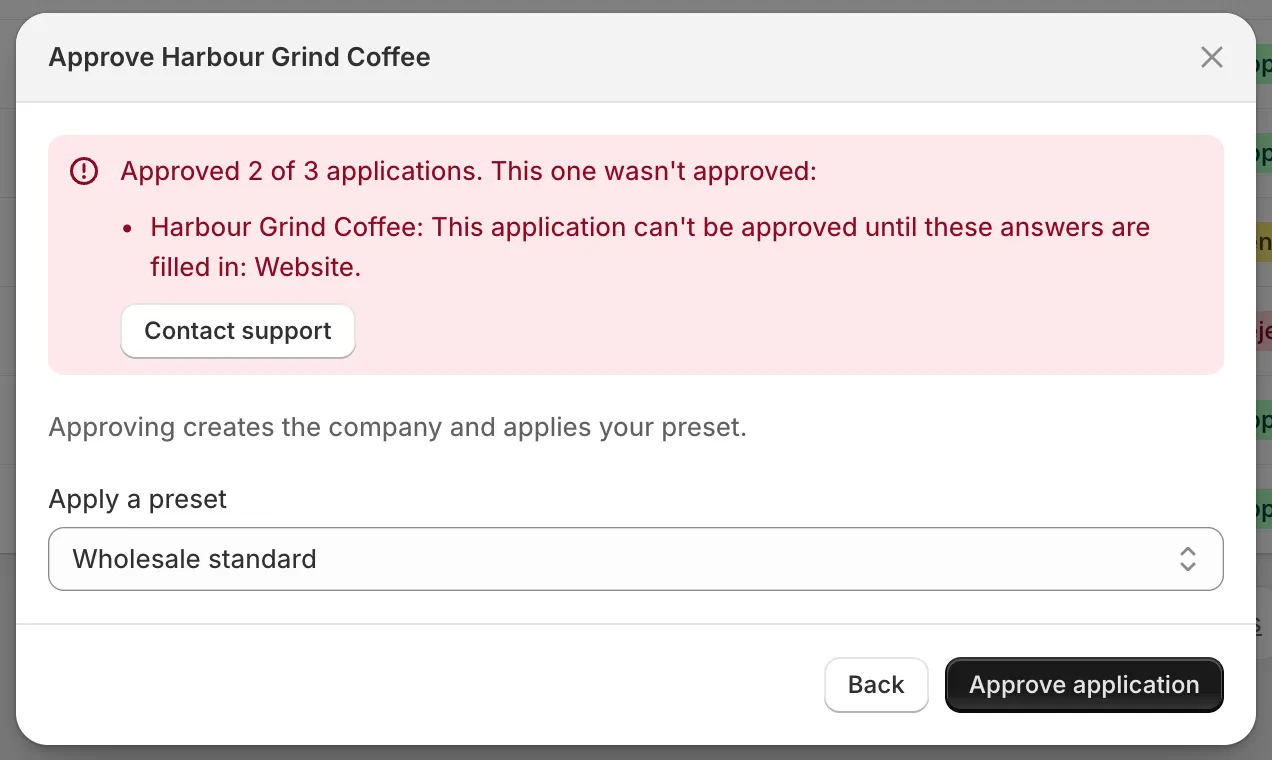
The banner names each application that wasn’t approved and says why, and only those stay ticked for another try.
Export applications to CSV
Section titled “Export applications to CSV”-
Choose the rows
Section titled “Choose the rows”Tick rows, or search, filter or pick a view, to narrow what you export. You can also export everything.
-
Open the export dialog
Section titled “Open the export dialog”Click the export icon (Export) at the end of the search bar, or … › Export selected in the selection bar. The Export applications dialog opens.
-
Pick the scope and format
Section titled “Pick the scope and format”Under Export, pick Current page, All applications, Selected (with the number ticked) or Matching your search (with the number found). Under File format, pick CSV for Excel, Numbers, or other spreadsheet programs or Plain CSV file.
-
Export
Section titled “Export”Click Export applications. Your browser downloads a file named applications.csv.
Selected is available when rows are ticked, and Matching your search when a search, a filter or a view other than All is active. The dialog starts on Selected when rows are ticked, then on Matching your search when the list is narrowed, and otherwise on All applications.
The file has one row per application, with these columns:
| Column | What it holds |
|---|---|
| Reference | The application’s reference. |
| Company | The company name. |
| Contact | The contact’s name. |
| The contact’s email. | |
| Country | The buyer’s country. |
| Status | The application’s status as a short lowercase code, for example pending, info_requested (Needs info) or auto_applied (approved by a rule). |
| Submitted at | When the buyer submitted it. |
| Assignee | The reviewer it’s assigned to. |
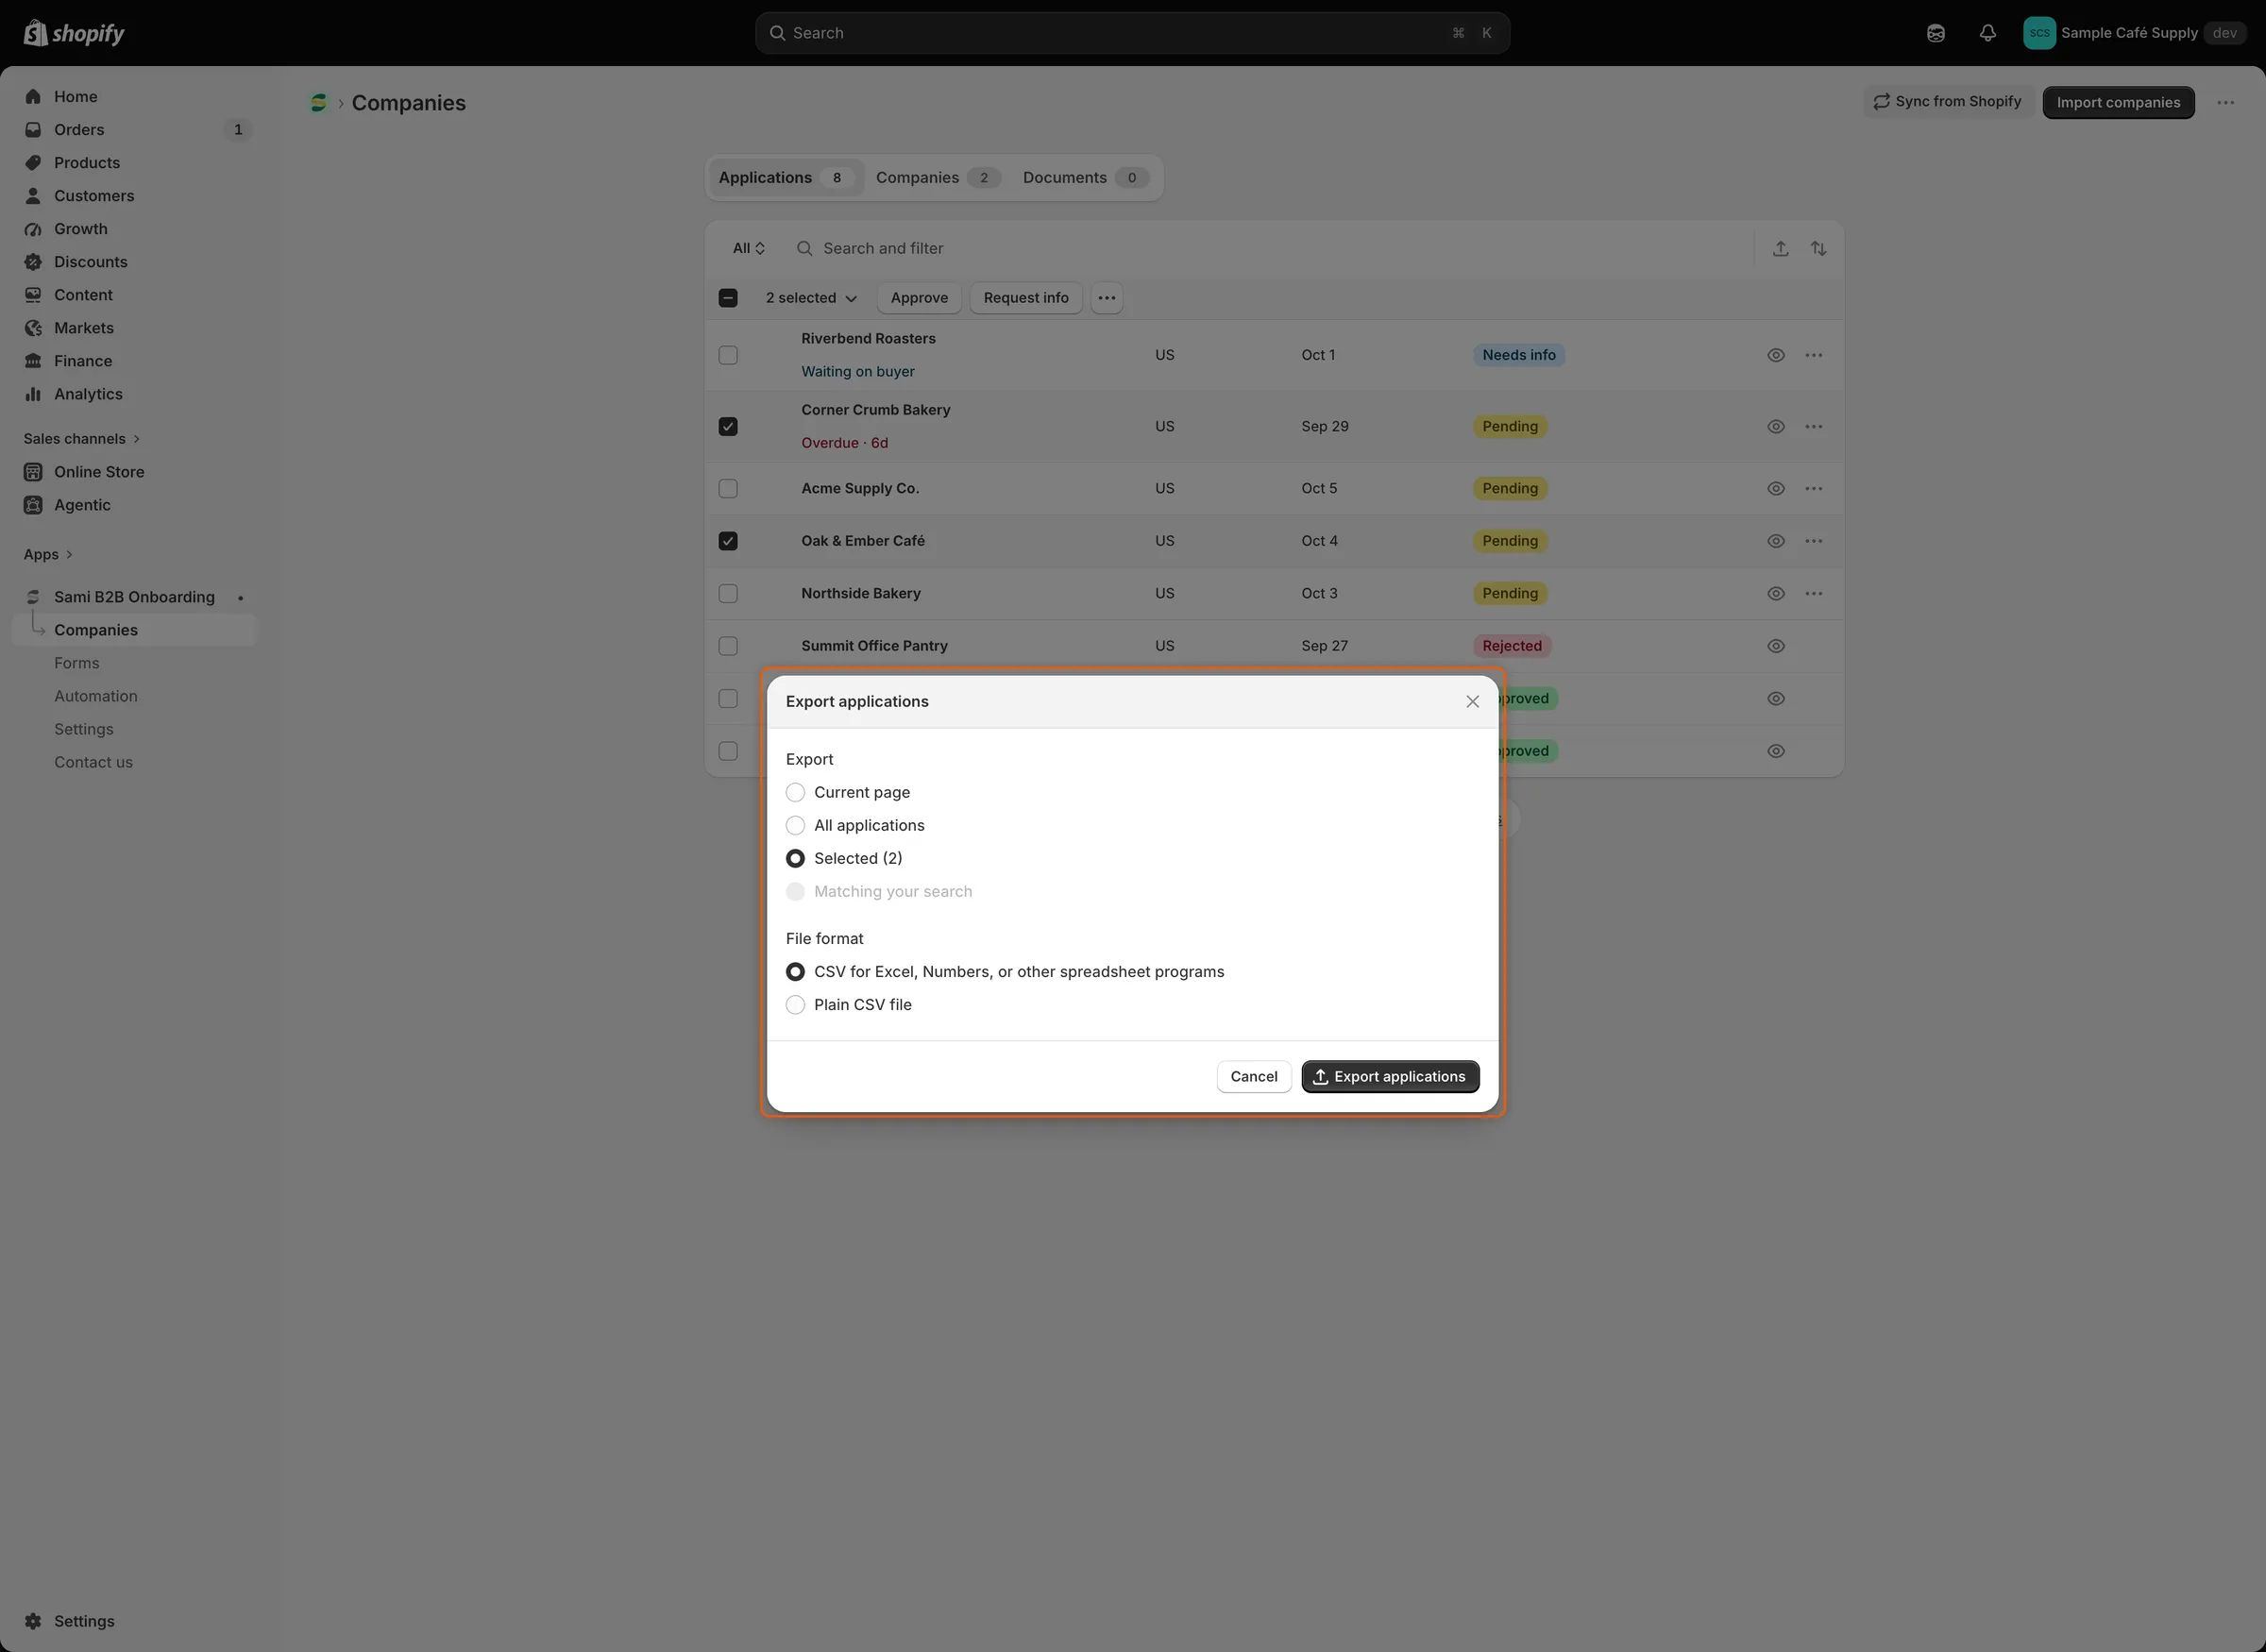
With rows ticked, the dialog starts on Selected; choose the CSV format that suits your spreadsheet program.
Next steps
Section titled “Next steps”- Approval presets — set up the preset you’ll apply to a batch.
- Rules that decide applications — let rules decide routine applications for you.
- Applications — views, statuses and filters for narrowing the list.