
Reject an application
Turn an application down with a reason, choose whether the buyer can try again, and decide whether to email them.
Reject an application when you won’t open a B2B account for the buyer. Sami B2B Onboarding records your reason, can email the buyer, and lets you choose whether they may update the application and send it again. Nothing is created in Shopify.
If something is only missing, request more information instead.
Reject an application
Section titled “Reject an application”-
Open the reject dialog
Section titled “Open the reject dialog”Use any of these:
- On the Applications tab, click … at the end of the row and pick Reject.
- In the quick review drawer, click Reject, or press
R. - On the full application page, click More actions › Reject.
The Reject application dialog opens.
-
Pick a reason
Section titled “Pick a reason”Under Reason, pick Doesn’t meet requirements, Information doesn’t check out, Duplicate application or Other.
-
Add details
Section titled “Add details”Under Details, write what the buyer should know. This and the reason are what the declined email quotes.
-
Choose what happens next
Section titled “Choose what happens next”Under After rejecting, pick one:
- Let them update it and send it again (the default): “Their account shows your reason and reopens the application for them to change.”
- Close the application: “They can’t change it or apply again from their account.”
-
Choose whether to email the buyer
Section titled “Choose whether to email the buyer”Leave Email the buyer about this decision ticked to send the Application declined email, or untick it to reject quietly.
-
Reject
Section titled “Reject”Click Reject application. “Application rejected” confirms it. The status changes to Rejected, the application moves to the Decided view, and the timeline shows “Rejected Acme Supply Co.” with the reason.
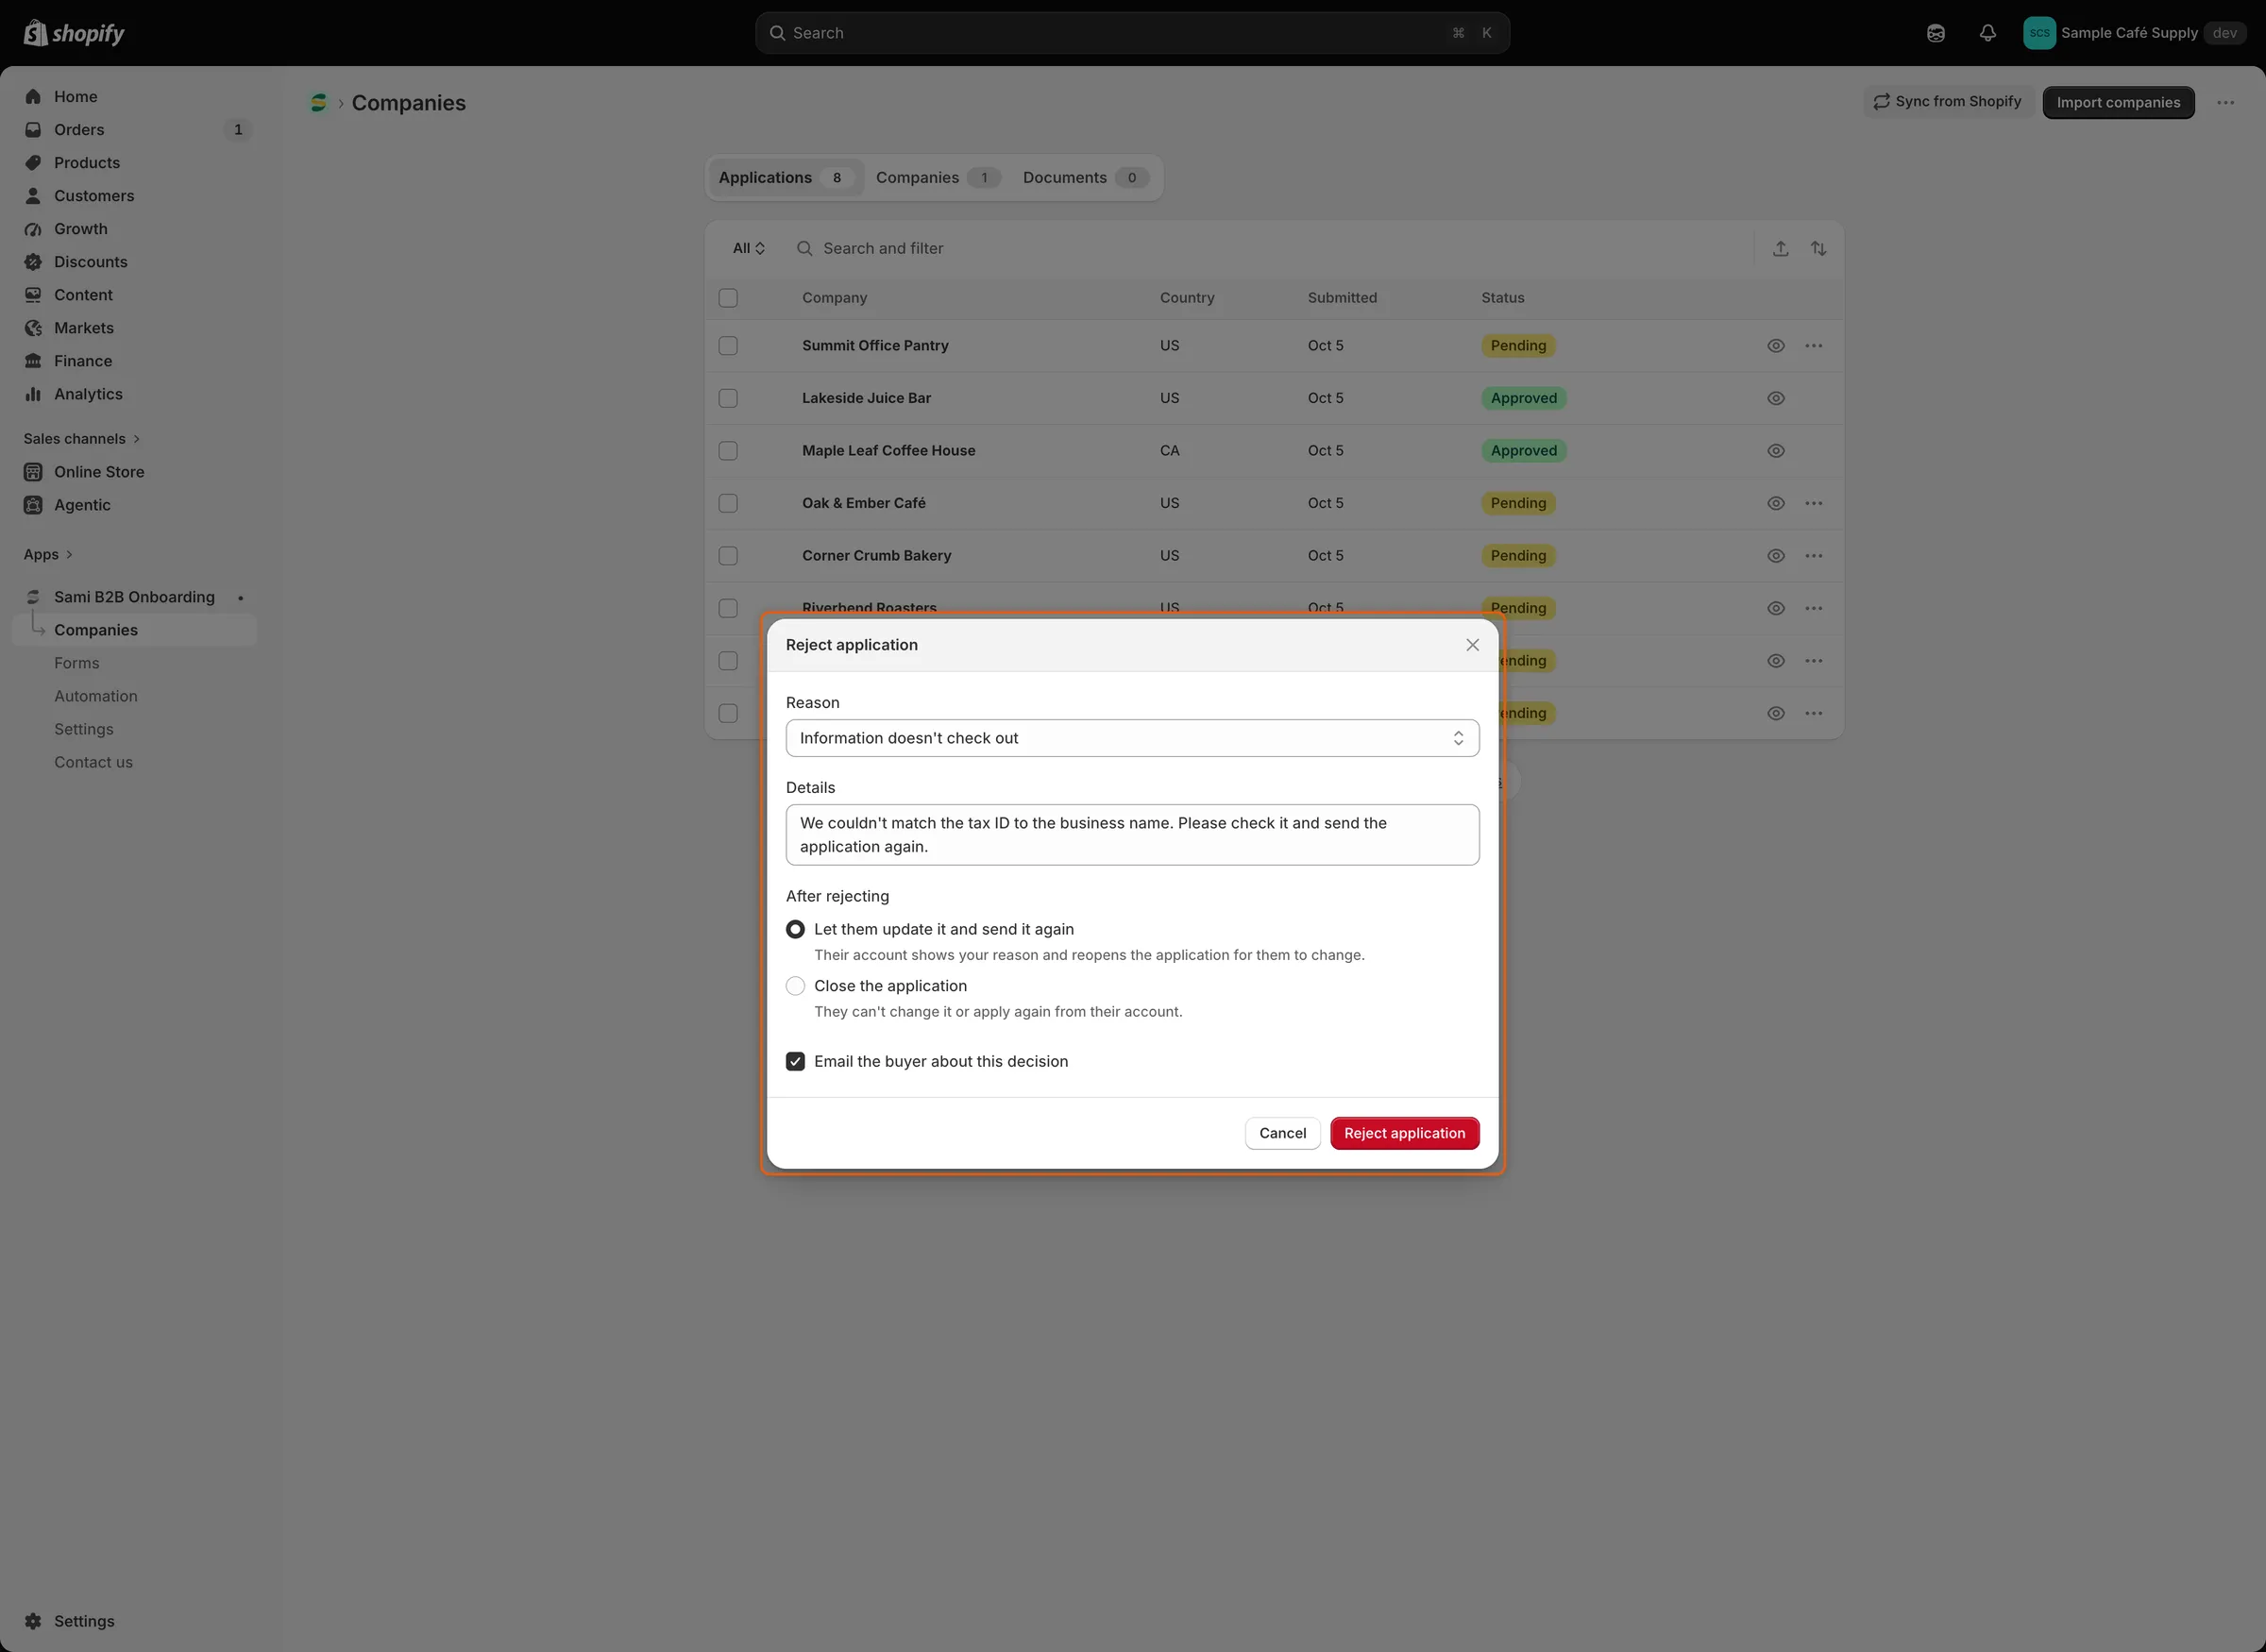
The reason and details go to the buyer; After rejecting decides whether they can send the application again.
Turn on the declined email
Section titled “Turn on the declined email”Each application form has its own switch for this email.
-
Open the form’s emails
Section titled “Open the form’s emails”Go to Forms and click Edit beside the form, for example Wholesale application. In the rail on the left of the builder, click Email. Application declined is listed under Sent to buyers.
-
Turn it on
Section titled “Turn it on”Turn on the switch beside Application declined, then click Save in the builder’s save bar.
Do this for each form whose rejected buyers should hear from you. Application rejected must also be on under Automation › Automations. It’s on by default. While it’s off, the email’s row in the builder says “Its automation trigger is off, so this won’t send.”
The email, “About your application”, thanks the buyer, says you can’t approve the application at this time, and quotes your reason and details. It tells them they can still shop at regular prices and apply again if their details change, and has a Visit the store button. To change its wording, see Edit email templates.
What the buyer sees
Section titled “What the buyer sees”When the buyer is signed in, their customer account and your form page show “Your application wasn’t approved”. In their account, the line under it is your reason and details. On your form page:
- If you picked Let them update it and send it again, they read “You can update your application and send it again.” and get an Update your application button, which their account shows too. When they send it, the application comes back to you as Resubmitted, with the decision left to your team. See Request more information.
- If you picked Close the application, they read “Get in touch if you think this was a mistake.” and there’s no button.
What happens to the application
Section titled “What happens to the application”A rejected application stays in the Decided view. Shopify Flow’s Application rejected trigger runs while it’s on under Automation › Automations, and integrations you set to send rejections get it.
Rejected applications are deleted for good, with their files and timeline, after the time set in Settings › Application rules › Data retention › Rejected applications: Keep for 1 year (the default), Keep for 90 days or Keep indefinitely. See Application rules.
Change your mind
Section titled “Change your mind”You can still approve a rejected application. Open it from the list. The full page keeps the Approve application button. Check the Approval card first: a rejected application doesn’t start from your default preset, so set the terms with the pencil and click Save. Then click Approve application. When the summary reads Ready to approve, it’s approved straight away, with no dialog. See Approve an application.
The application page, the drawer and the row’s … menu offer Reject only while an application is undecided.
Next steps
Section titled “Next steps”- Edit email templates — reword the Application declined email.
- Rules that decide applications — reject applications that match your conditions automatically.
- Application rules — set how long rejected applications are kept.