
Quick start
Create your first countdown
Build a working sale timer end to end, from picking a template to seeing it tick on your product page.
This walkthrough builds one complete, common countdown: a sale timer on your product pages that counts down to a fixed end date and disappears when it’s over. It touches every part of the builder — content, timing, design, and display — without any of the more advanced options.
Make sure you’ve turned on the app embed first, or the countdown you build here won’t render on your storefront.
-
Start a new countdown
Open the app. On the dashboard, click Create countdown on the second setup card. (From the Countdowns page, the Create countdown button does the same thing.)
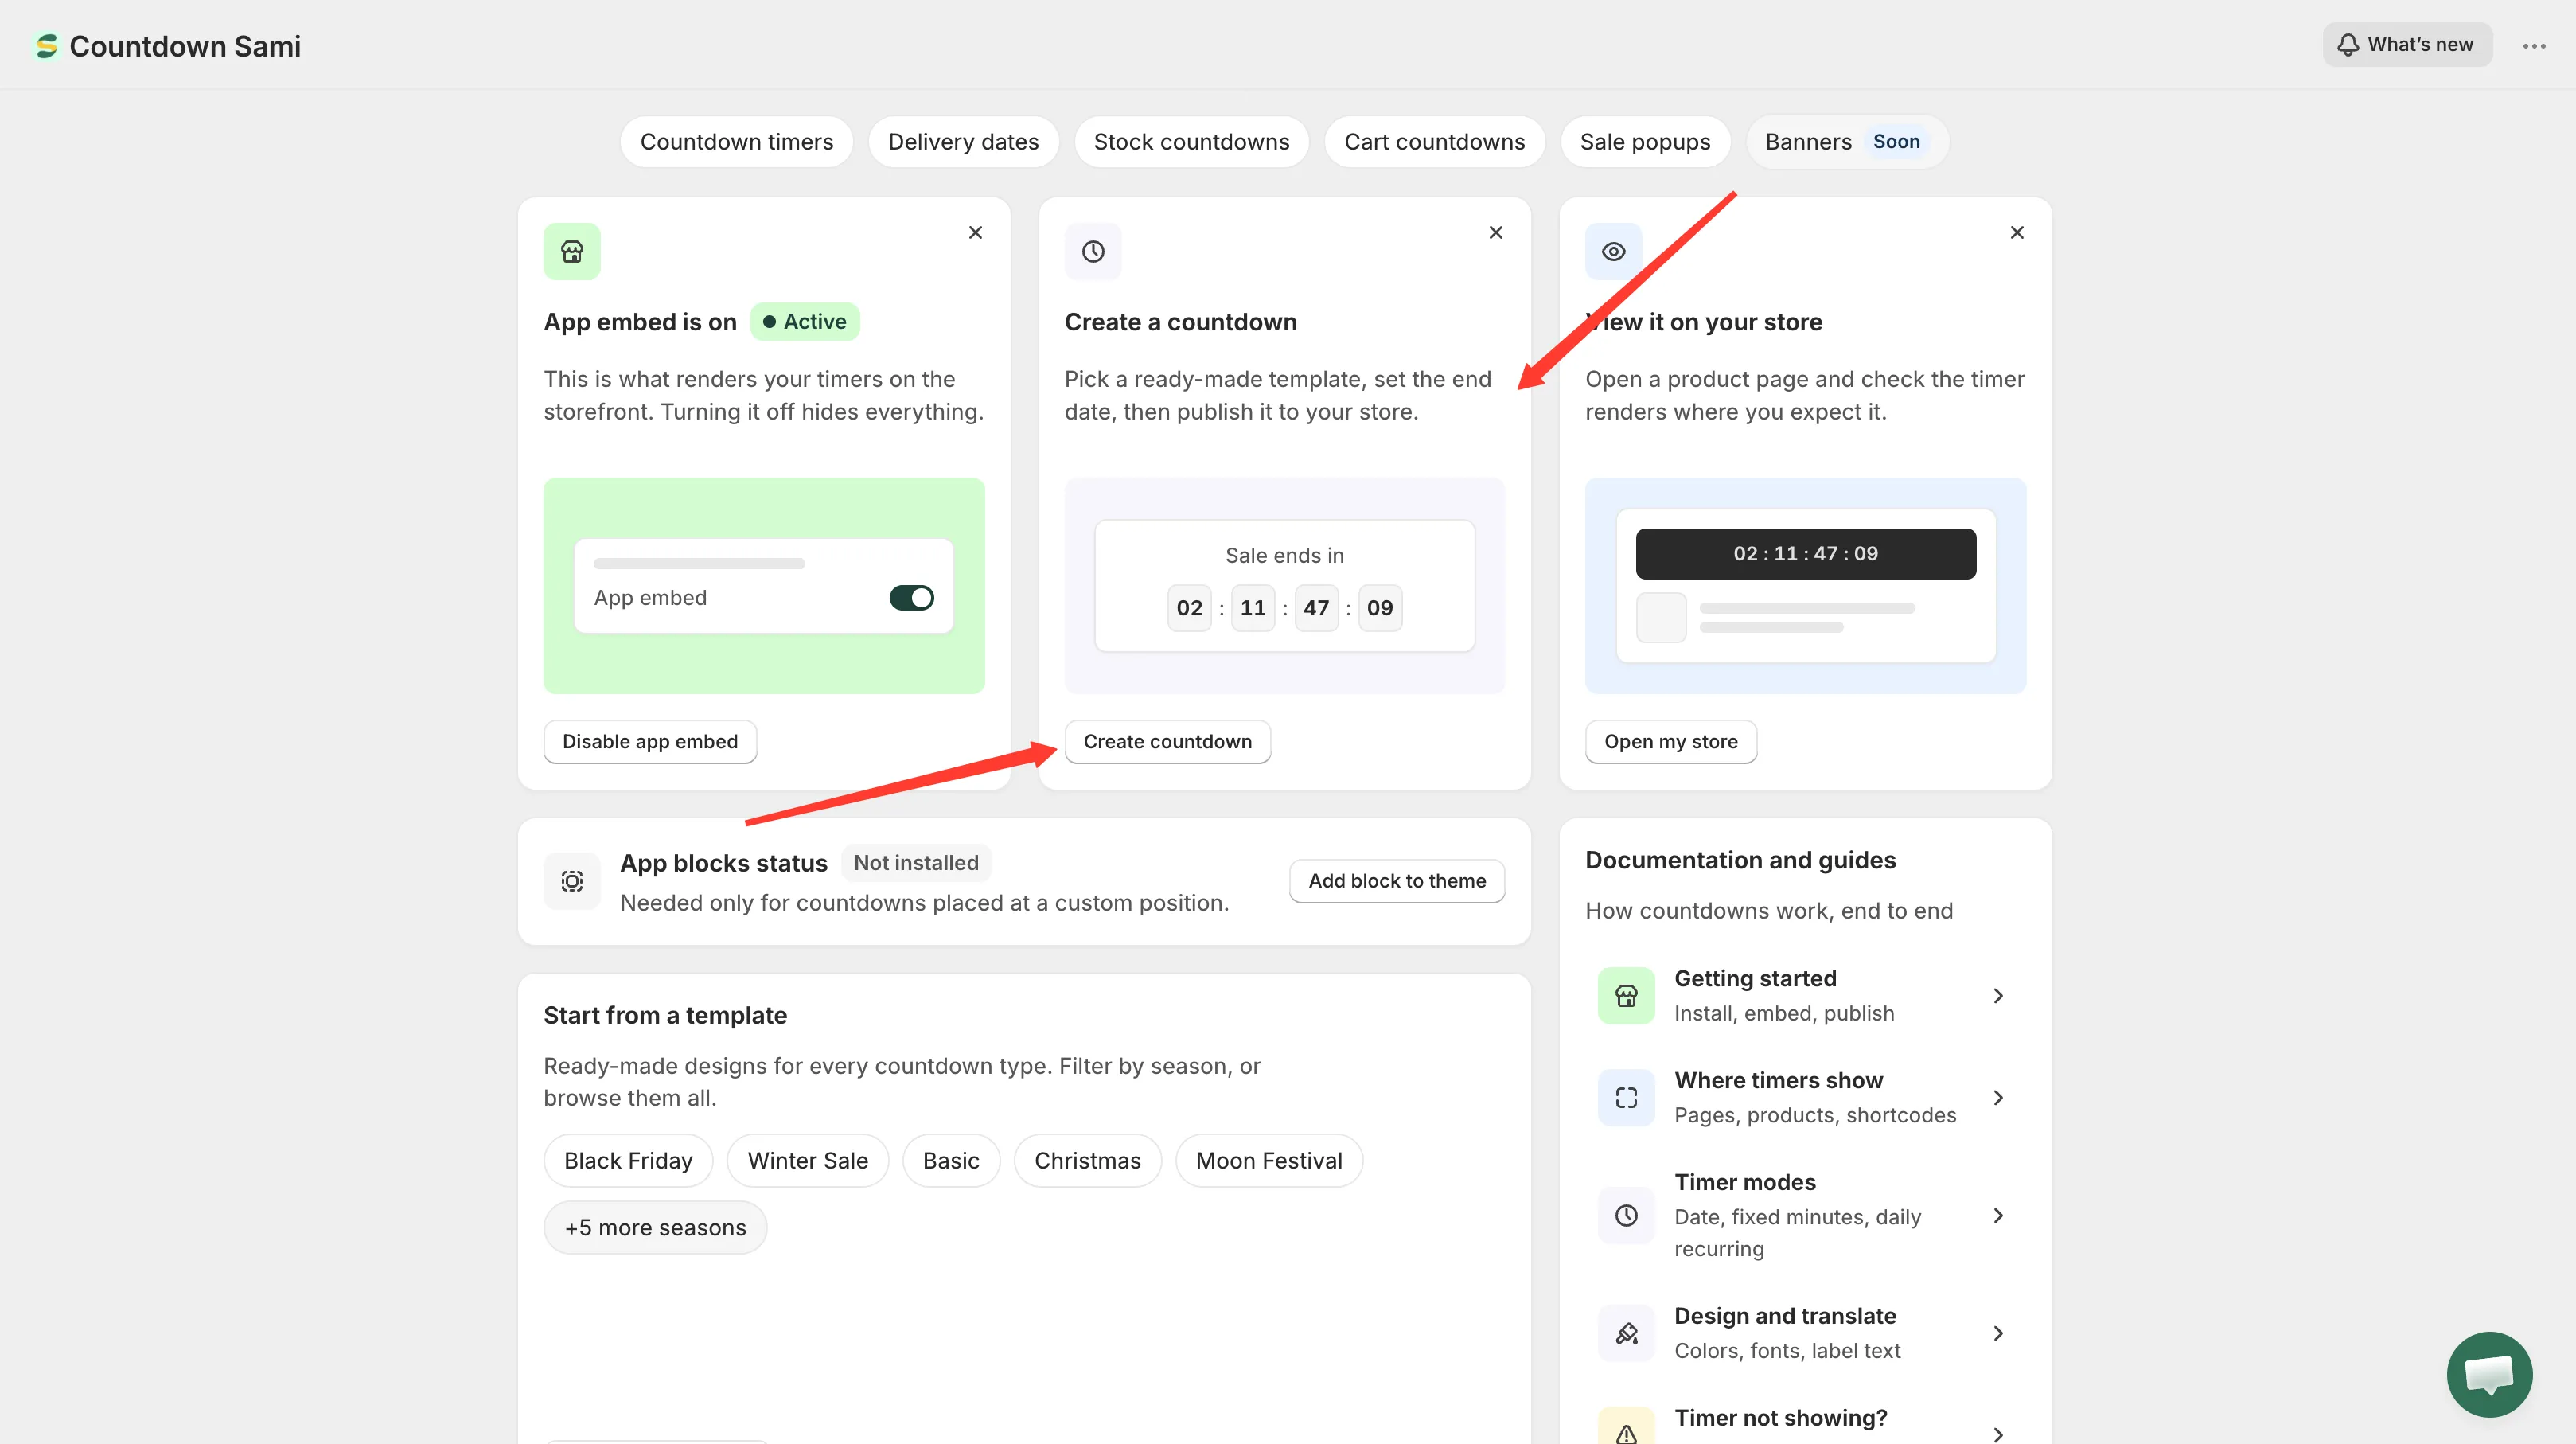
Start a countdown from the dashboard’s Create a countdown card.
-
Pick a template
The Countdown templates page opens with four type tabs across the top: Countdown timer, Delivery date, Stock countdown, and Cart countdown. Leave it on Countdown timer.
Browse the designs, or search by name or occasion — typing
black fridayfinds that season’s designs even though they’re named things like Onyx and Ribbon. When you’ve found one you like, click Select on its card.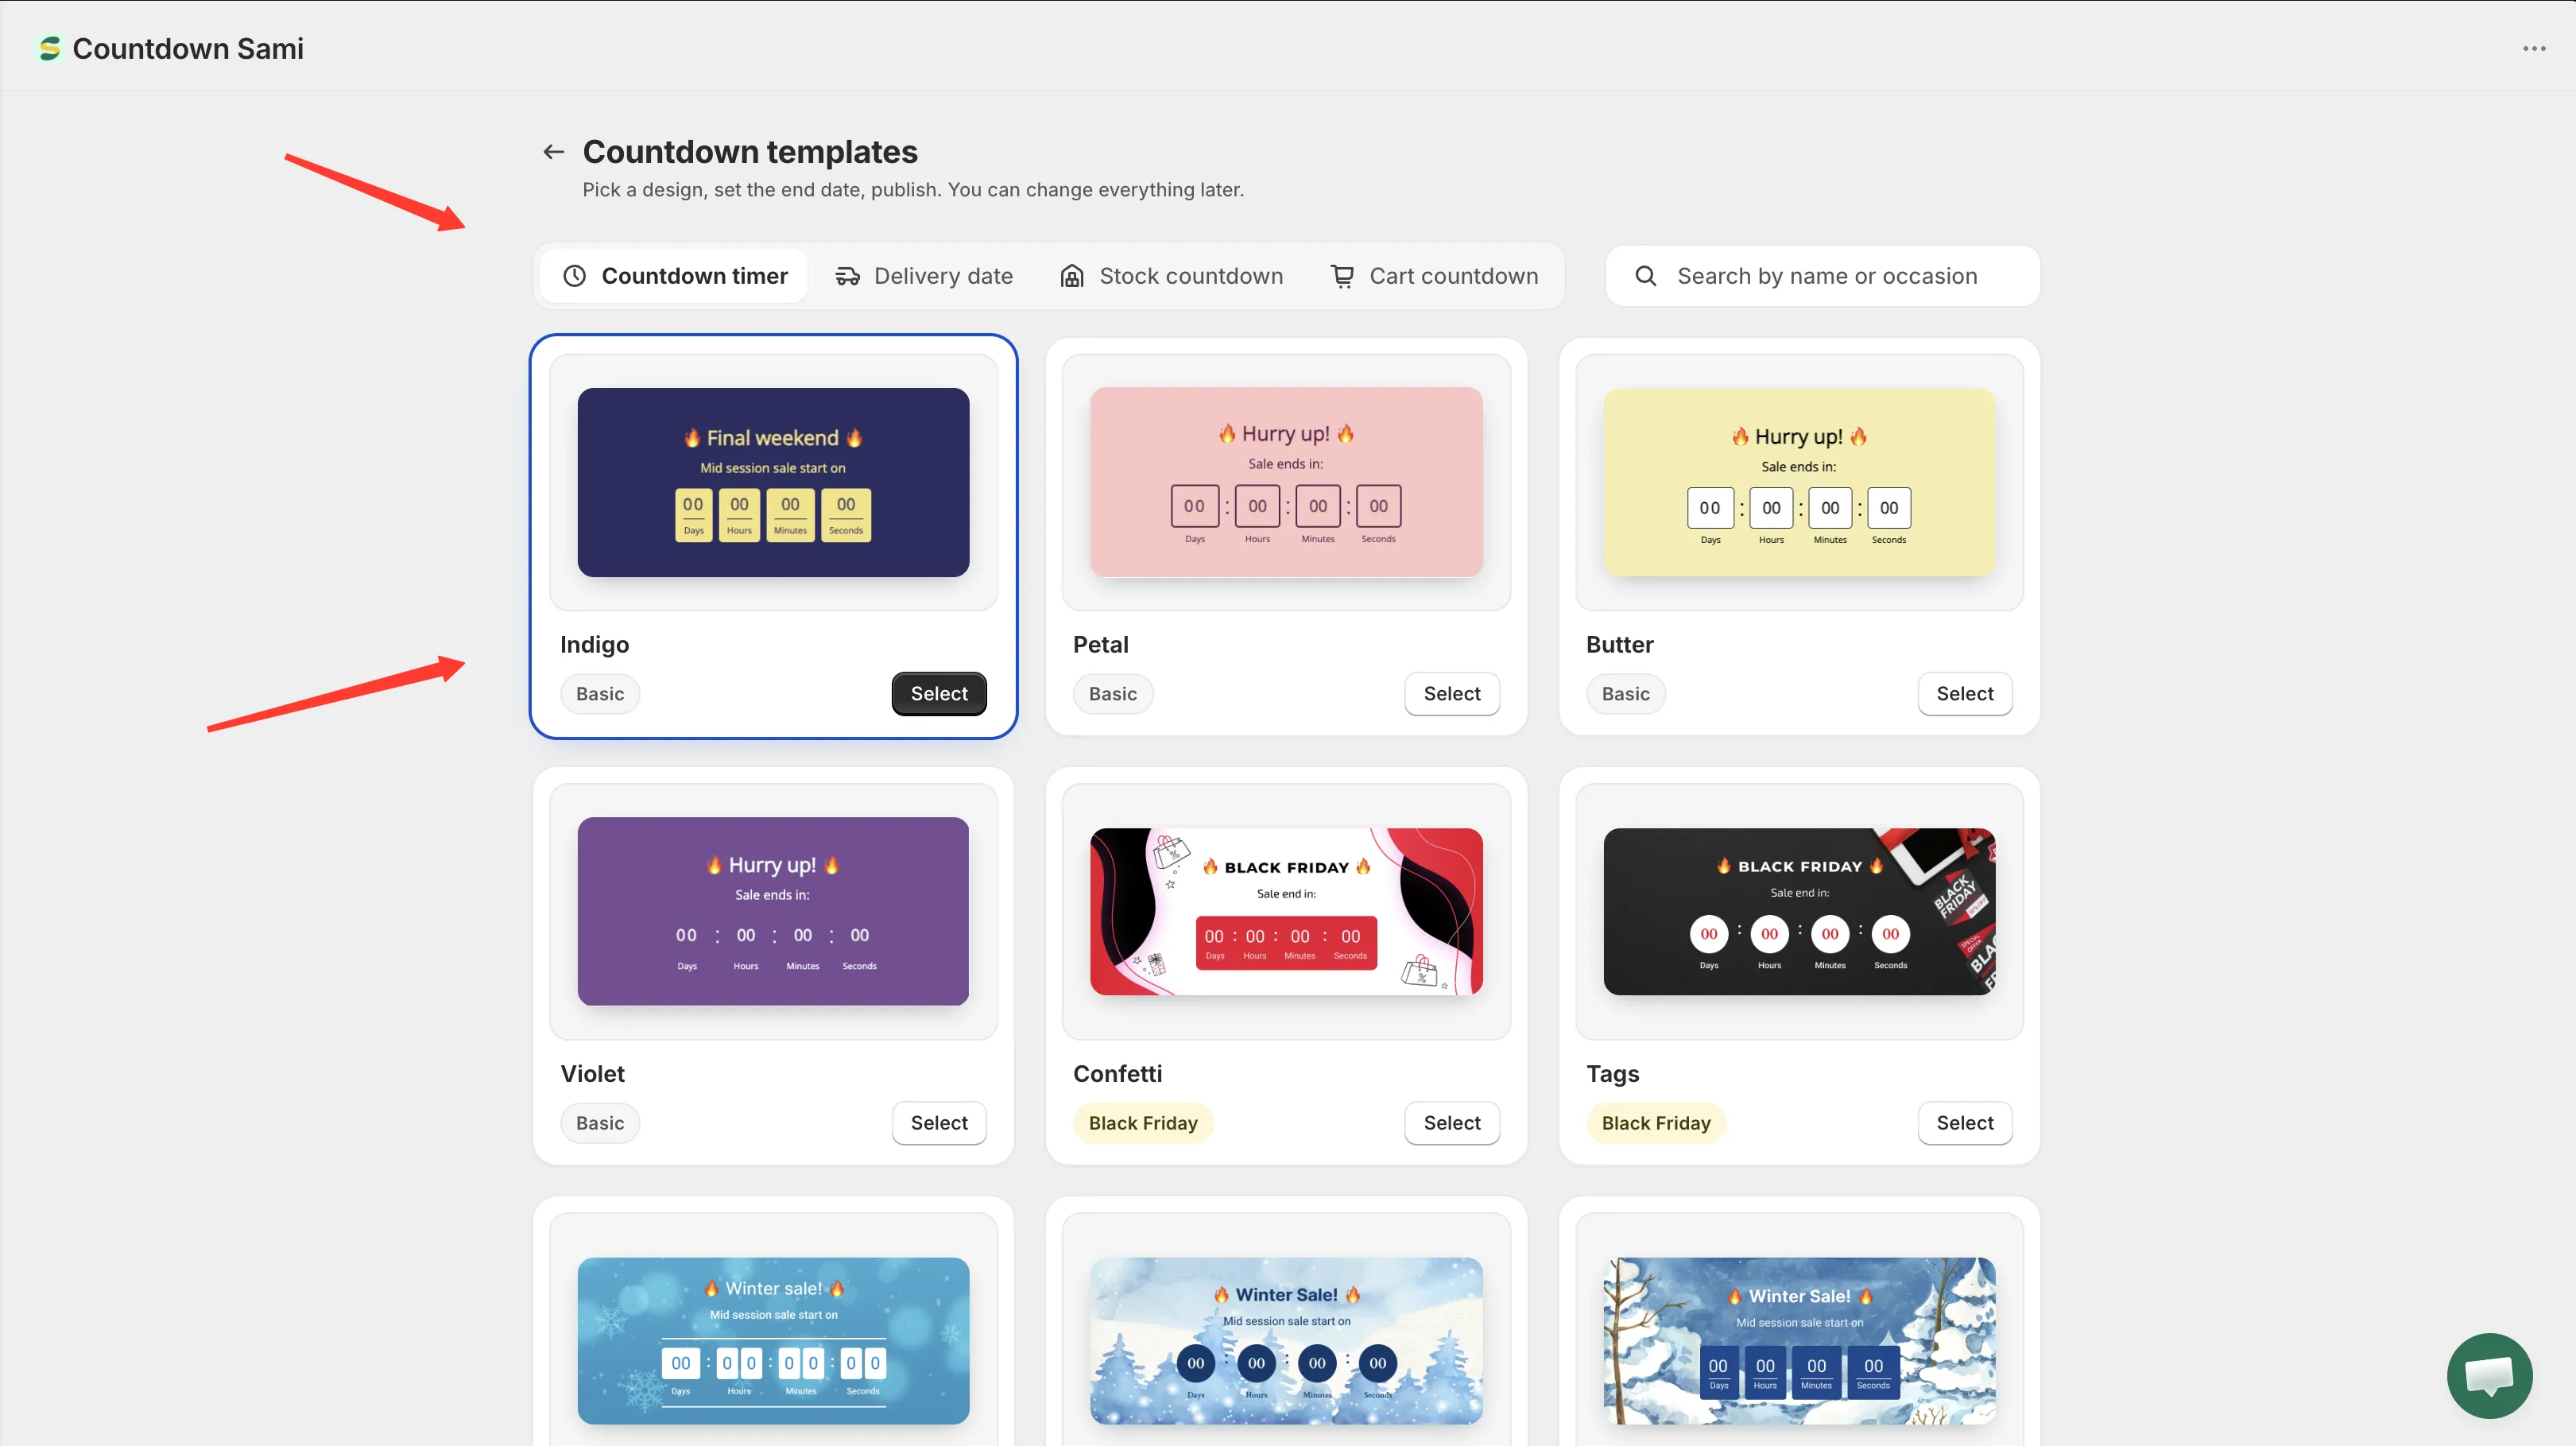
Pick a design from the template grid — you can change everything about it later.
-
Name the countdown
The builder opens with your chosen design already in the preview. Give the countdown a name at the top — something like “Spring sale timer”. This name is only for you; shoppers never see it.
-
Write the timer text
On the Settings tab, open the Content section and set what the timer says:
- Title — the big line, for example
🔥 Hurry up! 🔥 - Subtitle — the line above the digits, for example
Sale ends in: - Timer — the labels under each number: Days, Hours, Min, Sec
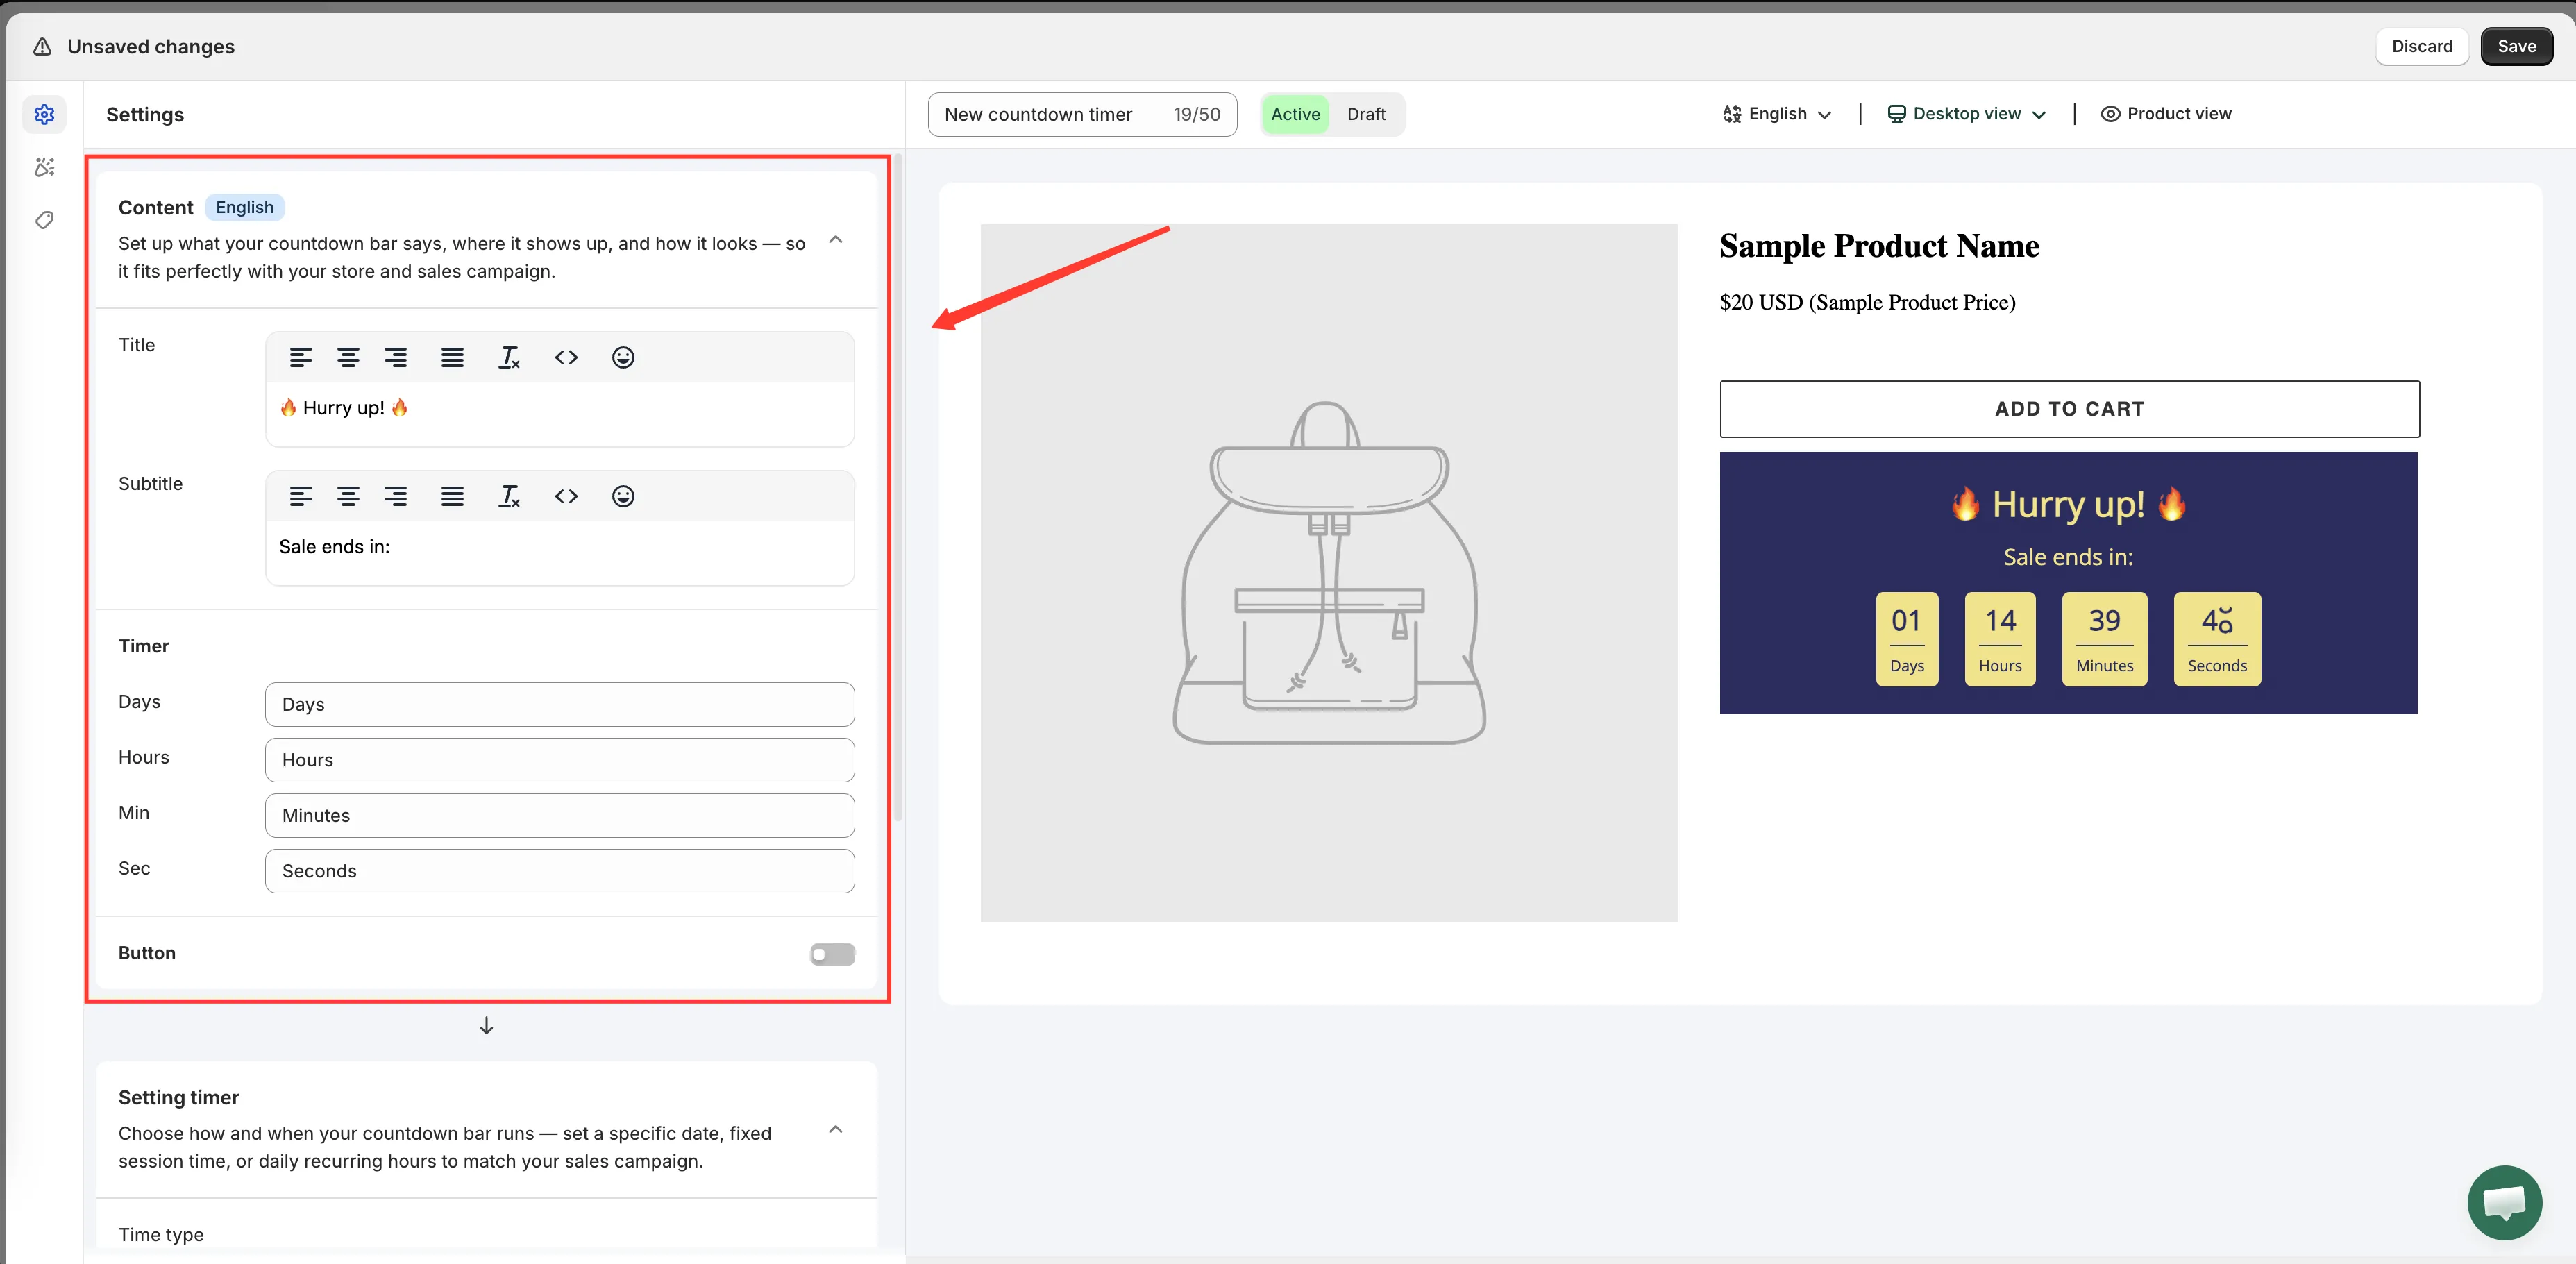
The Content section controls every piece of text on the timer.
- Title — the big line, for example
-
Set the end date
Still on Settings, open the Setting timer section. Leave Time type on Countdown to a date — it’s the default and the mode this example needs.
Under Date between, set End to the moment your sale finishes. Leave Start empty so the timer runs from now; fill it in if you want the timer to stay hidden until the sale actually opens.
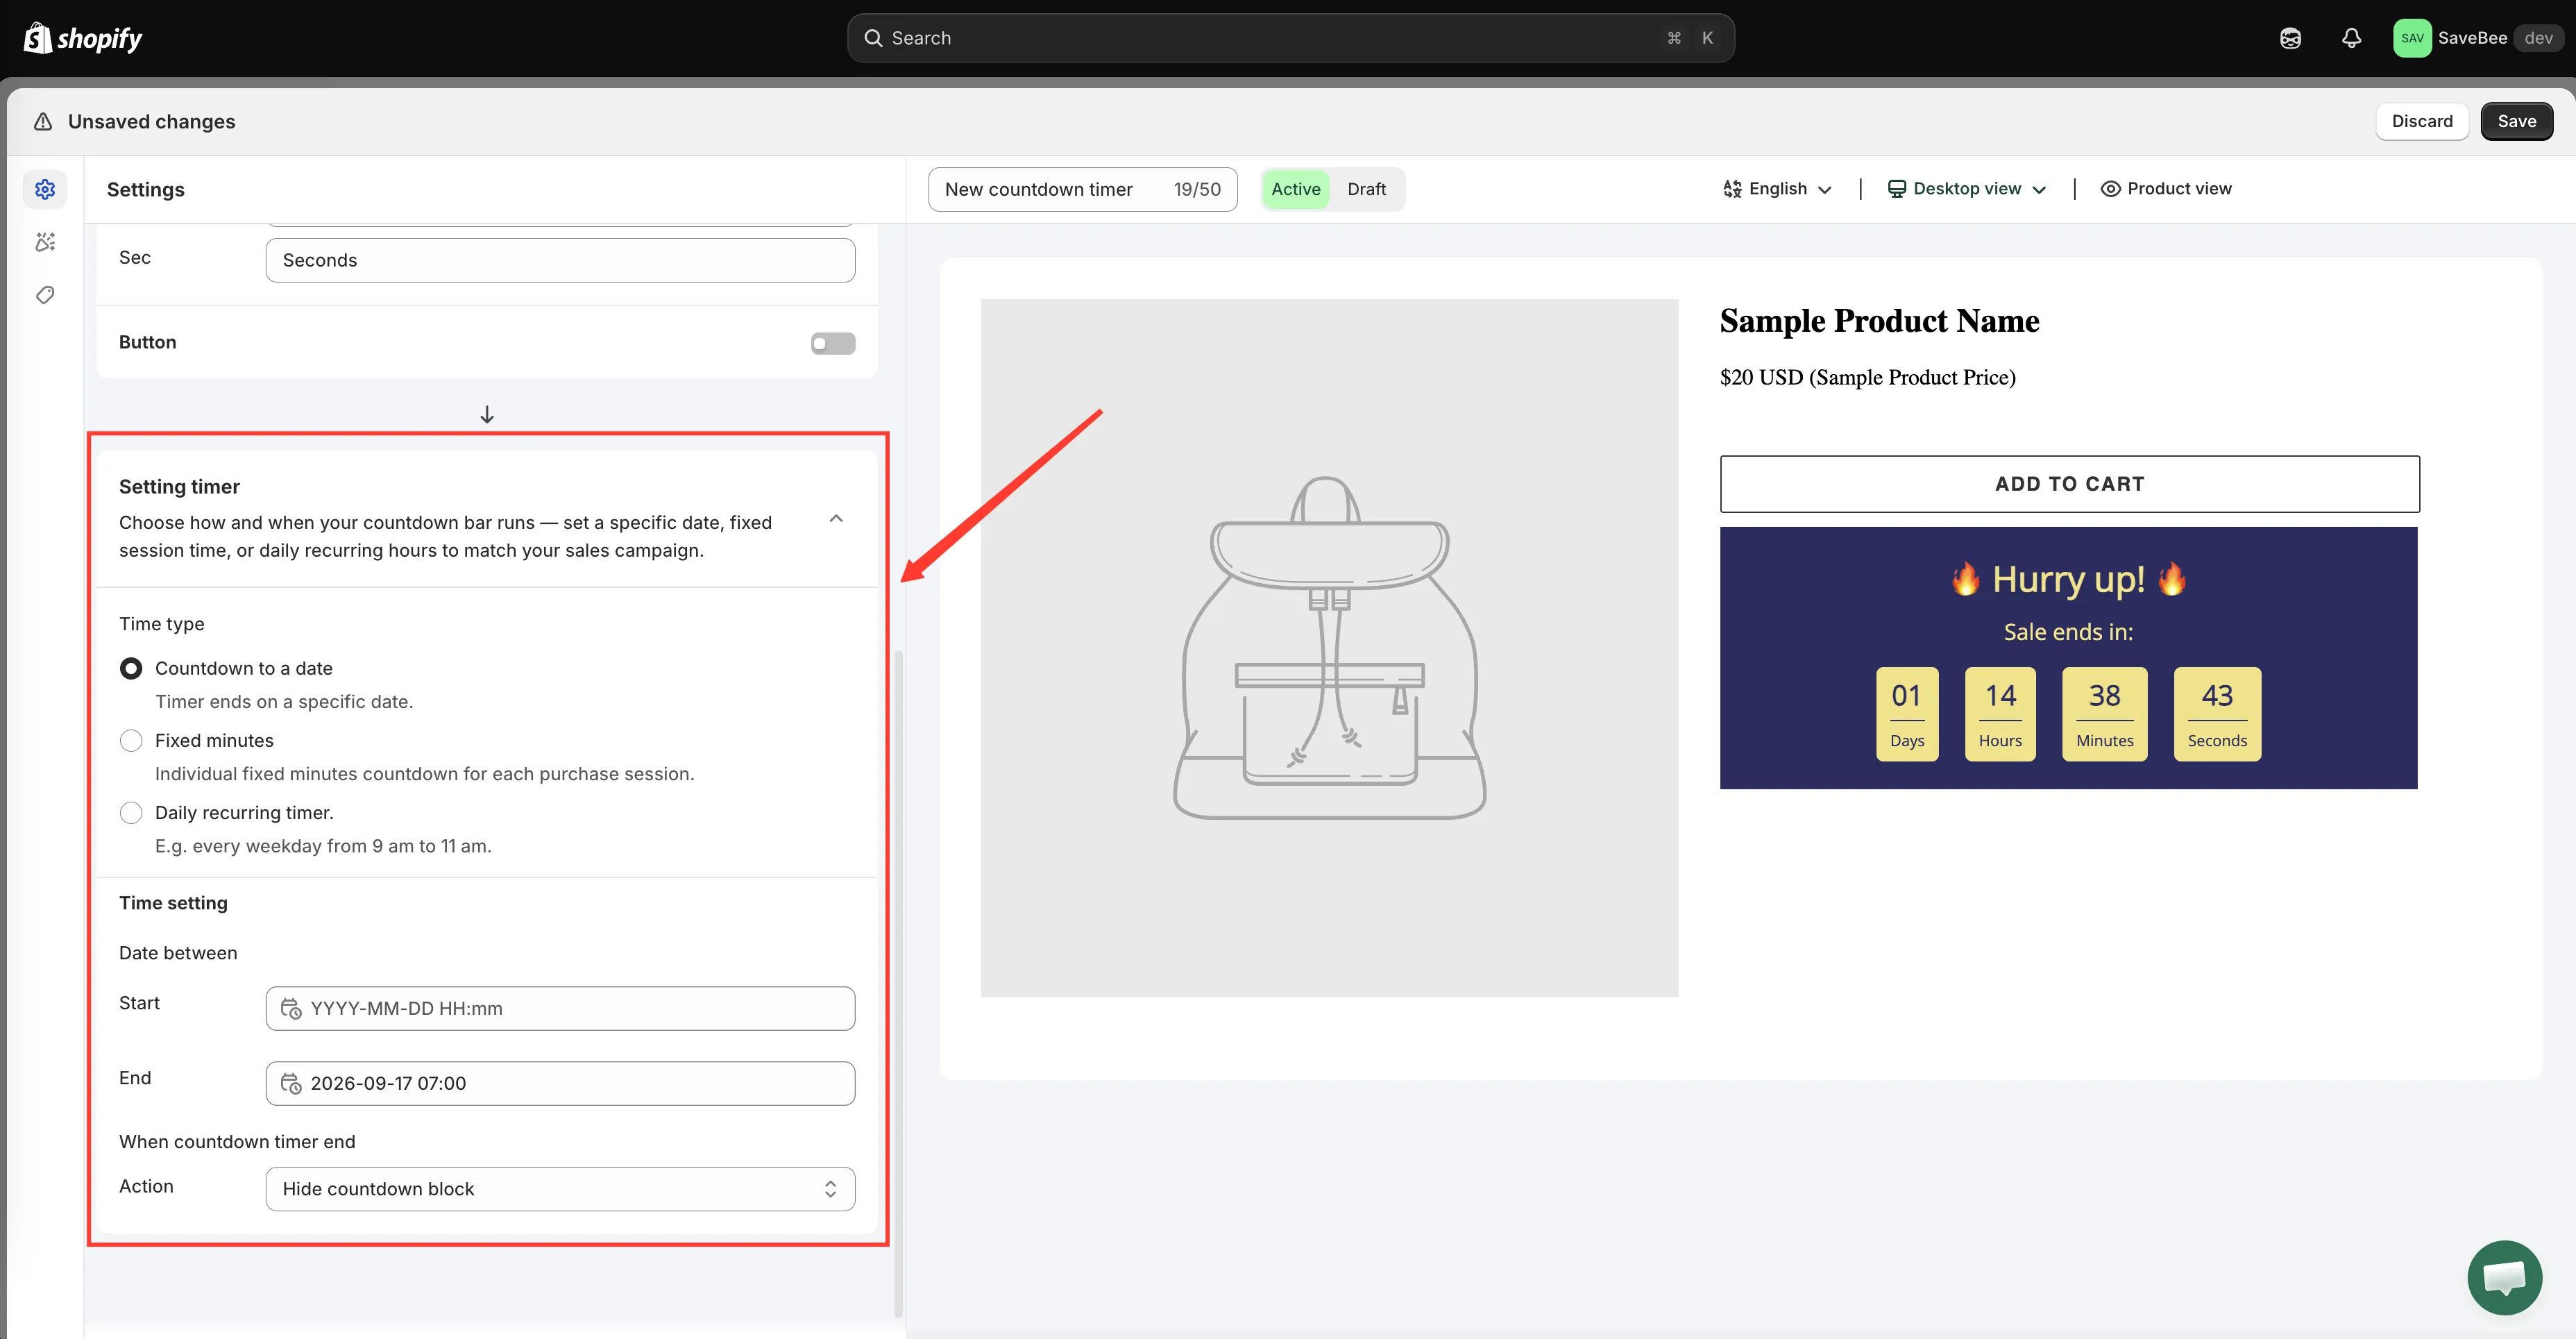
Countdown to a date is the default Time type — set the End date to your deadline.
-
Choose what happens at zero
Below the dates, set When countdown timer end to Hide countdown block. When the deadline passes, the timer disappears rather than sitting at 00:00:00.
The other two options are covered in When the timer ends.
-
Choose where it shows
Switch to the Display tab. Under Show countdown on, tick Product page. That places the timer on every product page, just below the Add to cart area.
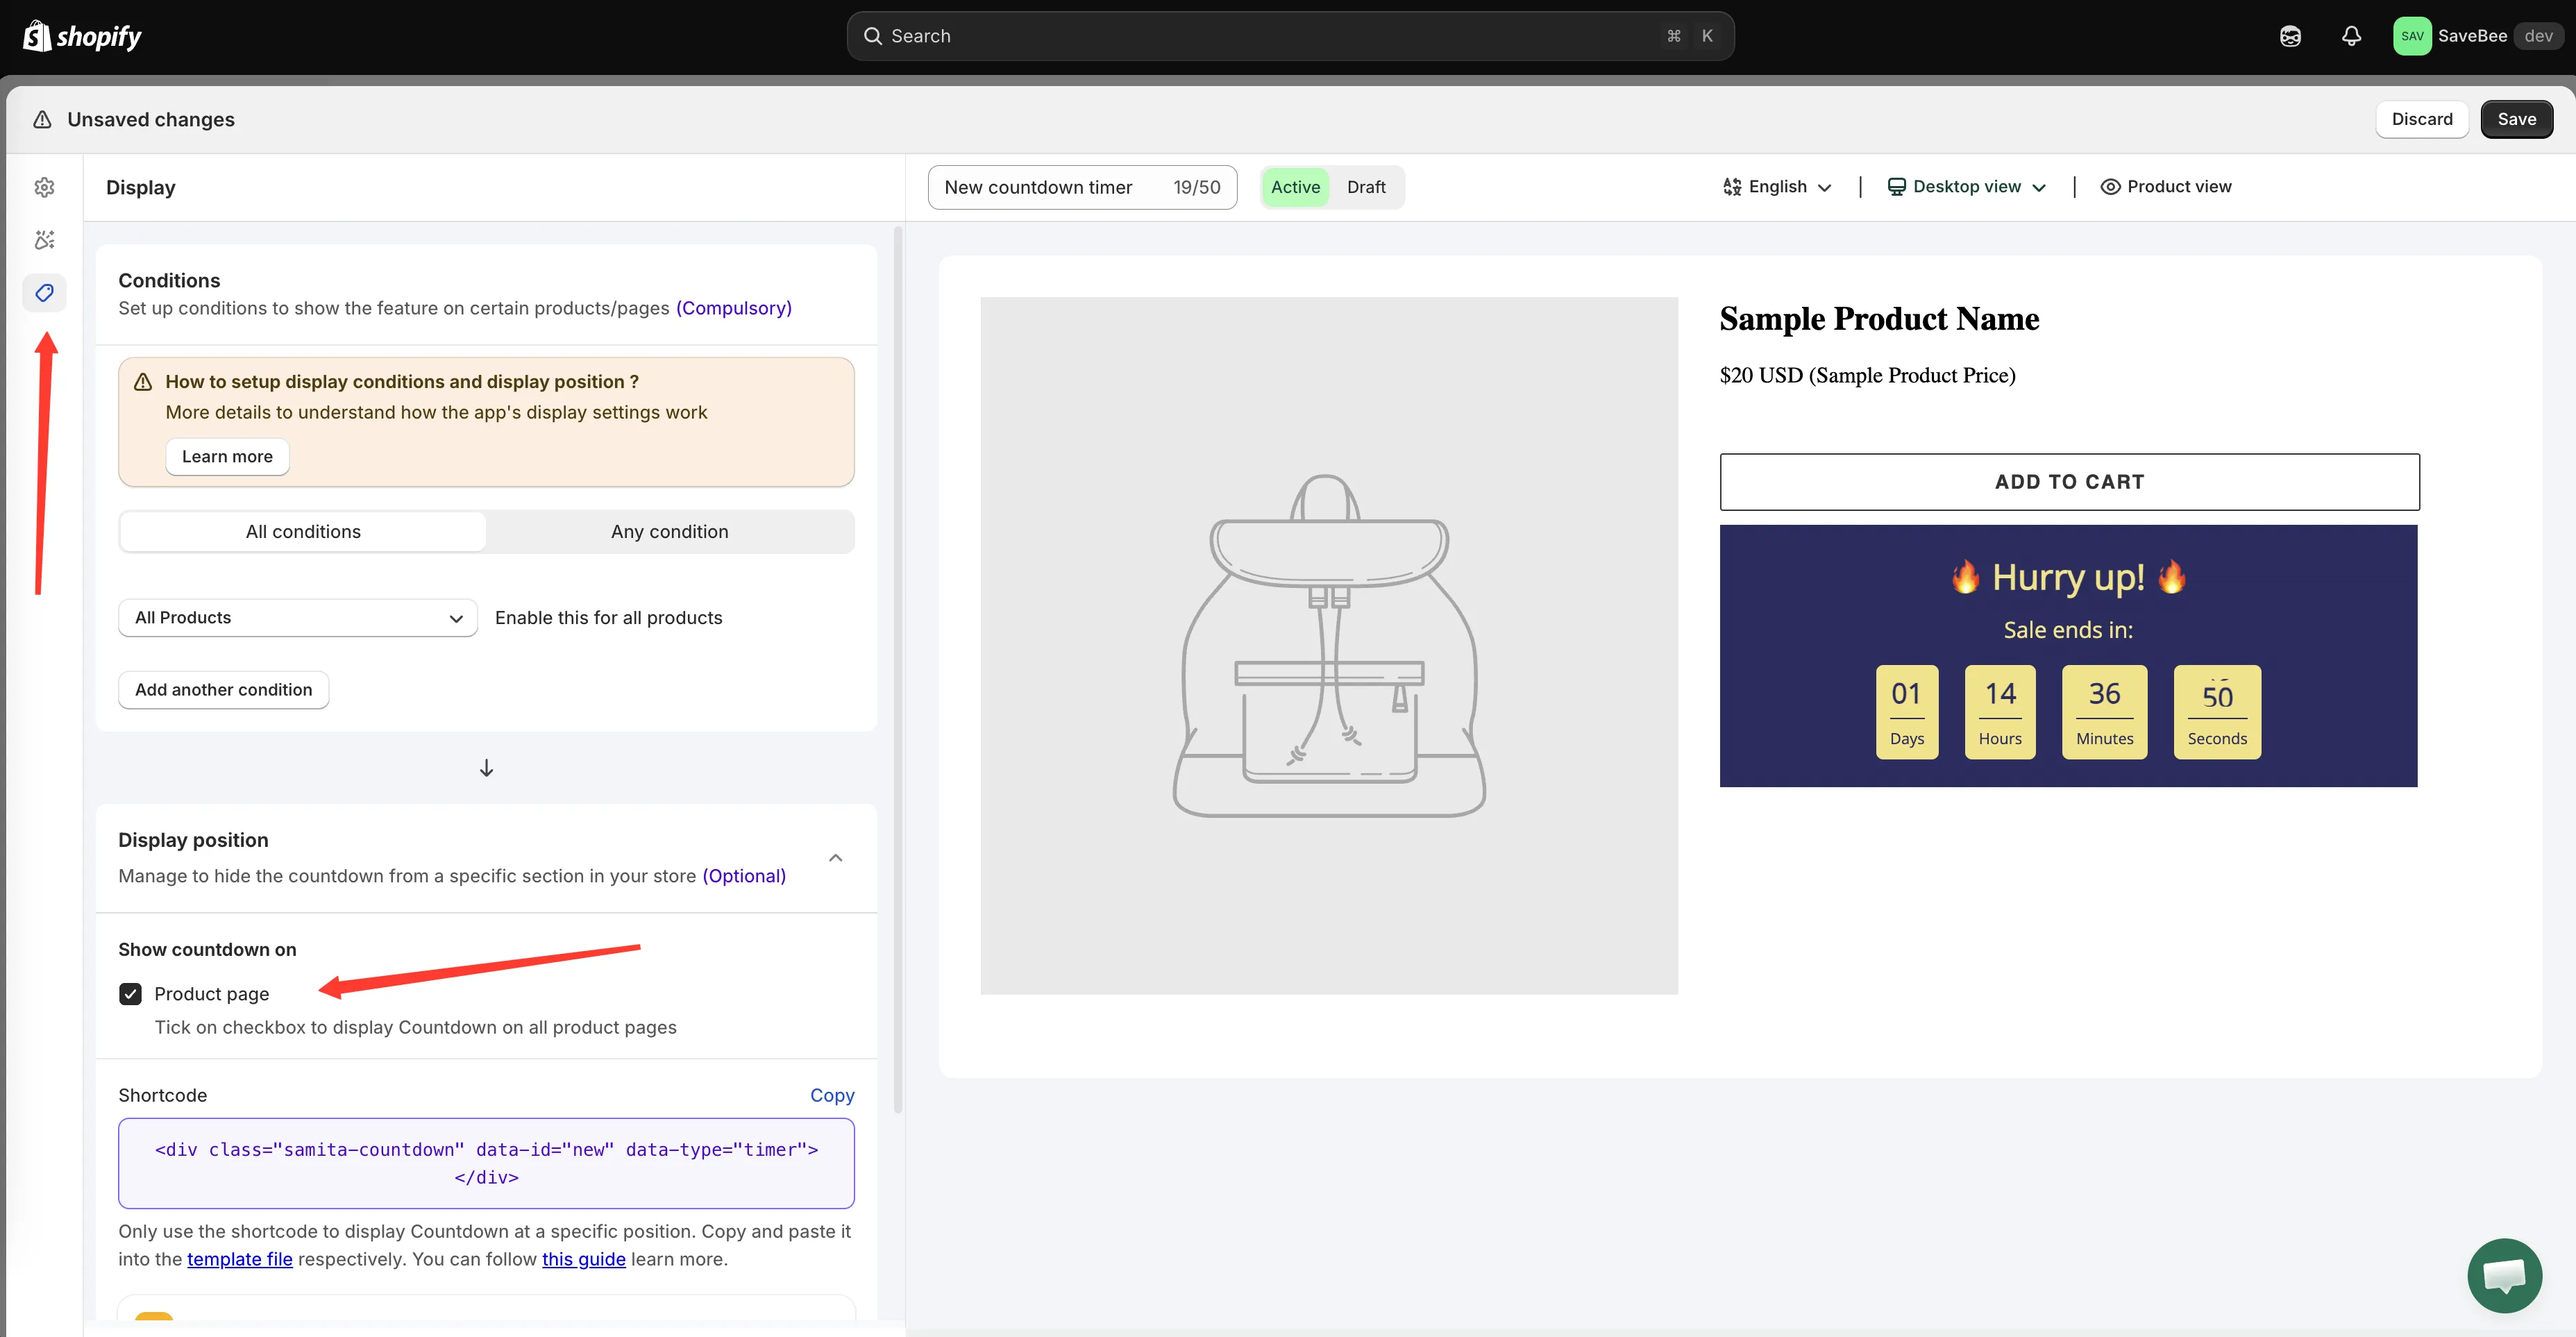
Ticking Product page puts the timer on all product pages.
-
Limit it to the right products (optional)
Above the display position, the Conditions section decides which products get the timer. Leave it on All Products to cover your whole catalog, or change it to target a collection, specific products, or a customer group — see Display conditions.
-
Save it as active
Click Save. Check the status control reads Active, not Draft — a draft is saved but never rendered.
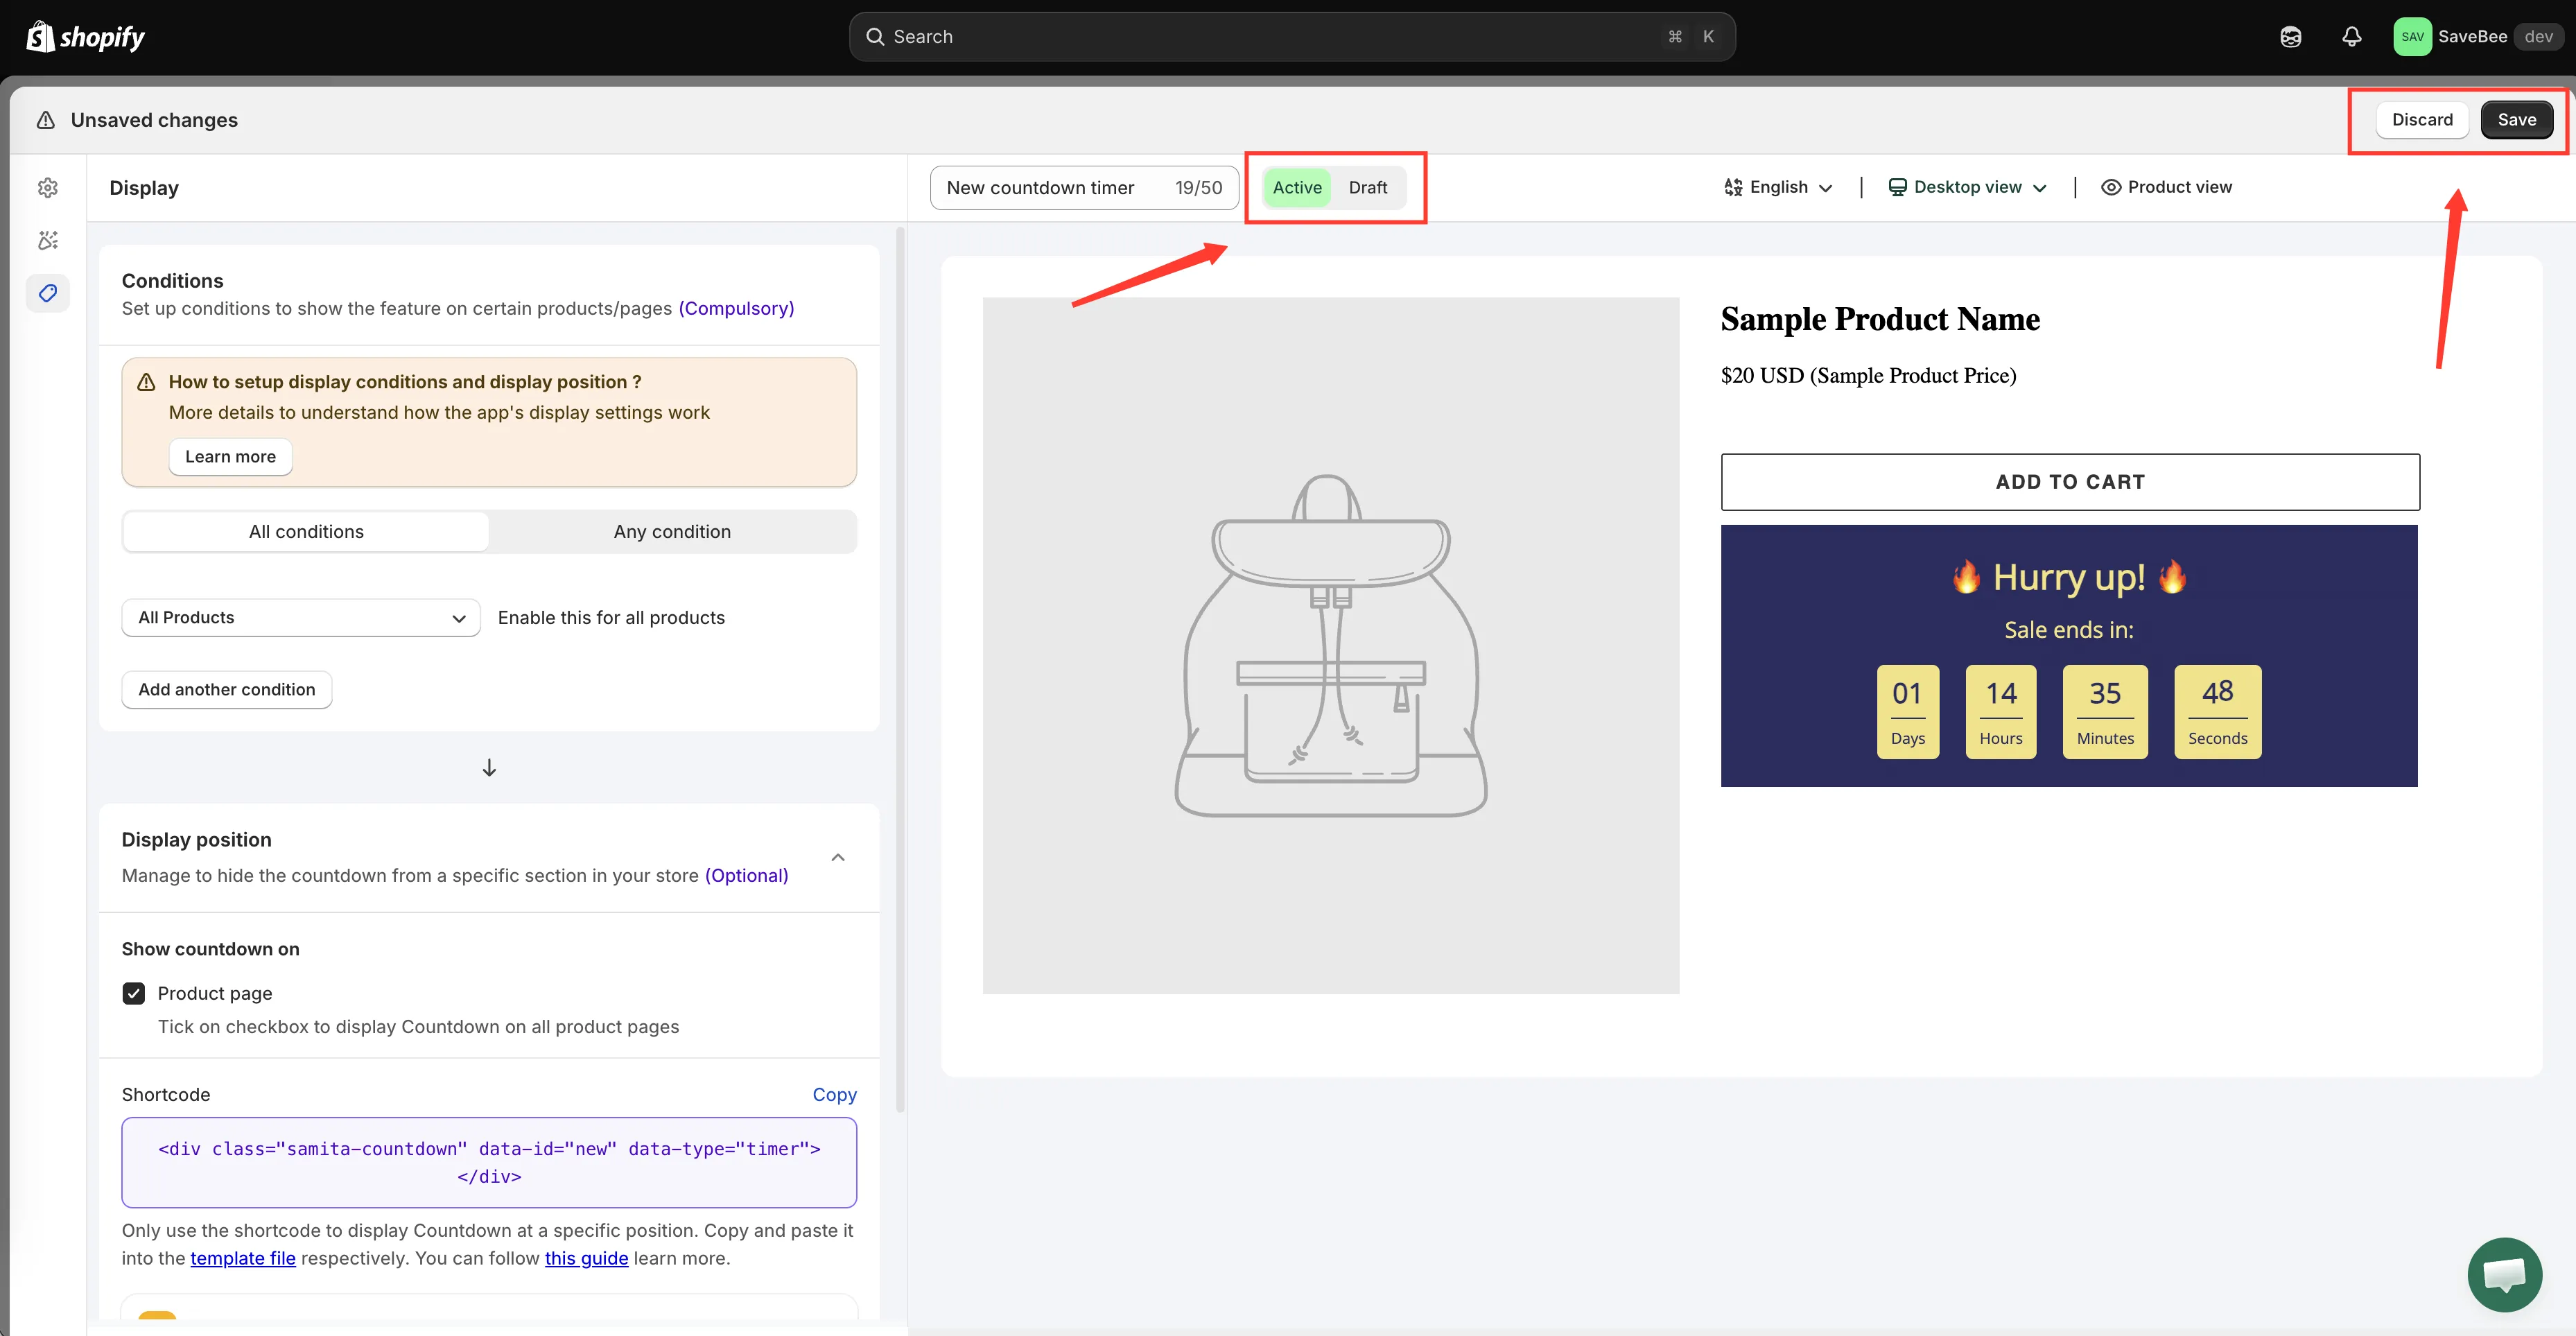
Save the countdown with its status set to Active.
-
Check it on your storefront
Open any product page on your live storefront in a new tab — the dashboard’s Open my store button is a shortcut. You should see your timer below the Add to cart button, counting down.
Try it on your phone too, or narrow the browser window: themes lay product pages out differently on small screens, and it’s worth seeing the timer where most of your shoppers will.
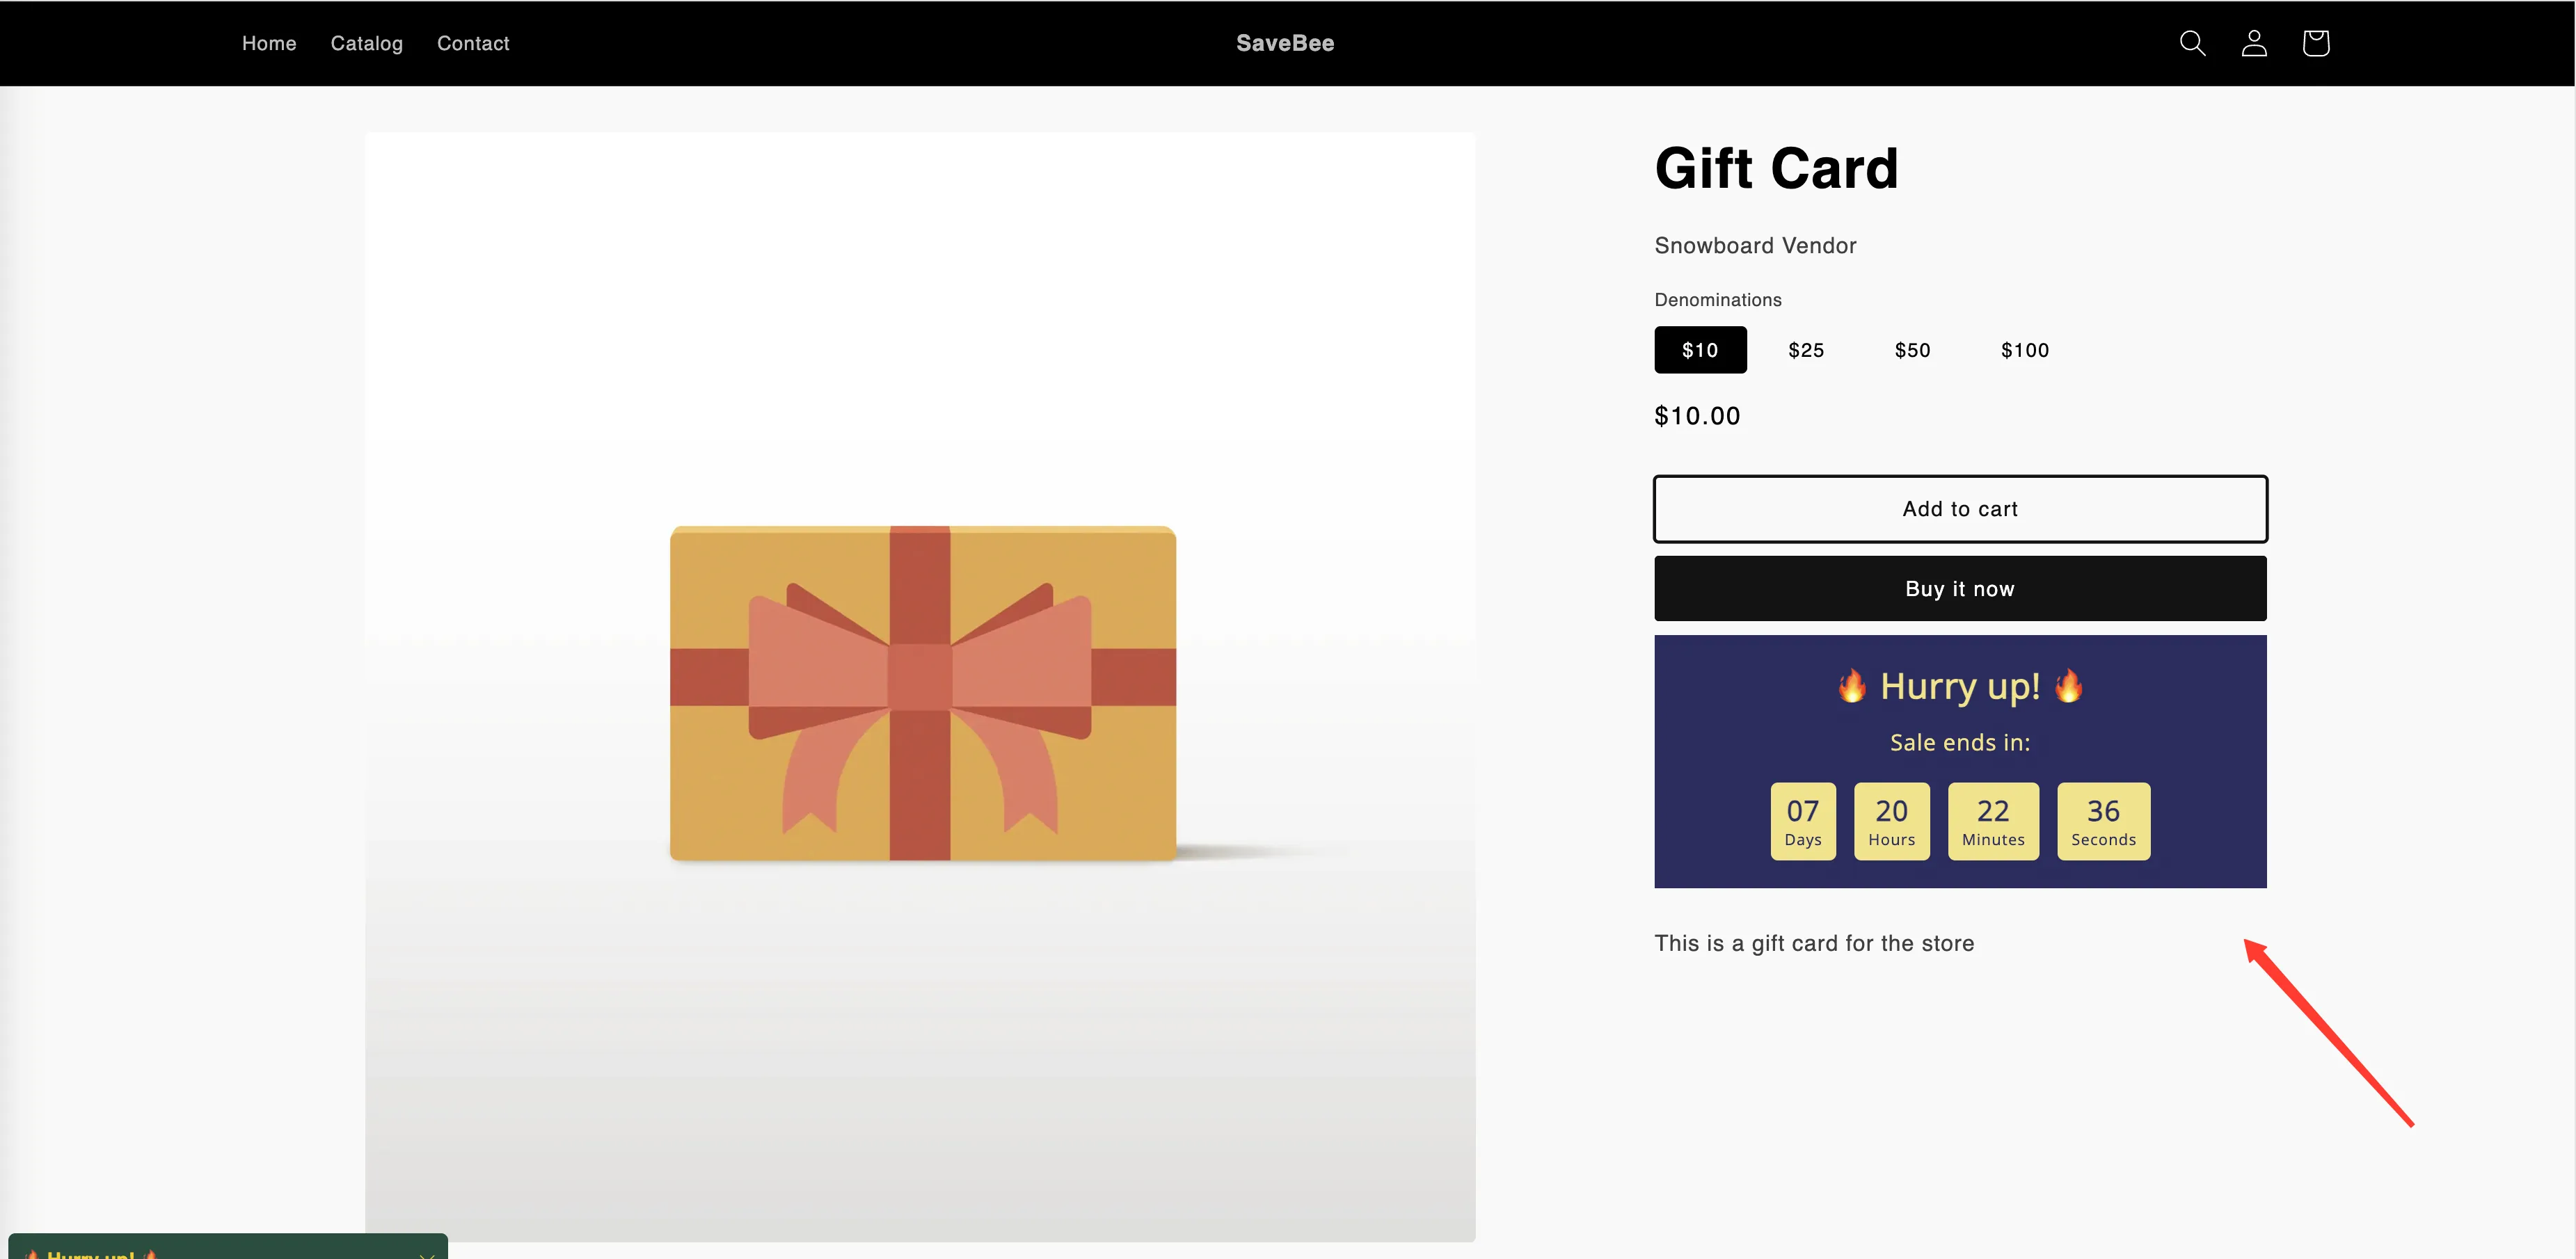
The finished timer on a live product page.