
Address autocomplete (Google Maps)
Show Google Maps address suggestions as buyers type, and fill in the city, state, postal code and country for them.
With address autocomplete, Sami B2B Onboarding shows Google’s address suggestions as soon as a buyer starts typing their street. Picking a suggestion fills in the rest of that address for them. Buyers finish the form faster, and the company location the app creates in Shopify gets a clean address.
You add one Google Maps key for the store. Each form turns autocomplete on or off.
Create a browser key in Google Cloud
Section titled “Create a browser key in Google Cloud”-
Pick a project
Section titled “Pick a project”Open the Google Cloud console and create a project, or pick the one you want to use.
-
Turn on the APIs
Section titled “Turn on the APIs”In APIs & Services › Library, search for and enable Maps JavaScript API, then Places API. The first loads the suggestions on your storefront. The second finds the addresses.
-
Create the key
Section titled “Create the key”In APIs & Services › Credentials, click Create credentials › API key. Copy the key. It starts with
AIza. -
Restrict the key to your store
Section titled “Restrict the key to your store”Open the key’s settings:
- Under Application restrictions, choose Websites and add each domain your store is reached on, for example
https://example.com/*andhttps://your-store.myshopify.com/*. - Under API restrictions, choose Restrict key and select Maps JavaScript API and Places API.
- Click Save.
- Under Application restrictions, choose Websites and add each domain your store is reached on, for example
Add the key and turn it on
Section titled “Add the key and turn it on”-
Open the Address autocomplete panel
Section titled “Open the Address autocomplete panel”Go to Forms and click Edit beside the form. In the rail on the left, click Integrations. Under Connected apps, click Set up on the Address autocomplete row.
The Address autocomplete panel opens with two sections: Account and This form.
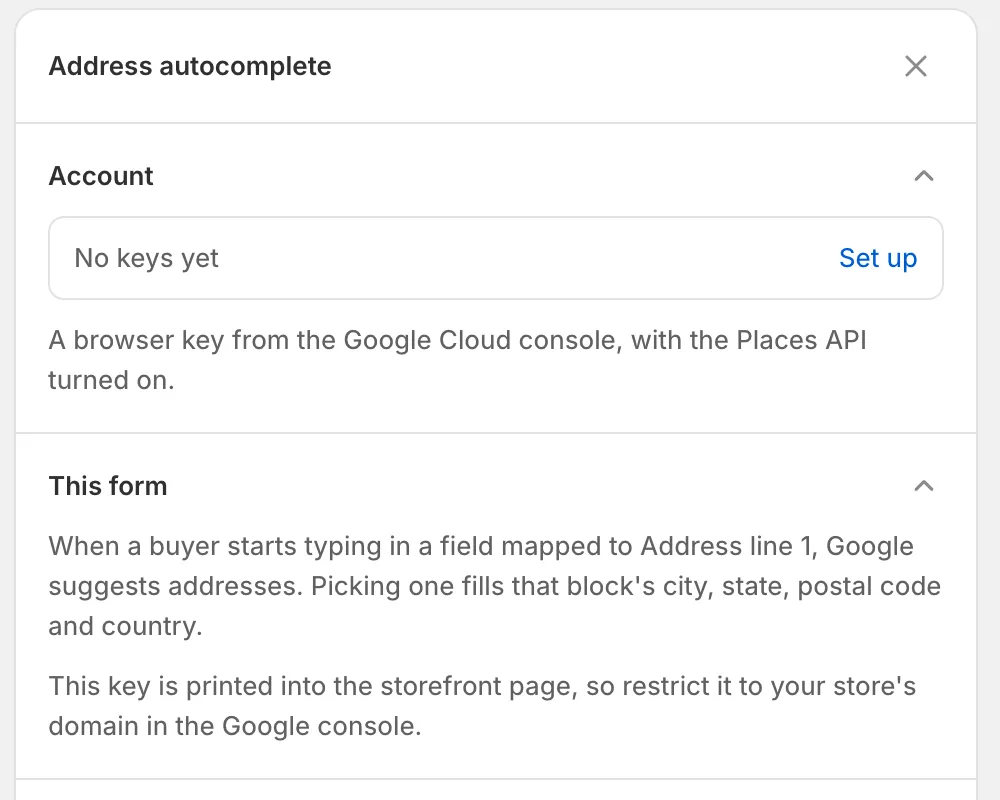
Click Set up to add your key; the panel explains which field gets suggestions and reminds you to restrict the key.
-
Paste the key
Section titled “Paste the key”Under Account, click Set up. In the Address autocomplete dialog, paste the key into Maps API key and click Save. You see Keys saved, and the Account row shows the key.
-
Enable it
Section titled “Enable it”At the bottom of the panel, click Enable. The button changes to Disable, and the Address autocomplete row in Connected apps shows Active. If no key is saved yet, a banner reads Add your Maps API key first.
-
Save the form
Section titled “Save the form”Click Save in the save bar. You see Form saved.
Which fields it fills
Section titled “Which fields it fills”Suggestions appear in every field that’s mapped to Address line 1 in the form’s Shopify panel. As the panel says, When a buyer starts typing in a field mapped to Address line 1, Google suggests addresses. Picking one fills that block’s city, state, postal code and country.
When the buyer picks a suggestion, the app fills the fields of the same address that are mapped to:
| Mapped to | Filled with |
|---|---|
| Address line 1 | The street number and street name |
| City | The city or town |
| State / province | The state or province |
| ZIP / postal code | The postal code |
| Country | The country |
- Address line 2, Recipient and Phone are left for the buyer to fill in.
- The shipping and billing addresses are kept apart. Picking a shipping address never changes the billing fields.
- The buyer can still change any box that was filled in.
- The suggestions are in the language of the store page.
The Wholesale application form the app creates already maps these fields for both addresses. If you build your own address questions, map them in Company location. See Map answers to Shopify.
Check it on your storefront
Section titled “Check it on your storefront”-
Open the form
Section titled “Open the form”Go to Forms and click Copy link beside the form. Open the link in a private browser window.
-
Type an address
Section titled “Type an address”Under Shipping address, start typing in Address line 1, for example
123 Main Street. Google’s list of suggestions opens under the box. -
Pick a suggestion
Section titled “Pick a suggestion”Click an address in the list. City, ZIP or postal code, Country and State or province fill in for that address.
If no suggestions appear:
| Check | What to do |
|---|---|
| The Address autocomplete row shows Active, and the form is saved. | Click Enable in the panel, then Save. |
| The key’s website restriction includes the domain you’re testing on. | Your store answers on your own domain and on its myshopify.com domain. Add both in Google Cloud. |
| Maps JavaScript API and Places API are enabled, and billing is set up on the project. | Turn them on in APIs & Services › Library. |
| The field is mapped to Address line 1. | Map it in the Shopify panel, under Company location. |
Turn it off
Section titled “Turn it off”- On one form: open its Address autocomplete panel, click Disable, then Save.
- On every form: under Account, click Change, then Remove keys. The dialog warns Every form in this store stops using Address autocomplete until you add keys again. Click Remove keys to confirm.
Next steps
Section titled “Next steps”- Map answers to Shopify — map your address questions so they fill the company location.
- Build your form — add address fields to a form.
- Captcha (reCAPTCHA, hCaptcha) — keep bots away from the same form.