
Countdown timer
Count down to a date
Build a timer that counts down to one fixed deadline — a sale end, a launch, a pre-order cut-off.
Countdown to a date is the default Time type and the one most campaigns want. Every shopper sees the same clock, counting down to a single moment you choose. When that moment passes, the timer does whatever you told it to do at zero.
Use it for a sale that really ends, a product that really launches, or a shipping cut-off you really honour.
Steps to set it up
Section titled “Steps to set it up”-
Create the countdown
Open the app and click Create countdown, either from the dashboard or from the Countdowns page.
-
Pick a Countdown timer template
On the Countdown templates page, leave the type tab on Countdown timer, choose a design, and click Select. See Choose a template if you want to filter by occasion.
-
Name it
Give the countdown a name at the top of the builder — “Spring sale, ends 31 Mar”, for instance. Only you see it.
-
Write the text
On the Settings tab, open Content and fill in the Title, Subtitle, and the four timer labels. Full detail in Timer text and button.
-
Choose Countdown to a date
Open the Setting timer section and set Time type to Countdown to a date. It’s described in the app as “Timer ends on a specific date.” and is selected by default on a new timer.
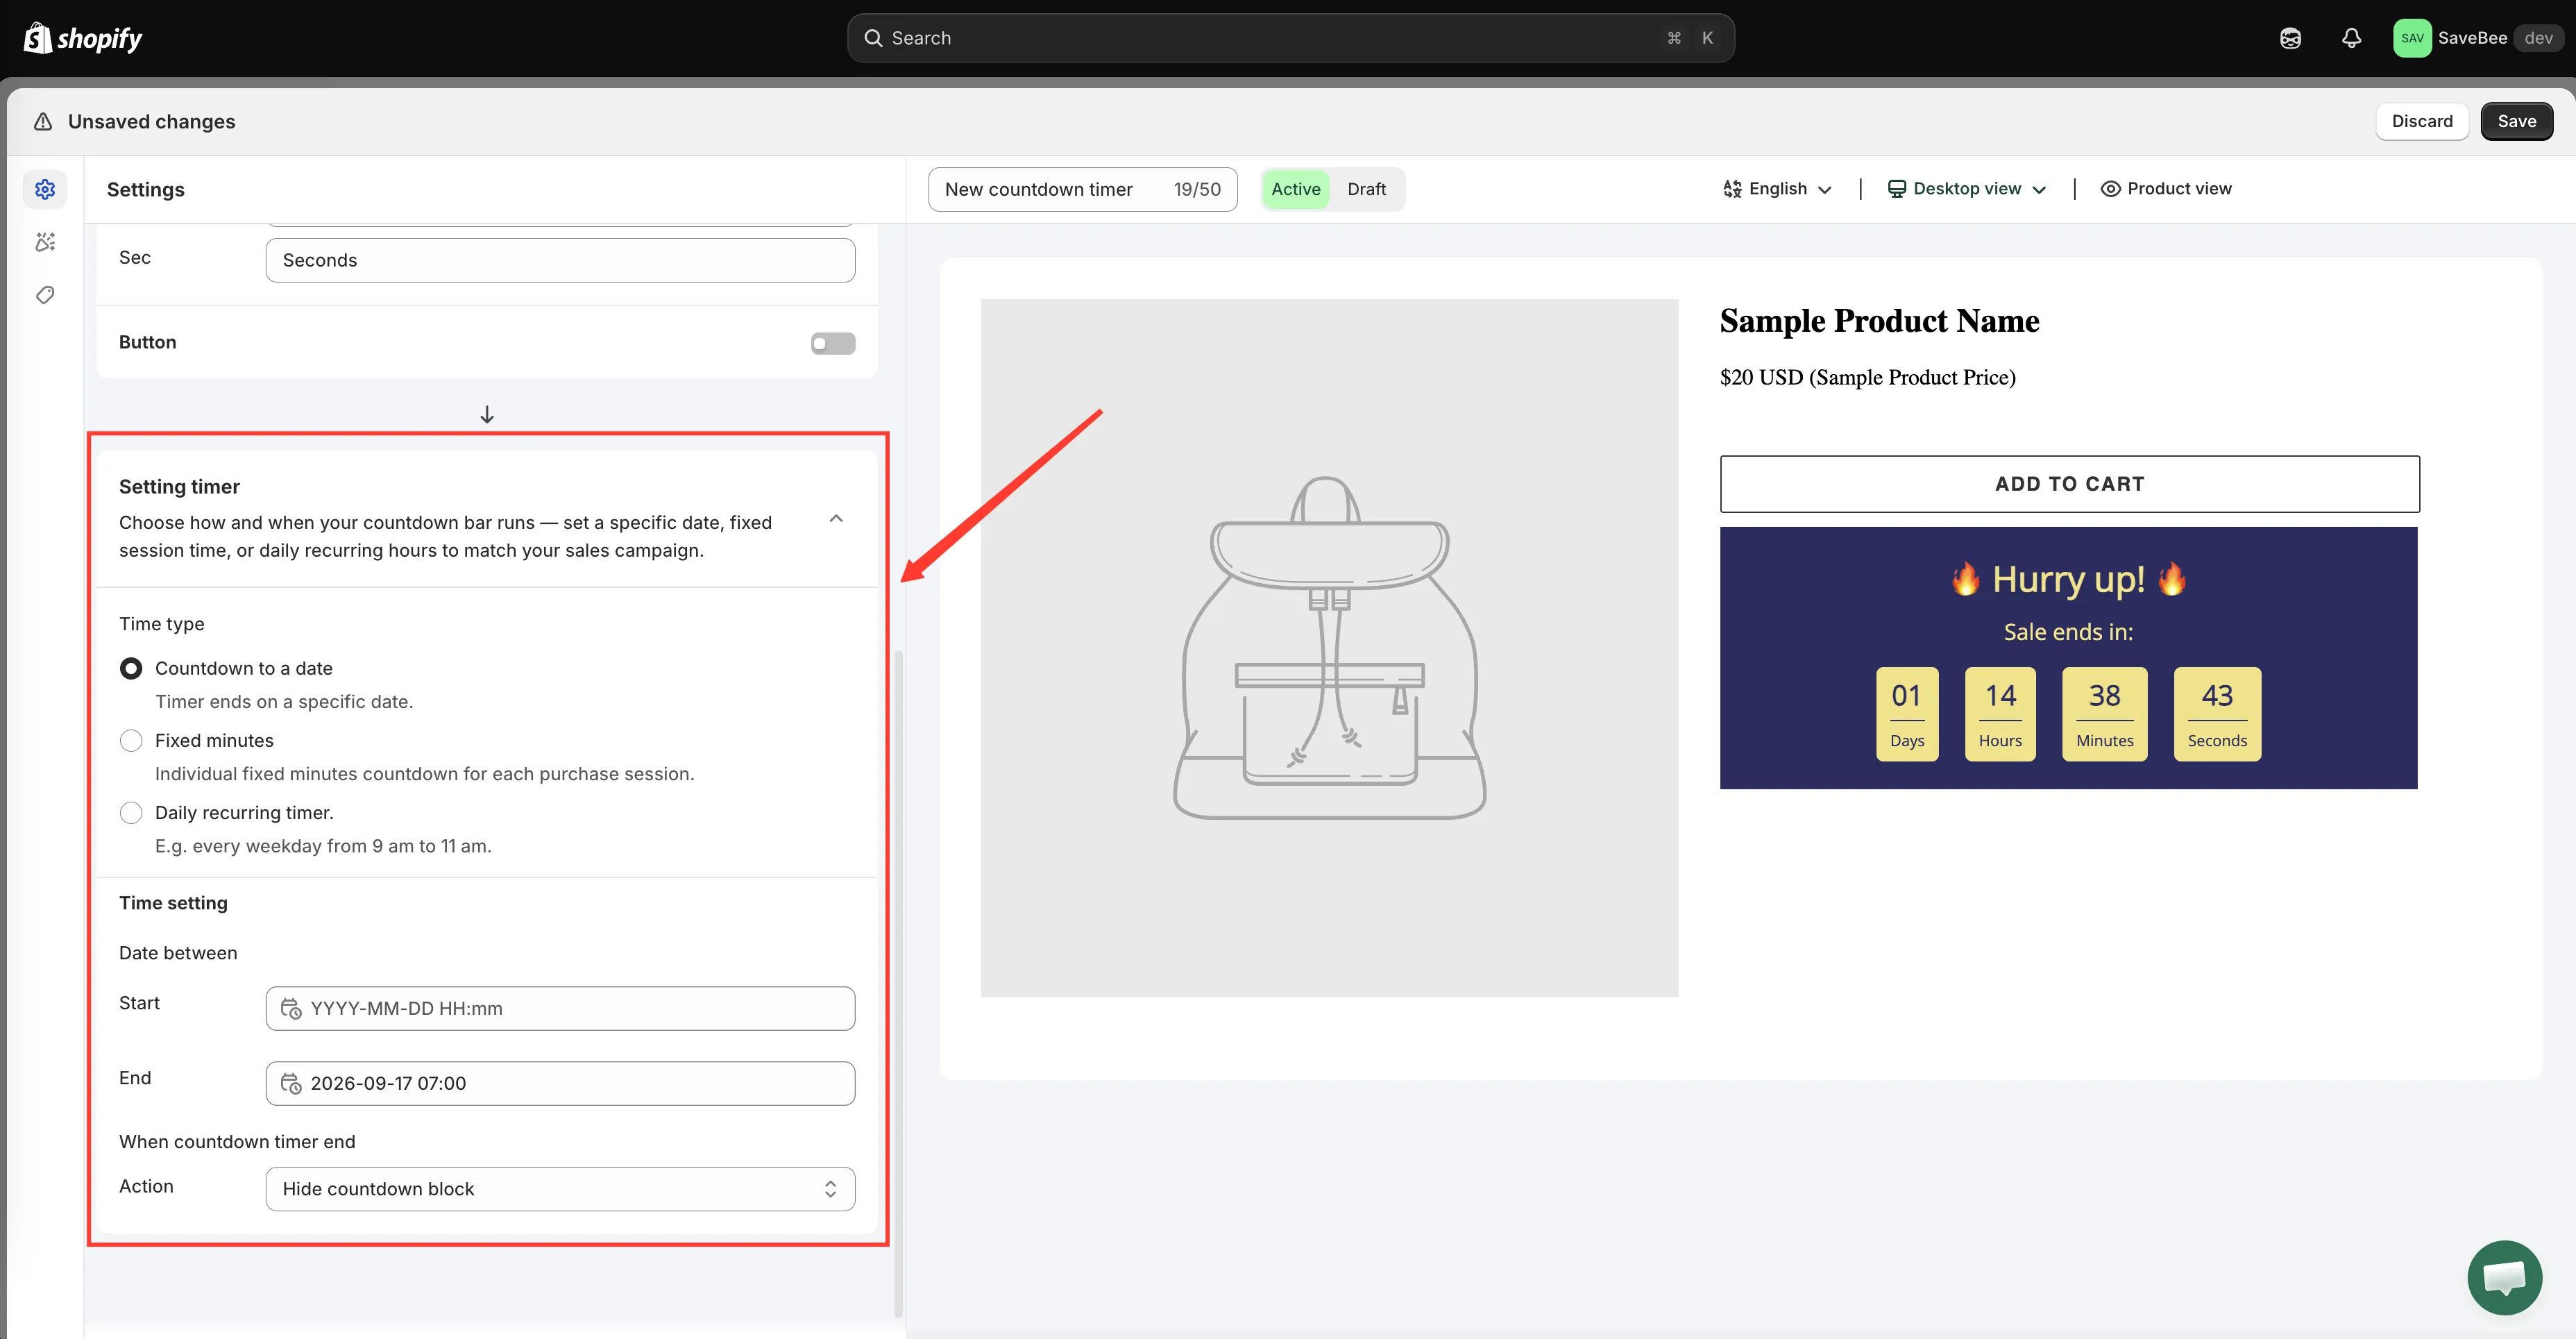
Countdown to a date is the default Time type.
-
Set the End date
Under Date between, set End to the date and time the campaign finishes. This is the moment the timer counts towards, down to the second.
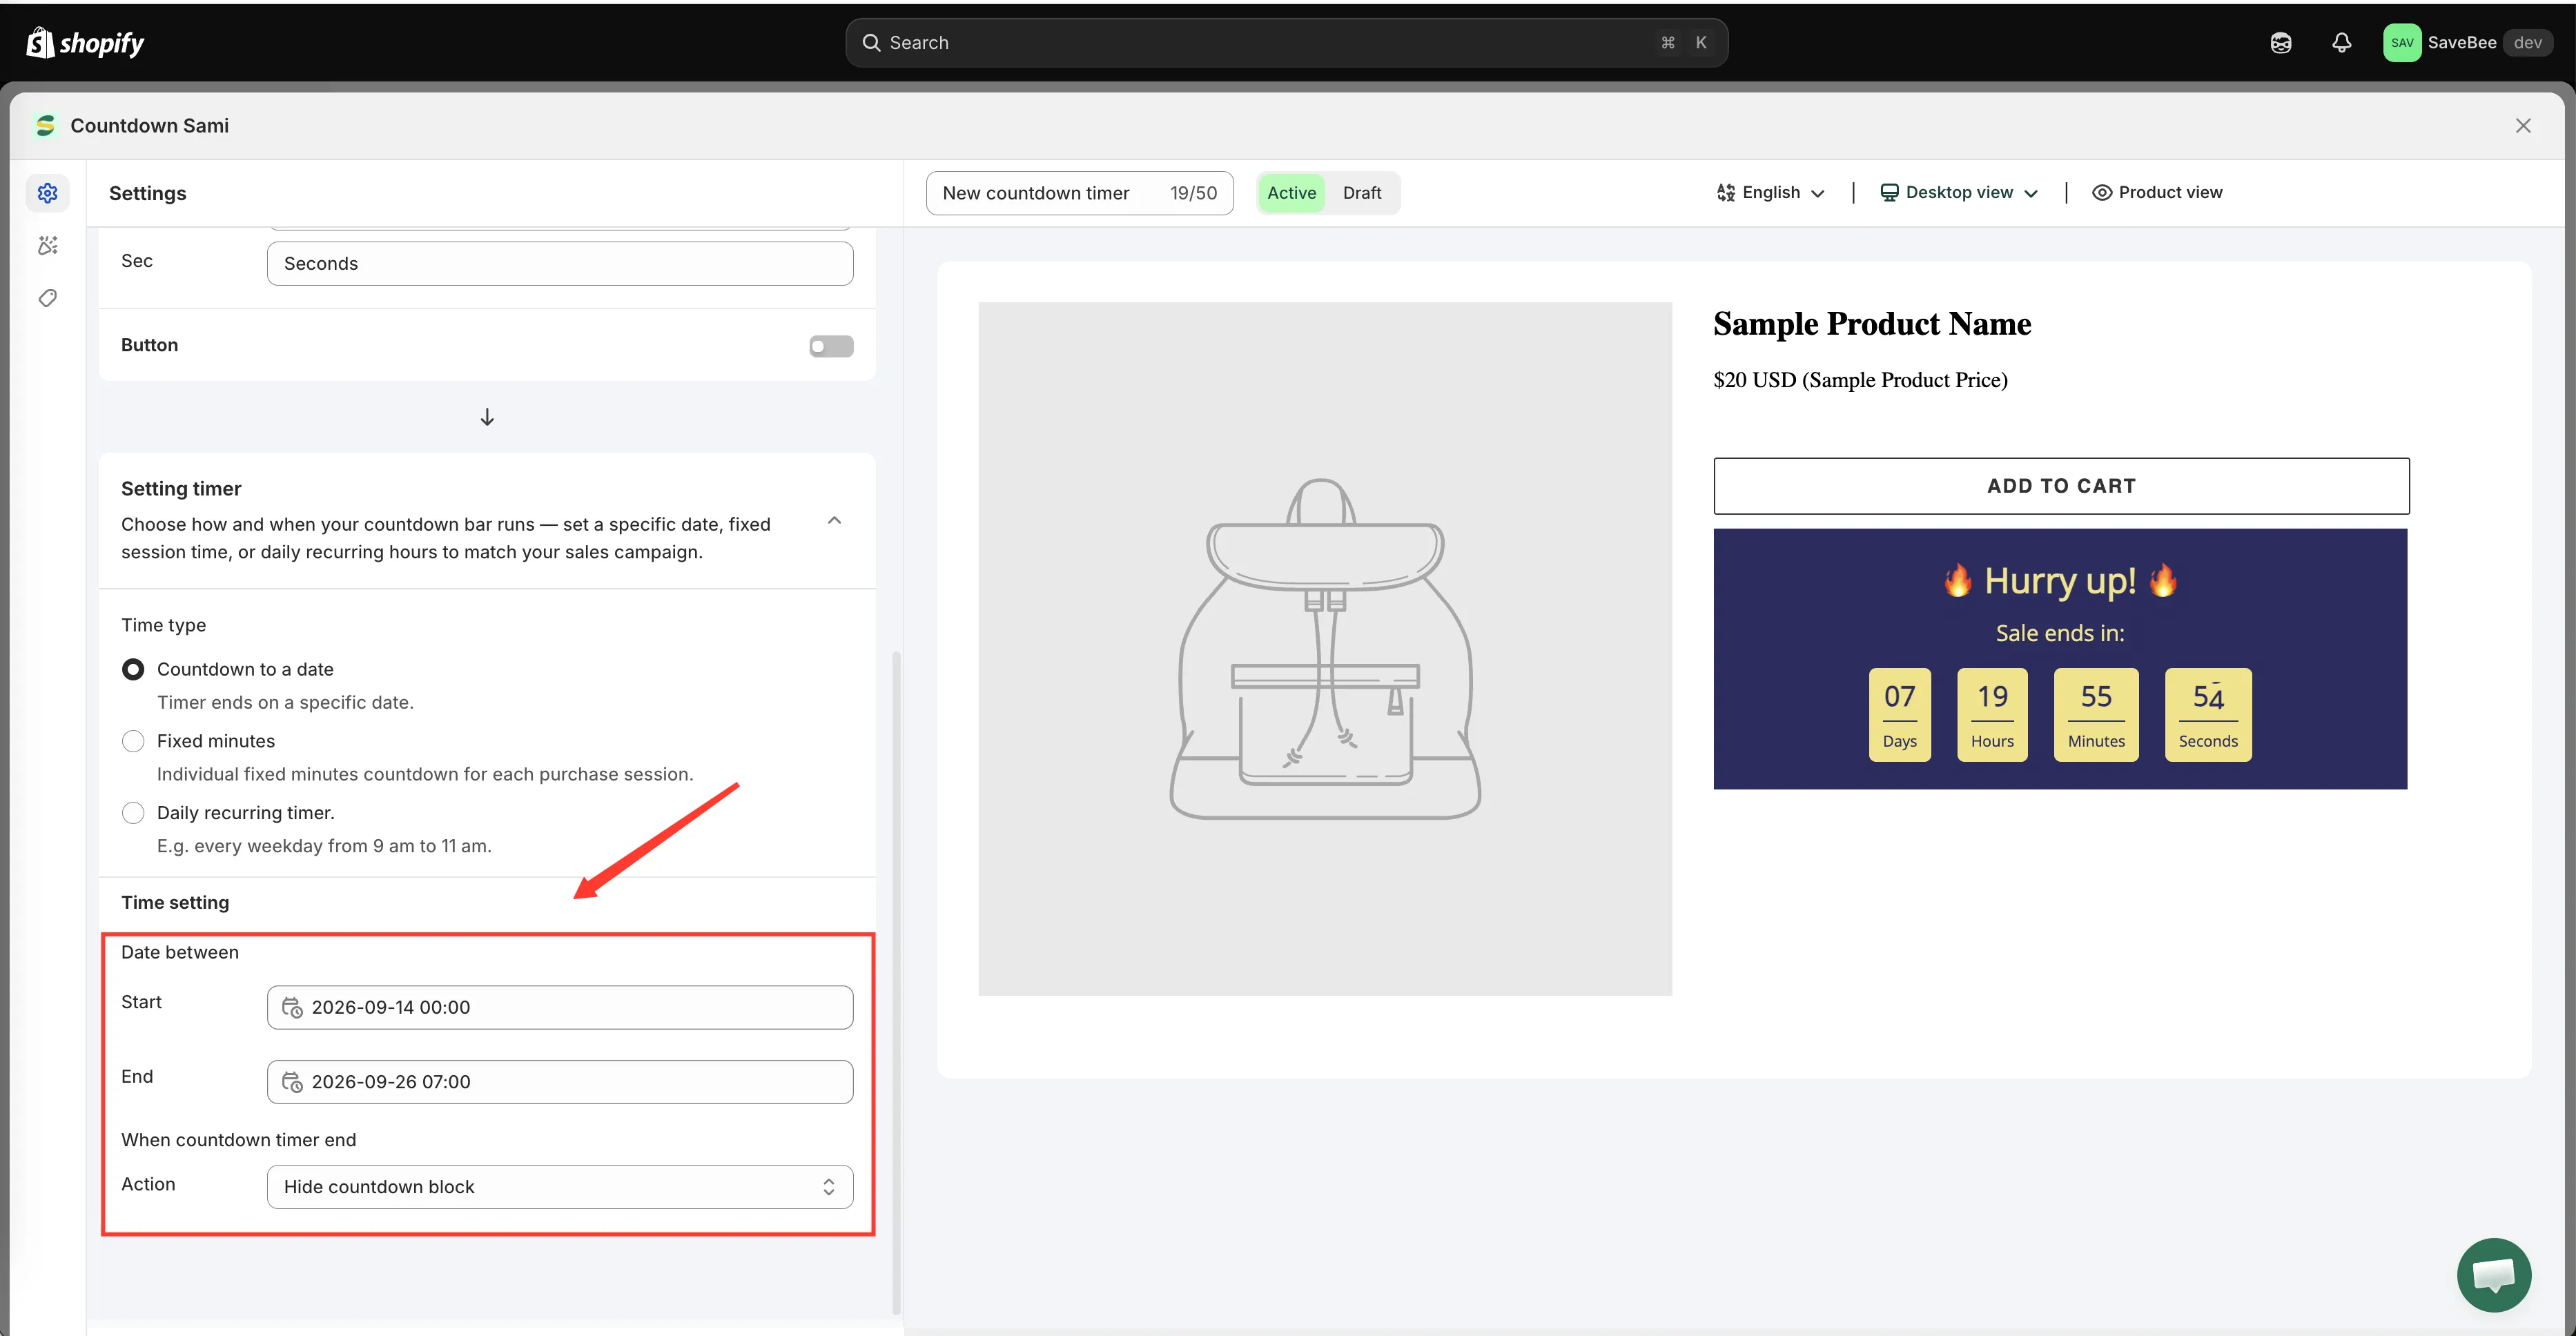
End is the deadline. Start is optional.
-
Set a Start date, or leave it empty
Leave Start empty and the timer is live as soon as you save it.
Set a Start and the timer stays hidden until that moment arrives, then appears on its own. This is how you schedule a sale in advance: build it today, set it to start Friday morning, save it as Active, and forget about it.
-
Choose what happens at zero
Set When countdown timer end to one of Do nothing, Hide countdown block, or Repeat the timer. For a real deadline, Hide countdown block is usually right. See When the timer ends.
-
Style it on the Design tab
Switch to Design to change colors, fonts, background, borders, and spacing — or skip it and keep the template’s look. See Design a countdown.
-
Choose where it shows
On the Display tab, tick Product page under Show countdown on to place it automatically on product pages, or copy the Shortcode to put it somewhere specific.
Use the Conditions section above it to limit the timer to certain products, collections, pages, customers, languages, or countries. See Display conditions.
-
Save it as Active
Set the status to Active and click Save. A Draft is saved but never rendered.
-
Check it on your storefront
Open a page that matches the countdown’s conditions on your live storefront. The timer should be visible and ticking. If the Start date hasn’t arrived yet, it correctly shows nothing.
How the deadline is read
Section titled “How the deadline is read”The remaining time is worked out in the shopper’s browser by comparing the End date you set against their device clock. There’s no separate timezone setting — the End date you enter is the deadline the app counts towards.
The practical consequences:
- Shoppers in other timezones see the same moment expressed as their own remaining time, which is what you want.
- A shopper whose device clock is badly wrong sees a wrong timer. There’s nothing the app can do about that, and it’s rare.
Extending or shortening a running sale
Section titled “Extending or shortening a running sale”Change the End date and save. Every shopper’s timer picks up the new deadline the next time they load the page — you don’t need to recreate the countdown.
You can do this without opening the full builder, from the Countdowns list.