
Create a sale popup
Build a sale popup end to end, from its content through to a live storefront page.
This guide builds one complete sale popup: an image, a heading and a line of text, a link, a position, a schedule, and the pages it should appear on.
Make sure the app embed is on before you start — it renders sale popups as well as countdowns.
Steps to set it up
Section titled “Steps to set it up”-
Open Sale Popups and create one
Section titled “Open Sale Popups and create one”Click Sale Popups in the app’s menu, then Create popup.
-
Name it
Section titled “Name it”Give it a name at the top of the editor — “Spring sale banner”, for example. Only you see it.
-
Write the content
Section titled “Write the content”On the Component tab, fill in:
- Heading text — the bold first line. A new popup starts with
🔥 Hurry up! 🔥 - Content text — the line underneath. A new popup starts with “The Sale is on – Don’t miss out on hot deals for a limited time only!”
- Link — where the popup goes when clicked, with an option to open it in a new tab
- Image — an optional picture beside the text
Full detail in Popup content and image.
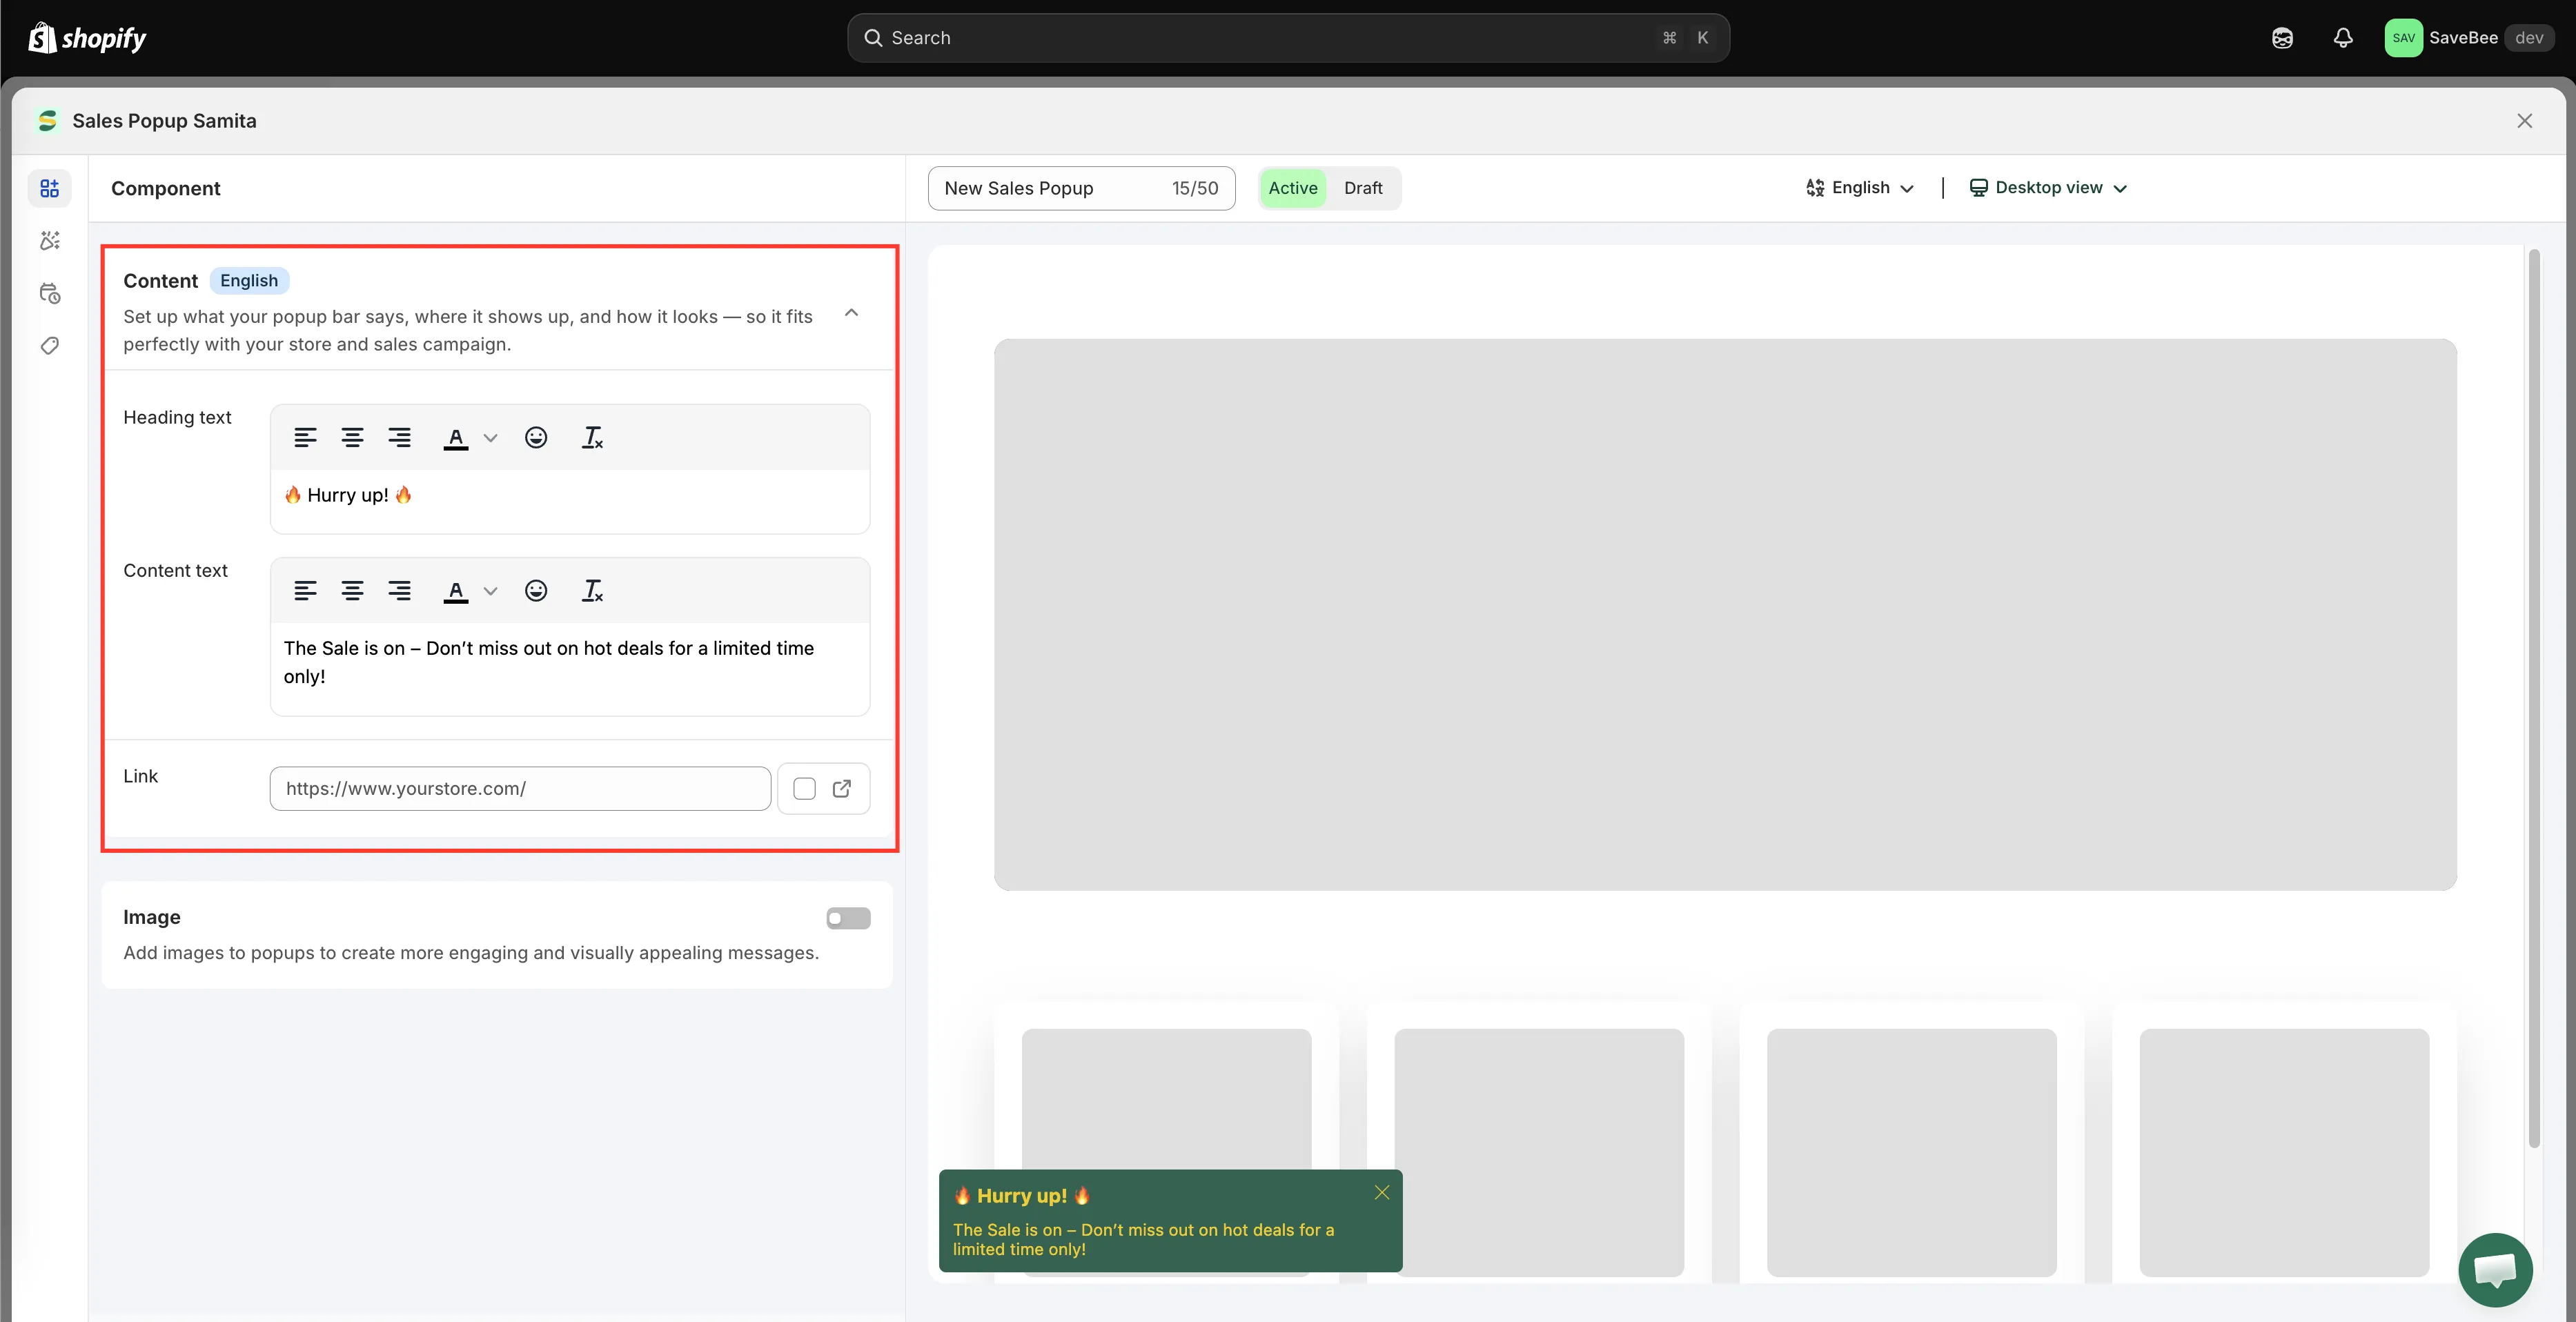
The Component tab holds everything a shopper reads and clicks.
- Heading text — the bold first line. A new popup starts with
-
Style it and place it
Section titled “Style it and place it”Switch to the Design tab:
- Appearance and background — solid, gradient, or image fill, with opacity, borders, padding and margins
- Position settings — where it floats, separately for desktop and mobile, with an animation
- Size settings — popup size and image size, with different sizes for mobile if you want
- Font family and font size — heading and content font sizes
Details in Design and position.
-
Set the schedule
Section titled “Set the schedule”Switch to the Schedule tab:
- Schedule date — Start at and End at
- Times shown — how many times one shopper sees it
- Duration — how long it stays on screen, in seconds
- Always visible — keep it on screen instead of timing out
Details in Visibility and schedule.
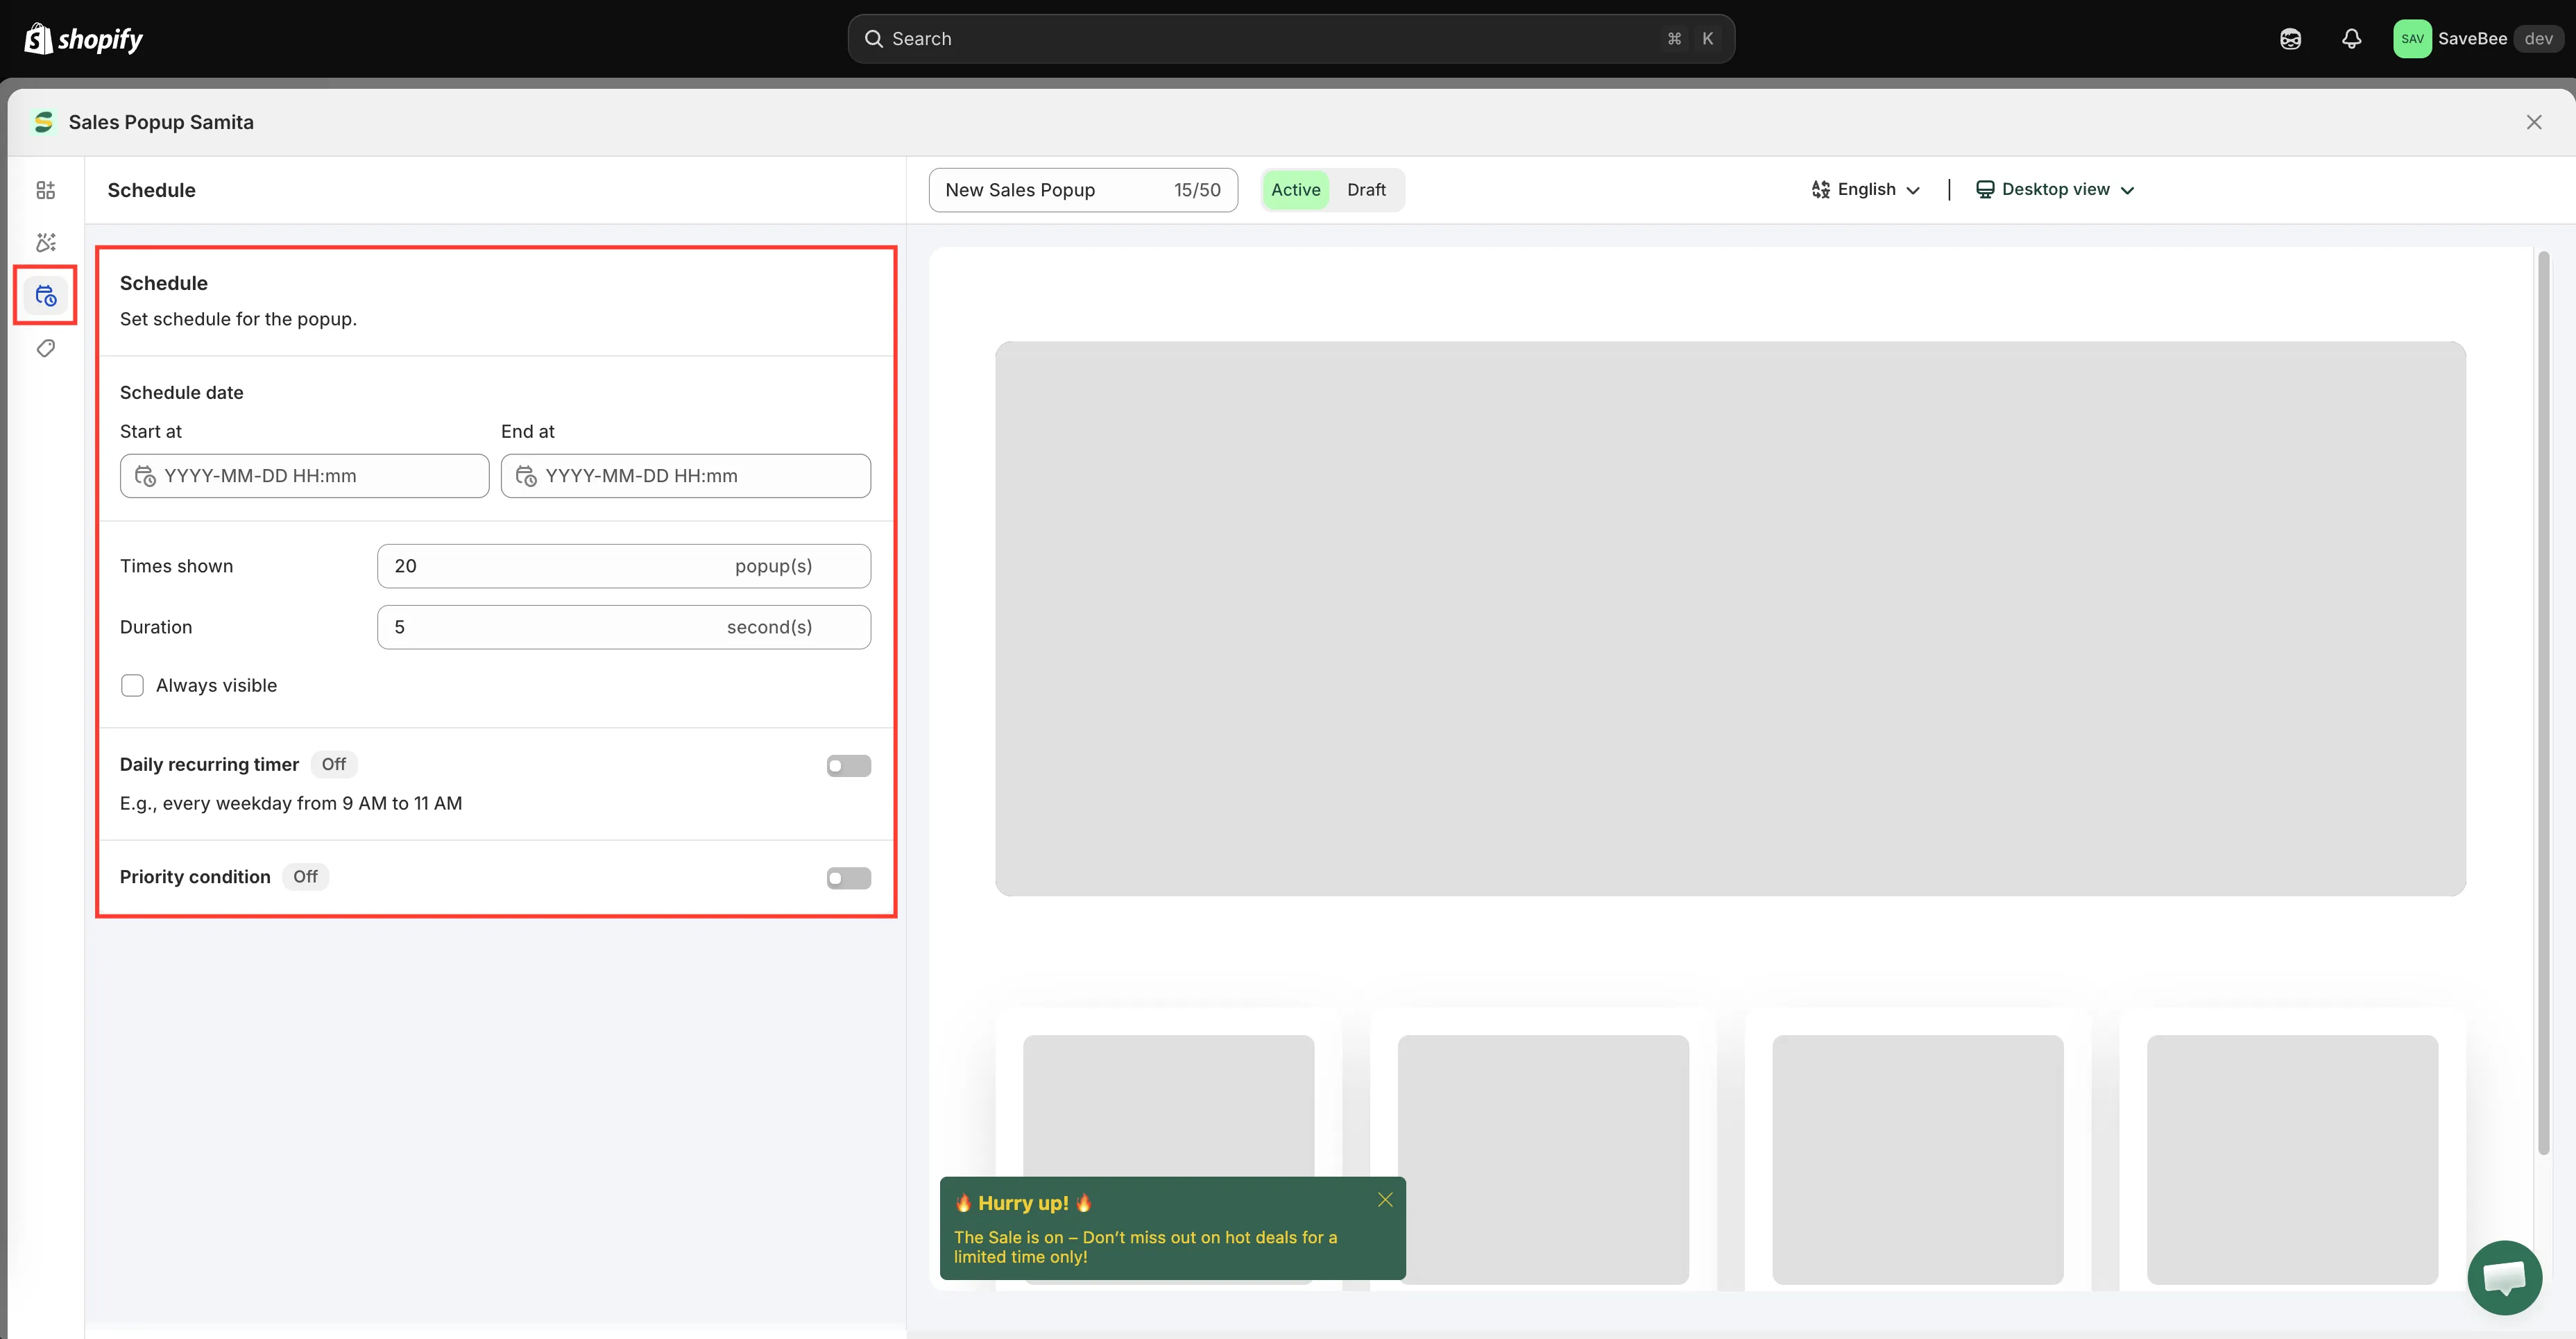
The Schedule tab controls when the popup runs and how long it stays.
-
Choose who sees it
Section titled “Choose who sees it”Switch to the Display tab and set the Conditions. Popups can be targeted by All pages, Select products, Collections, Page, Customer, Customer tag, Language, and Country. See Display conditions.
The same tab carries a shortcode, under Custom location to show popup, if you’d rather pin the popup into the page than let it float.
-
Check the shared settings
Section titled “Check the shared settings”Open Popup General Settings and check the timing that applies to every popup — how long before the first one appears, the gap between pops, and the maximum number. A new store’s defaults are deliberately low. See Sale popup general settings.
-
Save it as Active
Section titled “Save it as Active”Set the status to Active and click Save. A Draft popup never appears.
-
Check it on your storefront
Section titled “Check it on your storefront”Open your live storefront on a page that matches the popup’s conditions and wait for it to appear — remember the Time before the first pop delay in the general settings.
Check three things:
- It appears in the corner you chose, and doesn’t cover anything important.
- The close button works.
- The link goes where you meant it to.
Then check it on a phone. Popups take up proportionally much more of a small screen, and this is where the mobile position and size settings earn their keep.